
Do you remember the absolute magic of a rainy Saturday afternoon, huddled under a dining room table draped in heavy quilts, clutching a flashlight like it was a sacred sword? To us, it wasn’t just furniture and fabric; it was a fortress, a hidden kingdom where the rules of the world didn’t apply. As parents, we often find ourselves wishing we could bottle that pure, unadulterated sense of wonder and give it back to our children in a space they can call their own.
Designing a play space isn’t just about choosing the right storage bins or finding a rug that hides stains—though let’s be honest, those things help! It’s about creating an invitation. It’s about setting a stage where their imaginations can run wild, where they can be explorers, artists, and dreamers. Whether you have a sprawling backyard or a tiny apartment nook, the goal is the same: to build a sanctuary that whispers, ‘Anything is possible here.’
In this guide, I’m sharing my favorite ways to transform ordinary spaces into extraordinary realms. From the earthy scents of a backyard sensory garden to the sleek, calming lines of a minimalist indoor retreat, we’re diving deep into the elements that make a play space truly ‘dreamy.’ So, grab a cup of coffee, take a deep breath, and let’s start building some magic together.
How to Design an Enchanting Nature Nook for Endless Creative Exploration
Why we love this
There is something profoundly grounding about the scent of damp earth and the rough, honest texture of tree bark that sparks a specific kind of quiet curiosity in children. This nature nook feels like a secret garden hidden in plain sight, where the air smells faintly of pine and sun-warmed wood, and the soft rustle of leaves provides a natural soundtrack for discovery. It’s a space that encourages little hands to touch, feel, and explore the organic world, grounding their high energy in the rhythmic peace of the outdoors.
Essential Elements:
- Natural cedar wood stumps for seating
- A weather-resistant magnifying glass station
- Large smooth river stones for painting
- A bird feeder or butterfly puddling stone
- Low-hanging willow branches or a small trellis
How to make it
- Begin by selecting a semi-shaded corner of your yard where the ground is relatively level. Clear away any debris or sharp rocks, leaving the natural soil or grass as a base.
- Layer the area with 3-4 inches of organic cedar mulch. This provides a soft, aromatic cushion that suppresses weeds and gives the space a defined, ‘woodsy’ feel.
- Arrange three to five cedar stumps of varying heights in a semi-circle. Ensure they are heavy enough to be stable; if they wobble, dig a shallow 2-inch depression to ‘set’ the stump firmly into the earth.
- Install a low-profile wooden table or a large, flat-topped boulder to serve as a ‘specimen station.’ This is where kids will examine leaves, bugs, and rocks.
- Plant fast-growing vines like jasmine or honeysuckle over a small archway or trellis at the entrance. This creates a physical transition into the ‘enchanted’ zone, offering a delightful floral scent every time they enter.
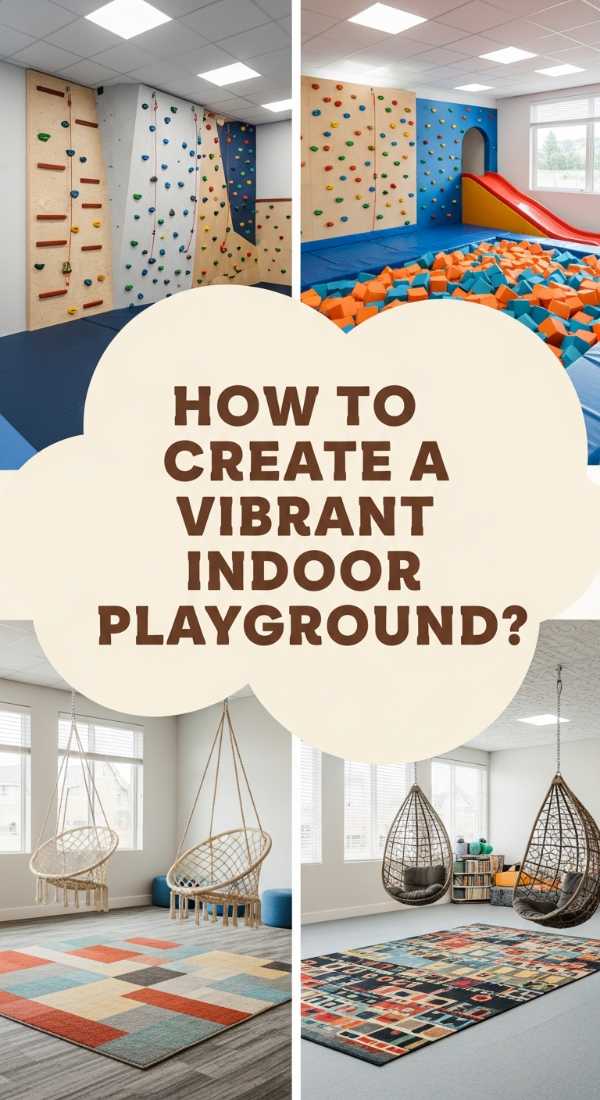
How to Create a Vibrant Indoor Playground for Active Rainy Day Fun
Why we love this
When the clouds roll in and the energy levels start to climb, having a dedicated indoor movement zone is an absolute lifesaver for the soul. This space is a symphony of primary colors and soft textures, smelling faintly of clean cotton and fresh air, designed to let kids burn off steam without sacrificing your living room decor. It feels like an invitation to climb, jump, and swing, providing that essential tactile feedback that helps little bodies feel strong, capable, and wonderfully exhausted by bedtime.
Essential Elements:
- High-density interlocking foam floor mats
- Wall-mounted Swedish ladder or monkey bars
- A sturdy ceiling-mounted sensory swing
- Collapsible colorful tunnels and tents
- Soft-sided oversized foam blocks
How to make it
- Measure your ceiling height and wall studs meticulously. For an indoor playground, you must anchor equipment into the wall studs using heavy-duty lag bolts to ensure it can support dynamic weight.
- Lay down a double layer of high-density foam mats over the entire designated area. For extra safety, choose mats with a ‘puzzle’ edge that lock tightly together to prevent tripping on loose seams.
- Install the Swedish ladder. Pre-drill holes into the studs, use a level to ensure the rungs are perfectly horizontal, and tighten all bolts until they are flush with the wood.
- Mount the swing hook. Use a heavy-duty joist hanger and ensure it is centered on a structural ceiling beam. Test the weight capacity yourself before letting the kids climb in.
- Organize the peripheral toys like tunnels and blocks into low, open bins. This keeps the center ‘action zone’ clear for movement while keeping the ‘building’ components within easy reach.
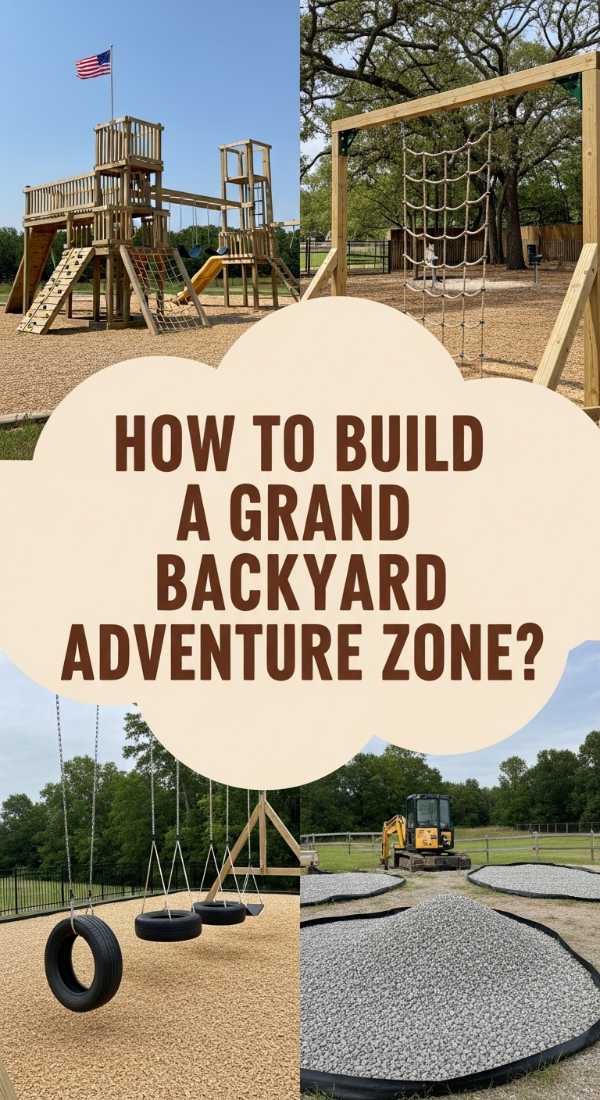
How to Build a Grand Backyard Adventure Zone for Bold Little Explorers
Why we love this
This is the ultimate childhood dream realized—a sprawling, adventurous terrain that feels like a professional obstacle course scaled down for tiny heroes. The air out here is filled with the scent of fresh-cut grass and the thrill of the wind as they zip through the air. It’s a space of high-contrast textures, from the cool metal of a slide to the rugged grip of a climbing wall, designed to build confidence and grit through physical play that feels like a grand quest.
Essential Elements:
- A wooden multi-level play tower
- Heavy-duty zipline kit with safety harness
- A-frame climbing wall with professional grips
- Rubber mulch safety surfacing
- Rope bridge with high-tension cables
How to make it
- Map out your ‘flight path’ for the zipline first, ensuring there is at least 10 feet of clear space on either side of the cable. Anchor the starting point at least 7 feet high on a sturdy tree or a custom-built timber post set 3 feet deep in concrete.
- Construct the main tower using pressure-treated lumber. Use carriage bolts instead of standard screws for the main structural joints to prevent loosening over time due to vibrations.
- Install the climbing wall at a slight 10-degree incline for beginners. Space the resin hand-holds about 8 to 12 inches apart, alternating colors to create ‘paths’ of varying difficulty levels.
- Excavate the ground beneath high-impact areas (under the tower and the end of the zipline) to a depth of 6 inches and fill with bonded rubber mulch. This provides the highest level of shock absorption for falls.
- Tension the rope bridge using galvanized steel turnbuckles. This allows you to tighten the ropes as they naturally stretch over time, ensuring the bridge remains safe and stable for crossing.
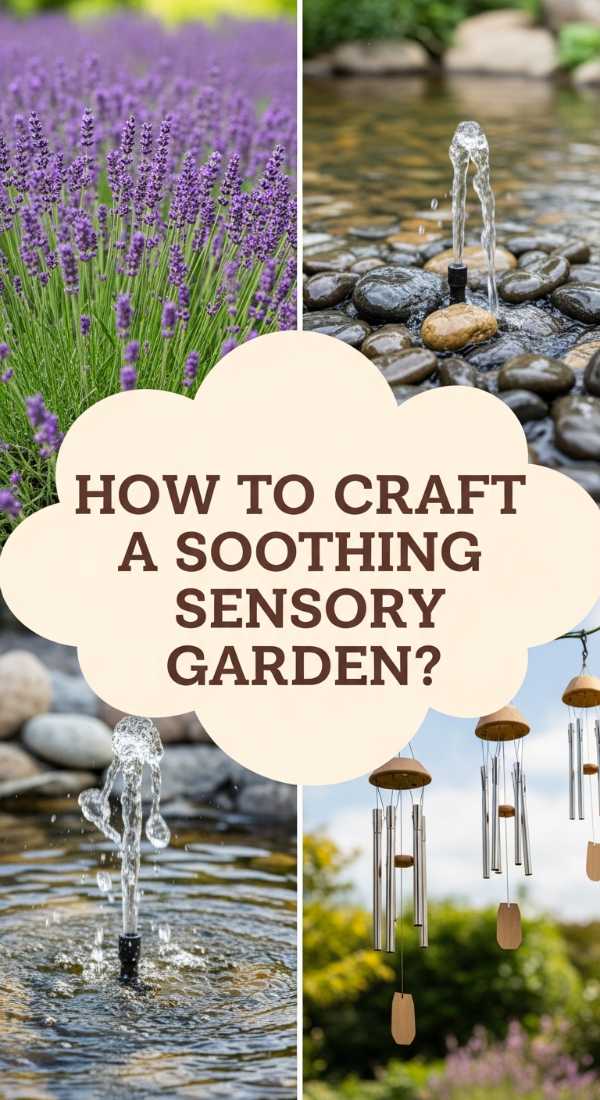
How to Craft a Soothing Sensory Garden for Calm Outdoor Kids Play

Why we love this
In a world that is often loud and fast-paced, this sensory garden is a breath of cool, lavender-scented air. It is a masterclass in subtlety, focusing on the velvet touch of lamb’s ear leaves, the gentle chime of bamboo in the breeze, and the rhythmic sound of trickling water. This space feels like a warm hug for the nervous system, providing a serene environment where children can decompress and engage their senses in a way that is restorative rather than overstimulating.
Essential Elements:
- Herb garden with mint, lavender, and rosemary
- Textured path made of smooth pebbles and soft moss
- Solar-powered bubble fountain
- Bamboo wind chimes
- ‘Touch’ plants like Lamb’s Ear (Stachys byzantina)
How to make it
- Choose a quiet, protected corner of the garden. Install a small, solar-powered water fountain on a flat stone. The sound of moving water acts as ‘white noise’ to mask neighborhood sounds.
- Create a ‘sensory path’ by digging a shallow trench 2 feet wide. Divide it into sections using cedar slats, filling one section with smooth river stones, one with fine sand, and one with soft, walkable Irish moss.
- Plant the aromatic herbs in raised containers at child-height. This encourages them to brush their hands against the leaves to release the scents of mint and rosemary.
- Hang bamboo chimes at varying heights from a low tree branch. Bamboo produces a deeper, more hollow tone than metal, which is less jarring for sensitive ears.
- Add a ‘nesting’ area—a small patch of long, ornamental grasses where a child can sit hidden and feel the tall blades swaying against their skin.
How to Style a Chic Modern Play Area for Stylish Family Backyards
Why we love this
Who says play spaces have to be an eyesore? This chic modern area is a visual delight, blending the clean lines of Scandinavian design with the playful spirit of childhood. It smells of expensive cedar and high-end outdoor fabric, looking more like an architectural installation than a toy zone. It’s the perfect compromise for the design-conscious parent, proving that a space can be both incredibly fun for a toddler and a sophisticated addition to a curated backyard aesthetic.
Essential Elements:
- Monochromatic black or white A-frame playhouse
- Geometric sandbox with a custom-fit sun cover
- Sunbrella fabric floor cushions in neutral tones
- Minimalist wooden swing set with black hardware
- Architectural plantings like horsetail or boxwood
How to make it
- Stick to a strict color palette: choose two neutrals (like charcoal and light oak) and one ‘pop’ of muted color (like sage green or terracotta). Paint the playhouse and sandbox frame in these unified tones.
- Build a low-profile sandbox using 4×4 cedar beams. Use hidden deck screws to keep the surfaces smooth and free of visible hardware. Finish the wood with a clear, matte UV-resistant sealant.
- Source a high-quality white play sand (often sold as ‘crystalline silica-free’). It looks cleaner and feels softer than standard construction sand.
- Install ‘floating’ bench seating around the play area using the same cedar as the sandbox. This creates a cohesive look and provides a place for adults to sit comfortably while supervising.
- Add overhead string lights (Edison bulbs) on a dimmer switch. This transitions the space from a daytime play zone to a beautiful backyard focal point in the evening.
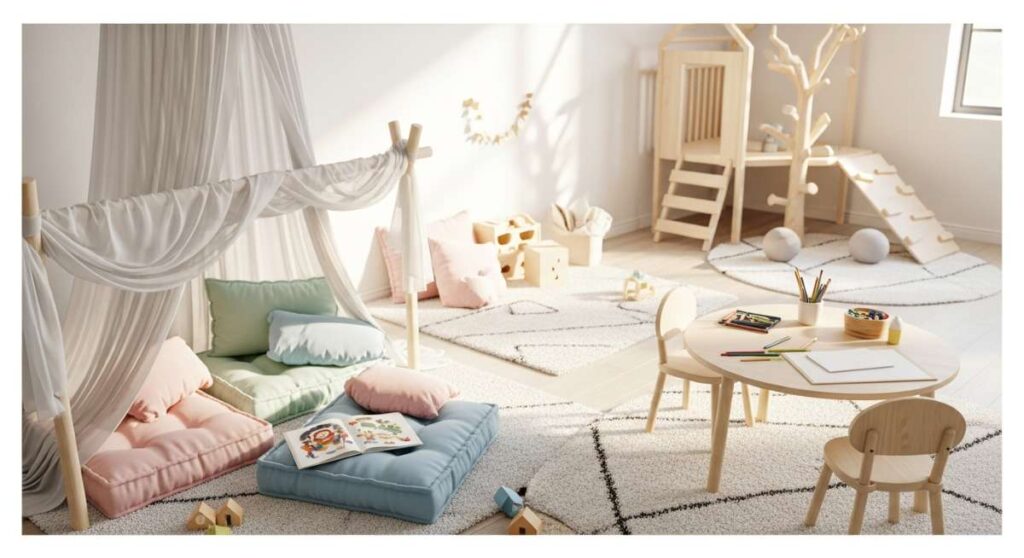
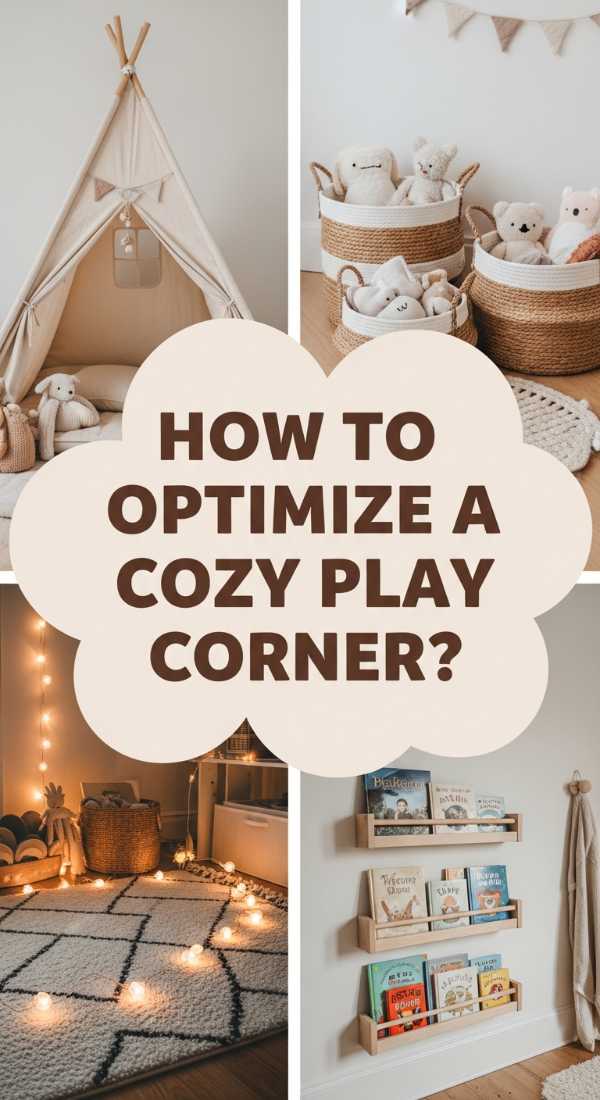
How to Optimize a Cozy Play Corner for Maximum Indoor Joy
Why we love this
This corner is the ultimate sanctuary for a budding bookworm or a quiet dreamer. It’s a plush, tactile wonderland that smells of fresh laundry and vanilla-scented candles (safe ones, of course!). With its layers of sheepskin rugs and soft, dimmable lighting, it feels like being wrapped in a giant cashmere sweater. It’s the kind of space that invites you to curl up, slow down, and get lost in the pages of a picture book or a world of imaginative figurines.
Essential Elements:
- Faux sheepskin or high-pile shag rug
- Wall-mounted acrylic bookshelves at eye level
- Canvas teepee or fabric canopy
- Dimmable warm LED ‘fairy’ lights
- Overstuffed velvet floor pillows
How to make it
- Identify an underutilized corner of a bedroom or living room. Lay down a thick, non-slip rug pad followed by your softest high-pile rug to create a luxurious foundation.
- Install a fabric canopy from the ceiling using a heavy-duty toggle bolt. Drape the fabric so it pools slightly on the floor, creating a ‘nest’ effect.
- Mount three to four acrylic ‘floating’ shelves. Arrange books with the covers facing out; this visual display makes reading more enticing and adds a pop of color to the walls.
- Weave warm-toned LED fairy lights through the top of the canopy or along the wall. Use a plug-in set with a remote dimmer so you can adjust the ambiance from ‘playtime’ to ‘sleepy storytime.’
- Fill the interior with pillows of different textures—velvet, linen, and chunky knit—to provide various sensory inputs and ultimate comfort for long lounging sessions.
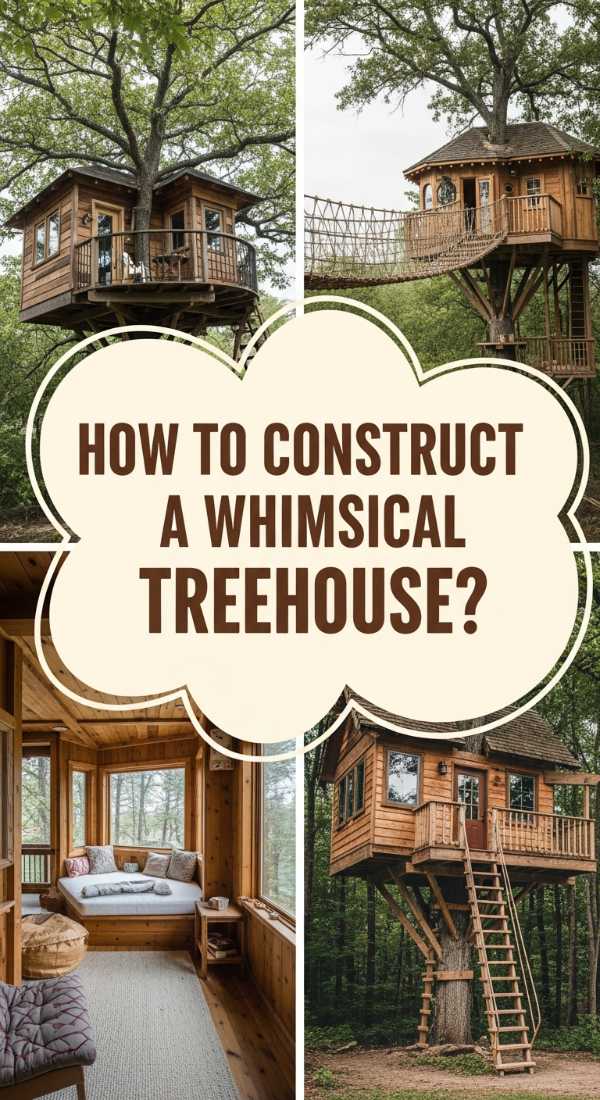
How to Construct a Whimsical Treehouse Retreat for Magical Childhood Memories

Why we love this
The treehouse is the crown jewel of childhood play, a literal escape from the ‘grounded’ world of adults. Up here, the air is cooler and smells of sap and sky. It feels like a living, breathing fortress that sways gently with the wind. The texture of the unfinished wood and the rhythmic clatter of a pulley bucket create a sense of old-world charm that feels timeless, turning an ordinary backyard tree into a vessel for endless high-stakes adventures.
Essential Elements:
- Platform anchored with tree-friendly TABs (Tree Attachment Bolts)
- Rope ladder with wooden rungs
- A bucket-and-pulley system for ‘supplies’
- Recycled wood or cedar shingle siding
- Porthole-style windows
How to make it
- Consult an arborist to ensure your tree is healthy and of a species (like Oak or Maple) that can support a structure. Never ‘girdle’ the tree with ropes or chains; use professional TABs that allow the tree to grow around the bolt.
- Build the main platform using 2×8 joists. Use a level to ensure it is perfectly flat, and leave a 2-inch gap around the trunk to allow for the tree’s movement and growth.
- Construct the walls on the ground before hoisting them up. This is much safer and ensures more precise joinery. Use lightweight cedar shingles for the exterior to keep the total weight low.
- Install a simple pulley system using a marine-grade block and tackle. Attach it to a sturdy overhanging branch or a dedicated beam on the porch. This is the #1 feature kids will actually use!
- Add a secret trapdoor entrance for the rope ladder. Ensure the hinges are heavy-duty and that the door has a ‘soft-close’ mechanism to protect little fingers.
How to Setup a Refreshing Splash Zone for Cooling Summer Backyard Play
Why we love this
When the sun is blazing, this splash zone is a shimmering, cool oasis. It’s the sound of joyful shrieks and the rhythmic ‘shhh’ of a misting system. The air is heavy with the refreshing scent of wet pavement and sunscreen. It feels like a private water park, where the sensation of cool water on warm skin provides the ultimate sensory relief, making every summer afternoon feel like a vacation in the middle of the suburbs.
Essential Elements:
- In-ground or elevated water table
- Outdoor misting kit for cooling the air
- Non-slip perforated rubber floor mats
- Adjustable hose-end sprinklers
- Quick-dry mesh toy storage
How to make it
- Choose a location with a slight slope for natural drainage, or near a deck drain. Lay down perforated rubber mats to prevent the area from becoming a muddy slip-hazard.
- Set up a multi-level water table. Fill it with a mixture of large ‘ice blocks’ (frozen in Tupperware) and fresh water to keep the temperature cool for hours.
- Run a misting line along the underside of a patio umbrella or a nearby fence. Connect it to your outdoor faucet with a pressure regulator to ensure a fine, ‘dry’ mist that cools the air by up to 20 degrees.
- Install a ‘car wash’ station using PVC pipes with holes drilled at intervals. Connect your hose to the pipe structure to create a walk-through tunnel of gentle sprays.
- Keep all water toys in mesh bags or bins with holes in the bottom. This allows for airflow, preventing the ‘stale water’ smell and keeping everything hygienic and ready for the next day.
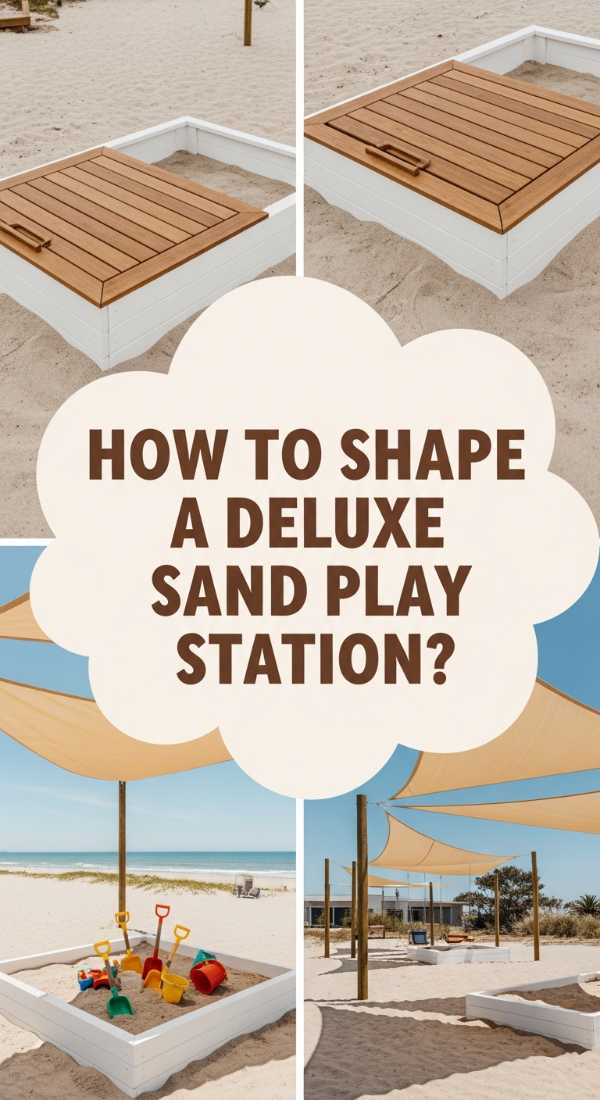
How to Shape a Deluxe Sand Play Station for Tactile Backyard Discovery
Why we love this
There is nothing quite as meditative as the feeling of cool, damp sand slipping through your fingers. This deluxe station is a haven of tactile exploration, smelling of sun-baked wood and clean earth. It feels like a miniature construction site where the world can be built and rebuilt a thousand times over. It’s a space that encourages deep focus, as children master the art of the perfect sandcastle or the most intricate ‘dinosaur dig’ ever recorded.
Essential Elements:
- Extra-large cedar sandbox with built-in benches
- Tiered ‘construction’ levels for truck play
- High-quality filtered play sand
- Heavy-duty canvas or wooden cover
- Selection of metal (not plastic) sand tools
How to make it
- Build a large 6×6 foot frame using 4×4 cedar posts. Cedar is naturally rot-resistant and doesn’t require chemical treatments, making it safer for little ones who might touch the wood.
- Line the bottom with professional-grade landscape fabric. This allows water to drain out so the sand doesn’t get swampy, but prevents weeds and worms from coming up through the bottom.
- Create ‘tiers’ by adding a smaller 2×4 wooden box inside one corner of the large box. This allows for ‘dry sand’ on top and ‘wet sand’ on the bottom, which is essential for different types of building.
- Fill with at least 10-12 bags of play sand. Pro tip: Add a few sprinkles of cinnamon to the sand; it’s a natural non-toxic ant repellent and makes the sandbox smell amazing!
- Fashion a heavy, hinged wooden cover. This is non-negotiable to keep neighborhood cats out and to ensure the sand stays clean and dry when not in use.
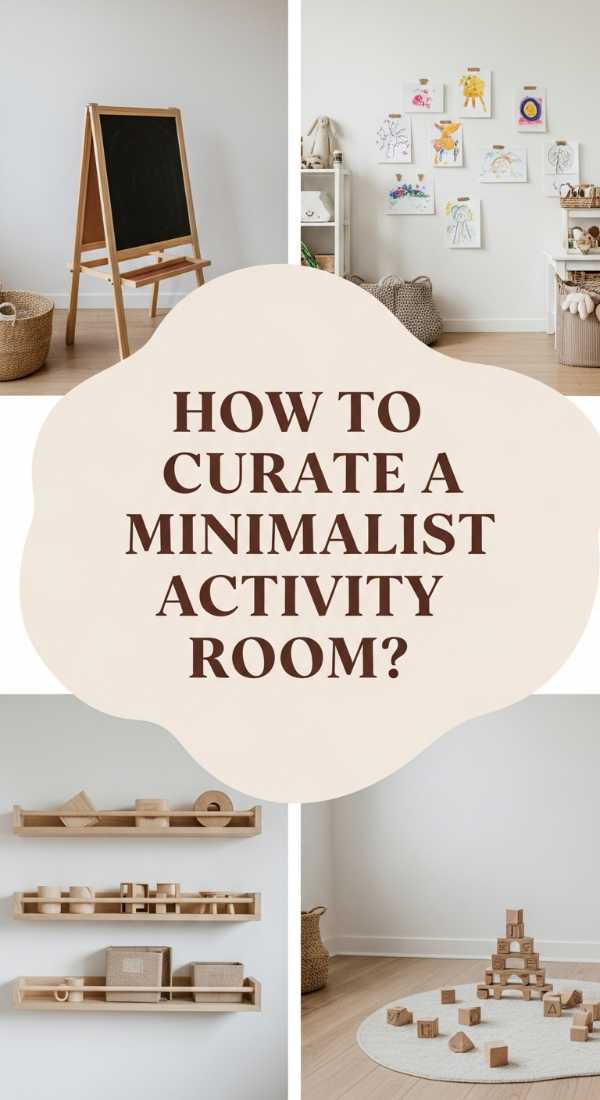
How to Curate a Minimalist Activity Room for Focused Creative Development
[IMAGE_10]
Why we love this
This room is a visual palate cleanser—a bright, airy space that smells of fresh paper and beeswax crayons. By stripping away the visual ‘noise’ of traditional playrooms, this minimalist retreat allows a child’s inner world to take center stage. It feels calm, intentional, and respectful, providing a high-quality environment where the texture of a wooden block or the pigment of a paint stroke becomes the most important thing in the world. It’s where focus is born.
Essential Elements:
- Open, low-profile wooden shelving
- Neutral white or soft grey walls
- Natural wood activity table and chairs
- Woven baskets for categorized toy storage
- Rotating art display wire
How to make it
- Start by ruthlessly decluttering. Follow the ‘Toy Rotation’ method: only keep 8-10 high-quality toys out at a time, storing the rest in a closet and swapping them every two weeks to maintain interest.
- Choose a ‘unit block’ set as the room’s centerpiece. These are mathematically proportional wooden blocks that encourage spatial reasoning and are beautiful enough to leave on display.
- Install low, open shelving (like the IKEA Kallax turned on its side). Arrange toys with plenty of ‘white space’ between them so the child isn’t overwhelmed by choice.
- Set up a ‘Creation Station’ with a sturdy wooden table. Provide high-quality materials—beeswax crayons, thick watercolor paper, and clay—stored in clear glass jars so the colors are visible and inviting.
- Use natural baskets (seagrass or wicker) for any smaller items. The organic texture adds warmth to the minimalist aesthetic while hiding any visual ‘clutter’ of multi-colored pieces.
Creating a Legacy of Play
In the end, the most beautiful play space isn’t the one with the most expensive toys or the trendiest wallpaper. It’s the one where your child feels safe enough to take risks and inspired enough to dream. Whether you’re building a grand treehouse or simply laying down a soft rug in a quiet corner, you are building more than just a room—you are building the backdrop of their childhood. These spaces are where magic happens, and being the one to create that magic is the greatest gift of all.