
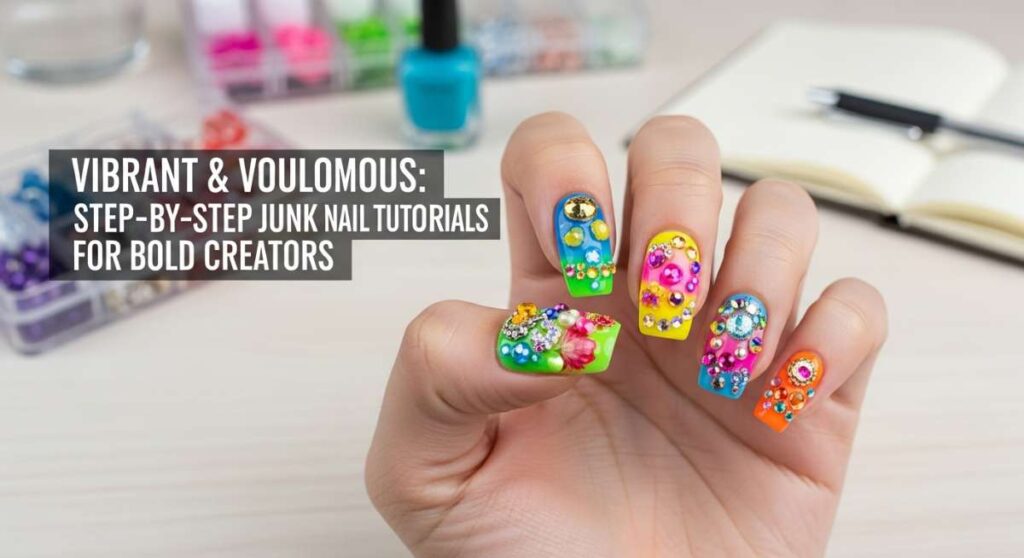
Vibrant & Voluminous: Step-by-Step Junk Nail Tutorials for Bold Creators
Hello, my beautiful loves! Welcome back to our cozy little corner of the internet. Today, I want to talk about something that feels like a warm, colorful hug for your hands—maximalist junk nails. There is something so profoundly healing about looking down at your fingertips and seeing a chaotic, beautiful masterpiece that reflects every single facet of your vibrant soul. It’s not just a manicure; it’s a tiny art gallery you carry with you everywhere you go.
Lately, I’ve been leaning into the ‘clutter-core’ aesthetic because, let’s be honest, life is far too short for boring, beige nails. We are creators, dreamers, and bold spirits! These tutorials are designed to help you embrace the ‘more is more’ philosophy. Whether you’re sipping a lavender latte or typing away at your keyboard, I want your nails to make you smile every single time they catch the light. So, grab your favorite sparkly polish, find a sunny spot to sit, and let’s dive into the magic together.
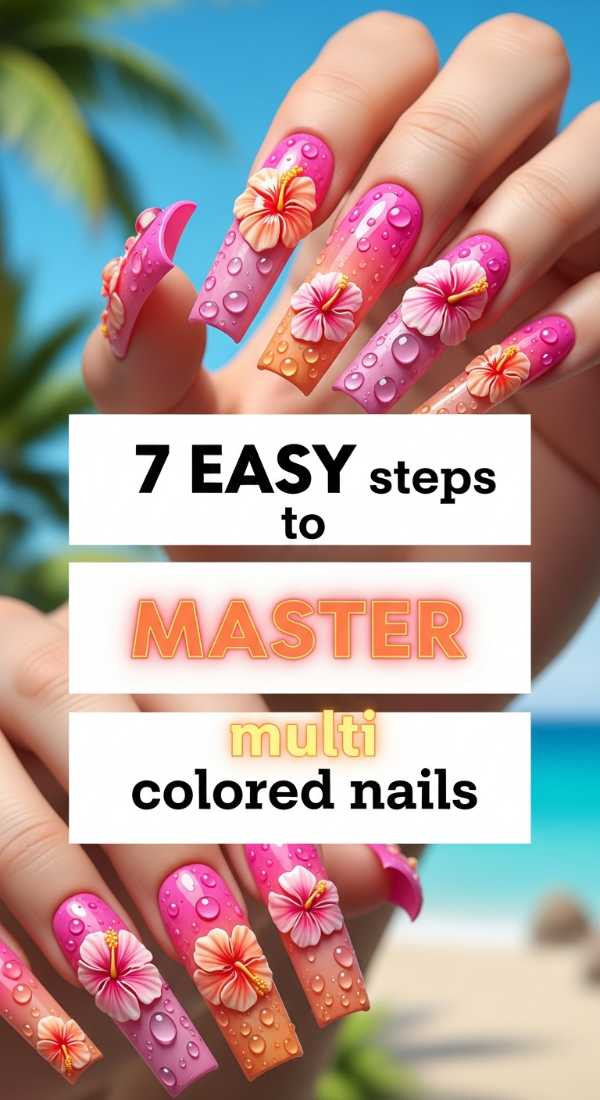
7 EASY steps to MASTER multi colored nails
Why to love this recipe:
There is something so freeing about letting go of the need for everything to match. This recipe is your gateway to the rainbow, a gentle way to introduce color without the stress of perfection. It’s like a soft sunrise on your fingertips.
Essential Ingredients:
- Base coat (any strengthening brand)
- 5 different pastel or neon polishes
- Small detail brush
- Nail polish remover and a Q-tip
- Quick-dry top coat
How to Prepare:
- Start with a clean, dry nail bed and apply your base coat.
- Pick five colors that make your heart skip a beat.
- Apply the first color to your thumb, moving through the palette for each finger.
- Wait 2 minutes for the first layer to settle.
- Apply a second thin coat for maximum vibrance.
- Clean up the edges with your Q-tip dipped in remover.
- Seal the magic with a high-shine top coat.
Budget Range
- Essie ‘Spring Collection’ Mini Set – $15.00
- Sally Hansen Insta-Dri – $6.00 per bottle
- Generic detail brush set – $8.00
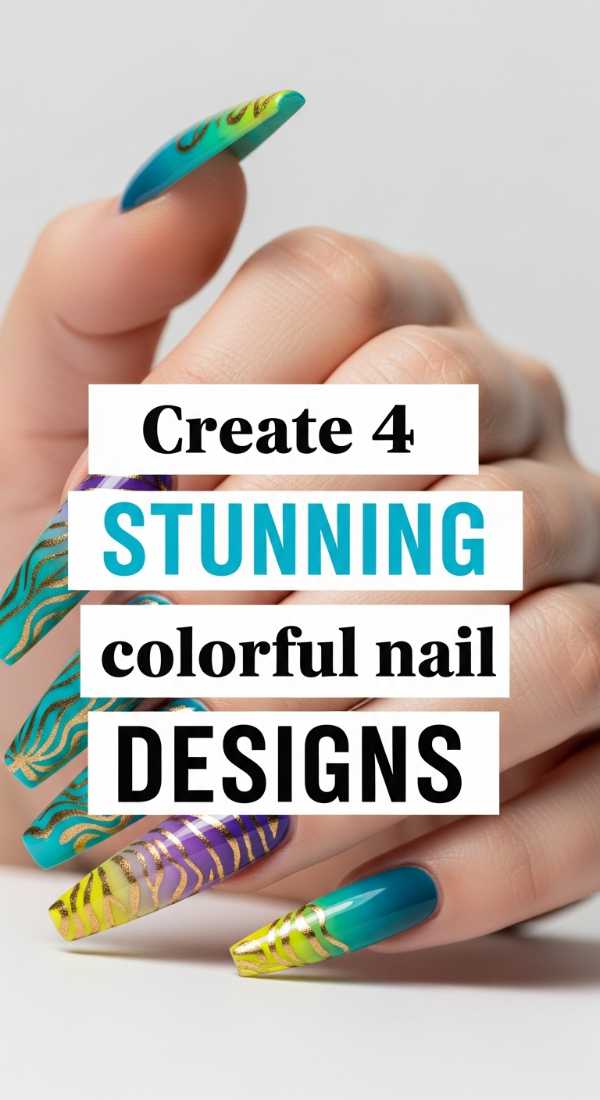
Create 4 STUNNING colorful nail DESIGNS
Why to love this recipe:
Why settle for one story when you can tell four? This tutorial is for the darlings who want every nail to be a conversation starter. It combines dots, stripes, and swirls into a harmonious symphony of style.
Essential Ingredients:
- Dotting tool
- Striper brush
- Three contrasting polish colors
- Gold leaf flakes
How to Prepare:
- On nail one, create a ‘cow print’ using two bright colors.
- On nail two, use the striper brush to create delicate vertical pinstripes.
- On nail three, apply a solid base and use the dotting tool for a floral cluster.
- On nail four, swirl two colors together while wet for a marble effect.
Budget Range
- Nail Art Tool Kit (Amazon) – $12.00
- Holo Taco Crushed Holo – $14.00
- Gold Leaf Flakes (Michaels) – $5.00
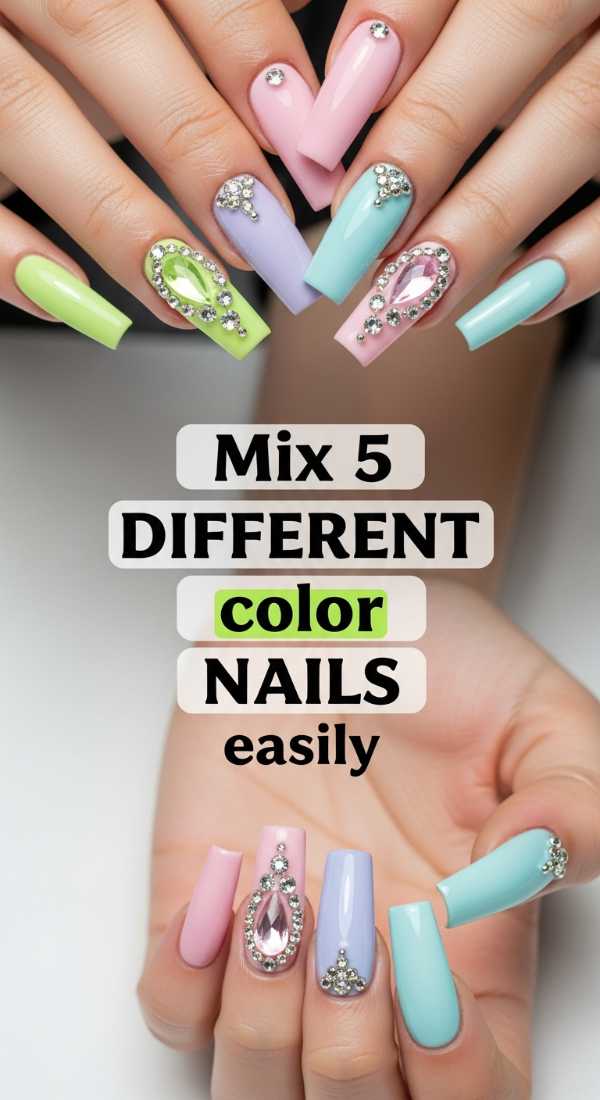
Mix 5 DIFFERENT color NAILS easily
Why to love this recipe:
Sometimes the hardest part is choosing the palette! This method takes the guesswork out of color theory, helping you pick 5 shades that feel like they belong in the same dreamscape. It’s curated chaos at its finest.
Essential Ingredients:
- A color wheel for reference
- Nail palette or a piece of foil
- Sponge for blending
- White base polish
How to Prepare:
- Select colors that are adjacent on the color wheel for a ‘gradient’ feel.
- Paint all nails with a white base to make the colors pop.
- Apply each of the 5 colors to a different nail.
- Use the sponge to lightly dab the transition areas if you want a softer look.
- Add a matte top coat for a sophisticated, modern finish.
Budget Range
- OPI Infinite Shine – $13.99 per bottle
- Makeup Sponges (CVS) – $4.00
- Matte Top Coat (Revlon) – $7.00
6 SIMPLE ways to STYLE junk nails
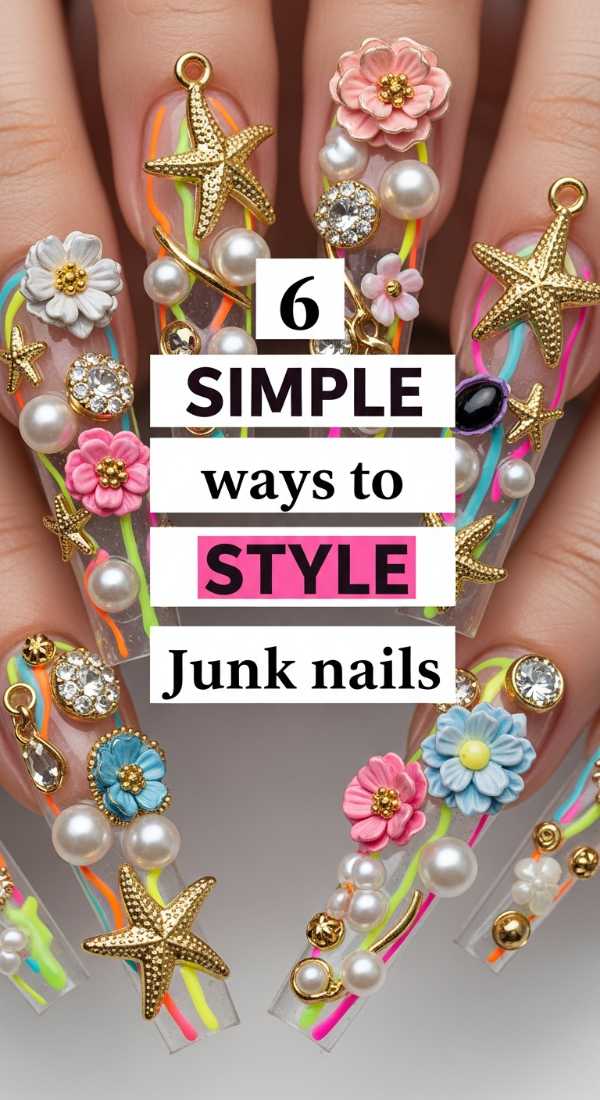
Why to love this recipe:
Styling junk nails is an art form of its own! These tips ensure your bold nails complement your outfit rather than clashing with it. It’s about creating a holistic look that feels like ‘you’.
Essential Ingredients:
- Stackable gold rings
- Oversized chunky sweaters
- Denim jackets
- A confident smile
How to Prepare:
- Pair multi-colored nails with neutral-toned sweaters to let the art pop.
- Use gold or silver rings to frame the nails and add texture.
- Style with a denim jacket for a 90s maximalist vibe.
- Mismatch your jewelry to match the energy of the junk nails.
- Keep your accessories rounded if your nail shape is soft; edgy if your nails are stiletto.
- Always carry a cuticle oil pen to keep the skin around the ‘junk’ looking fresh.
Budget Range
- H&M Ring Set – $9.99
- L’Occitane Shea Butter Cuticle Oil – $20.00
- Old Navy Denim Trucker Jacket – $40.00
8 MINUTES to PERFECT your color nails
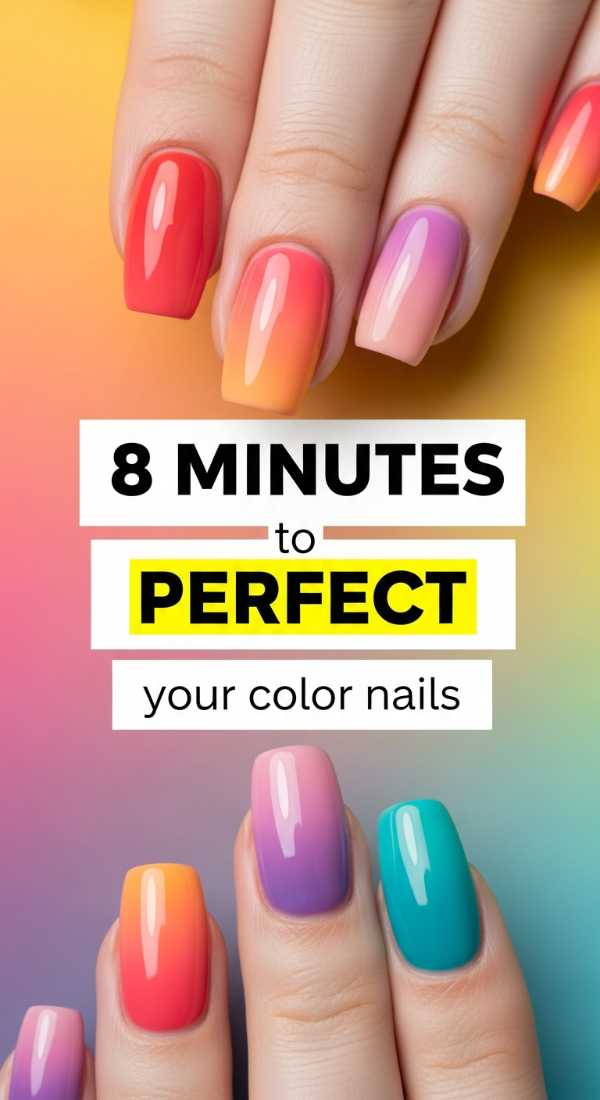
Why to love this recipe:
Life moves fast, but your nails can still look fabulous! This is for my busy loves who need a splash of joy in under ten minutes. It’s efficiency meets expression.
Essential Ingredients:
- Quick-dry spray
- High-pigment single-coat polish
- Buffer block
How to Prepare:
- Buff the nail surface for 30 seconds to ensure a smooth grip.
- Apply one thick (but not gloppy) coat of high-pigment polish.
- Wait 60 seconds.
- Apply a fast-acting top coat.
- Spray with drying agent immediately.
- Wait 2 minutes and you are ready to conquer the world!
Budget Range
- Zeva Quick Dry Spray – $10.00
- Orly One-Step Polish – $15.00
- Professional Buffer Block – $3.00
Blend TWO color NAILS in 3 steps
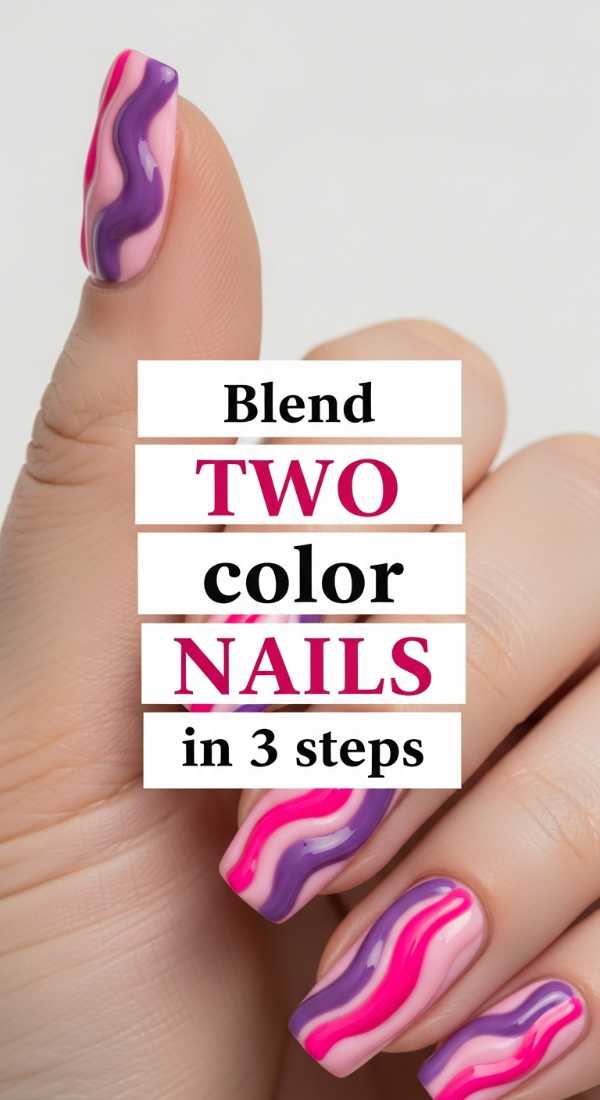
Why to love this recipe:
This is the ‘sunset on the beach’ look. It’s incredibly romantic and soft, perfect for when you want a little bit of color without the full maximalist weight. It’s like a gentle whisper of art.
Essential Ingredients:
- Two complementary colors (e.g., pink and orange)
- A makeup wedge
- Liquid latex or tape (for skin protection)
How to Prepare:
- Apply the lighter color as a base coat and let dry.
- Paint both colors side-by-side on the makeup sponge.
- Dab the sponge onto the nail until the colors blend beautifully at the center.
Budget Range
- Maniology Liquid Latex – $9.00
- Wet n Wild Megalast Polish – $3.00
- Generic Makeup Wedges – $2.00
Apply COLOR street NAILS in 5 steps
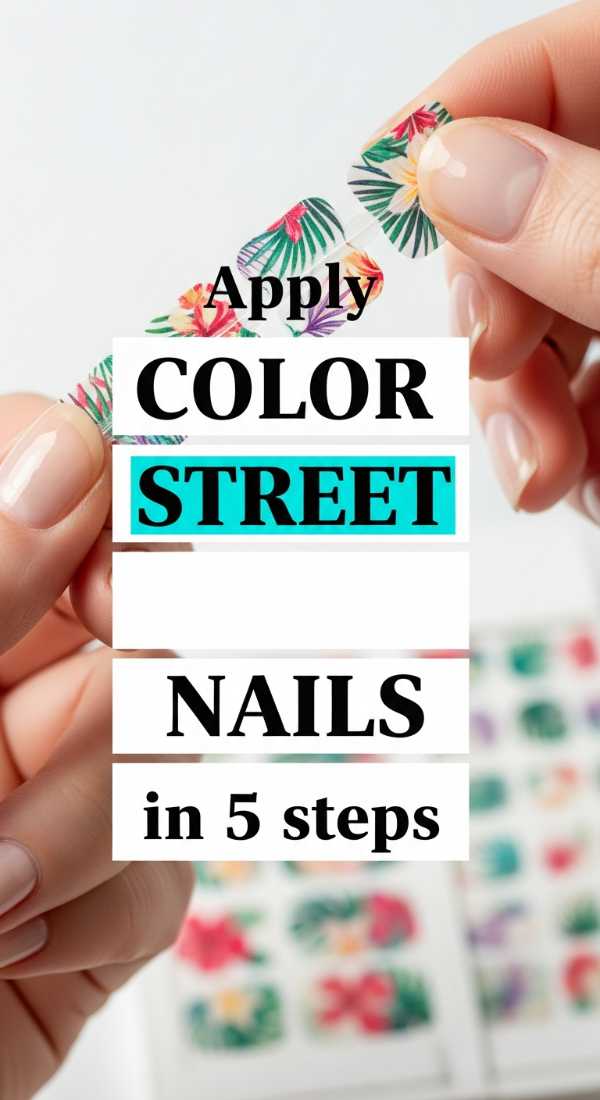
Why to love this recipe:
I love a good shortcut! Color Street strips are perfect for adding intricate patterns to your junk nail collection without needing a steady hand for painting. It’s the ultimate ‘cheat code’ for creators.
Essential Ingredients:
- Color Street nail strips
- Alcohol prep pads
- Nail file
How to Prepare:
- Clean nails thoroughly with the alcohol pad to remove oils.
- Select the strip size that best fits your nail.
- Peel the clear cover and the back paper.
- Apply the strip to the nail, smoothing it from the center outward.
- Fold the excess over the tip and file it off in a downward motion.
Budget Range
- Color Street Starter Set – $13.00
- Glass Nail File – $10.00
10 TROPICAL charms for NAILS colorful
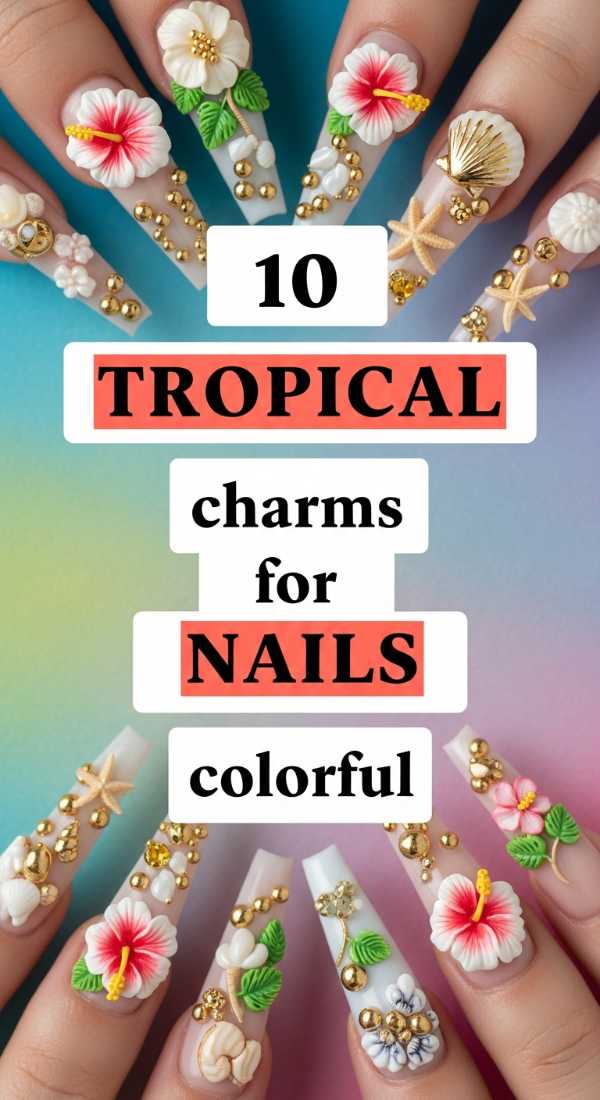
Why to love this recipe:
This is where the ‘junk’ really comes into play! Adding 3D charms gives your nails a tactile, playful dimension that feels like a vacation in the tropics. It’s purely fun and wonderfully extra.
Essential Ingredients:
- Nail glue or UV resin
- Small tropical charms (pineapples, palm trees, shells)
- Tweezers
How to Prepare:
- Paint your base colors and let them dry completely.
- Place a tiny drop of glue where you want the charm.
- Use tweezers to press the charm into the glue for 10 seconds.
- Apply a thick top coat around the base of the charm to secure it.
- Repeat with different charms on each nail for a lush, tropical forest look.
Budget Range
- Bulk Nail Charm Pack (Etsy) – $12.00
- KDS Nail Glue – $7.00
- Professional Tweezers – $5.00
4 EXPERT hacks for MULTICOLOR nails
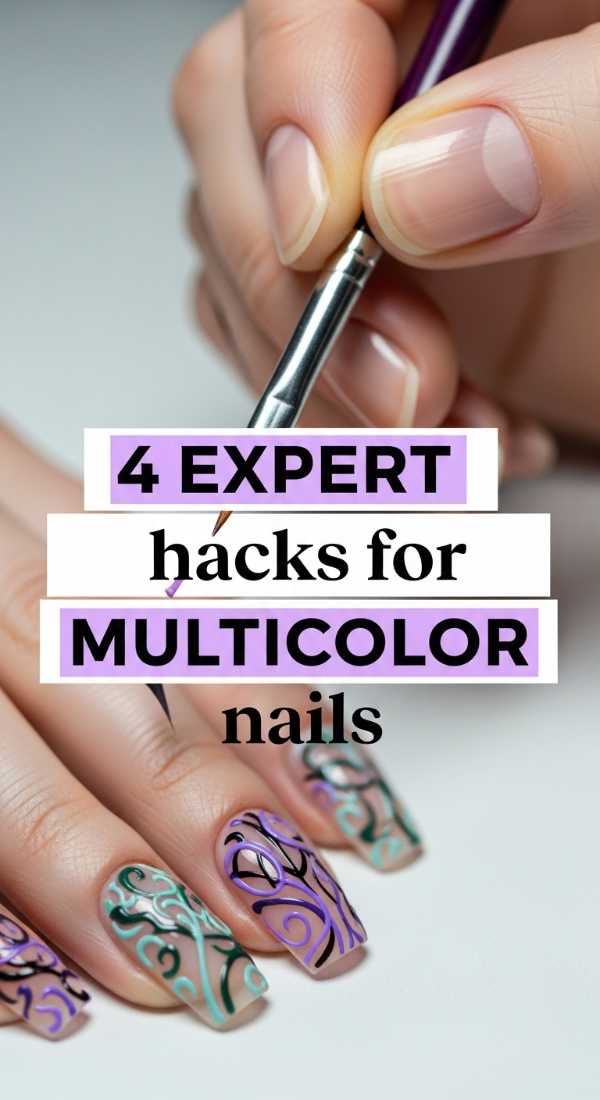
Why to love this recipe:
Ever wonder how the pros keep their multi-colored looks so crisp? These hacks are the secrets whispered in high-end salons, brought right to your vanity. It’s about working smarter, not harder.
Essential Ingredients:
- Matte tape
- A toothpick
- Clear polish
- Loose glitter
How to Prepare:
- Use matte tape to create perfect geometric sections for different colors.
- Mix loose glitter with clear polish for a custom ‘junk nail’ sparkle.
- Use a toothpick to swirl colors together for a ‘smoke’ effect.
- Dip a wet nail into a pot of tiny beads for instant texture.
Budget Range
- Scotch Magic Tape – $4.00
- Loose Iridescent Glitter – $6.00
- Clear Top Coat (Seche Vite) – $9.50
Shape COLORFUL stiletto NAILS in 3 stages

Why to love this recipe:
Stiletto nails are the ultimate ‘baddie’ look. They provide a long, sharp canvas that makes any colorful design look instantly more high-fashion and dramatic. It’s for the boldest of the bold.
Essential Ingredients:
- 180-grit nail file
- Nail clippers
- Stiletto nail tips (optional)
How to Prepare:
- Find the center point of your nail tip and mark it.
- File the sides at a 45-degree angle toward that center point.
- Refine the tip until it’s sharp (but safe!) and smooth the edges.
Budget Range
- Makartt Stiletto Nail Tips – $10.00
- Heavy Duty Nail Clippers – $12.00
- Flowery 180-grit Files – $4.00
Your Sparkle, Your Rules
Darlings, I hope these tutorials inspire you to pick up a brush and play. Remember, there are no mistakes in junk nail art—only happy little accidents that add character. Your hands are an extension of your heart, so let them be loud, let them be colorful, and most importantly, let them be uniquely you. I can’t wait to see the beautiful, voluminous masterpieces you create. Tag me in your photos so I can shower you with love!