
There’s something truly magical about that first morning coffee stepped out onto your own private porch, isn’t there? I used to look at my patchy grass and feel a sense of overwhelm, but lately, my feed has been exploding with these incredible DIY garden transformations that make a “paradise” feel totally achievable. Your outdoor space is more than just a patch of land; it is a living, breathing extension of your home where memories are etched into the landscape.
We are currently living through a backyard revolution where functionality meets high-end aesthetics. From sustainable duck habitats to chic, modernized ranch exteriors, the viral trends of the year are all about creating a sensory experience. Join me as we dive into the most sought-after garden upgrades that will turn your home into the neighborhood’s favorite sanctuary.
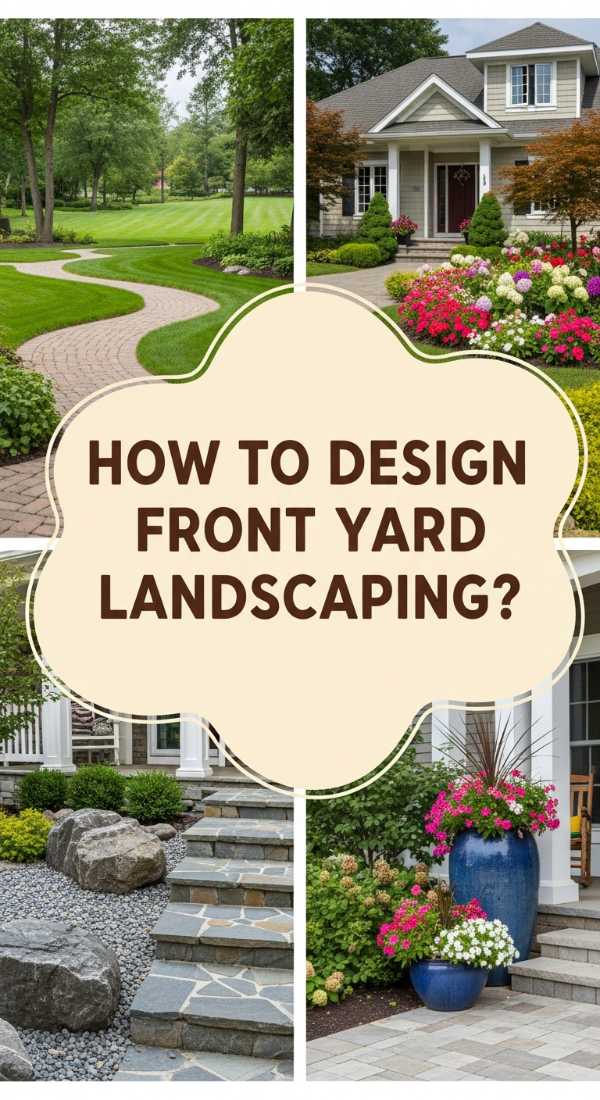
How to Design Front Yard Landscaping for Instant Curb Appeal
Why we love this
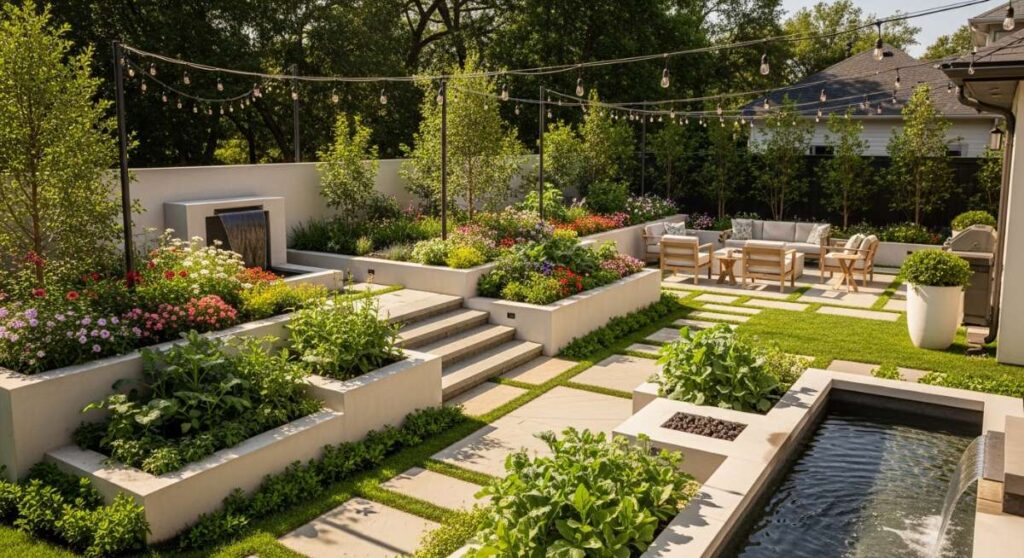
A well-designed front yard is like a warm hug for guests before they even reach your front door. We adore the way a thoughtful landscape uses the scent of blooming lavender and the structured elegance of boxwood to create a visual rhythm that guides the eye. There is a deep satisfaction in watching your home’s silhouette soften against a backdrop of lush textures, vibrant perennials, and the earthy, grounding aroma of fresh cedar mulch after a summer rain.
Essential Elements:
- Layered perennials (Salvia, Lavender, Hostas)
- Hardscape edging (Stone or Steel)
- Symmetrical boxwood shrubs
- Solar-powered path lighting
- A focal point specimen tree (like a Japanese Maple)
How to make it
- Begin by sketching a scaled map of your yard, identifying sun exposure zones and the architectural lines of your house to ensure balance.
- Edge your garden beds using a sharp spade or a power edger to create clean, deep trenches that clearly separate the turf from the planting zones.
- Amend your soil with high-quality organic compost and a slow-release fertilizer, tilling it to a depth of 6 inches to ensure root health.
- Arrange your plants while they are still in their pots, placing the tallest specimens at the back (near the house) and tapering down to ground covers at the front.
- Dig holes twice as wide as the root ball, tease the roots gently, and plant at the same depth as the nursery pot, tamping down firmly to remove air pockets.
- Apply a 3-inch layer of bark mulch to retain moisture and suppress weeds, then install low-voltage LED lighting to highlight the texture of the foliage at night.
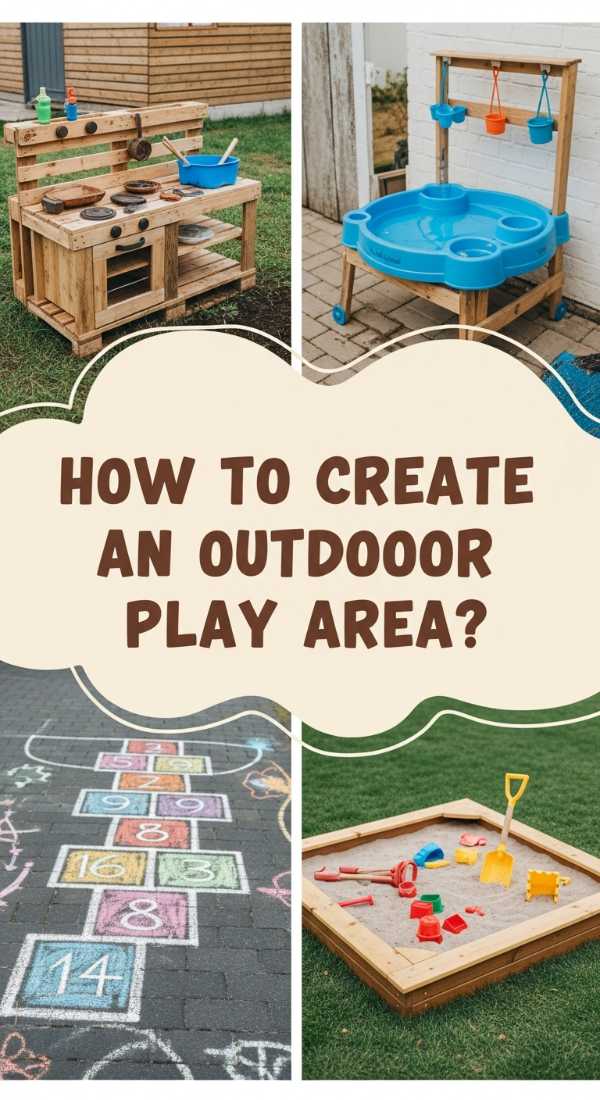
How to Create an Outdoor Play Area for Endless Backyard Fun
Why we love this
There is nothing quite as nostalgic or joyful as the sound of children laughing under the open sky. We love this trend because it encourages screen-free exploration while integrating beautifully into the natural landscape rather than clashing with it. Imagine a soft, cedar-scented play zone where the tactile crunch of wood chips meets the smooth, cool surface of a slide, creating a safe haven for imaginative adventures and high-energy afternoons.
Essential Elements:
- Natural wood play structure
- Rubber or cedar mulch safety flooring
- Timber borders
- Shade sail or umbrella
- Storage bench for outdoor toys
How to make it
- Select a level area within sight of a kitchen window or patio and clear all debris, rocks, and existing sod from the footprint.
- Install a timber border using pressure-treated 4x4s secured with rebar stakes to create a defined container for your safety surfacing.
- Lay down a heavy-duty landscape fabric to prevent weeds from poking through and to ensure proper drainage during rainy seasons.
- Assemble your play structure, following manufacturer torque specifications for every bolt, and ensuring the unit is anchored deep into the ground.
- Fill the bordered area with at least 9 inches of certified playground mulch to provide adequate impact absorption for falls.
- Add a shade sail overhead by mounting brackets to existing structures or dedicated 4×4 posts set in concrete to protect little ones from UV rays.
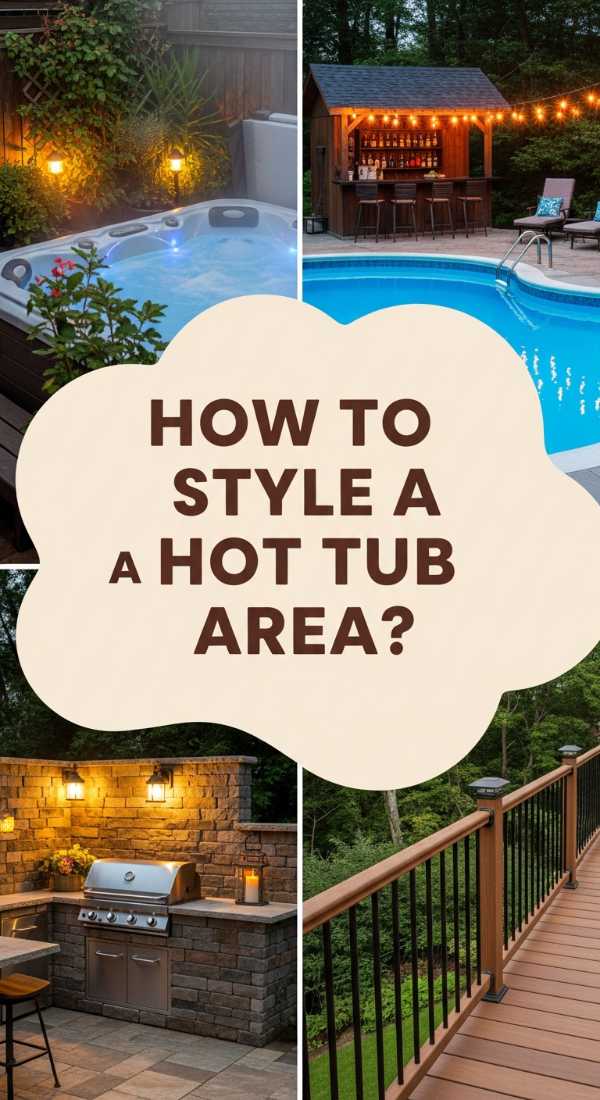
How to Style a Hot Tub Area for Ultimate Home Relaxation
Why we love this
Turning a hot tub into a high-end spa retreat is the ultimate flex in home relaxation. We love the contrast between the crisp night air and the rising steam, scented with eucalyptus or vanilla salts. The glow of fairy lights reflecting off the bubbling water creates an ethereal atmosphere that melts away the day’s stress, making your backyard feel like a five-star resort tucked away from the rest of the world.
Essential Elements:
- Cedar privacy screens
- Outdoor waterproof rug
- Tiered shelving for towels and drinks
- Dimmable string lights
- Potted palms or tall grasses
How to make it
- Ensure your base is a reinforced concrete slab or a heavy-duty deck rated for the weight of a filled tub (roughly 3,000-5,000 lbs).
- Construct or install vertical privacy screens using slatted wood to block wind and neighbors while allowing for air circulation.
- Run professional-grade electrical wiring through a GFCI breaker, ensuring all conduits are buried or hidden behind decorative skirting.
- Zone the area by placing a weather-resistant rug under the entry steps to keep feet clean and provide a soft landing spot.
- Arrange oversized planters with tall greenery around the perimeter to create a “living wall” effect that enhances the sense of seclusion.
- Set up a nearby station with hooks for plush robes and a small table for hydration, then string Edison bulbs overhead for a warm, amber glow.
How to Build a DIY Wood Planter Box for Vertical Garden Growth
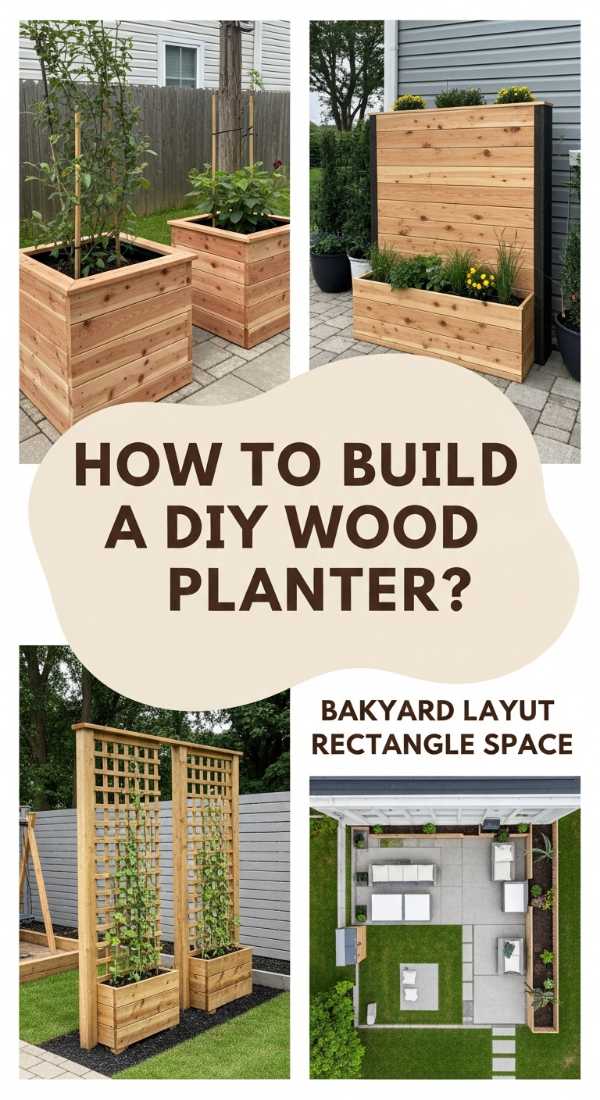
Why we love this
Vertical gardening is a game-changer for small spaces, and these wooden planters are the stars of the show. We love the raw, tactile nature of cedar planks and the way they smell when they’re freshly cut. Seeing a wall of cascading herbs and bright flowers grow upward brings a lush, architectural element to any wall or fence, proving that you don’t need an acre of land to cultivate a vibrant, edible paradise.
Essential Elements:
- Untreated cedar or redwood boards
- Galvanized exterior screws
- Geotextile liner
- Power drill and miter saw
- High-drainage potting mix
How to make it
- Cut your cedar boards into four equal side pieces and one bottom piece, ensuring the bottom board has pre-drilled 1/2-inch drainage holes every 6 inches.
- Assemble the frame by pre-drilling pilot holes to prevent splitting, then secure the sides together using 2-inch galvanized screws.
- Attach the bottom board, ensuring it fits snugly inside the frame, and add small wooden feet to the base to allow for airflow underneath.
- Line the interior with geotextile fabric or landscape mesh to protect the wood from direct wet soil contact while allowing water to escape.
- Fill with a premium mix of peat moss, perlite, and compost, leaving 2 inches of space at the top to prevent overflow during watering.
- Mount the boxes to a sturdy wall or fence using heavy-duty brackets, or stack them in a ladder formation for a stunning vertical display.
How to Modernize a Ranch Exterior for a Fresh New Look
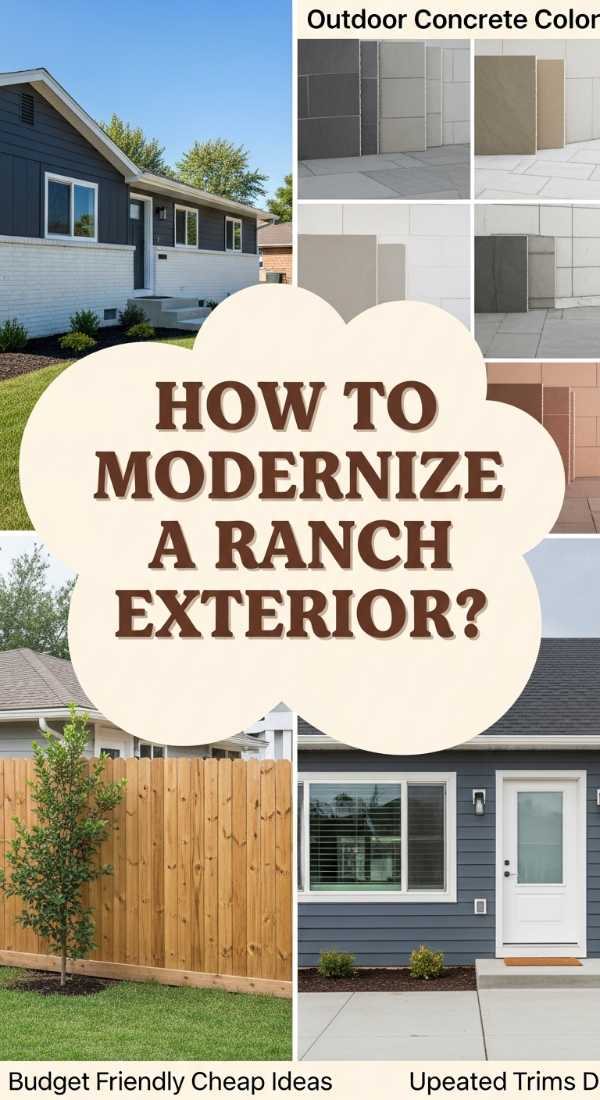
Why we love this
There is a massive trend right now for “Modern Ranch” aesthetics, and we are obsessed with the dramatic transformation. We love the sleek, high-contrast look of charcoal trim against white brick, and the way modern hardware can make a 1960s home feel like a contemporary masterpiece. It’s about honoring the low-slung lines of the house while injecting a fresh, sophisticated energy through texture and light.
Essential Elements:
- Matte black or dark bronze hardware
- Vertical wood slat accents
- Modern house numbers
- Updated exterior lighting fixtures
- Cohesive paint palette
How to make it
- Deep clean the entire exterior using a pressure washer to remove oxidation, dirt, and old chalky paint before starting any work.
- Apply a high-quality masonry primer to brick or siding, followed by two coats of premium exterior flat or eggshell paint in a neutral tone.
- Replace dated, ornate hardware with clean-lined, matte black handles and a modern deadbolt to immediately elevate the entryway.
- Install vertical cedar slats over a portion of the porch or a specific wall section to add warmth and a mid-century modern architectural detail.
- Swap out old carriage lights for sleek, geometric sconces that cast light both upward and downward to highlight the home’s texture.
- Finish the look by mounting oversized, modern house numbers in a high-contrast finish near the door or on a dedicated landscape pillar.
How to Craft Glass Yard Art for a Whimsical Garden Vibe
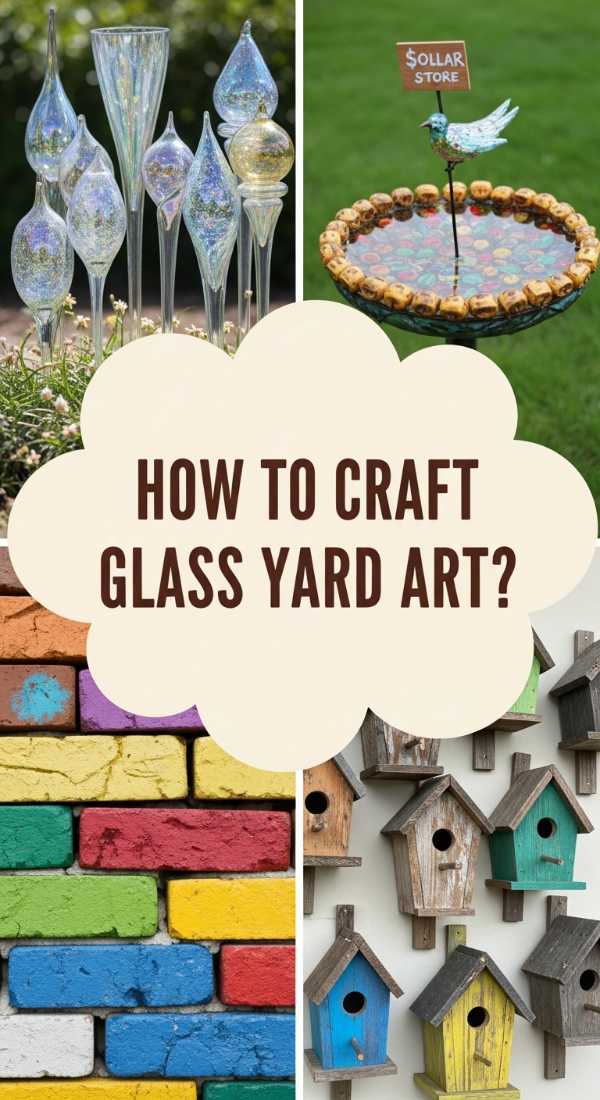
Why we love this
This trend is for the dreamers. We love how glass art catches the shifting sunlight, throwing rainbows across the grass and adding a pop of unexpected color to quiet corners. The combination of vintage glass textures—smooth, ribbed, and etched—creates a whimsical, almost magical atmosphere that makes your garden feel like it belongs in a fairytale, especially when the evening sun hits just right.
Essential Elements:
- Vintage glassware (plates, bowls, vases)
- All-weather clear silicone adhesive
- Rebar or copper pipe for stakes
- Glass drill bit (optional)
- Protective gloves
How to make it
- Source unique glass pieces from thrift stores, looking for varying sizes and vibrant colors like cobalt blue, amber, and emerald green.
- Thoroughly clean and dry all glass items to ensure the adhesive creates a permanent, weatherproof bond.
- Stack your glass pieces in various configurations to find the most balanced and aesthetic design before applying any glue.
- Apply a generous bead of clear, UV-resistant silicone adhesive between each layer, pressing firmly and allowing it to cure for a full 24 hours.
- Glue a small glass bud vase or a dedicated pipe flange to the bottom of your stack to serve as the mounting point for your garden stake.
- Insert a piece of rebar or copper pipe 12 inches into the ground and slide your glass creation onto the top for a secure, shimmering display.
How to Renovate an Elementary Art Room for Maximum Creative Flow

Why we love this
While this is an indoor project, we love it because a creative studio is the heart of a home’s inspiration. We adore the organized chaos of rainbow-colored bins, the smell of fresh tempera paint, and the flood of natural light that makes every project feel possible. A well-designed art room fosters a sense of freedom and wonder, providing a dedicated space where imagination can run wild without the worry of a mess.
Essential Elements:
- Mobile storage carts
- Easy-clean linoleum or epoxy flooring
- Adjustable-height work tables
- Drying racks
- Pegboards for tool organization
How to make it
- Zoning is key: Designate specific areas for “wet” work (painting/clay) and “dry” work (drawing/paper crafts) to streamline the creative process.
- Install durable, wipeable flooring like luxury vinyl or an epoxy coating that can withstand spills, splatters, and heavy foot traffic.
- Utilize vertical space by mounting oversized pegboards to keep scissors, brushes, and palettes within easy reach but off the work surfaces.
- Choose sturdy, adjustable tables that can grow with the students and accommodate different artistic mediums from sketching to sculpting.
- Implement a color-coded storage system using clear bins so that materials are easily identifiable and cleanup becomes a learned habit.
- Ensure the lighting is high-CRI (Color Rendering Index) LED to provide true-to-life color representation for every masterpiece created.
How to Build a DIY Duck Enclosure for a Happy Backyard Flock
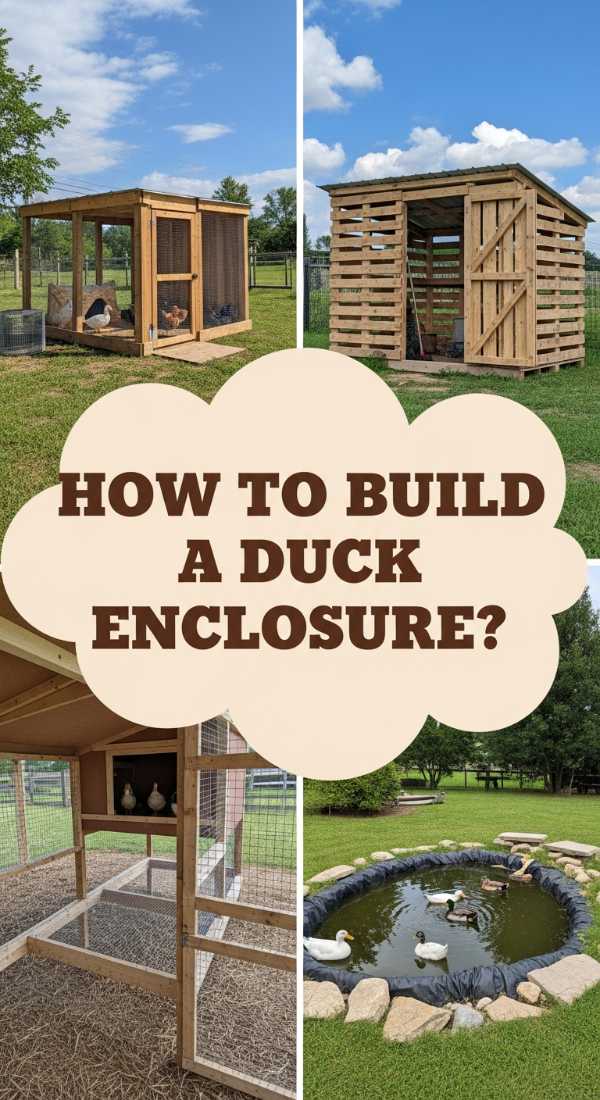
Why we love this
Backyard ducks are the new chickens, and we are here for it! We love the rhythmic sound of happy quacks and the sight of them splashing in their pond. Designing a predator-proof sanctuary that is as beautiful as it is functional adds a delightful sense of farm-to-table whimsy to your property. Plus, the joy of watching a flock waddle through a sun-drenched yard is the ultimate stress reliever.
Essential Elements:
- Hardware cloth (not chicken wire)
- Secure coop with ventilation
- Small pond or filtered pool
- Sloped drainage area
- Nesting boxes with straw
How to make it
- Frame out a large run using pressure-treated lumber, ensuring at least 10-15 square feet of outdoor space per duck for optimal health.
- Bury 1/2-inch hardware cloth at least 12 inches into the ground around the perimeter to prevent digging predators like foxes or raccoons.
- Build a raised coop with a solid floor and wide doors for easy cleaning, making sure to include high-up vents for airflow without drafts.
- Install a pre-formed pond or a heavy-duty tub, and crucially, create a drainage system (like a French drain) to manage the inevitable splashing.
- Add a “mud-free” zone around the water source using large river rocks or pea gravel to keep the rest of the enclosure clean.
- Place nesting boxes in the darkest, quietest corner of the coop and fill them with soft pine shavings or straw for egg-laying comfort.
How to Upgrade a Concrete Slab Patio for an Expensive Look

Why we love this
Most of us have a basic concrete slab, but it doesn’t have to look basic. We love this trend because it uses paint and pattern to mimic the look of expensive Moroccan tile or natural stone at a fraction of the cost. The transformation is tactile and visual; the cool, smooth finish underfoot and the intricate geometric designs turn a boring gray square into a chic outdoor living room.
Essential Elements:
- Concrete-specific porch & floor paint
- Large-scale tile stencil
- High-density foam rollers
- Painter’s tape and level
- Concrete sealer
How to make it
- Thoroughly scrub the concrete with a degreaser and use an acid etch solution to open the pores of the concrete for maximum paint adhesion.
- Apply a base coat of high-quality exterior concrete paint in your chosen “grout” color and let it cure completely for 24-48 hours.
- Mark the center of your patio and lay your stencil down, securing the edges with painter’s tape to ensure a crisp, bleed-free design.
- Use a “dry brush” technique with a foam roller—meaning you roll most of the paint off onto a paper towel before hitting the stencil—to prevent drips.
- Repeat the pattern across the entire slab, cleaning the stencil every few sections to prevent paint buildup from blurring the lines.
- Once fully dry, apply two coats of clear, anti-slip concrete sealer to protect your work from UV rays, rain, and furniture scratches.
How to Install a Rock River Bed for Better Garden Drainage
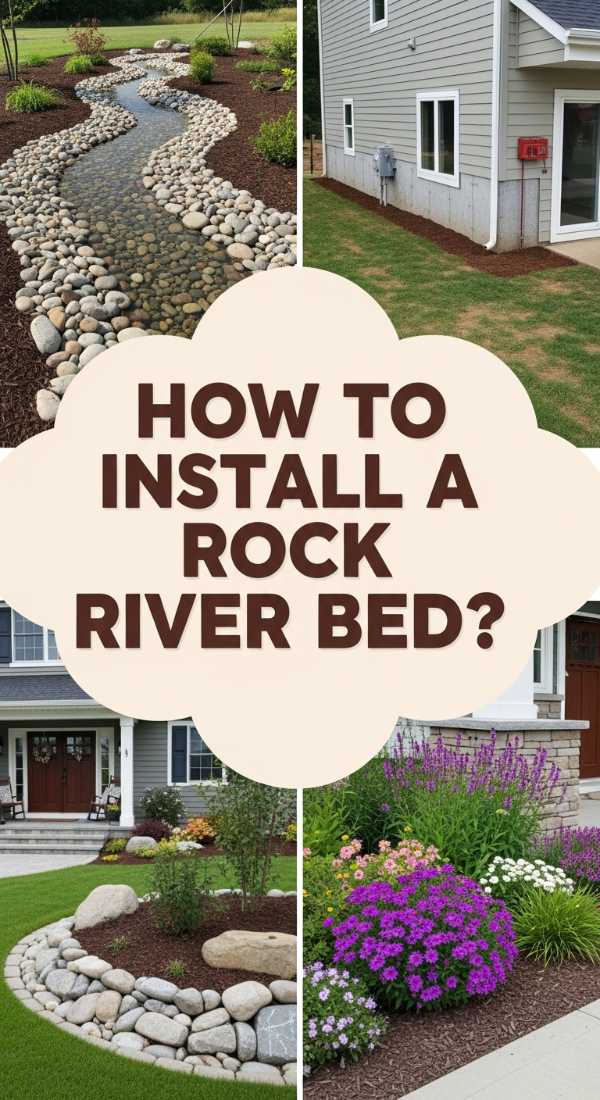
Why we love this
A dry creek bed is the perfect marriage of form and function. We love the Zen-like quality of smooth river stones winding through a garden, and the way it mimics a natural waterway. It’s a sensory delight: the varied textures of the stones, the sound of rain trickling through the rocks, and the visual peace it brings to a landscape while solving the very real problem of standing water.
Essential Elements:
- Assorted river rocks (small gravel to large boulders)
- Heavy-duty landscape fabric
- Spade and wheelbarrow
- Border plants (Ferns, Ornamental Grasses)
- Poured gravel base
How to make it
- Map out a natural, meandering path for your river bed, following the low points of your yard where water naturally collects or flows.
- Dig a trench roughly 12-18 inches wide and 6 inches deep, creating a slightly deeper “basin” area if you have significant runoff issues.
- Line the entire trench with professional-grade landscape fabric to prevent weeds and keep your rocks from sinking into the mud over time.
- Place your largest boulders first at the “bends” of your river to act as natural anchors and create a realistic, weathered appearance.
- Fill the remaining space with a mix of medium-sized river rocks and smaller pebbles, ensuring the center of the bed remains the lowest point.
- Tuck moisture-loving plants like sedges or hostas along the edges to soften the stone lines and complete the naturalistic look.
Creating Your Own Piece of Paradise
Transforming your backyard isn’t just about home value—it’s about creating a space that nourishes your spirit. Whether you start small with a wooden planter or go big with a full landscape overhaul, each project brings you one step closer to your dream sanctuary. Happy gardening!