
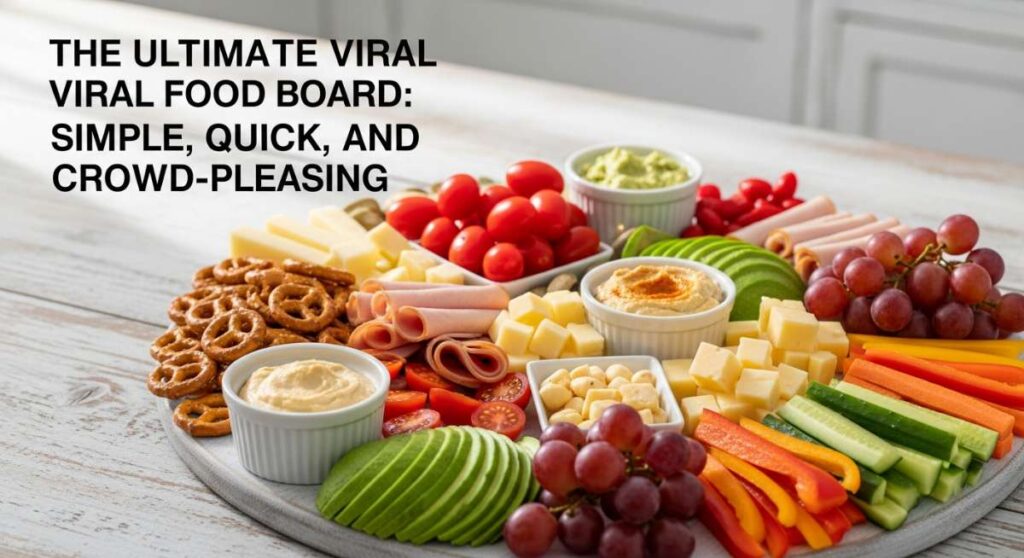
The Ultimate Viral Food Board: Simple, Quick, and Crowd-Pleasing
There is something truly magical about the way food brings us together, especially during those milestone moments like graduation season or the first warm weekends of spring. I remember standing in my kitchen last year, overwhelmed by the idea of hosting, until I realized that the best memories aren’t made over a formal five-course meal, but over a vibrant, overflowing board where everyone can pick and choose their favorites. It’s about that tactile joy of reaching for a crisp cracker or a sweet piece of fruit while sharing stories of the past and dreams for the future.
This ‘Viral Simple Food Board’ is my love letter to easy entertaining. It combines the tart, nostalgic flavors of seasonal rhubarb with the celebratory flair of graduation-themed treats, all anchored by savory zests and perfectly tempered chocolate. Whether you are celebrating a new graduate or just the arrival of sunny days, these elements come together to create a visual and culinary masterpiece that looks like it took days but comes together with heart and soul. Let’s dive into how you can recreate this viral sensation in your own home!
How to Decorate Graduation Cakes?
Why we love this
A graduation cake is more than just dessert; it is a centerpiece of achievement that demands a touch of elegance and whimsy. We love the way smooth, velvet-like buttercream provides a canvas for sophisticated gold leaf accents and miniature fondant mortarboards that sparkle under the party lights. There is an incredible satisfaction in seeing the smooth, crisp edges of a multi-tiered cake paired with the soft, delicate fragrance of vanilla and almond wafting through the room, signaling a moment of pure celebration and pride.
Ingredients
- Pre-baked tiered sponge cake
- Silky Swiss Meringue Buttercream
- Gold leaf sheets
- Black and colored fondant
- Edible glitter
- Cardboard cake rounds and dowels
How to make it
- Begin by applying a ‘crumb coat’ to your chilled cake layers using an offset spatula. This thin layer of buttercream locks in moisture and prevents crumbs from ruining your final finish; chill for 30 minutes until firm to the touch.
- Apply the final layer of buttercream, using a bench scraper held at a 45-degree angle against the spinning turntable to achieve perfectly vertical, smooth sides. The goal is a glass-like finish that reflects the light beautifully.
- Roll out your black fondant to a 1/8-inch thickness and cut out small squares and circles to assemble miniature graduation caps, securing them with a tiny drop of water or edible glue.
- Carefully apply gold leaf using a dry, soft-bristled brush. Touch the leaf gently to the frosting in organic, abstract patches to create a modern, high-end look without looking too uniform.
- Place your fondant caps and a customized ‘Class of’ topper on the highest tier, then finish with a light dusting of edible glitter for that final viral-worthy shimmer.
How to Bake Rhubarb Pie?

Why we love this
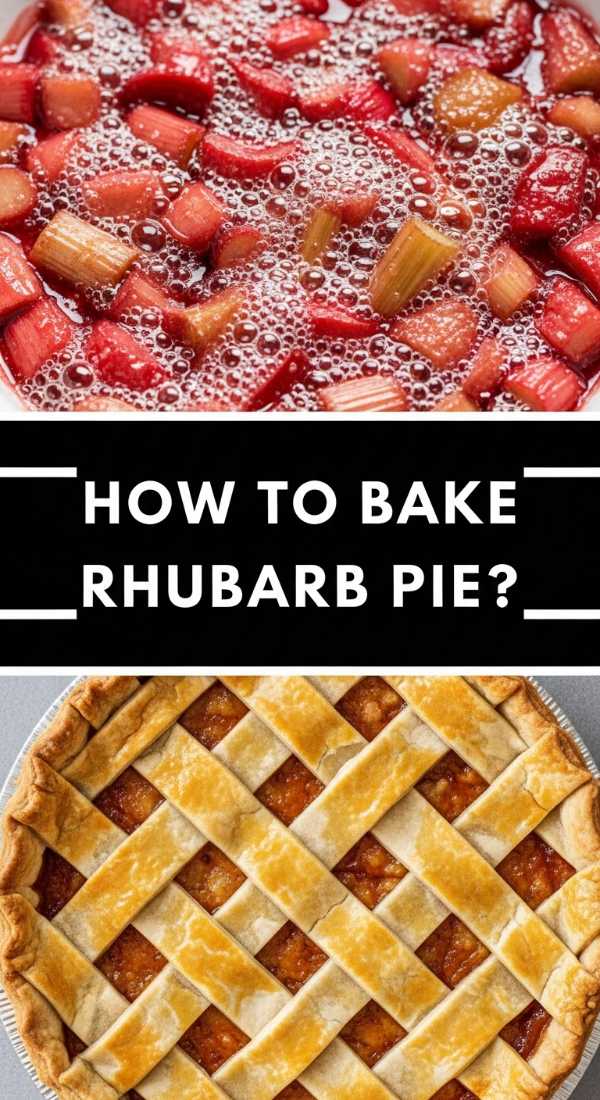
There is nothing quite like the aroma of a rhubarb pie bubbling in the oven, filling the entire house with a scent that is simultaneously tart, sweet, and buttery. The contrast between the flaky, salt-kissed golden crust and the vibrant, ruby-red filling that creates a thick, jammy syrup is a sensory experience like no other. It’s a rustic masterpiece that feels like a warm hug, offering a satisfying crunch followed by a bright burst of spring flavor that dances on the palate and leaves everyone asking for seconds.
Ingredients
- Double pie crust (chilled)
- 5 cups fresh rhubarb, chopped into 1-inch pieces
- 1 1/4 cups granulated sugar
- 1/4 cup cornstarch
- 1 tablespoon lemon juice
- 1 teaspoon vanilla extract
- 1 egg (for wash) and turbinado sugar
How to make it
- Preheat your oven to 400°F (200°C) and place a baking sheet on the bottom rack to catch any juices. Roll out your bottom crust and fit it into a 9-inch deep-dish pie plate, leaving a 1-inch overhang.
- In a large mixing bowl, toss the rhubarb pieces with sugar, cornstarch, lemon juice, and vanilla. Let this mixture sit for 10 minutes; this allows the sugar to draw out the juices, which the cornstarch will then thicken into a glossy filling.
- Pour the filling into the prepared crust. Roll out the second piece of dough and cut into 1-inch strips to create a lattice top, weaving them over and under to create a beautiful, traditional pattern.
- Trim the edges, fold the bottom crust over the top, and crimp tightly with your fingers or a fork to seal the juices inside. Brush the entire top with a beaten egg wash and sprinkle generously with turbinado sugar for a professional, crunchy finish.
- Bake at 400°F for 20 minutes, then reduce heat to 375°F and bake for another 35-45 minutes. You are looking for the crust to be deep golden brown and the filling to be bubbling slowly and thickly in the center.
How to Style Graduation Cupcakes?
Why we love this
Cupcakes offer the perfect bite-sized celebration, and styling them for a graduation means playing with heights, textures, and school colors. We adore the look of a ‘piped rose’ swirl that holds its shape perfectly, topped with a clever chocolate ‘tassel’ that adds a sophisticated touch to the humble cupcake. The sight of dozens of these beauties lined up, each with a miniature diploma made of white chocolate, creates a festive atmosphere that is both playful and incredibly chic, making them an absolute hit for social media photos.
Ingredients
- Freshly baked cupcakes
- Stiff buttercream frosting
- Ghirardelli chocolate squares
- Sour belt candies or fruit leather (for tassels)
- White chocolate melts
- Small ribbon scraps
How to make it
- Fit a piping bag with a large star tip (like a 1M or 2D). Start in the center of the cupcake and pipe in a circular motion outward to create a classic rose swirl, ensuring the frosting is cold enough to maintain sharp, defined ridges.
- To create the graduation caps, place a chocolate square (like Ghirardelli) on top of the frosting peak. Use a tiny dot of frosting to attach a thin strip of sour belt or fruit leather to act as the tassel.
- For the ‘diplomas’, melt white chocolate and spread it thinly on parchment paper. Once set but still flexible, roll it into small tubes and tie with a tiny piece of colored ribbon.
- Arrange the cupcakes on a multi-tiered stand, grouping them by color or creating a gradient effect for a more modern, viral-ready presentation.
- Add a final touch of edible gold pearls to the center of each ‘cap’ to give the display a cohesive, high-end aesthetic.
How to Make Lemon Pesto?

Why we love this
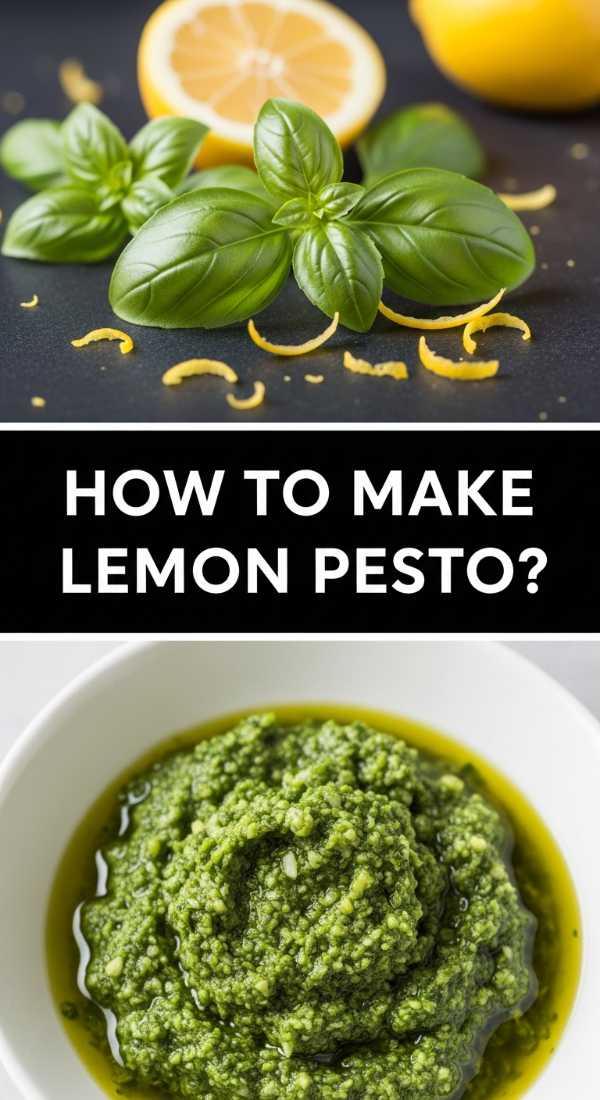
Lemon Pesto is a vibrant, zesty twist on the classic Genovese version, bringing a sunshine-bright acidity that cuts through the richness of a food board. The aroma of freshly slapped basil combined with the sharp, clean scent of lemon zest is intoxicating and immediately whets the appetite. We love how the creamy pine nuts and salty Parmesan cheese meld with the citrus to create a sauce that is both velvety and refreshing, making it the perfect dip for crusty bread or a bright drizzle over roasted vegetables.
Ingredients
- 2 cups packed fresh basil leaves
- 1/2 cup extra virgin olive oil
- 1/3 cup pine nuts (toasted)
- 2 cloves garlic
- Zest and juice of 1 large organic lemon
- 1/2 cup grated Parmesan cheese
- Salt and black pepper to taste
How to make it
- Start by toasting your pine nuts in a dry pan over medium-low heat for 3-5 minutes. Stir constantly until they are golden and fragrant; this step is crucial as it releases the essential oils and adds a deep, nutty base to the pesto.
- In a food processor, pulse the garlic and toasted pine nuts until coarsely chopped. Add the fresh basil leaves and the lemon zest, pulsing again until the basil is broken down into small bits.
- With the processor running on low, slowly drizzle in the olive oil in a steady stream. This emulsification process ensures the pesto becomes creamy and doesn’t separate into oil and solids.
- Add the lemon juice and grated Parmesan, then pulse just a few more times to incorporate. You want a bit of texture, so avoid over-processing into a complete liquid.
- Taste and season with salt and pepper. The lemon juice provides the acid, while the zest provides the floral aroma—adjust these to your preference for a perfectly balanced, bright green sauce.
How to Ice Graduation Cookies?
Why we love this
Icing graduation cookies is an art form that transforms simple sugar cookies into edible keepsakes. There is a meditative joy in the ‘flooding’ technique, where smooth royal icing settles into a perfect, matte finish that looks almost too good to eat. We love the contrast of a crisp, buttery cookie base with the sweet, citrusy snap of the icing, and the ability to customize every batch with school colors or individual names makes these the ultimate personalized party favor that guests will be talking about for weeks.
Ingredients
- Sugar cookies cut into cap, diploma, and star shapes
- Royal icing (stiff and flooding consistencies)
- Gel food coloring
- Scribe tool or toothpick
- Fine-tip piping bags
How to make it
- Separate your royal icing into bowls and tint them with gel colors. Prepare two consistencies for each color: ‘outline’ (like toothpaste) and ‘flood’ (like honey).
- Using the outline icing, pipe a thin border around the edge of the cookie. This acts as a dam to hold the thinner icing in place. Let this dry for 5-10 minutes.
- Fill the center of the cookie with the flood icing. Use a scribe tool or toothpick to move the icing into the corners and pop any tiny air bubbles for a flawless, mirror-like surface.
- Allow the base layer to dry completely (about 4-6 hours) before adding details. Once dry, use the stiff outline icing to pipe ‘tassels’ on the caps or ‘2024’ on the stars.
- For a professional touch, use a luster dust mixed with a drop of vodka to paint metallic accents on the dried icing, giving the cookies a sophisticated, celebratory glow.
How to Make Rhubarb Jam?

Why we love this
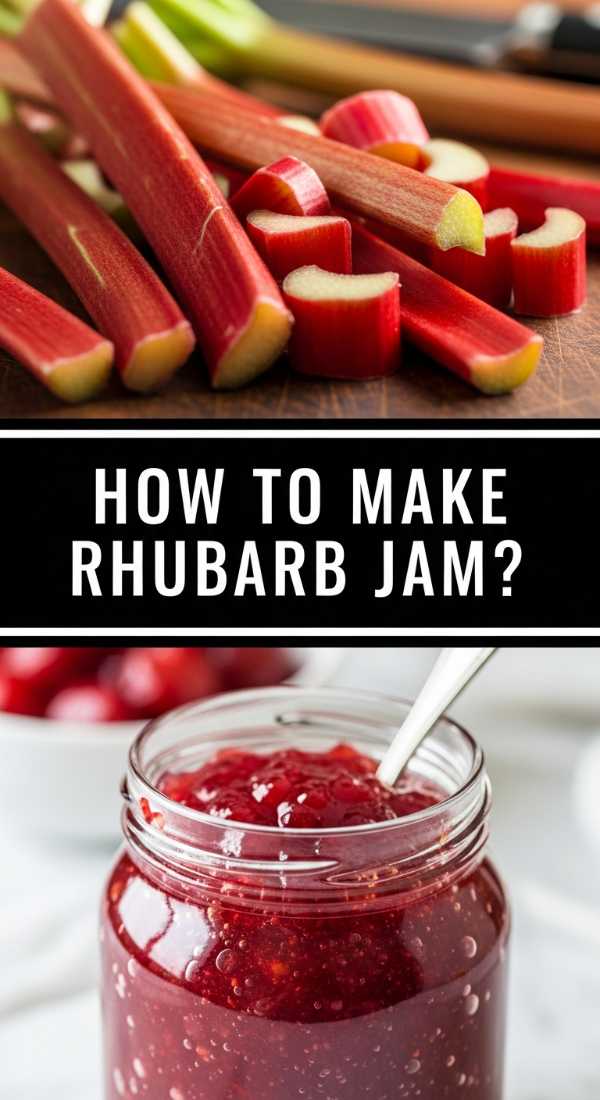
Making rhubarb jam is like capturing the essence of spring in a jar. We love the way the stalks break down into a thick, jewel-toned preserve that balances sharp acidity with a deep, caramelized sweetness. The sound of the jars ‘pinging’ as they seal is incredibly rewarding, and the resulting jam is a versatile powerhouse—perfect for swirling into morning yogurt, spreading on warm scones, or acting as a tart accompaniment to the cheeses on your viral food board. It’s a pantry staple that feels like a luxury.
Ingredients
- 2 lbs fresh rhubarb, sliced thin
- 3 cups granulated sugar
- 1/4 cup lemon juice
- 1 teaspoon orange zest
- 1/2 teaspoon ground ginger (optional)
- 1 packet liquid pectin (if a firmer set is desired)
How to make it
- In a heavy-bottomed Dutch oven, combine the sliced rhubarb, sugar, lemon juice, and orange zest. Stir well and let it macerate for at least 2 hours (or overnight in the fridge) until a thick syrup forms at the bottom.
- Place the pot over medium heat and bring the mixture to a slow boil, stirring frequently to prevent the sugar from scorching. The rhubarb will begin to soften and lose its structure, turning into a beautiful pink slurry.
- Increase the heat to high and bring to a rolling boil (one that cannot be stirred down). Boil for about 10-15 minutes, stirring constantly. If using pectin, add it now and boil for exactly one more minute.
- To test for doneness, place a small spoonful of jam on a chilled plate. Let it sit for a minute, then push it with your finger; if it wrinkles, it has reached the gel point.
- Ladle the hot jam into sterilized jars, leaving 1/4 inch of headspace. Wipe the rims, apply the lids, and process in a boiling water bath for 10 minutes to ensure they are shelf-stable and perfectly preserved.
How to Brew Fun Coffee?
Why we love this
Fun coffee isn’t just a caffeine fix; it’s an experience that awakens the senses and adds a layer of indulgence to any gathering. We love the visual appeal of layered lattes, where dark espresso meets creamy milk and colorful syrups in a glass. The aroma of freshly ground beans mingling with hints of lavender or salted caramel creates an inviting atmosphere that encourages guests to linger. It’s the perfect companion to a food board, providing a bitter-sweet balance to the various treats on display.
Ingredients
- Strong brewed espresso or cold brew concentrate
- Whole milk or oat milk (for frothing)
- Artisan syrups (Lavender, Vanilla, or Rose)
- Dried edible flower petals
- Ice cubes (clear or coffee-infused)
How to make it
- Start by preparing your glass. For a layered look, pour 1-2 tablespoons of your chosen syrup into the bottom of a tall glass.
- Add a generous amount of ice. If you want to be extra, use ice cubes made of frozen coffee so your drink doesn’t get watered down as the ice melts.
- Slowly pour in the milk until the glass is three-quarters full. To get a distinct layer, pour the milk over the back of a spoon held just above the syrup.
- Gently pour your hot espresso or cold brew concentrate over the milk. The density difference will cause the coffee to float on top of the milk, creating a stunning ombre effect.
- Top with a thick layer of cold foam (milk frothed while cold) and sprinkle with dried edible flower petals or a pinch of cinnamon. Serve with a long straw for the ultimate viral-ready aesthetic.
How to Build Graduation Boards?
Why we love this
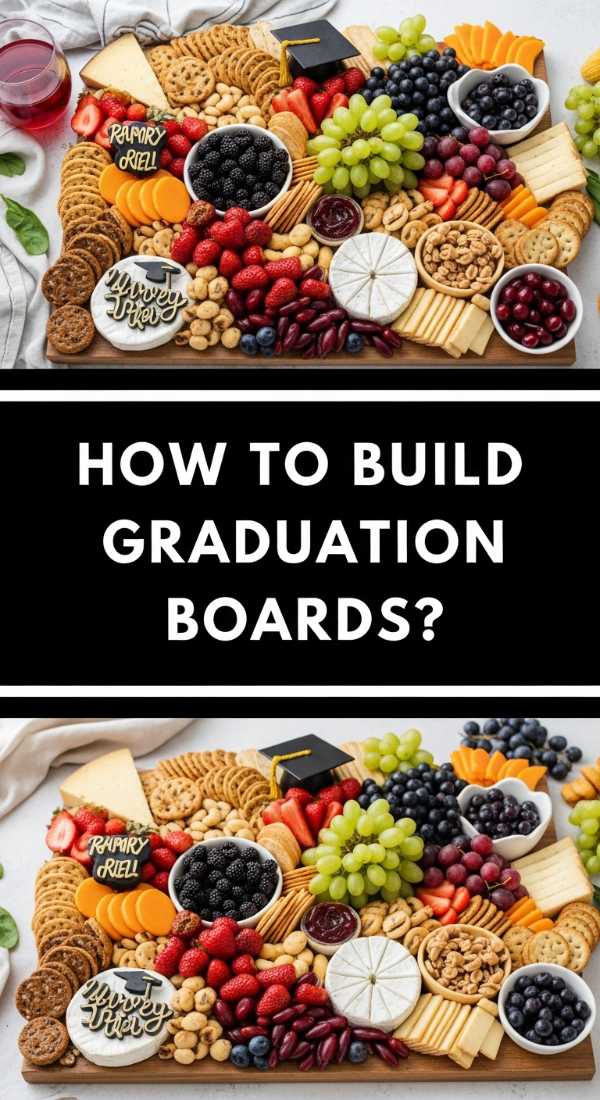
The Graduation Board is the ultimate expression of celebratory abundance. We love how it breaks the rules of traditional platters, mixing sweet graduation cookies and cupcakes with savory cheeses, fresh fruits, and tart rhubarb preserves. It’s a visual feast that draws people in, encouraging them to explore different flavor combinations and find their own perfect bite. The organized chaos of a well-built board creates a sense of generosity and joy that perfectly captures the spirit of a major life milestone.
Ingredients
- Large wooden board or slate
- Assorted cheeses (Brie, Sharp Cheddar, Goat Cheese)
- Cured meats (Prosciutto, Salami)
- Graduation cookies and cupcakes
- Fresh berries, grapes, and sliced rhubarb
- Crackers, nuts, and your homemade Lemon Pesto
How to make it
- Start by placing your ‘anchors’—the small bowls for your Lemon Pesto and Rhubarb Jam—on the board first. This creates focal points that guide the eye.
- Add your largest items next, such as the graduation cupcakes and the wheels of cheese. Space them out across the board to ensure a balanced distribution of weight and color.
- Create ‘movement’ by fanning out crackers and sliced meats in curved lines around the bowls and cheeses. This leads the guest’s eye through the board in a natural, flowing path.
- Fill in the larger gaps with your graduation cookies and clusters of fresh fruit. Use the berries to add pops of vibrant color that contrast with the neutral tones of the crackers and bread.
- Finalize the board by ‘tucking’ in small items like almonds, sprigs of fresh mint, or edible flowers into any remaining tiny spaces. The goal is to make the board look overflowing and lush, with no wood showing through.
How to Make Rhubarb Crumble?

Why we love this
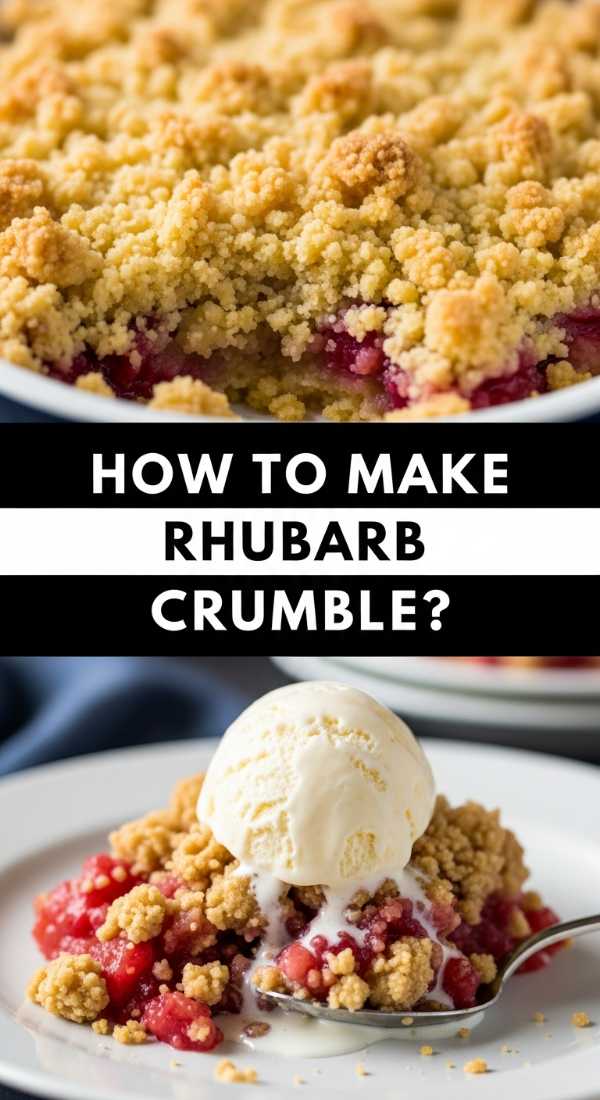
Rhubarb crumble is the epitome of comfort food, offering a delightful play of textures that is hard to resist. We love the way the topping—a buttery, oat-filled masterpiece—crisps up in the oven to provide a crunchy contrast to the soft, tangy fruit underneath. As it bakes, the juices from the rhubarb and sugar create a bubbling, magenta syrup that seeps up through the crumbs, making every bite a harmonious blend of salt, sugar, and tartness that feels like the very best of home cooking.
Ingredients
- 4 cups rhubarb, chopped
- 3/4 cup granulated sugar
- 1 cup all-purpose flour
- 1 cup rolled oats
- 1 cup brown sugar (packed)
- 1/2 cup cold unsalted butter, cubed
- 1 teaspoon cinnamon
How to make it
- Preheat your oven to 375°F (190°C) and lightly grease a 9×9 inch baking dish. Toss the chopped rhubarb with the granulated sugar and spread it evenly across the bottom of the dish.
- In a separate medium bowl, combine the flour, oats, brown sugar, and cinnamon. Use your fingers or a pastry cutter to work the cold, cubed butter into the dry ingredients.
- Continue working the mixture until it resembles coarse crumbs with some pea-sized chunks of butter remaining. This unevenness is the secret to a varied, crunchy texture in the final crumble.
- Sprinkle the crumble mixture evenly over the rhubarb. Do not pack it down; keep it loose so the air can circulate and crisp up the oats and butter.
- Bake for 35-40 minutes until the fruit is bubbling and the topping is a deep, golden brown. Serve warm, ideally with a scoop of cold vanilla bean ice cream to balance the tart rhubarb heat.
How to Temper Chocolate Art?
[IMAGE_10]
Why we love this
Tempering chocolate is where science meets art, and the result is a professional, high-gloss finish that snaps perfectly when broken. We love the process of transforming a simple bar of chocolate into intricate, edible decorations that elevate a dessert board from homemade to artisanal. The smooth, satiny sheen of correctly tempered chocolate is a sign of true craftsmanship, and the way it melts slowly on the tongue, releasing deep cocoa notes, is a luxurious experience that adds a touch of sophistication to any celebration.
Ingredients
- 1 lb high-quality dark or milk chocolate (at least 60% cocoa)
- Digital thermometer
- Silicone mats or parchment paper
- Spatula and double boiler
How to make it
- Chop your chocolate into very small, uniform pieces. Set aside one-third of the chocolate to use as ‘seed’ chocolate later.
- Place the remaining two-thirds of the chocolate in a double boiler over simmering water. Heat slowly, stirring constantly, until the chocolate reaches 115°F (46°C) for dark chocolate or 110°F (43°C) for milk chocolate. Never let water touch the chocolate, or it will seize.
- Remove from heat and immediately stir in the reserved ‘seed’ chocolate. This introduces stable cocoa butter crystals to the mixture. Stir vigorously until the temperature drops to 88-90°F (31-32°C) for dark or 84-86°F (29-30°C) for milk.
- Test the temper by dipping a knife into the chocolate; it should set firmly and look glossy within 2-3 minutes at room temperature. If it stays soft or looks streaky, you must restart the process.
- Once tempered, use a piping bag or spatula to create artistic swirls, shapes, or ‘brushed’ designs on parchment paper. Allow to set completely before peeling off and adding to your graduation board for a professional, viral-ready finish.
Conclusion
Creating a viral food board is all about the balance of flavors, the beauty of presentation, and the love you pour into every detail. From the tart snap of rhubarb jam to the sophisticated shimmer of a graduation cake, these elements combine to tell a story of celebration and new beginnings. I hope these tips inspire you to gather your loved ones, break out the wooden boards, and create a feast that is as delicious as it is beautiful. Happy hosting!