

The Ultimate Guide to This Season’s Hottest DIY Home & Garden Projects
There is something truly magical about the way the light filters through the trees this time of year, beckoning us to step outside and breathe in the scent of blooming jasmine and fresh earth. As the seasons shift, our homes crave a bit of that same renewal, a chance to shed the heavy layers of winter and embrace a lifestyle that feels intentional, handcrafted, and deeply connected to the world around us. Creating a sanctuary isn’t just about buying new things; it’s about the soul-stirring satisfaction of building something with your own two hands.
This season, we are leaning into the ‘slow home’ movement—where every corner of our garden and every shelf in our library tells a story of creativity. Whether you have a sprawling backyard or a cozy city balcony, these DIY projects are designed to infuse your space with personality and peace. From the gentle splash of water in a handcrafted bird bath to the whimsical charm of hand-painted book-bricks, let’s dive into the projects that will turn your living space into a dreamy, curated retreat.
How to Craft a Scandi Style Bird Bath for a Serene Garden Oasis

Why we love this
This project embodies the ‘hygge’ philosophy by blending functional utility with the stark, clean beauty of Nordic design. Imagine the cool, smooth texture of poured concrete against your fingertips and the rhythmic sound of water droplets disturbing the surface of a still pool. The Scandi style bird bath provides a striking focal point that doesn’t overwhelm the eye, offering a crisp, minimalist aesthetic that looks breathtaking when surrounded by soft, flowing ornamental grasses and the earthy aroma of damp cedar mulch.
Essential Elements:
- Two bags of quick-set white concrete mix
- One large plastic basin (for the outer mold)
- One smaller plastic bowl (for the inner mold)
- A wooden dowel or heavy stone for weight
- Sandpaper (medium and fine grit)
- Eco-friendly concrete sealer
- Water and a mixing bucket
How to make it
- Prepare your workspace by laying down a drop cloth in a cool, shaded area to prevent the concrete from drying too quickly, which can cause cracking.
- Mix the white concrete in your bucket, adding water gradually until you achieve a thick, peanut-butter-like consistency; ensure there are no dry lumps by scraping the bottom of the container.
- Lightly coat the inside of your larger basin and the outside of your smaller bowl with a non-stick spray or vegetable oil to act as a release agent.
- Pour the concrete into the larger basin until it is two-thirds full, then firmly tap the sides of the basin for 3-5 minutes to vibrate out any trapped air bubbles.
- Press the smaller bowl into the center of the wet concrete to create the basin, placing a heavy stone inside it to keep it submerged at a uniform depth.
- Allow the concrete to cure for at least 48 hours; once it feels stone-cold and hard to the touch, gently wiggle the molds free and sand the edges until they are buttery smooth.
- Apply two coats of non-toxic sealer to the interior of the bath to ensure it remains waterproof and safe for your feathered visitors.
How to Design Painted Bricks for a Whimsical Home Library

Why we love this
There is an undeniable nostalgia in the weight of a brick, transformed into a piece of art that anchors your favorite literary worlds. These painted bricks bring a touch of eccentricity to your bookshelves, mimicking the look of vintage leather-bound volumes or whimsical folk-art illustrations. The tactile experience of dragging a fine-tipped brush across the porous, gritty surface of the clay creates a beautiful contrast with the smooth, cream-colored pages of your library, making your reading nook feel like a secret, enchanted archive.
Essential Elements:
- Clean, reclaimed red bricks
- Acrylic multi-surface paints (gold, navy, and cream are classics)
- Fine-detail brushes and flat wash brushes
- Matte or satin clear varnish
- Stencils or carbon paper for tracing designs
- Small felt pads for the bottom
How to make it
- Scrub your bricks thoroughly with a stiff wire brush and warm soapy water to remove all dust and loose grit, then let them dry in the sun for a full day.
- Apply a base coat of high-quality acrylic primer; this is a critical phase as it prevents the porous brick from absorbing your colored paint and making it look dull.
- Once dry, map out your ‘book spine’ design using a pencil; for a library look, include titles of your favorite classics or intricate floral borders.
- Layer your colors starting with the largest areas first using a flat brush, maintaining a steady hand to keep lines crisp against the brick’s natural irregularities.
- Use a very fine ‘liner’ brush and metallic gold paint to add ‘gilding’ details, such as faux-leather ridges or elegant typography, which gives the brick a luxurious weight.
- Let the paint cure for 12 hours before applying a thin, even layer of spray varnish to protect the artwork from UV fading and dust.
- Attach felt pads to the underside to protect your wooden shelving from scratches when you slide your new ‘book’ into place.
How to Build Rustic Birdhouses for a Charming Backyard Retreat
Why we love this
Nothing says ‘rustic charm’ quite like the sight of a weathered birdhouse nestled among the apple blossoms. This project celebrates the raw, unrefined beauty of reclaimed wood—the silvered patina of old fence pickets and the faint, sweet scent of aged pine. It brings a sense of life and movement to your backyard, inviting the cheerful chirps of wrens and bluebirds into your morning routine, creating a living tapestry of nature and craftsmanship right outside your window.
Essential Elements:
- Reclaimed cedar or pine planks (non-treated)
- Galvanized finishing nails or exterior screws
- Wood glue (weather-resistant)
- A miter saw or hand saw
- A 1.5-inch spade bit or hole saw
- Natural twine or hemp rope for hanging
How to make it
- Cut your wood into six pieces: a base, two sides, a front, a back with an extended top for mounting, and a sloped roof piece to shed rain effectively.
- Using the spade bit, drill a hole exactly two-thirds of the way up the front panel; this height keeps hatchlings safe from predators while providing enough ventilation.
- Apply a thin bead of weather-resistant wood glue to the joints before nailing them together; the glue provides the primary seal against moisture, while the nails provide structural integrity.
- Assemble the walls first, then attach the base, ensuring you leave small 1/8-inch gaps at the corners of the floor for drainage in case of heavy storms.
- Attach the roof at a steep angle, allowing for a generous overhang of at least two inches over the entrance hole to keep the interior dry during summer downpours.
- Lightly sand the entrance hole to ensure there are no splinters that could harm the birds, but leave the exterior wood rough to maintain that authentic farmhouse texture.
- Mount the house on a post or tree at least 5 feet off the ground, facing East to catch the gentle morning sun without overheating the nest in the afternoon.
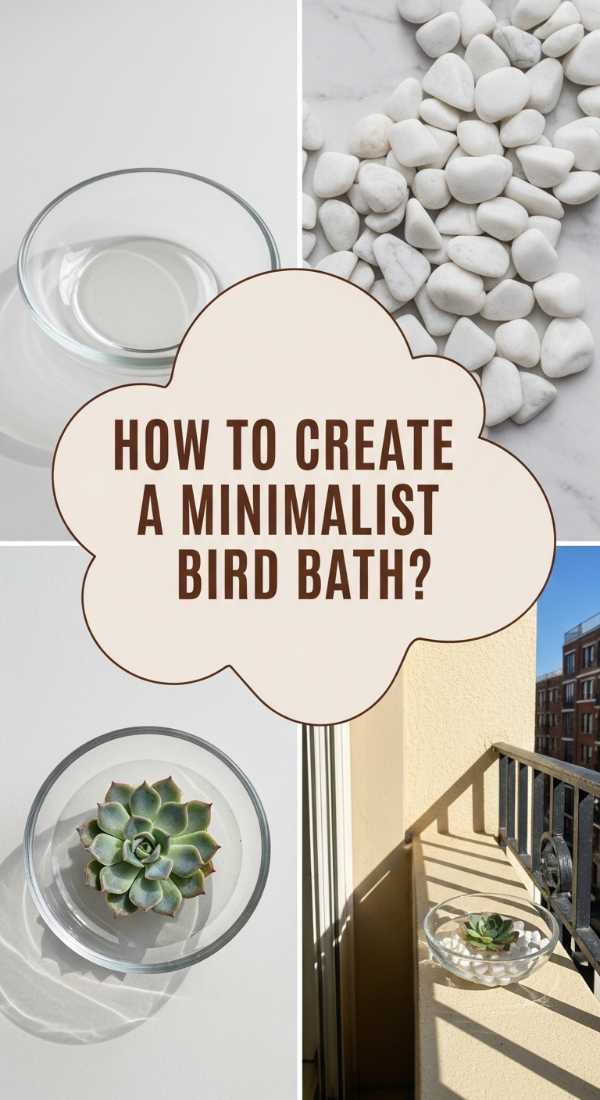
How to Create a Minimalist Bird Bath for a Peaceful Balcony View

Why we love this
Even the smallest urban balcony can become a high-altitude sanctuary with this sleek, minimalist design. This project focuses on the interplay between matte black ceramics and the crystal-clear reflection of the sky, offering a moment of Zen amidst the city’s hustle. It’s about the quiet joy of watching a single sparrow take a dip against a backdrop of concrete and glass, bringing a cooling, elemental presence to your outdoor seating area that feels sophisticated and incredibly intentional.
Essential Elements:
- Large, shallow matte ceramic or terracotta saucer
- Low-profile metal plant stand or three large river stones
- Solar-powered micro-fountain (optional)
- Decorative black river pebbles
- Distilled water
How to make it
- Select a saucer that is at least 12 inches in diameter but no more than 2 inches deep, as most songbirds prefer shallow water where they can feel the bottom.
- If using terracotta, soak the saucer in a tub of water for 24 hours before painting or sealing it to ensure the material is fully hydrated and won’t crack.
- Apply a matte, waterproof sealant to the saucer to prevent algae growth and to give it that modern, high-end finish that fits a minimalist aesthetic.
- Position your metal stand in a corner of the balcony that receives partial shade; this prevents the water from reaching temperatures that are too high for birds to enjoy.
- Place the saucer on the stand and fill the bottom with a single layer of smooth black river pebbles, which provides a steady footing for birds as they enter the water.
- Add water until it just covers the pebbles; if using a solar fountain, place it in the center and ensure the panels are angled toward the sun for a gentle, bubbling effect.
- Check the water level daily, as small basins on balconies can evaporate quickly in the wind; refresh the water every two days to keep it sparkling and clean.
How to Decorate Painted Bricks for an Enchanting Garden Path
Why we love this
Transforming a standard garden path into a trail of ‘storybook stones’ adds a layer of enchantment to your landscape that feels like a discovery at every step. These bricks, painted with intricate moss-like patterns, ladybugs, or celestial motifs, create a visual rhythm that guides the eye through your flower beds. The cooling sensation of the bricks underfoot on a warm evening and the way their colors pop against the deep greens of hostas and ferns makes every walk to the garden shed feel like a stroll through a fairy tale.
Essential Elements:
- Standard pavers or salvaged bricks
- Outdoor patio paints or porch enamels
- Detail sponges for texture
- Stencils (mandala or leaf patterns)
- Anti-slip clear grit additive
- Exterior grade sealer
How to make it
- Thoroughly pressure wash your bricks to remove all biological growth; the surface must be ‘squeaky clean’ for the patio paint to bond effectively with the clay.
- Apply a base coat of a neutral, earthy tone using a roller, then use a sponge to dab on secondary colors while the base is still slightly tacky to create a natural, stone-like variegated texture.
- Lay your stencils over the center of each brick and apply your decorative design (like a sunburst or a dragonfly) using a dry-brush technique to prevent the paint from bleeding under the edges.
- Mix a small amount of ‘anti-slip’ grit into your final clear sealer; this is a vital safety step to ensure the bricks don’t become dangerously slick when it rains.
- Apply the sealer in two thin, even coats, allowing four hours of drying time between each coat to ensure a hard, durable finish that can withstand foot traffic.
- When laying the path, dig a shallow trench and fill it with leveled sand first; this prevents the painted bricks from shifting or cracking over time as the ground settles.
- Space the bricks about two inches apart and fill the gaps with creeping thyme or moss to frame your artwork with living, fragrant greenery.
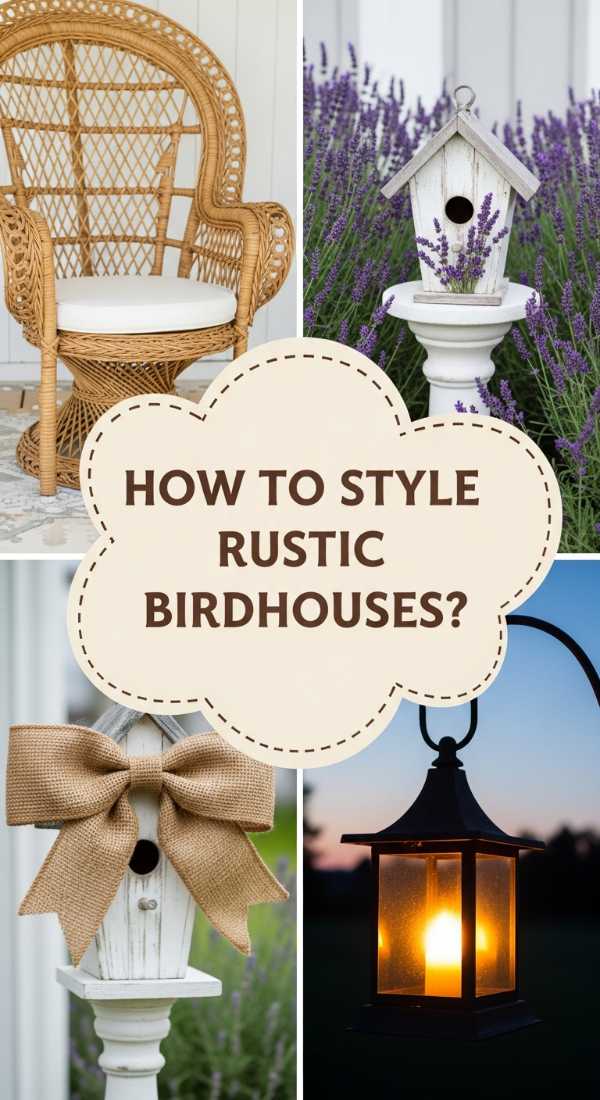
How to Style Rustic Birdhouses for a Cozy Porch Aesthetic
Why we love this
Styling is the secret sauce that turns a simple DIY project into a cohesive piece of home decor. By grouping rustic birdhouses on a porch, you create a sense of ‘intentional clutter’ that feels warm and lived-in. The sight of chipped paint, natural twigs, and little tin roofs creates a visual story of the countryside. It’s the feeling of a slow Sunday morning, with a hot cup of tea in hand, looking out at a porch that feels like an extension of your cozy living room, complete with the soft textures of weathered wood and dried lavender bundles.
Essential Elements:
- 3-5 birdhouses of varying heights and widths
- A vintage wooden ladder or a rustic side table
- Dried grapevine or eucalyptus garlands
- Battery-operated fairy lights (waterproof)
- Outdoor pillows in linen or burlap
How to make it
- Start by choosing a focal point on your porch, such as a corner near a rocking chair or an empty wall space, and place your largest ‘anchor’ birdhouse there.
- Use a vintage ladder to create vertical interest, placing birdhouses on different rungs to lead the eye upward and make the space feel taller and more dynamic.
- Intertwine dried grapevine or eucalyptus around the base of the houses; the natural, earthy scent of the greens enhances the rustic vibe and softens the wooden edges.
- Thread waterproof fairy lights through the grapevine, ensuring the battery pack is hidden; this creates a warm, amber glow that highlights the textures of the wood after sunset.
- Cluster the houses in groups of three (the ‘rule of threes’) to create a balanced look that feels curated rather than random.
- Add a burlap or linen outdoor pillow to a nearby chair to echo the soft, natural tones of the birdhouses, tying the whole ‘outdoor room’ together.
- Rotate the arrangement slightly every few weeks to prevent sun-bleaching on just one side and to keep the porch looking fresh for the season.
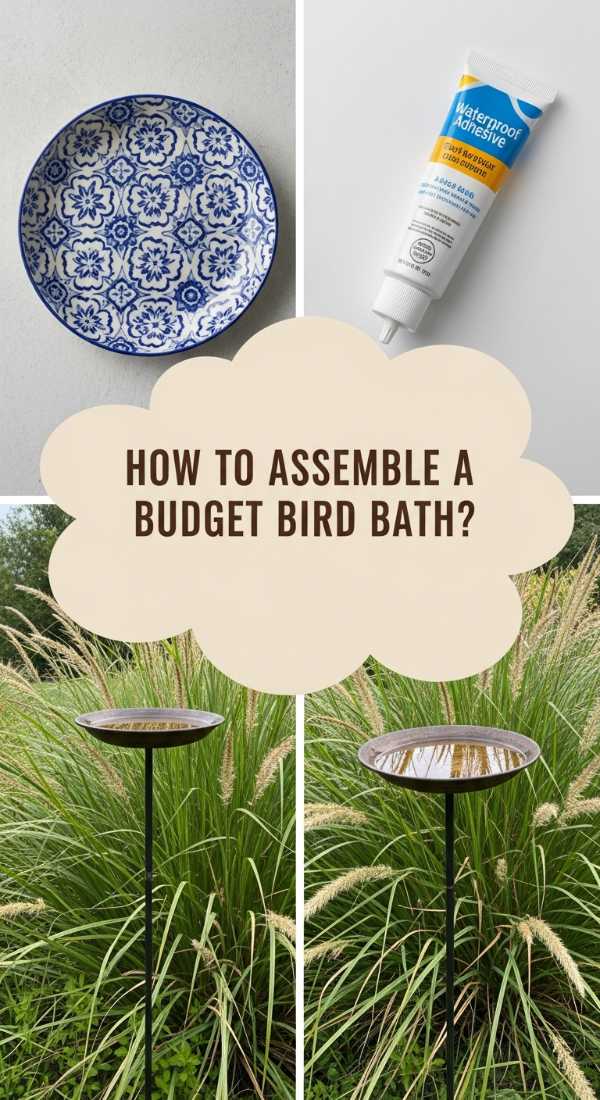
How to Assemble a Budget Bird Bath for an Elegant Outdoor Space

Why we love this
Elegance doesn’t have to come with a high price tag; sometimes, the most sophisticated garden features are born from clever upcycling. This project utilizes the timeless silhouette of a classic terracotta pot and saucer, reimagined with a coat of ‘faux-stone’ spray paint. It captures the heavy, grand feeling of a Mediterranean estate but with a lightweight, accessible twist. The sound of water gently lapping against the rim and the sight of butterflies landing on the edge makes your garden feel like a luxury resort, even on a shoestring budget.
Essential Elements:
- One large terracotta pot (for the base)
- One extra-large terracotta saucer (for the bath)
- Stone-texture spray paint
- Strong waterproof construction adhesive
- Large flat stones or sea glass
- Clear UV-resistant topcoat
How to make it
- Invert your large terracotta pot so the wide opening is on the ground; ensure the surface is level so the bird bath doesn’t wobble.
- Apply a generous ring of waterproof construction adhesive to the bottom of the inverted pot (which is now the top).
- Carefully center the saucer on top of the adhesive, pressing down firmly; place a few heavy books inside the saucer for 24 hours to ensure a permanent, rock-solid bond.
- Once the adhesive is fully cured, take the unit to a well-ventilated area and apply the stone-texture spray paint in short, even bursts to avoid drips.
- Apply at least three layers of the textured paint, allowing each to dry for 30 minutes, until the terracotta is completely transformed into ‘granite’ or ‘sandstone.’
- Seal the entire piece with a clear, UV-resistant topcoat to prevent the ‘stone’ finish from peeling or fading under the harsh summer sun.
- Fill the basin with water and add a handful of sea glass or colorful stones; these catch the light beautifully and provide a shallow landing spot for smaller insects like bees.
How to Use Painted Bricks for a Unique Bohemian Doorstop
Why we love this
A bohemian home is all about the unexpected details—the pops of color in forgotten corners and the blending of utility with art. This painted brick doorstop is a heavy, tactile piece that keeps your summer breezes flowing while adding a burst of personality to your entryway. The feel of the cool, painted clay as you move it aside and the vibrant mandalas or geometric patterns reflecting the light make even the simplest doorway feel like a gateway to a creative sanctuary. It’s a small, heavy piece of soul for your floor.
Essential Elements:
- A heavy solid-core brick
- Neon and pastel acrylic paints
- Gold leaf or metallic paint pens
- Heavy-duty clear epoxy or resin
- Thick felt or cork sheet (for the base)
- Tassels or leather cord for wrapping
How to make it
- Choose a brick with no cracks to ensure it has the maximum weight possible to hold heavy doors against a draft.
- Paint the entire brick in a bold, solid color like deep turquoise or mustard yellow to serve as your vibrant bohemian canvas.
- Using a gold paint pen, draw intricate, free-form doodles or geometric shapes across the top and sides, allowing the design to flow naturally without too much planning.
- For a true ‘boho’ touch, glue a small colorful tassel to one corner using high-strength adhesive, or wrap a section of the brick in thin leather cord.
- Apply a thick layer of clear epoxy resin over the top surface; this gives the brick a ‘jewel-like’ glossy finish that makes the colors vibrate with intensity.
- Wait 24-48 hours for the resin to become completely non-tacky before handling.
- Glue a piece of thick cork or felt to the bottom of the brick to prevent it from sliding on hardwood or tile floors and to ensure it doesn’t leave any scuff marks.
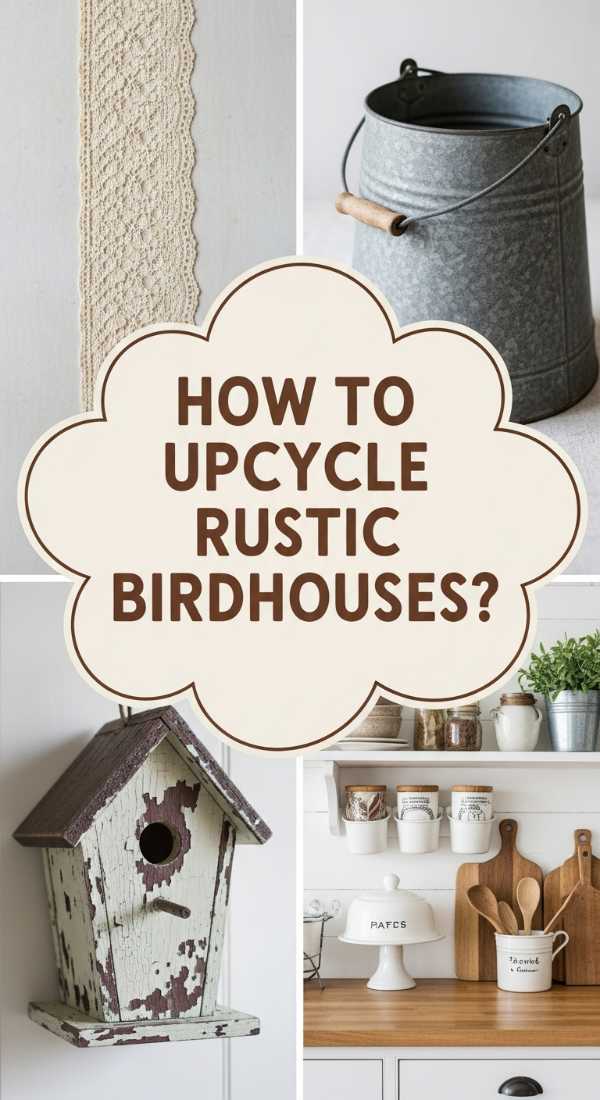
How to Upcycle Rustic Birdhouses for a Vintage Farmhouse Feel
Why we love this
There is a profound beauty in giving something old a second life. Upcycling vintage birdhouses—perhaps by adding a corrugated metal roof or a drawer-pull perch—creates a ‘farmhouse chic’ look that feels storied and sentimental. The juxtaposition of rusted iron against soft white-washed wood evokes the feeling of an old family farm, where nothing is wasted and everything has a purpose. It’s the scent of sun-warmed metal and the sight of ‘shabby-chic’ textures that bring a grounded, historic comfort to your modern garden.
Essential Elements:
- Old wooden birdhouses or scrap wood boxes
- White ‘chalk’ paint and dark wax
- Scrap pieces of corrugated metal or old tin cans
- Vintage hardware (old keys, drawer pulls, or hinges)
- Tin snips and a hammer
- Antique-style nails
How to make it
- Start by applying a ‘distressed’ paint finish: paint the birdhouse with white chalk paint, then once dry, lightly sand the corners and edges to let the dark wood peek through.
- Rub a small amount of dark furniture wax into the crevices of the wood to mimic years of accumulated dust and character, then buff it with a soft cloth.
- Cut a piece of corrugated metal or a flattened tin can to fit the roof dimensions using tin snips; wear heavy gloves for this step to avoid sharp edges.
- Use a hammer and antique-style nails to secure the metal roof, letting it overlap slightly for a truly authentic, reclaimed look.
- Replace the standard wooden perch with a vintage skeleton key or an old brass drawer knob, drilling a pilot hole first to prevent the aged wood from splitting.
- If the birdhouse has a flat back, attach an old window hinge so you can easily hang it on a fence post or the side of a garden shed.
- Place the finished house near a climbing rose or clematis; the vintage white and metal look provides a stunning contrast to the deep green leaves and vibrant blooms.
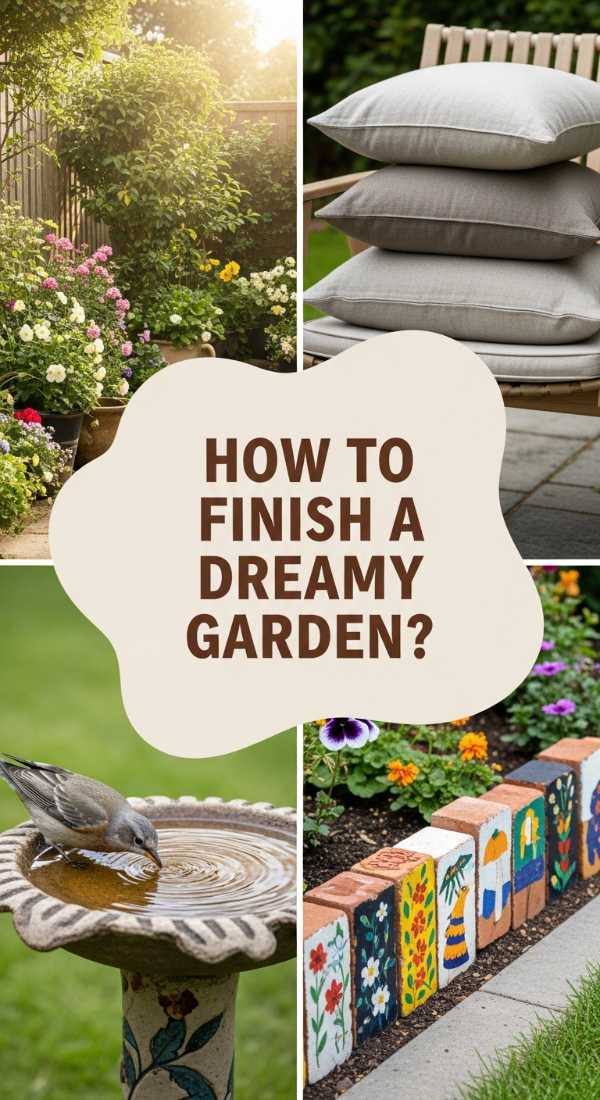
How to Finish a Lush Garden Setup for a Dreamy Summer Vibe
[IMAGE_10]
Why we love this
This is the grand finale—the moment where all your individual DIY projects come together to create a cohesive, lush paradise. A well-finished garden setup is about layering: the height of the birdhouses, the grounding weight of the painted bricks, and the shimmering surface of the bird bath. It’s about the sensory explosion of jasmine-scented air, the cool touch of damp moss, and the visual feast of a space that reflects your unique spirit. It’s where you’ll spend your golden hours, watching the sunset and feeling completely at home in the world you built.
Essential Elements:
- All your DIY projects from the sections above
- Solar-powered warm-white string lights
- Assorted perennial plants (ferns, lavender, hydrangeas)
- Natural cedar mulch or pea gravel
- Comfortable outdoor seating with weather-proof textiles
- A large outdoor rug in a neutral weave
How to make it
- Begin by ‘zoning’ your garden: place your seating area on a neutral rug to create an ‘outdoor living room’ feel that grounds the space.
- Position your Scandi and Minimalist bird baths in quiet corners away from the main seating to give birds a sense of security while still allowing you a clear view.
- Integrate your painted bricks as ‘edging’ for your flower beds or as decorative accents on side tables, ensuring they are placed where the sun can catch their colors.
- Mount your rustic birdhouses at varying heights throughout the trees or on the porch to create a ‘bird village’ effect that draws the eye upward.
- Layer your plants so the tallest are in the back and the shortest are in the front, creating a ‘lush’ wall of greenery that acts as a natural privacy screen.
- String warm-white solar lights through the branches of trees or along the porch railing, making sure they drape loosely to maintain a relaxed, ‘dreamy’ vibe.
- Finish the ground cover with a fresh layer of cedar mulch; the dark color makes the greens of your plants pop and provides that signature ‘fresh garden’ aroma that defines summer.
Creating Your Handcrafted Sanctuary
In a world that often feels fast and digital, taking the time to paint a brick, build a birdhouse, or mix concrete for a bird bath is an act of rebellion. It’s a way to claim your space and infuse it with your own heartbeat. As you look around your garden or home this season, I hope you see more than just objects; I hope you see the stories of your own creativity. Whether the birds are splashing in their new bath or your library is anchored by a ‘book’ you painted yourself, these projects are the threads that weave a house into a home. Happy crafting, and may your summer be as beautiful as the sanctuary you’ve created.
Frequently Asked Questions
How often should I clean my DIY bird bath?
To keep your feathered friends healthy, it is best to rinse out the bird bath and refresh the water every 2-3 days. Once a week, give it a gentle scrub with a solution of nine parts water to one part vinegar to prevent algae buildup without using harsh chemicals.
What kind of paint is best for bricks used outdoors?
For outdoor bricks, always use a high-quality acrylic patio paint or a porch and floor enamel. These are specifically formulated to handle UV rays and moisture. Always finish with a clear, non-yellowing exterior sealer for maximum longevity.
Will birds actually use a DIY birdhouse?
Absolutely! The key is the ‘location and dimension.’ Ensure the entrance hole is the correct size for the birds in your area (usually 1.25 to 1.5 inches for common songbirds) and place the house in a spot where it is protected from high winds and direct midday sun.