

Imagine waking up to the softest light filtering through linen curtains, the smell of fresh coffee swirling through a space that feels entirely like you. There is a certain magic in the quiet moments of the morning, where the neutral palette of your home meets the vibrant potential of the day ahead. Designing your dream lifestyle isn’t just about the furniture you pick; it’s about creating a sanctuary where your soul can breathe and your creativity can run wild.
We often get caught up in the hustle of ‘doing,’ but the real art of living lies in the ‘being.’ It’s about the texture of a throw blanket, the way sunlight hits a vintage vase, and the intentional corners we carve out for our passions. Today, I’m sharing how to blend that aesthetic dream with functional, joyful spaces that make every day feel like a curated retreat.
How to Style a Retro Sanctuary for Total Nostalgia

Why we love this
There is something deeply comforting about the warm glow of an Edison bulb reflecting off the rich, mustard-yellow velvet of a mid-century chair. This space is a love letter to the past, blending the earthy scent of old books with the smooth texture of polished teak wood. It creates a cocoon of nostalgia that feels both timeless and personal, allowing you to disconnect from the digital noise and sink into a slower, more intentional pace of life where every object has a story to tell.
Essential Elements:
- Mid-century modern armchair in velvet or corduroy.
- Teak or walnut side table with tapered legs.
- Vintage-inspired record player and vinyl collection.
- Warm-toned lighting (amber bulbs, brass lamps).
- Macramé wall hangings or retro geometric art prints.
How to make it
- Define Your Era: Choose a specific decade (like the 70s or 60s) to keep the look cohesive rather than cluttered. Look for iconic shapes like the ‘egg’ chair or low-profile credenzas.
- Curate a Focal Point: Position a large retro piece, such as a velvet sofa or a record console, against a neutral wall to let the design shine. Ensure there is enough space around it to appreciate its silhouette.
- Layer Textures: Combine contrasting materials—think a shaggy faux-fur rug over hardwood floors, paired with smooth ceramic vases. This creates visual depth and a tactile experience.
- Warm Your Palette: Incorporate ‘earthy neutrals’ like burnt orange, olive green, or mustard through accent pillows and throws. Use warm-toned LED bulbs (2700K) to mimic the amber glow of vintage lighting.
- Personalize with Artifacts: Visit local thrift stores for unique glass decanters, brass figurines, or old cameras. Arrange them in small clusters of three to create a ‘curated’ rather than ‘messy’ look.
How to Build a Backyard Adventure Zone for Endless Fun

Why we love this
Watching the golden hour light dance through the trees as children climb and explore their own backyard kingdom is pure magic. The scent of cedar wood and freshly cut grass mingles with the sound of laughter, creating a sensory-rich environment that encourages movement and imagination. It’s about transforming a simple lawn into a landscape of discovery, where every corner holds the promise of a new adventure and the crisp air feels like an invitation to play freely in the safety of home.
Essential Elements:
- Pressure-treated cedar wood climbing frame.
- Heavy-duty climbing ropes and monkey bars.
- Rubber mulch or wood chips for safety surfacing.
- A chalkboard wall or mud kitchen station.
- Solar-powered fairy lights for evening play.
How to make it
- Site Selection: Choose a level area in your yard that is visible from the house but far enough from flower beds to prevent trampling. Measure the footprint, allowing for a 6-foot ‘safety zone’ around all equipment.
- Prepare the Ground: Excavate the area to a depth of 4-6 inches. Lay down heavy-duty landscape fabric to prevent weeds, then fill with high-impact surfacing like certified playground wood chips or rubber mulch to cushion falls.
- Assemble the Core: Build or install your main structure (like a fort or swing set). Use galvanized hardware to prevent rust and ensure all vertical posts are anchored in concrete or deep ground spikes for stability.
- Incorporate Sensory Zones: Add a ‘mud kitchen’ using an old wooden crate and stainless steel bowls. This encourages tactile play. Install a weather-proof chalkboard on a fence panel for outdoor art sessions.
- Safety Check: Sand down any rough wooden edges and cap all bolts. Check the tension of climbing ropes weekly to ensure they haven’t loosened or frayed under UV exposure.
How to Design Creative Pavement Art for Sunny Afternoons
Why we love this
The chalky dust on your fingertips and the vibrant explosion of color against the cool, grey concrete transform a mundane driveway into a temporary masterpiece. As the sun warms your back, you lose yourself in the flow of creating geometric patterns or whimsical murals that catch the eye of every passerby. It’s a tactile, fleeting form of expression that celebrates the beauty of the present moment and the simple joy of making something beautiful just for the sake of it, knowing it will wash away with the next rain.
Essential Elements:
- High-pigment outdoor sidewalk chalk.
- Painter’s tape or masking tape for crisp lines.
- Stencils (mandala or geometric shapes).
- A bucket of water and sponges for blending.
- Kneeling pad for comfort.
How to make it
- Surface Prep: Sweep your driveway or patio thoroughly to remove pebbles and dirt. A clean surface ensures the chalk adheres better and the colors pop against the concrete.
- The Tape Technique: For a ‘stained glass’ effect, lay down strips of masking tape in a random, criss-cross pattern. Ensure the tape is pressed down firmly so no chalk dust creeps underneath.
- Color Application: Fill in the sections between the tape with different colors. Use a heavy hand for saturated hues. For gradients, apply two colors side-by-side and use a damp sponge to softly blend the seam.
- Detailing: Use thin pieces of charcoal or black chalk to outline shapes once the main colors are down. This adds a professional, ‘pop-art’ finish to your pavement mural.
- The Reveal: Slowly peel back the tape at a 45-degree angle to reveal the clean, grey lines underneath. Take a photo from a high vantage point (like a ladder) to capture the full scale of your work.
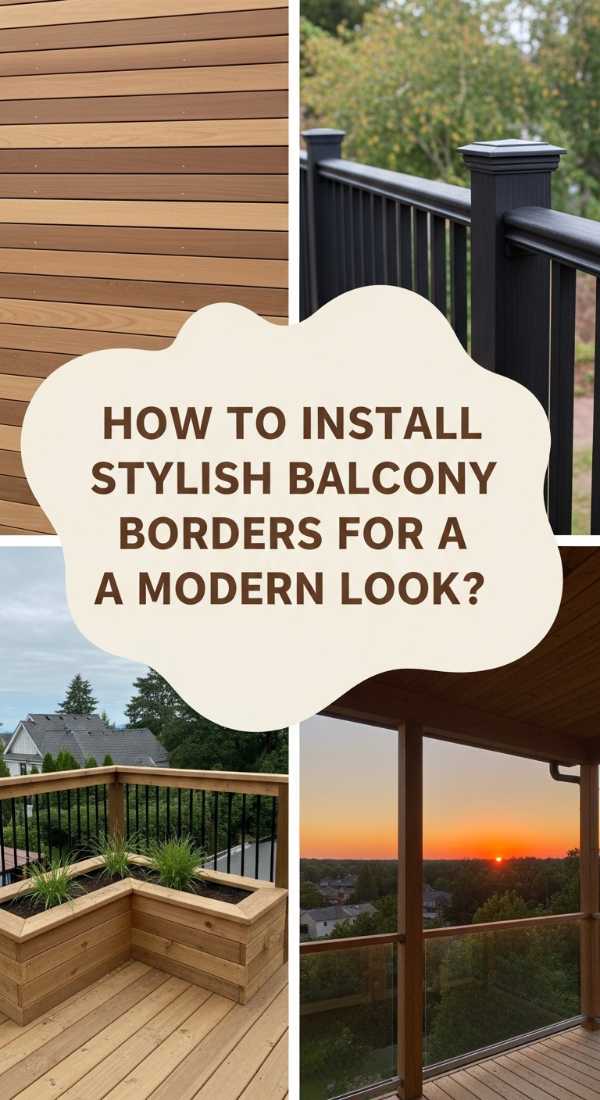
How to Install Stylish Balcony Borders for a Modern Look

Why we love this
Elevating your outdoor space with sleek, modern borders creates a sophisticated frame for those breathtaking sunset views. The cool touch of brushed metal or the organic warmth of horizontal wooden slats provides both privacy and a high-end aesthetic that makes your balcony feel like an extension of your living room. As you lean against the sturdy railing, the scent of potted jasmine wafting through the air, you feel a sense of enclosure and freedom all at once, turning a small urban balcony into a chic, sky-high retreat.
Essential Elements:
- Horizontal cedar or composite wood slats.
- Black powder-coated metal railing system.
- Frosted glass or acrylic panels for privacy.
- Stainless steel cable wires for an industrial feel.
- Drill with masonry bits and weather-rated screws.
How to make it
- Consult Regulations: Check your local building codes or HOA rules regarding balcony modifications. Ensure your design meets the minimum height requirement (usually 36-42 inches) and gap restrictions for safety.
- Frame the Perimeter: Install vertical support posts if they aren’t already in place. Use a level to ensure they are perfectly vertical, as even a slight tilt will be amplified once the horizontal slats are added.
- Mount the Slats: If using wood, pre-drill holes to prevent splitting. Use spacers (about 1/2 inch) between each slat to ensure a uniform look and to allow wind to pass through, reducing the load on the structure.
- Integrate Lighting: Run low-voltage LED strip lights along the underside of the top rail. This provides a soft, downward glow that highlights the texture of the border without causing glare.
- Seal and Protect: Apply a high-quality UV-resistant sealant to wooden components to prevent silvering. Wipe down metal parts with a silicone spray to protect against salt air or pollution-induced corrosion.
How to Curate a Vintage Media Nook for Coziest Vibes
Why we love this
There is an undeniable soul in the crackle of a vinyl record and the tactile experience of flipping through a physical collection. This nook is a dedicated celebration of analog beauty, where the smell of aged paper and the soft hum of a tube amplifier create an immersive sensory experience. Snuggling into a pile of oversized floor cushions with a warm drink, you’re transported to a time when media was meant to be savored slowly and shared intimately, making it the perfect escape from our fast-paced digital lives.
Essential Elements:
- Dedicated turntable and speakers.
- Low-profile wooden record crates or shelving.
- Oversized linen floor cushions or a bean bag.
- Small gallery wall of favorite album covers.
- Dimmable floor lamp with a warm shade.
How to make it
- Acoustic Planning: Choose a corner with minimal echo. Avoid placing speakers directly on the same surface as the turntable to prevent vibrations from causing the needle to skip.
- Ergonomic Storage: Use ‘flip-style’ bins where you can see the album art as you browse. This makes the experience more interactive. Ensure the shelving is sturdy enough to handle the significant weight of vinyl.
- Cable Management: Hide unsightly wires using cord runways or by tucking them behind the furniture. A clean, wire-free look is essential for that ‘aesthetic’ blogger vibe.
- Lighting for Mood: Use a smart bulb so you can transition from ‘reading light’ to ‘listening glow.’ Soft oranges or warm yellows enhance the vintage feel of the space.
- Accessorize for Comfort: Place a small tray nearby for your coffee or tea. Add a thick knit throw blanket and a few succulent plants to bring life and oxygen to your little media sanctuary.
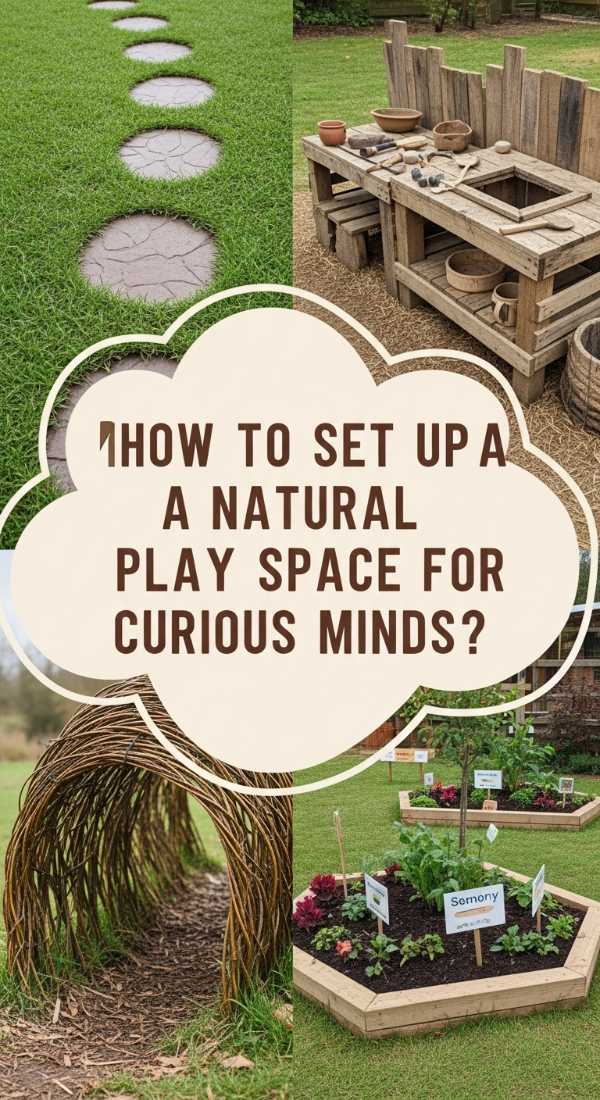
How to Set Up a Natural Play Space for Curious Minds

Why we love this
Reconnecting with the earth through raw materials like smooth river stones, rough bark, and cool sand sparks a deep sense of wonder in explorers of all ages. This space smells of damp pine and wild herbs, offering a grounding experience that contrasts with our increasingly plastic-filled world. The visual harmony of organic shapes and earth tones creates a calming atmosphere where the mind is free to wander, build, and imagine without the constraints of structured toys, fostering a lifelong love for the environment.
Essential Elements:
- Hollowed-out log segments for balance beams.
- Assorted river stones and smooth pebbles.
- White play sand in a wooden enclosure.
- Hardy, non-toxic plants like rosemary or lamb’s ear.
- Natural willow or bamboo privacy screening.
How to make it
- Zoning by Texture: Create ‘islands’ of different materials. One area could be a sand pit, another a circle of large flat stones, and a third a grassy mound. This encourages different types of tactile exploration.
- Incorporate ‘Loose Parts’: Provide baskets filled with pinecones, acorns, and dried seed pods. These are ‘open-ended’ toys that can become anything from ‘forest food’ to ‘building supplies’ in a child’s mind.
- Plant for the Senses: Surround the area with plants that offer different textures (soft lamb’s ear), scents (lavender), and sounds (rustling bamboo or ornamental grasses).
- Build a Willow Tunnel: Use live willow wands or dried bamboo stakes to create a small tunnel or teepee. This provides a ‘secret’ hiding spot that feels integrated into the landscape.
- Safety and Maintenance: Check the area regularly for sharp sticks or insect nests. Replace sand every season and ensure the stones are too large to be a choking hazard for smaller children.
How to Map Out Active Garden Paths for Energetic Play
Why we love this
A winding path through a lush garden is more than just a walkway; it’s a journey that invites you to notice the tiny details of nature. The crunch of gravel underfoot or the rhythmic tap of boots on wooden stepping stones adds a musical quality to your outdoor exercise. Surrounded by the fragrance of lavender and the buzzing of bees, these paths encourage a flow of energy and movement, making the simple act of walking through your yard feel like a revitalizing ritual that clears the mind and energizes the body.
Essential Elements:
- Natural flagstone or large slate pavers.
- Pea gravel or decomposed granite.
- Professional-grade landscape edging (metal or plastic).
- Low-voltage path lights.
- Creeping thyme or moss for ‘living’ cracks.
How to make it
- Trace the Desire Path: Watch how you naturally walk through your yard. Instead of a straight line, use a garden hose to mark out a meandering ‘S’ curve, which feels more organic and leads the eye through the space.
- Excavate and Base: Dig down 3-4 inches along your marked path. Lay a 2-inch layer of crushed stone (base rock) and compact it firmly. This prevents the pavers from shifting or sinking over time.
- Set the Pavers: Lay your flagstones or pavers on top of the base. Leave 2-3 inches of space between them if you want to fill the gaps with gravel or ‘steppable’ plants like creeping thyme.
- Edge for Precision: Install edging along the sides of the path to keep the gravel contained and prevent grass from encroaching. Hammer the edging spikes in at an angle for maximum grip.
- Plant the Borders: Surround the path with ‘active’ plants—tall grasses that sway in the wind or aromatic herbs that release their scent when your clothes brush against them as you walk.
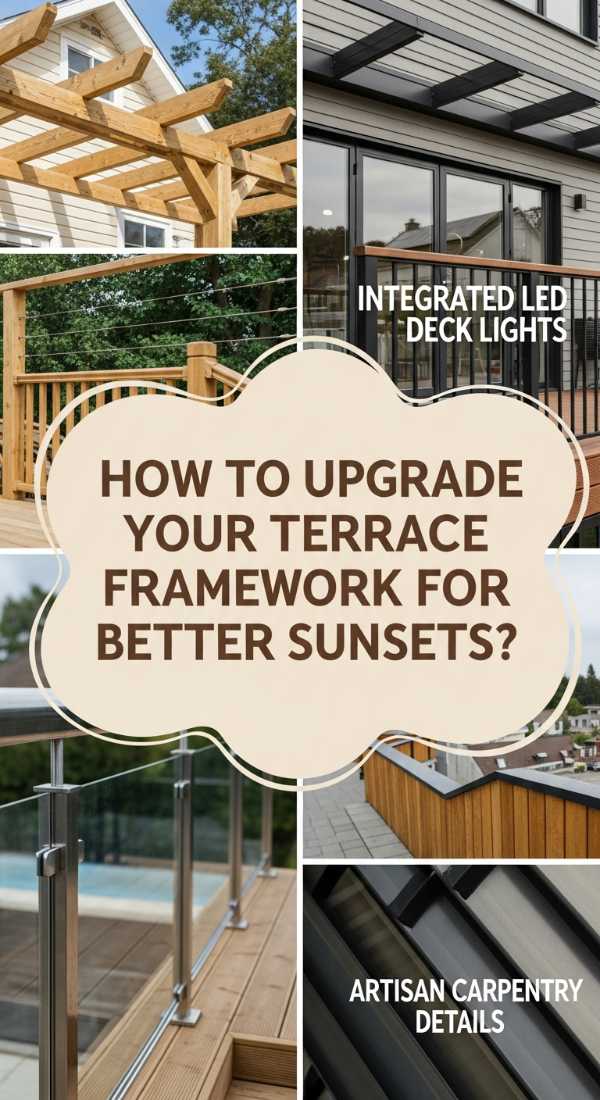
How to Upgrade Your Terrace Framework for Better Sunsets
Why we love this
Architecturally framing your view of the horizon can turn a regular evening into a cinematic event. The sturdy lines of a pergola or a custom-built terrace frame provide the perfect structure for climbing vines and twinkling fairy lights. As the sky shifts from gold to deep violet, the shadows play against the crisp angles of the framework, creating a cozy outdoor ‘room’ that feels both expansive and protected, perfect for hosting long dinners under the stars or enjoying a quiet glass of wine as the day fades away.
Essential Elements:
- 4×4 or 6×6 pressure-treated timber posts.
- Retractable sun shade or outdoor fabric sails.
- Heavy-duty post anchors for deck or concrete mounting.
- Weather-proof string lights (G40 globe style).
- Climbing plants like wisteria or star jasmine.
How to make it
- Structural Assessment: Ensure your terrace or deck can handle the weight of a framework. If building on a deck, the posts should ideally be bolted directly to the joists, not just the floorboards.
- Erect the Vertical Posts: Use a post-hole digger for ground installation or heavy-duty steel base plates for deck mounting. Use a plumb line to ensure they are perfectly straight before the concrete sets or bolts are tightened.
- Connect the Headers: Install the horizontal beams (headers) across the tops of the posts. Use ‘carriage bolts’ rather than wood screws for structural integrity, as they have much higher shear strength.
- Install Sun Protection: Attach a retractable canopy or high-density polyethylene (HDPE) shade sails to the frame. This allows you to control the amount of light during the heat of the day.
- Add the ‘Magic’: Zig-zag string lights across the top beams. Use ‘eye hooks’ to keep the wires taut. Plant fast-growing climbers at the base of the posts to soften the wood and add a natural, romantic feel.
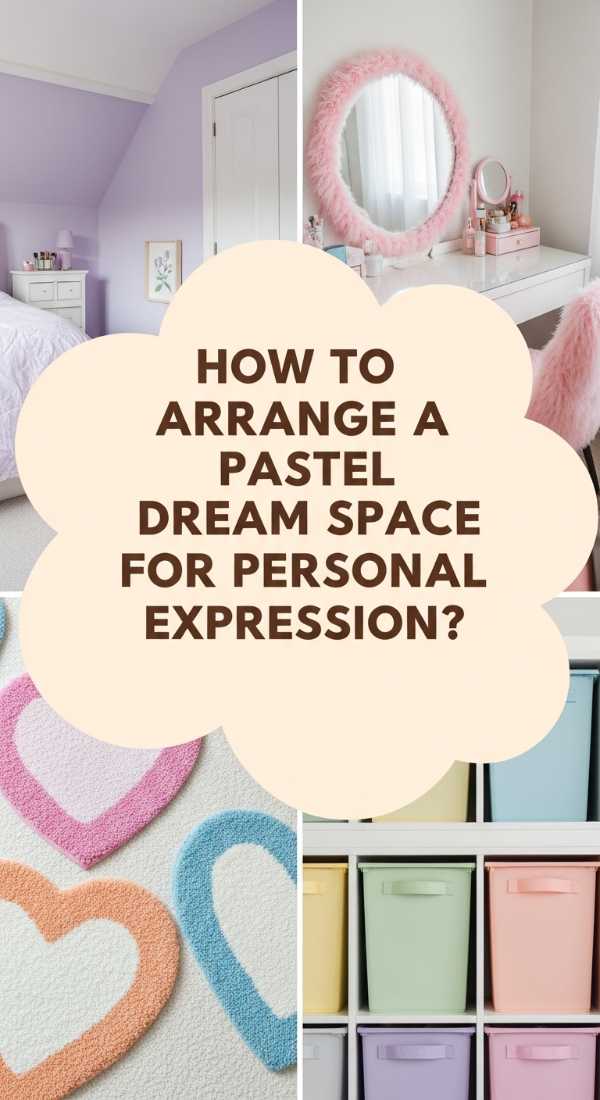
How to Arrange a Pastel Dream Space for Personal Expression
Why we love this
Stepping into a room washed in soft mint, dusty rose, and pale lilac feels like stepping into a peaceful daydream. The light reflects off these gentle hues, creating a luminous glow that lifts the spirit and encourages creative flow. This space is a soft landing for your thoughts, filled with the delicate textures of macramé and the faint scent of vanilla candles, providing a sanctuary where you can express your most whimsical ideas without the judgment or noise of the outside world.
Essential Elements:
- Matte-finish pastel wall paint.
- White or light-oak minimalist furniture.
- Textured textiles (bouclé pillows, mohair throws).
- Aesthetic grid board or cork board for inspiration.
- Sheer voile curtains to soften the incoming light.
How to make it
- Pick a Dominant Pastel: Choose one ‘hero’ color (like sage green) for the walls. Keep it muted—look for ‘dusty’ versions of the color rather than ‘neon’ versions to maintain a sophisticated look.
- Neutralize with White: Use white furniture and picture frames to break up the color. This prevents the room from feeling like a nursery and gives the pastels a clean, modern edge.
- Layer for Depth: Don’t just use flat colors. Introduce a ‘pop’ of a metallic like rose gold or brass, and use different fabrics. A velvet cushion next to a linen curtain adds a professional designer touch.
- Curate the View: Keep the surfaces relatively clear. Use aesthetic trays to group small items like crystals, candles, and journals. This ‘intentional clutter’ adds personality without overwhelming the senses.
- Light Softly: Avoid harsh overhead lights. Use table lamps with fabric shades and floor lamps that bounce light off the ceiling to create a soft, diffused glow that enhances the pastel tones.
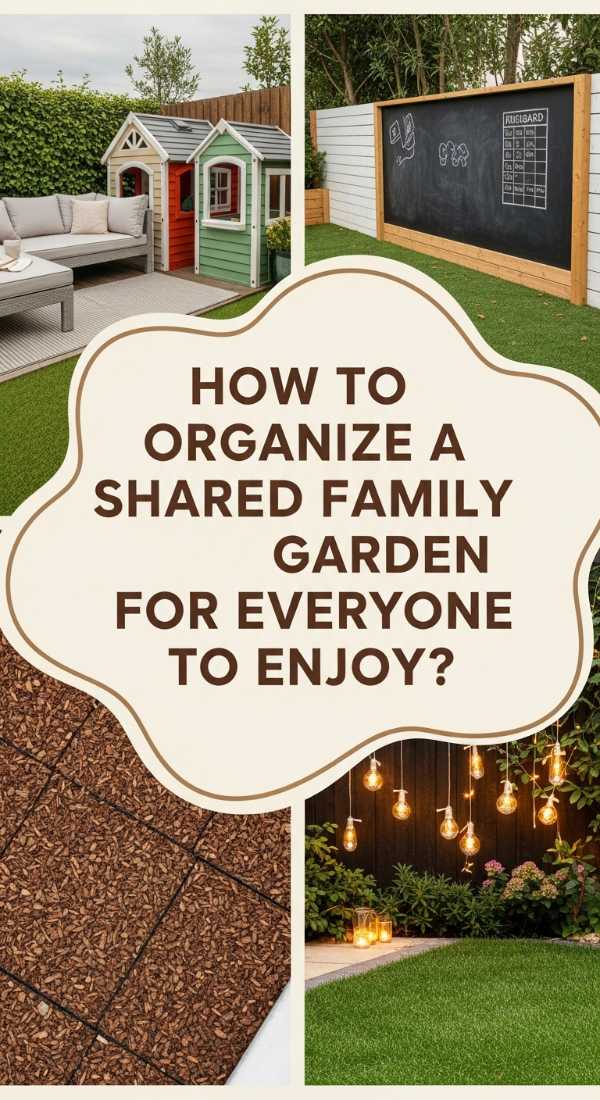
How to Organize a Shared Family Garden for Everyone to Enjoy
[IMAGE_10]
Why we love this
There is a profound sense of connection found in digging your hands into the warm soil alongside those you love. The garden becomes a living classroom where the aroma of tomato leaves and damp earth signals the rewards of patience and care. It’s a shared endeavor that yields not just fresh produce, but memories of collaborative work and the quiet pride of seeing a seed you planted together grow into something vibrant and nourishing for the whole family, strengthening bonds through nature.
Essential Elements:
- Raised garden beds at varying heights.
- Child-sized gardening tools and gloves.
- Weather-proof plant labels and markers.
- Central potting bench or workstation.
- Cozy bench or bistro set for resting.
How to make it
- Plan the Layout: Design the garden with wide paths (at least 3 feet) so multiple people can work side-by-side without bumping into each other. Use ‘sun-mapping’ to place sun-loving veggies in the brightest spots.
- Vary the Heights: Build some beds at 12 inches for children and some at 30 inches (waist-high) for adults or seniors. This makes gardening accessible for all ages and reduces back strain.
- Assign ‘Personal Plots’: Give each family member their own small section or container. Let them choose what to plant—whether it’s giant sunflowers, cherry tomatoes, or colorful zinnias.
- The Irrigation Strategy: Install a simple drip irrigation system with a timer. This ensures the garden thrives even during busy weeks and teaches children about responsible water usage.
- Create a ‘Harvest Hub’: Set up a station with baskets, scissors, and a wash-down area. This makes the transition from garden-to-table seamless and celebrates the end result of your hard work together.
Conclusion
Designing your dream lifestyle isn’t a destination; it’s a beautiful, ongoing process of aligning your surroundings with your soul. Whether you’re painting a pavement mural on a Saturday afternoon or sipping tea in your retro sanctuary, these spaces are the backdrop to your most precious memories. Embrace the neutrals, chase the morning views, and never stop creating a life that feels as good as it looks.
Frequently Asked Questions
How do I maintain a neutral aesthetic without it feeling cold?
The secret is texture! Layering different materials like wood, wool, and stone adds warmth that color alone can’t provide.
Are these outdoor projects expensive?
Not necessarily! Many projects, like the pavement art or natural play space, use affordable materials like chalk and found wood.
How much time do these garden projects take?
Most of these can be completed in a single weekend with a bit of planning and the right tools.