
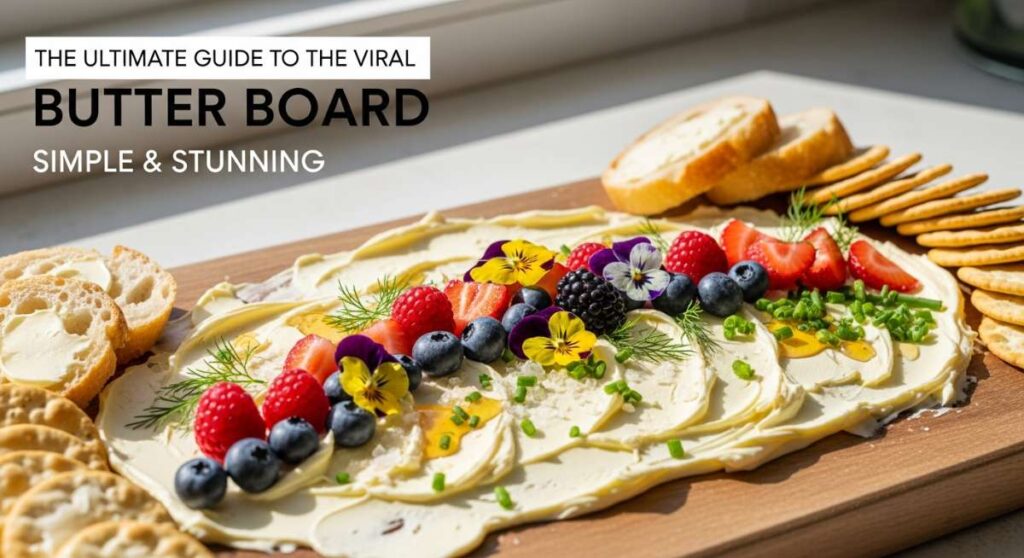
There is something undeniably magical about the golden hour of a summer evening, where the sun hangs low and the air feels heavy with the scent of blooming jasmine and charcoal grills. During these moments, I find that the best way to connect with friends and family isn’t through a formal five-course meal, but through the shared experience of a beautifully curated food board. It’s about the clinking of glasses, the messy joy of dipping warm bread into something delicious, and the laughter that flows as freely as the chilled rosé.
The ‘Butter Board’ trend might have started as a viral sensation, but it has evolved into a philosophy of eating that I hold dear: keeping things simple, stunning, and communal. It’s a celebration of textures and colors that invites everyone to the table to graze and linger. Whether you’re hosting a backyard bash or a quiet sunset picnic, these ideas will help you transform simple ingredients into a visual and culinary masterpiece that feels like a warm hug for your guests.
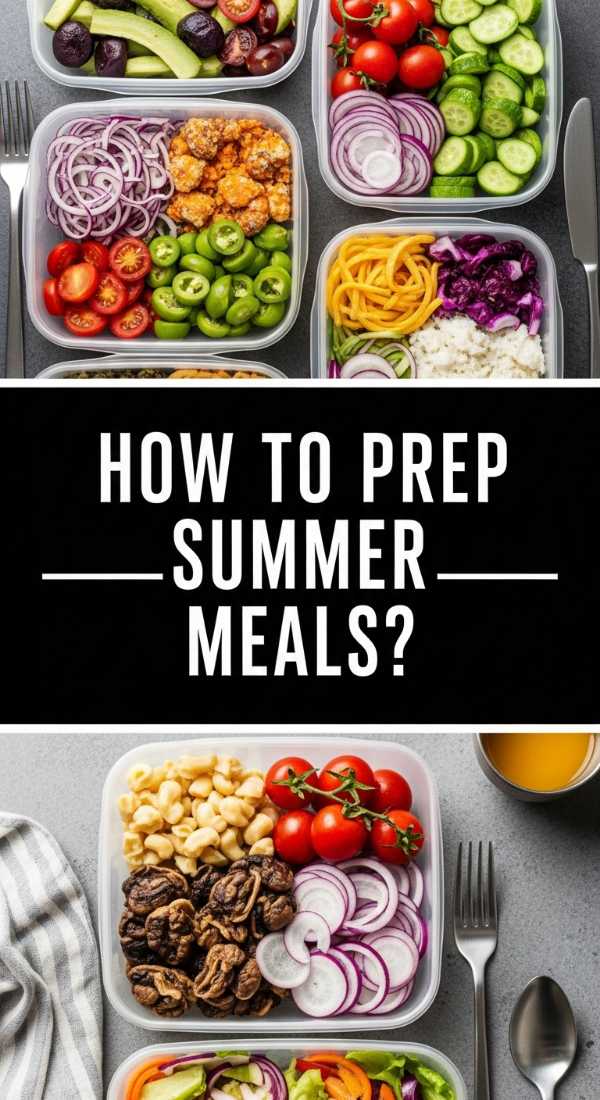
How to prep summer meals
Why we love this
Prepping summer meals is all about embracing the abundance of the season while keeping your kitchen cool and your stress levels low. We love this approach because it focuses on vibrant, raw produce and minimal cook times, allowing the natural sweetness of sun-ripened tomatoes and the crispness of garden-fresh greens to take center stage. There is a tactile satisfaction in washing, chopping, and arranging these elements into a rainbow of nutrition that feels both indulgent and incredibly light on the palate.
Ingredients
- Assorted heirloom tomatoes
- Fresh English cucumbers
- Mixed bell peppers (red, yellow, orange)
- Radishes with greens attached
- Snap peas
- Extra virgin olive oil
- Flaky sea salt and cracked black pepper
How to make it
- Begin by selecting the freshest produce available; look for firm skins and vibrant colors at your local farmer’s market.
- Wash all vegetables in cold, filtered water and pat them completely dry with a lint-free kitchen towel to ensure crispness.
- Slice the heirloom tomatoes into thick rounds or wedges, varying the shapes to add visual interest to your board.
- De-seed the bell peppers and cut them into long, elegant batons that are perfect for dipping.
- Thinly shave the radishes using a mandoline on the thinnest setting to create translucent, crunchy discs.
- Arrange the vegetables in clusters on a large wooden board, grouping by color for a gradient effect.
- Just before serving, drizzle the entire spread with high-quality olive oil and a generous sprinkle of sea salt to draw out the natural juices.
How to cook rotel dip

Why we love this
Rotel dip is the ultimate nostalgic comfort food that somehow always manages to disappear within minutes of being placed on the table. We love it for its velvety, molten texture and that signature kick of heat from the green chiles that cuts right through the richness of the melted cheese. It creates an irresistible aroma of savory spices and creamy goodness that signals to everyone that the party has officially started, making it a staple for any communal food board.
Ingredients
- 16 oz processed cheese (like Velveeta), cubed
- 1 can (10 oz) Ro-Tel Diced Tomatoes and Green Chilies
- 1 lb ground breakfast sausage or lean ground beef
- 1/2 cup whole milk (optional, for thinning)
- Fresh cilantro for garnish
- Tortilla chips for serving
How to make it
- In a large skillet over medium-high heat, brown the ground sausage or beef, breaking it into small crumbles with a wooden spoon until no pink remains.
- Drain the excess fat from the skillet thoroughly to ensure the dip doesn’t become greasy.
- In a slow cooker or a heavy-bottomed saucepan over low heat, combine the cubed cheese and the undrained can of Ro-Tel tomatoes.
- Stir constantly if using a saucepan to prevent the cheese from scorching on the bottom; the goal is a perfectly smooth, liquid consistency.
- Once the cheese is fully melted, fold in the cooked meat and stir until the mixture is uniform.
- If the dip is too thick, whisk in a tablespoon of milk at a time until you reach your desired dipping consistency.
- Transfer to a warm bowl, garnish with chopped cilantro, and place it in the center of your board surrounded by sturdy chips.
How to make hummingbird food

Why we love this
While not a dish for humans, creating hummingbird food is a beautiful ritual that brings the vibrant energy of nature right to your patio while you dine. We love this because it transforms your outdoor space into a sanctuary, filled with the iridescent shimmer and soft hum of these tiny visitors. The simple act of boiling sugar and water creates a life-sustaining nectar that connects your summer gathering to the wider ecosystem, adding an element of wonder and tranquility to your afternoon.
Ingredients
- 1 cup granulated white sugar
- 4 cups filtered water
- (Do not use honey, brown sugar, or red dye)
How to make it
- Mix the white granulated sugar and the filtered water in a medium saucepan.
- Place the pan over medium heat and stir occasionally until the sugar is completely dissolved; the water should return to a clear state.
- Bring the solution to a gentle boil for about 1 to 2 minutes to kill any bacteria or mold spores that might be present in the water or sugar.
- Remove the pan from the heat and allow the nectar to cool completely to room temperature; never put hot liquid into a feeder as it can warp the plastic or harm the birds.
- Fill your clean hummingbird feeders with the cooled nectar, ensuring they are positioned in a shaded area to prevent the sugar from fermenting too quickly.
- Store any extra nectar in a clean, airtight glass jar in the refrigerator for up to one week.
- Remember to clean your feeders every 3 to 5 days with hot water to keep your feathered friends healthy.
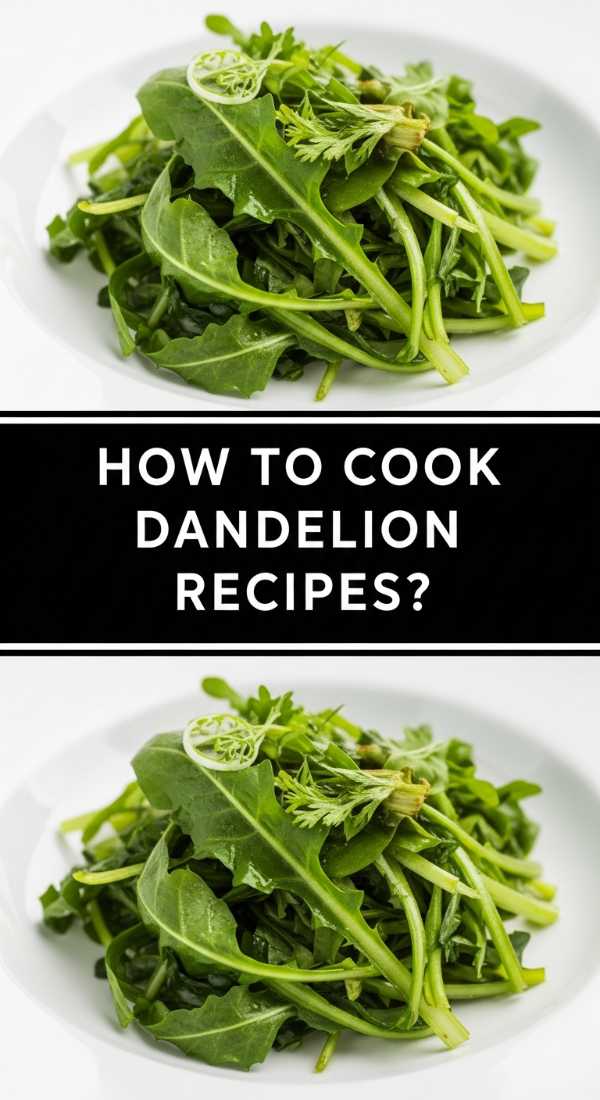
How to cook dandelion recipes
Why we love this
Dandelions are often overlooked, but when harvested correctly, they offer a sophisticated, peppery bitterness that mimics high-end radicchio or arugula. We love foraging for these greens because it feels like a secret treasure hunt in your own backyard, resulting in a dish that is earthy, rustic, and incredibly unique. When sautéed with garlic and lemon, the leaves wilt into a silky, savory side dish that adds an unexpected touch of wild elegance to any summer food board.
Ingredients
- 4 cups young dandelion greens (harvested before flowering for less bitterness)
- 2 cloves garlic, thinly sliced
- 2 tablespoons extra virgin olive oil
- 1 tablespoon fresh lemon juice
- Red pepper flakes
- Pinch of sea salt
How to make it
- Thoroughly soak the dandelion greens in a bowl of cold water for 10 minutes to remove any dirt or grit, then rinse and pat dry.
- If the greens are particularly large, blanch them in boiling salted water for 2 minutes and immediately shock them in an ice bath to mellow the bitter flavor.
- Heat the olive oil in a wide sauté pan over medium heat until it shimmers.
- Add the sliced garlic and a pinch of red pepper flakes, cooking for about 30-60 seconds until the garlic is fragrant and golden brown around the edges.
- Add the dandelion greens to the pan (be careful of splashes if they are damp) and toss with tongs to coat in the garlic oil.
- Sauté for 3-5 minutes until the greens are tender and have reduced in volume significantly.
- Finish with a squeeze of fresh lemon juice and a sprinkle of salt, and serve warm alongside crusty bread.
How to make summer pasta

Why we love this
Summer pasta is the epitome of effortless entertaining, acting as a canvas for the brightest flavors of the season. We love this dish for its light, citrusy notes and the way it manages to be filling without being heavy, making it perfect for a warm evening. The aroma of toasted garlic and fresh basil mingling with melting parmesan creates an inviting atmosphere that beckons everyone to grab a fork and dive in directly from a shared platter.
Ingredients
- 1 lb spaghetti or linguine
- 1/2 cup high-quality olive oil
- 4 cloves garlic, minced
- Zest and juice of 2 lemons
- 1 cup fresh basil leaves, torn
- 1/2 cup grated Parmesan cheese
- 1 cup reserved pasta water
How to make it
- Bring a large pot of heavily salted water to a rolling boil—it should taste like the sea to properly season the pasta from within.
- Cook the pasta according to the package directions, but aim for ‘al dente’—about 1-2 minutes less than the box suggests—as it will finish cooking in the sauce.
- While the pasta boils, heat the olive oil in a large skillet over low-medium heat and gently sauté the minced garlic until soft but not browned.
- Before draining the pasta, carefully scoop out a cup of the starchy pasta water; this is the secret to a silky sauce.
- Drain the pasta and add it directly to the skillet with the garlic oil.
- Add the lemon juice, zest, and half of the pasta water, tossing vigorously over medium heat to create an emulsified sauce that coats every strand.
- Fold in the Parmesan cheese and fresh basil at the very last second so the basil stays bright green, adding more pasta water if the mixture looks dry.
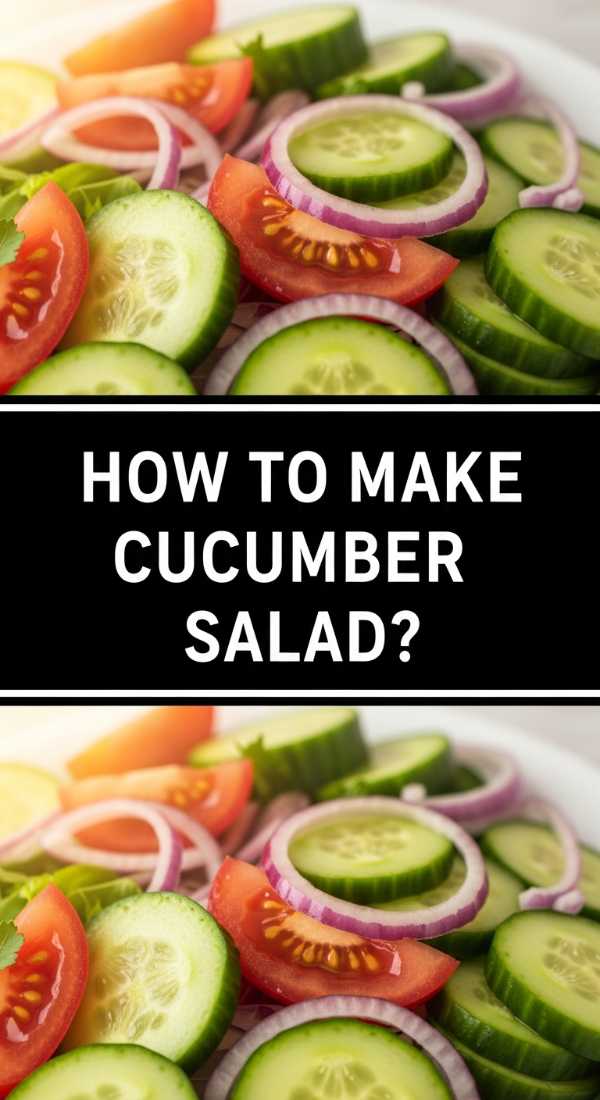
How to make cucumber salad
Why we love this
A crisp cucumber salad is the ultimate palate cleanser, providing a refreshing, watery crunch that balances out richer board items like cheeses or dips. We love the bright, acidic zing of the vinegar dressing combined with the cooling properties of the cucumbers and the aromatic punch of fresh dill. It’s a sensory delight that looks beautiful in a glass bowl, with its translucent green slices and flecks of purple onion catching the light.
Ingredients
- 2 large English cucumbers, thinly sliced
- 1/2 small red onion, sliced into paper-thin half-moons
- 1/2 cup white wine vinegar or apple cider vinegar
- 2 tablespoons sugar
- 1/4 cup fresh dill, chopped
- 1 teaspoon salt
How to make it
- Using a mandoline or a very sharp chef’s knife, slice the cucumbers into uniform rounds about 1/8 inch thick.
- In a small bowl, whisk together the vinegar, sugar, and salt until the sugar crystals are completely dissolved.
- Place the sliced cucumbers and red onions in a large glass bowl and pour the vinegar mixture over them.
- Toss thoroughly to ensure every slice is submerged or coated in the liquid.
- Cover the bowl and refrigerate for at least 30 minutes, though 2 hours is ideal to allow the flavors to penetrate the cucumbers and soften the bite of the onions.
- Just before serving, drain about half of the excess liquid if desired and toss in the freshly chopped dill.
- Serve chilled in a shallow bowl to maintain that crisp, refreshing temperature.
How to bake summer desserts

Why we love this
Summer desserts should feel like an extension of the garden—sweet, juicy, and bursting with berry flavors. We love a simple berry crumble because it fills the house with the intoxicating scent of caramelized sugar and warm fruit, creating an irresistible draw to the kitchen. The contrast between the bubbling, jammy fruit and the buttery, golden-brown crunch of the topping is a textural masterpiece that pairs perfectly with a scoop of melting vanilla bean ice cream.
Ingredients
- 4 cups mixed berries (blueberries, raspberries, blackberries)
- 1/2 cup granulated sugar
- 1 tablespoon cornstarch
- 1 cup rolled oats
- 1 cup all-purpose flour
- 1/2 cup cold butter, cubed
- 1 teaspoon cinnamon
How to make it
- Preheat your oven to 375°F (190°C) and lightly grease a 9×9 inch baking dish.
- In a large bowl, gently toss the mixed berries with the granulated sugar and cornstarch until the fruit is evenly coated; the cornstarch will thicken the juices into a glossy sauce.
- In a separate bowl, combine the oats, flour, and cinnamon.
- Using your fingertips or a pastry cutter, work the cold, cubed butter into the oat mixture until it resembles coarse crumbs with some pea-sized chunks of butter remaining.
- Spread the berry mixture into the prepared baking dish in an even layer.
- Sprinkle the crumble topping generously over the fruit, covering it completely.
- Bake for 35-40 minutes until the fruit is bubbling vigorously around the edges and the topping is a deep, golden brown. Let it cool for 15 minutes before serving to allow the juices to set.
How to grill summer kabobs

Why we love this
Grilling kabobs is a celebration of fire and flavor, offering charred, smoky edges and tender, juicy centers that are impossible to resist. We love them because they are inherently communal and customizable, looking absolutely stunning when piled high on a serving platter with their vibrant alternating colors. The aroma of searing meat and caramelized vegetables wafting from the grill is the universal signal for a great summer meal, bringing everyone together around the flames.
Ingredients
- 1 lb sirloin steak or chicken breast, cut into 1-inch cubes
- 1 red bell pepper and 1 green bell pepper, cut into chunks
- 1 red onion, cut into wedges
- 8 oz whole button mushrooms
- 1/4 cup soy sauce, 2 tbsp olive oil, 1 tbsp honey (for marinade)
- Wooden or metal skewers
How to make it
- If using wooden skewers, soak them in water for at least 30 minutes to prevent them from burning on the grill.
- Whisk together the soy sauce, olive oil, and honey in a bowl; reserve a small amount for brushing and use the rest to marinate the meat for at least 1 hour in the fridge.
- Thread the meat and vegetables onto the skewers, alternating colors and textures—try to leave a tiny bit of space between items so the heat can circulate.
- Preheat your grill to medium-high heat (about 400°F) and lightly oil the grates.
- Place the kabobs on the grill and cook for 8-12 minutes, turning every 3 minutes to ensure an even char on all sides.
- Use a meat thermometer to ensure the chicken reaches 165°F or the steak reaches your desired doneness (135°F for medium-rare).
- During the last 2 minutes of grilling, brush the reserved marinade over the kabobs for a glossy, flavorful finish.
How to make summer soup

Why we love this
Summer soup, particularly a chilled gazpacho, is a revelation for those hot afternoons when you want something savory but refreshing. We love this because it captures the essence of a garden in a single bowl—it’s vibrant, zesty, and incredibly smooth. The way the acidity of the tomatoes plays with the coolness of the cucumber and the bite of raw garlic creates a sophisticated flavor profile that feels like a spa day in culinary form, especially when served in small shooters on a food board.
Ingredients
- 6 large ripe tomatoes, cored and chopped
- 1 cucumber, peeled and chopped
- 1 red bell pepper, seeded and chopped
- 1 small shallot, minced
- 2 tablespoons sherry vinegar
- 1/3 cup extra virgin olive oil
- Salt and pepper to taste
How to make it
- Place the chopped tomatoes, cucumber, bell pepper, and shallot into a high-powered blender.
- Add the sherry vinegar and a generous pinch of salt and pepper.
- Blend on high until the mixture is completely liquefied and smooth; for an extra silky texture, you can pass the liquid through a fine-mesh sieve.
- With the blender running on low, slowly stream in the olive oil to create a stable emulsion that adds richness and a beautiful orange hue.
- Taste and adjust the seasoning, adding more vinegar if it needs more ‘zing’ or salt to enhance the tomato flavor.
- Pour the soup into a glass pitcher and chill in the refrigerator for at least 4 hours—gazpacho must be served ice-cold to be at its best.
- Pour into small glasses and garnish with a tiny sprig of cilantro or a drop of olive oil before placing on your board.
How to prepare camping meals

Why we love this
Camping meals bring a rustic, adventurous spirit to the table, focusing on hearty ingredients that can stand up to an open flame. We love the simplicity of foil-packet cooking because it seals in all the juices and flavors, resulting in a perfectly steamed and roasted meal with zero cleanup. There is a primal joy in opening a steaming foil packet to reveal tender potatoes and savory sausages, smelling the woodsmoke and the herbs, even if you’re just ‘camping’ in your own backyard.
Ingredients
- 1 lb smoked sausage, sliced into rounds
- 1 lb baby gold potatoes, quartered
- 2 cups green beans, trimmed
- 2 tablespoons melted butter or oil
- 1 tablespoon Cajun seasoning or garlic herb blend
- Heavy-duty aluminum foil
How to make it
- Tear off four large squares (about 12×12 inches) of heavy-duty aluminum foil.
- In a large bowl, toss the sliced sausage, quartered potatoes, and green beans with the melted butter and spices until everything is well-coated.
- Divide the mixture evenly among the four foil squares, placing the food in the center.
- Fold the sides of the foil up and over the food, then fold the ends in to create a completely sealed, airtight packet.
- Place the packets on a hot grill or over white-hot coals for 20-25 minutes.
- Flip the packets halfway through the cooking time using tongs to ensure the potatoes on the top get a chance to brown against the foil.
- Carefully open one packet to check if the potatoes are fork-tender; if so, they are ready to be served directly in the foil for that authentic rustic feel.
Conclusion
Creating a viral-worthy food board is less about following strict rules and more about embracing the joy of the season. By combining these diverse elements—from the savory crunch of grilled kabobs to the refreshing chill of gazpacho shooters—you create a tapestry of flavors that invites conversation and connection. Remember to focus on fresh ingredients, play with colors, and most importantly, enjoy the process of bringing people together around a beautiful, simple spread. Happy hosting!