

The Ultimate Guide to Dreamy Outdoor Living: DIY Decor and Layouts
There is something truly transformative about the moment the sun begins to dip below the horizon, casting a golden hue over your own backyard. It’s that magical hour where the air cools just enough, the crickets begin their evening chorus, and the stresses of the day seem to melt into the shadows of the trees. For me, the backyard has always been more than just a patch of grass; it’s an extension of my soul, a sanctuary where memories are etched into the landscape and every corner holds the potential for a new adventure or a quiet moment of reflection.
Creating a dreamy outdoor living space doesn’t require a professional landscaping crew or a bottomless bank account; it requires a bit of imagination, some elbow grease, and the desire to build a haven that reflects your unique lifestyle. Whether you’re dreaming of a secluded spa-like retreat to soak away your worries or a vibrant, whimsical playground where your children’s imaginations can run wild, the journey of DIYing your outdoor space is incredibly rewarding. Let’s dive into these ten projects designed to turn your yard into the oasis you’ve always envisioned.
How to Build a Serene Sanctuary for Local Birds

Why we love this
Imagine waking up to the gentle melody of songbirds right outside your window, a natural soundtrack that signals the start of a peaceful day. This sanctuary brings a lively, fluttery energy to your garden, filled with the soft texture of feathers and the sparkling reflections of water in a sunlit bath. There is a profound sense of connection to nature when you watch a bright cardinal or a tiny chickadee find refuge in a space you created specifically for them, turning your morning coffee ritual into a front-row seat to the wonders of the wild. It’s a sensory delight that blends the scent of fresh morning dew with the visual joy of vibrant plumage.
Essential Elements:
- Cedar or weather-resistant wood birdhouse
- Stone or ceramic birdbath
- High-quality wild bird seed mix
- Suet cages for winter feeding
- Pollinator-friendly shrubs (like elderberry or serviceberry)
- Hooks or poles for hanging feeders
How to make it
- Select a quiet, low-traffic area of your yard that is visible from a window but offers birds a sense of security from predators like neighborhood cats.
- Install a sturdy birdbath on level ground; ensure it is no deeper than 2 inches, as birds prefer shallow water for bathing and drinking.
- Mount your birdhouse at least 5-10 feet off the ground on a pole or a tree trunk, ensuring the entrance hole faces away from prevailing winds to keep the interior dry.
- Place various feeders at different heights—tube feeders for small finches and platform feeders for larger birds—to cater to different species’ eating habits.
- Plant a ‘living fence’ of native shrubs around the area to provide natural cover and additional food sources like berries and insects.
- Maintain the sanctuary by cleaning the birdbath every 2-3 days with a stiff brush and fresh water to prevent algae growth and disease.
How to Design a Vibrant Flower Bed for Curb Appeal

Why we love this
A well-designed flower bed is like a warm embrace for your home’s exterior, offering a burst of color that instantly lifts the spirits of anyone who passes by. We love the intoxicating scent of blooming jasmine and lavender that wafts through the air on a breeze, combined with the velvety texture of rose petals and the architectural interest of ornamental grasses. It’s a living canvas that changes with the seasons, providing a tactile and visual feast that makes the transition from the street to your front door feel like entering a private, botanical paradise. This project turns a simple lawn into a sophisticated statement of beauty and care.
Essential Elements:
- Hardwood mulch (dark brown or black for contrast)
- Assortment of perennials (Coneflowers, Hostas, Daylilies)
- Annuals for seasonal pops (Petunias, Marigolds)
- Landscaping fabric or cardboard for weed suppression
- Spade and metal rake
- Slow-release organic fertilizer
How to make it
- Outline the shape of your bed using a garden hose or spray paint, opting for soft, organic curves rather than rigid straight lines for a more natural look.
- Remove the existing grass using a spade, or lay down thick layers of cardboard to smother the turf, which eventually decomposes into rich organic matter.
- Amend the soil by tilling in several inches of compost and organic fertilizer to ensure your plants have the nutrients they need to thrive.
- Arrange your plants while they are still in their nursery pots; place the tallest varieties in the back, mid-sized in the center, and low-growing groundcovers at the front edge.
- Dig holes twice the width of each root ball, tease the roots gently, and plant them at the same depth they were in the pots.
- Apply a 3-inch layer of mulch across the entire bed, taking care not to pile it against the stems of the plants, and water deeply to settle the soil.
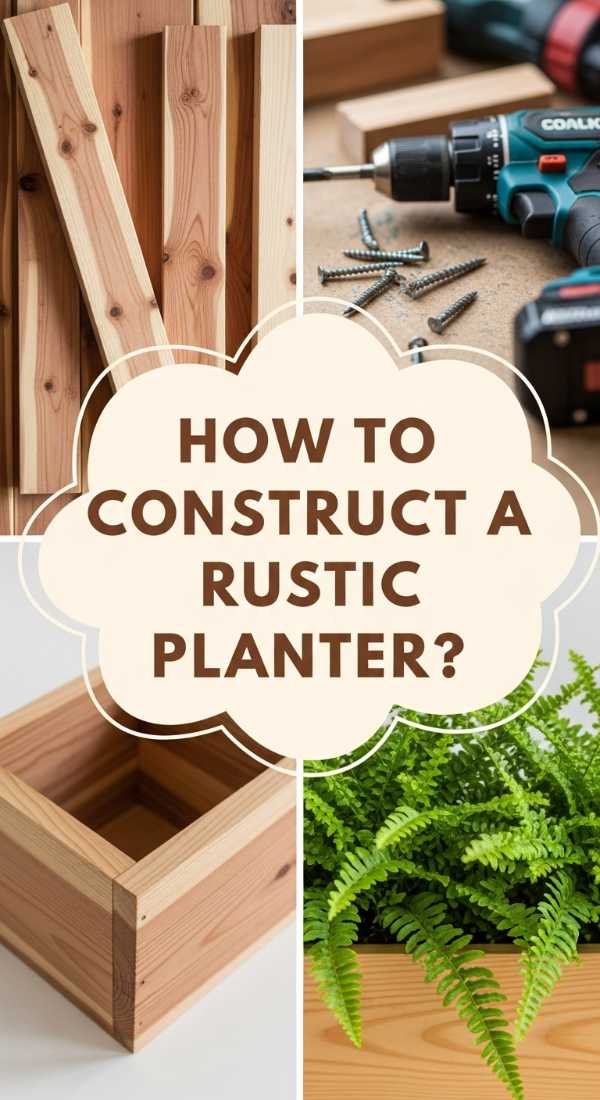
How to Construct a Rustic Wood Planter for Your Porch
Why we love this
There is a rugged, timeless charm in handcrafted wood that perfectly complements the soft greens of porch plants. We adore the tactile grain of cedar or reclaimed pine, which feels warm to the touch and releases a faint, earthy aroma when kissed by the morning sun. These planters add height and structure to your entryway, allowing you to frame your door with cascading ivy or structural evergreens that stay vibrant year-round. It’s a project that brings a sense of farmhouse elegance and artisan pride to your home, creating a welcoming threshold that feels both sturdy and sophisticated.
Essential Elements:
- Weather-resistant wood boards (Cedar is best)
- Galvanized wood screws
- Wood glue (exterior grade)
- Power drill and saw
- Plastic liner or landscape fabric
- Potting mix and drainage stones
How to make it
- Measure and cut four side panels of equal height, and a base panel that fits snugly inside the perimeter of the walls.
- Apply exterior wood glue to the vertical edges of the side panels and join them to form a square or rectangular box, securing them with galvanized screws.
- Drill several 1/2-inch drainage holes into the base panel to prevent root rot, then screw the base into the bottom of the frame.
- Sand the edges of the planter to remove any splinters and apply a clear water-sealant or a rustic stain to protect the wood from the elements.
- Line the interior with landscape fabric or a heavy-duty plastic liner (with holes poked for drainage) to prevent the wet soil from rotting the wood over time.
- Fill the bottom with 2 inches of drainage stones followed by high-quality potting soil, and plant your favorite seasonal greenery.
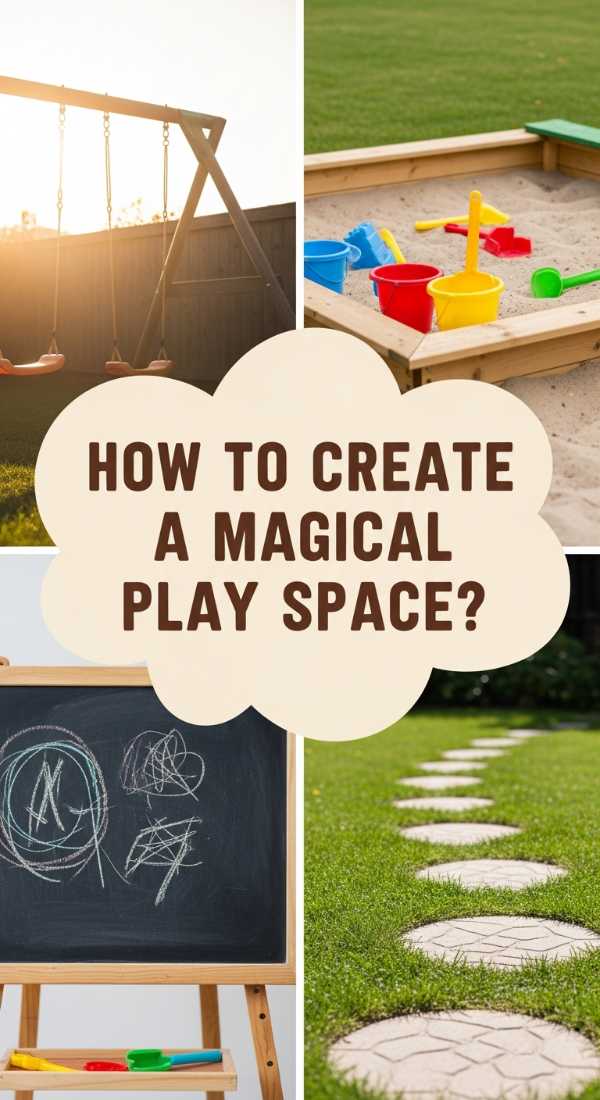
How to Create a Magical Play Space for Little Explorers
Why we love this
This space is where childhood magic lives, a hidden nook where the air smells of pine needles and the ground is carpeted in soft, springy moss. We love the way filtered sunlight dances through overhead leaves, illuminating a world of make-believe where sticks become wands and stones become treasures. It’s a tactile environment designed for tiny hands to touch rough bark and smooth pebbles, fostering a deep love for the outdoors through unstructured play. By adding twinkly fairy lights and cozy textures, you turn a corner of the yard into a secret kingdom that echoes with the sound of pure, unbridled joy.
Essential Elements:
- Weatherproof outdoor teepee or canvas tent
- Soft outdoor rugs or artificial turf
- Strings of solar-powered fairy lights
- Log rounds for seating
- A wooden treasure chest for outdoor toys
- Binoculars and a magnifying glass
How to make it
- Select a shaded spot under a large tree or in a secluded corner of the garden to keep the play area cool during summer days.
- Clear the ground of any sharp rocks or debris and lay down a soft base, such as a weather-resistant rug or a thick layer of play-grade wood chips.
- Set up a durable canvas teepee, securing the poles firmly into the ground to ensure it stays upright during enthusiastic play.
- Drape solar-powered fairy lights around the entrance and over nearby branches to create an enchanting glow as the sun sets.
- Arrange log rounds or stumps in a circle to create a gathering spot for “meetings” or snack times, ensuring they are sanded smooth on top.
- Incorporate nature-based tools like a magnifying glass station or a weather station to encourage active exploration of the surrounding environment.
How to Style a Functional Mud Kitchen for Messy Play

Why we love this
A mud kitchen is the ultimate tribute to the messy, glorious freedom of being a kid. We love the sensory explosion of squelching mud, the cooling sensation of water on skin, and the spicy scent of crushed marigold petals used as “garnish” for a dirt pie. It’s a space that encourages tactile learning and imaginative role-play, where the textures of sand, water, and earth come together in a symphony of creativity. Seeing children fully immersed in their “work,” with dirt under their fingernails and wide smiles on their faces, is a reminder that the best memories are often the messiest ones.
Essential Elements:
- Old wooden pallet or potting bench
- Stainless steel mixing bowls and old pots
- A functional hand-pump or large water dispenser
- Muffin tins and wooden spoons
- Chalkboard for the “Menu”
- Storage hooks for utensils
How to make it
- Repurpose an old wooden table or build a simple frame from pallets, ensuring the height is appropriate for your child to stand and work comfortably.
- Cut two large circles into the countertop using a jigsaw to drop in stainless steel bowls, which will serve as the “sinks” for mixing mud and water.
- Install a series of hooks along the backboard to hang whisks, spoons, and ladles, keeping the workspace organized and inviting.
- Attach a large water dispenser or a simple hand-pump at one end so children can easily access water without needing a constant garden hose.
- Paint a small section of the backboard with chalkboard paint so the “chef” can write out the daily specials, like “Pinecone Soup” or “Mud Cupcakes.”
- Fill nearby containers with “ingredients” like dried beans, sand, gravel, and fallen leaves to give the children a variety of textures to experiment with.
How to Arrange a Cozy Spa Retreat for Evening Relaxation

Why we love this
Transforming your patio into a spa retreat is about reclaiming the night for your own well-being. We love the contrast between the crisp night air and the steam rising from a warm tub, accented by the soothing aroma of eucalyptus and lavender candles. It’s a space defined by soft, plush textures—thick towels and outdoor floor cushions—and the gentle, rhythmic sound of a small water feature. This is where you go to decompress, where the warm glow of lanterns creates an intimate atmosphere that feels miles away from the bustle of the house, allowing your body and mind to drift into total serenity.
Essential Elements:
- Inflatable or permanent hot tub
- Teak or bamboo privacy screens
- Outdoor-rated essential oil diffuser
- Large lanterns with LED candles
- Bamboo bath mat and plush robes
- Potted ferns and palms for a tropical feel
How to make it
- Position your hot tub or soaking tub on a reinforced, level surface that is close enough to a power source but tucked away for privacy.
- Surround the area with tall bamboo screens or teak partitions to create an enclosed, intimate feeling that blocks out the rest of the world.
- Set up a small side table or weather-resistant cart to hold rolled-up towels, a bowl of citrus-infused water, and an essential oil diffuser.
- Place oversized lanterns at varying heights around the perimeter to provide a soft, amber glow that is much more relaxing than harsh overhead lights.
- Introduce lush, green foliage like potted palms or ferns around the base of the tub to soften the edges and create a tropical, secluded vibe.
- Hang a dedicated hook for plush robes and keep a basket of slippers nearby to ensure the transition from the water back to the house is just as luxurious.
How to Repurpose Wood Pallets for Imaginative Play

Why we love this
The humble wood pallet is a blank slate for childhood dreams, offering a rustic and sturdy foundation for countless structures. We love the raw, sun-bleached texture of the wood and the way it can be transformed with just a bit of paint and creativity into a castle, a lemonade stand, or a reading nook. It’s a sustainable way to build, giving new life to industrial materials while providing a tactile, multi-level environment for kids to climb, hide, and explore. There’s a wonderful, DIY honesty to pallet furniture that feels right at home in a backyard, inviting kids to be rough and tumble in a space built just for them.
Essential Elements:
- Heat-treated (HT) wood pallets
- Crowbar and hammer for disassembly
- Coarse and fine sandpaper
- Exterior paint or wood stain
- Heavy-duty bolts and washers
- Outdoor cushions or bean bags
How to make it
- Source pallets marked with “HT” (heat-treated) rather than “MB” (methyl bromide) to ensure they are safe for children to touch and play on.
- Spend ample time sanding every surface of the pallet with coarse grit followed by fine grit to ensure there are no splinters or rough edges.
- To build a simple fort, stand two pallets vertically and bolt them together at a 90-degree angle, using a third pallet as a roof or a floor.
- Paint the structure in bright, whimsical colors or a classic wood stain to protect it from rotting and to make it visually appealing.
- Secure the structure to the ground using long stakes or anchors to prevent it from tipping during vigorous play sessions.
- Add comfort by placing weather-resistant cushions or an old mattress covered in outdoor fabric inside the pallet nook to create a cozy reading or lounging spot.
How to Assemble a Splashy Water Table for Summer Fun

Why we love this
When the summer heat becomes thick and heavy, a water table is a shimmering oasis of cool relief. We love the sound of splashing water and the sight of bright, colorful toys bobbing in the blue, creating a sensory playground that keeps little ones entertained for hours. The feeling of cool droplets on sun-warmed skin and the focus required to pour water from one cup to another makes this a simple yet deeply engaging outdoor activity. It’s a centerpiece for summer play that brings a refreshing, aquatic energy to your patio, turning even the hottest afternoon into a cool, splashy adventure.
Essential Elements:
- Large, shallow plastic or galvanized metal tub
- Sturdy wooden base or legs
- PVC pipe segments and connectors
- Assorted funnels, cups, and sieves
- Waterproof toys (boats, ducks, squirt toys)
- A drain plug (optional but recommended)
How to make it
- Construct a sturdy wooden frame from pressure-treated 2x4s that is high enough for your child to stand comfortably without leaning over too far.
- Insert a large plastic bin or a galvanized metal tub into the frame; ensure it fits snugly so it won’t shift when filled with heavy water.
- Build a “water wall” at one end of the table using PVC pipes, funnels, and zip ties, allowing children to pour water through a maze of tubes.
- Add a variety of pouring vessels—like measuring cups and old teapots—to encourage fine motor skill development through repetitive pouring.
- Keep the water fresh by draining the table after each use; if you don’t have a drain plug, use a small bucket to bale it out into your garden beds.
- Store a basket of waterproof toys nearby, ensuring they are rinsed and dried periodically to prevent the buildup of mold or mildew.
How to Build a Lush Privacy Wall for Secluded Lounging

Why we love this
There is nothing quite like the feeling of being completely hidden in plain sight, nestled behind a wall of living greenery. We love the way a privacy wall muffles the sounds of the neighborhood, replacing them with the rustle of leaves and the sweet perfume of climbing jasmine or honeysuckle. It’s a vertical garden that provides a sense of enclosure and intimacy, turning a standard patio into a secret garden where you can lounge in your pajamas with a book, shielded from the world. The lush, vibrant green backdrop creates a stunning visual depth that makes even a small outdoor space feel like an expansive, private estate.
Essential Elements:
- Wooden or metal trellis panels
- Large rectangular planters or garden beds
- Fast-growing climbing plants (Clematis, Ivy, Star Jasmine)
- Galvanized wire and eye hooks
- High-quality climbing plant fertilizer
- Pruning shears
How to make it
- Position large, heavy planters along the edge of the area you wish to screen, ensuring they are spaced closely together to create a continuous base.
- Attach tall trellis panels to the back of the planters or mount them directly to an existing fence or wall using spacers to allow air circulation.
- Plant fast-growing climbers like Star Jasmine or Clematis in the planters, using at least two plants per 4-foot section for a dense look.
- Gently weave the young stems into the trellis or secure them with soft garden ties to encourage them to grow upwards and spread horizontally.
- Install horizontal rows of galvanized wire between the trellis posts if you need extra support for heavier vines like wisteria.
- Feed the plants regularly during the growing season and prune them in early spring to encourage new, thick growth that will fill in any gaps in your living wall.
How to Illuminate a Dreamy Garden Walkway on a Budget

Why we love this
As dusk settles, a properly lit walkway feels like a guided path into a dream. We love the rhythmic crunch of gravel beneath our feet as we follow a trail of warm, flickering lights that lead deeper into the garden. It’s a low-cost project that provides a high-end, magical atmosphere, highlighting the silhouettes of plants and creating depth in the darkness. The soft, amber glow of solar lanterns avoids the harshness of floodlights, instead offering a romantic, ethereal vibe that makes nighttime strolls feel safe and enchanting. It’s the finishing touch that makes your outdoor space usable and beautiful long after the sun goes down.
Essential Elements:
- Solar-powered stake lights or lanterns
- Gravel or stepping stones
- Edging material (bricks, metal, or plastic)
- Outdoor-rated string lights (optional)
- Small shovel and level
- Landscape staples
How to make it
- Mark out a path using flour or string, making sure it connects key areas of your garden—like the patio to the bird sanctuary—in a logical flow.
- Excavate the path to a depth of about 3 inches, level the soil, and install edging material to keep your gravel or mulch from spilling into the grass.
- Fill the path with crushed stone, pea gravel, or wood chips, tamping it down firmly to create a stable walking surface.
- Place solar stake lights every 3 to 4 feet along both sides of the path, staggering them for a more natural, less “runway” look.
- For extra magic, drape low-voltage string lights through the branches of trees that overhang the path, creating a canopy of stars above.
- Ensure the solar panels on your lights are positioned to receive maximum sunlight during the day so they remain bright throughout the night.
Transforming Your Space into a Living Haven
As we wrap up this guide, remember that the most beautiful outdoor spaces aren’t just about the furniture or the plants—they are about how they make you feel. Each project you tackle, from the smallest birdhouse to the grandest privacy wall, is a step toward creating a home that nurtures your spirit and provides a backdrop for a life well-lived. Take your time, enjoy the process of getting your hands dirty, and don’t be afraid to let your personal style shine through. Your dreamy outdoor oasis is waiting to be built, one DIY project at a time.