

The Ultimate Guide to Creating the Internet’s Favorite Simple Food Board
There is something undeniably magical about the way food brings us together, especially when it is served on a sprawling, beautiful board that invites everyone to dig in. I remember the first time I set out a ‘Simple Food Board’ for a backyard get-together; the air was thick with the scent of jasmine and charcoal, and as my friends hovered over the spread, the conversation flowed as effortlessly as the chilled sun tea. It wasn’t about fancy hors d’oeuvres or complicated techniques; it was about the communal joy of picking up a wrap, dipping a chip, and sharing a moment in the golden hour light.
This guide is my love letter to those effortless summer afternoons. We are moving beyond just cheese and crackers to create a ‘Simple Food Board’ that is a viral sensation for a reason: it combines comfort, freshness, and that ‘wow’ factor that makes every guest feel special. Whether you are hosting a graduation party, a Sunday brunch, or just want to elevate a Tuesday night dinner, these recipes are designed to be the centerpiece of your table and your memories.
How to make the ultimate cheesy rotel dip?

Why we love this
This dip is the quintessential soul of any gathering, offering a rich, velvety texture that blankets your palate in pure comfort. The aroma of melted cheese mingling with the zesty kick of diced tomatoes and green chilies is enough to draw anyone into the kitchen from three rooms away. It is that perfect balance of creamy and spicy, with a satisfying weight that clings beautifully to a salty tortilla chip, making every bite feel like a warm hug for your taste buds.
Ingredients
- 16 oz Velveeta or high-quality melting cheese, cubed
- 1 can (10 oz) Ro-Tel Diced Tomatoes and Green Chilies
- 1/2 lb ground breakfast sausage or lean ground beef
- 1/2 teaspoon garlic powder
- 1/4 teaspoon cumin
- Fresh cilantro for garnish
How to make it
- Begin by browning your choice of meat in a medium skillet over medium-high heat. Use a wooden spoon to break the meat into small, uniform crumbles, ensuring it is cooked through until no pink remains and it has developed a slightly crispy, golden-brown exterior.
- Once the meat is fully cooked, carefully drain the excess grease into a heat-safe container; this step is crucial to prevent your dip from becoming oily or separated.
- Lower the heat to medium-low and add the cubed cheese to the skillet. It is important to cut the cheese into small, 1-inch cubes to ensure even melting and to prevent scorching the bottom of the pan.
- Pour in the entire can of Ro-Tel, including the juices. The acidity in the tomato juice helps emulsify the cheese, creating that signature silky-smooth texture that we are looking for.
- Stir constantly with a silicone spatula, scraping the bottom and sides of the pan as the cheese begins to liquefy. Maintain low heat; if the cheese bubbles too aggressively, it can become grainy.
- Add the garlic powder and cumin, continuing to stir until the mixture is completely homogenous and glossy. Once the dip reaches a slow, thick ribbon consistency, remove it from the heat immediately.
- Garnish with fresh cilantro and serve in a pre-warmed ceramic bowl to maintain the melt for as long as possible.
How to create the perfect fresh summer salad?

Why we love this
A fresh summer salad is like a cool breeze on a humid afternoon; it provides a crisp, hydrating crunch that resets the palate between heavier bites. The scent of torn basil and sliced cucumbers is incredibly revitalizing, and the vibrant colors of heirloom tomatoes make the whole food board pop with life. It is the texture—the snap of the greens against the softness of fresh mozzarella or avocado—that makes this an essential, cooling component of your spread.
Ingredients
- 4 cups mixed baby greens or arugula
- 1 pint cherry tomatoes, halved
- 1 large English cucumber, thinly sliced
- 1/2 red onion, shaved paper-thin
- 1/4 cup toasted pine nuts or sunflower seeds
- Homemade vinaigrette (olive oil, lemon juice, Dijon mustard, honey)
How to make it
- Start by washing your greens in ice-cold water. This ‘shocks’ the leaves, ensuring they are as crisp as possible. Use a salad spinner to dry them thoroughly; any excess water will prevent the dressing from adhering to the leaves.
- Prepare your vegetables with precision. Halving the cherry tomatoes allows their juices to mingle with the dressing, while slicing the English cucumber into thin rounds provides a consistent crunch in every forkful.
- For the red onion, use a mandoline if available to get translucent shavings. To take the ‘bite’ out of the onion, soak the shavings in a bowl of ice water for ten minutes, then pat dry before adding to the salad.
- In a small glass jar, combine 3 parts extra virgin olive oil with 1 part fresh lemon juice, a teaspoon of Dijon mustard for emulsification, and a drizzle of honey. Shake vigorously until the mixture is thick and cloudy.
- Place the greens in a large wooden bowl and lightly toss with half of the dressing. Layer the tomatoes, cucumbers, and onions on top rather than mixing them in deeply; this keeps the presentation looking ‘viral-ready’ and prevents the heavy veggies from sinking to the bottom.
- Just before serving, sprinkle the toasted seeds or nuts over the top for a final layer of smoky crunch and drizzle the remaining dressing over the surface.
How to prepare delicious chicken caesar wraps?

Why we love this
There is a reason the chicken Caesar wrap has taken over social media feeds: it is the ultimate handheld comfort food. The contrast between the warm, savory grilled chicken and the cold, crisp romaine lettuce wrapped in a soft flour tortilla is addictive. When you add the salty punch of parmesan and the crunch of hidden croutons inside the wrap, you get a multidimensional eating experience that is both filling and incredibly refreshing.
Ingredients
- 2 large flour tortillas (burrito size)
- 2 cups grilled chicken breast, sliced into strips
- 2 cups chopped romaine lettuce
- 1/4 cup shaved Parmesan cheese
- 1/2 cup crushed sourdough croutons
- 1/3 cup creamy Caesar dressing
- Black pepper to taste
How to make it
- Warm your flour tortillas for about 10-15 seconds in a dry pan or microwave. A warm tortilla is much more pliable and less likely to tear when you are rolling it tightly.
- In a large mixing bowl, toss the chopped romaine, sliced chicken, and shaved parmesan together. It is vital to mix these ingredients before putting them in the wrap to ensure an even distribution of flavor.
- Add the Caesar dressing to the bowl and toss thoroughly. You want the leaves and chicken to be coated, but not swimming in dressing, as excess liquid will make the tortilla soggy within minutes.
- Add the crushed croutons last. By crushing them slightly, you ensure they stay tucked inside the wrap and provide a consistent crunch without being too bulky to roll.
- Lay the tortilla flat and place the filling in the lower center third. Fold the sides of the tortilla inward over the filling, then tuck the bottom edge over the sides and roll tightly upward.
- Place the wrap seam-side down on a cutting board and slice diagonally with a very sharp serrated knife. This diagonal cut shows off the beautiful internal layers for your board presentation.
How to master your blackstone grill for summer?

Why we love this
The Blackstone grill is the theater of summer cooking, bringing the sizzle and steam of a professional griddle to your backyard. The aroma of searing proteins and caramelizing onions hitting that hot steel plate is intoxicating, creating a crust and flavor profile that a standard grate grill simply cannot match. It’s about the ritual of the scrape, the hiss of the water cleaning the surface, and the incredible speed at which you can feed a crowd.
Ingredients
- High-smoke point oil (Avocado or Grapeseed oil)
- Your choice of proteins (smash burgers, shrimp, or steak bites)
- Seasonal vegetables (zucchini, bell peppers, onions)
- Unsalted butter for finishing
- Coarse sea salt and cracked black pepper
How to make it
- Preheat your Blackstone by turning all burners to high for at least 10-15 minutes. You are looking for the surface to just start wisps of smoke; this indicates the steel is hot enough to create an instant sear.
- Establish heat zones. Turn one side to low and keep the other on high. This allows you to sear your meat on the hot side and move it to the cool side to finish cooking through without burning.
- Apply a thin, even layer of oil using a squeeze bottle. Use your griddle spatula to spread it across the entire cooking surface. Do not use olive oil, as it will burn and become bitter at these high temperatures.
- Place your food on the griddle. For the perfect sear, do not move the food for at least 2-3 minutes. You want the natural sugars to caramelize against the steel, creating a deep brown ‘bark’ or crust.
- Use your heavy-duty scrapers to flip the food with a confident, quick motion. This ensures you pick up all those flavorful browned bits (the fond) from the surface.
- In the final minute of cooking, add a pat of butter directly onto the griddle next to the food and toss everything through the melting butter for a rich, glossy finish.
- After removing the food, immediately squirt water onto the hot griddle to steam off any residue, scrape it clean, and apply a very light coat of oil to maintain the seasoning of the metal.
How to make homemade hummingbird nectar?

Why we love this
There is a quiet, meditative joy in preparing hummingbird nectar, knowing you are inviting nature’s most delicate acrobats into your garden. The sight of a shimmering hummingbird darting toward a feeder you’ve prepared is a soul-soothing experience that completes the atmosphere of a backyard gathering. This homemade version is pure and safe, free from the dyes and preservatives found in store-bought mixes, making your garden a true sanctuary.
Ingredients
- 1 cup refined white granulated sugar
- 4 cups filtered water
How to make it
- Mix the sugar and water in a medium saucepan. It is essential to use plain white granulated sugar; do not use honey, brown sugar, or sugar substitutes, as these can be fatal to hummingbirds or cause rapid mold growth.
- Heat the mixture over medium-high heat, stirring constantly until the sugar is completely dissolved. You do not need to bring it to a rolling boil, but a light simmer for 1-2 minutes helps to remove impurities from the water and ensure the solution is fully integrated.
- Remove the pan from the heat and allow the nectar to cool completely to room temperature. Pouring hot liquid into a plastic feeder can warp the plastic or release chemicals.
- Do not add red food coloring. The red parts of your feeder are enough to attract the birds, and the dye can be harmful to their kidneys.
- Fill your clean bird feeders and store any leftover nectar in a clean, airtight glass jar in the refrigerator for up to two weeks.
- Clean your feeders every 3-5 days (more often in extreme heat) with hot water and a brush to prevent fermented nectar or mold, which can make the birds sick.
How to bake a classic strawberry pie?

Why we love this
A classic strawberry pie is the crown jewel of a summer dessert spread, smelling of sun-warmed berries and buttery pastry. Each slice offers a symphony of textures: the flaky, salt-kissed crust shattering against the soft, jammy heart of macerated strawberries. It’s a nostalgic flavor that feels like a celebration of the harvest, especially when the bright red filling glows against a dollop of fresh, unsweetened whipped cream.
Ingredients
- 2 discs of chilled pie dough (homemade or high-quality store-bought)
- 6 cups fresh strawberries, hulled and sliced
- 3/4 cup granulated sugar
- 1/4 cup cornstarch
- 1 tablespoon lemon juice
- 1 teaspoon vanilla extract
- 1 egg (for egg wash)
- Turbinado sugar for topping
How to make it
- In a large bowl, toss the sliced strawberries with sugar, cornstarch, lemon juice, and vanilla. Let this sit for at least 20 minutes; this ‘macerating’ process allows the berries to release their juices which then combine with the cornstarch to create a thick, clear glaze as it bakes.
- Roll out your bottom crust on a lightly floured surface until it is about 12 inches in diameter. Gently drape it into a 9-inch pie plate, being careful not to stretch the dough, which causes shrinkage during baking.
- Pour the strawberry mixture into the crust, mounding them slightly in the center.
- Roll out the second disc of dough. You can do a full top crust with vents or a lattice pattern. For a viral look, a lattice is stunning and allows steam to escape efficiently, preventing a soggy bottom.
- Trim the excess dough and crimp the edges tightly to seal. Brush the top of the crust with a beaten egg mixed with a tablespoon of water, then sprinkle generously with turbinado sugar for a professional, sparkling crunch.
- Bake at 425°F for the first 15 minutes to set the crust, then reduce the heat to 375°F and bake for another 40-50 minutes. You are looking for the crust to be deep golden brown and the filling to be bubbling thick juices through the vents.
- Crucially, let the pie cool for at least 4 hours before slicing. This allows the cornstarch to fully set the filling so it doesn’t run when you cut into it.
How to use up your sourdough discard easily?
Why we love this
There is something incredibly satisfying about the ‘no-waste’ kitchen, and sourdough discard crackers are the ultimate example of turning a byproduct into a gourmet snack. These crackers carry a sophisticated tang and a complex depth of flavor that store-bought options just can’t match. They are incredibly thin, shattering with a crispness that makes them the perfect vessel for dips, yet they are flavorful enough to be eaten entirely on their own.
Ingredients
- 1 cup sourdough discard (unfed)
- 1/4 cup unsalted butter, melted
- 1 cup all-purpose flour
- 1/2 teaspoon sea salt
- 2 tablespoons dried herbs (rosemary, thyme, or ‘everything’ seasoning)
- Additional sea salt for sprinkling
How to make it
- In a medium bowl, stir together the sourdough discard and melted butter until combined. The fat from the butter is what will give the crackers their tender, flaky texture.
- Add the flour, salt, and herbs. Mix by hand until a cohesive dough forms. It should be soft but not overly sticky; if it’s too wet, add a tablespoon of flour at a time.
- Divide the dough in half and wrap in plastic. Let it rest in the fridge for at least 30 minutes. This relaxes the gluten, making it much easier to roll the dough paper-thin.
- Preheat your oven to 325°F. Place one piece of dough on a sheet of parchment paper and roll it out until it is almost translucent. The thinner you roll it, the crispier the cracker will be.
- Brush the surface lightly with water or a tiny bit of olive oil and sprinkle with extra sea salt. Use a pizza cutter or a sharp knife to score the dough into squares or rectangles.
- Slide the parchment onto a baking sheet and bake for 20-25 minutes. You must watch them closely toward the end; they should be golden brown across the entire surface. If the edges brown too fast, you can pull the edge pieces off and return the center to the oven.
- Let them cool completely on a wire rack to reach maximum crispness before breaking them along the score lines.
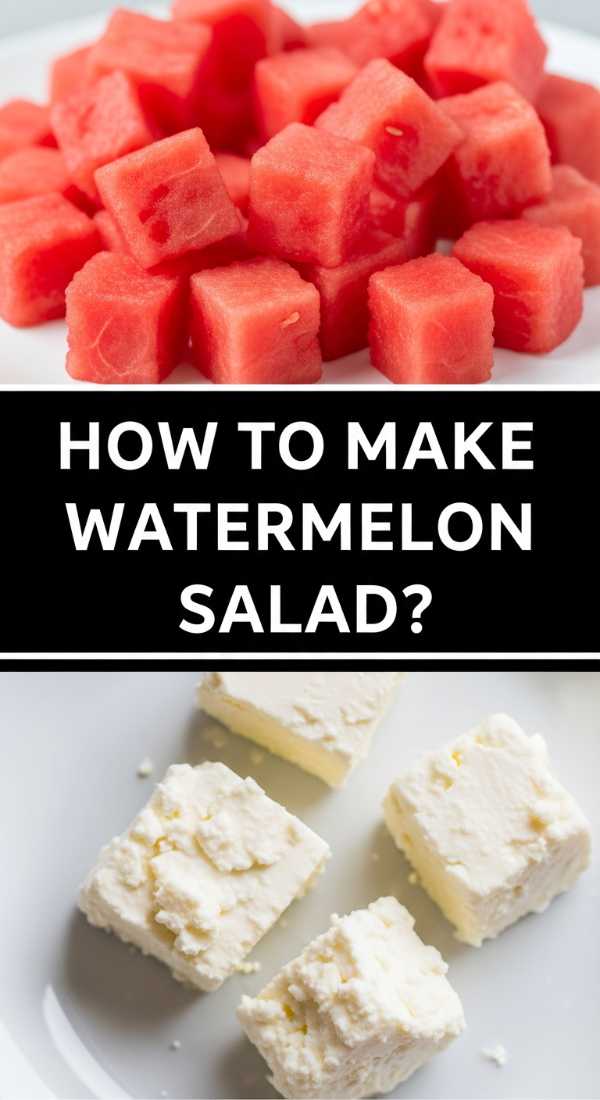
How to make a refreshing watermelon salad?

Why we love this
Watermelon salad is the ultimate ‘sweet meets savory’ dish that defines modern summer dining. The cold, dripping sweetness of the melon paired with the salty, creamy crumbles of feta cheese creates a flavor profile that is surprisingly sophisticated. With a hint of mint providing a cooling finish and a squeeze of lime to brighten everything up, it’s a dish that feels like a spa day for your taste buds—light, hydrating, and visually stunning on a board.
Ingredients
- 6 cups seedless watermelon, cubed into 1-inch pieces
- 1/2 cup crumbled feta cheese
- 1/4 cup fresh mint leaves, chiffonade
- 1/2 red onion, very thinly sliced
- Juice of 1 lime
- 1 tablespoon extra virgin olive oil
- A pinch of flaky sea salt
How to make it
- Chill your watermelon in the refrigerator for at least 4 hours before preparing. This salad is only at its best when the fruit is ice-cold.
- Cube the watermelon into uniform 1-inch squares. This consistency makes the salad easier to eat and ensures that every piece can be paired with a bit of feta and mint in a single bite.
- Spread the watermelon cubes out on a large, shallow platter rather than a deep bowl. This prevents the weight of the fruit from crushing the bottom pieces and keeps the salad from becoming ‘soupy’ too quickly.
- Distribute the paper-thin red onion slices over the melon. The onion provides a sharp contrast to the sugar in the fruit.
- Sprinkle the feta cheese evenly over the top. Use a high-quality sheep’s milk feta stored in brine for the best texture and salty punch.
- Whisk the lime juice and olive oil together and drizzle it over the salad. This acts as a simple dressing that enhances the natural flavors without masking them.
- Just before serving, scatter the fresh mint. Mint oxidizes (turns black) quickly once cut, so saving this for the final second keeps the salad looking vibrant and fresh. Finish with a tiny pinch of flaky salt to make the watermelon’s sweetness pop.
How to brew the perfect jar of sun tea?

Why we love this
Sun tea is the epitome of slow living; it’s a beverage brewed by the gentle warmth of the earth itself. There is a nostalgic beauty in watching the clear water slowly transform into a deep amber hue as the sun works its magic through the glass. The result is a tea that is incredibly smooth and mellow, lacking the bitterness that can sometimes come from over-steeping with boiling water, making it the perfect base for honey, lemon, or fresh sprigs of mint.
Ingredients
- 1 gallon cold filtered water
- 8-10 high-quality black tea bags (or 4-5 tablespoons loose leaf tea in a sachet)
- Fresh lemon slices
- Fresh mint sprigs
- Sweetener of choice (optional)
How to make it
- Start with a clean one-gallon glass jar. Using glass is essential, as plastic can leach flavors or chemicals when sitting in the heat of the sun.
- Fill the jar with cold, filtered water. Using filtered water ensures a ‘clean’ tea flavor without the interference of chlorine or minerals found in tap water.
- Add your tea bags, hanging the strings over the rim of the jar and securing them with the lid. Do not use flavored teas with oils for sun tea, as the low heat may not properly emulsify the oils; stick to high-quality black, green, or herbal teas.
- Place the jar in a spot that receives direct, intense sunlight for 3 to 5 hours. Avoid placing it on the ground; a table or porch railing is better for airflow and consistent temperature.
- Observe the color. Once it reaches a deep, translucent amber, bring the jar inside. Do not leave it out for more than 5 hours, as the water temperature can reach a ‘danger zone’ where bacteria could potentially grow.
- Remove the tea bags immediately. Squeezing them can release tannins that make the tea bitter, so simply lift them out.
- Refrigerate the tea immediately. Serve over plenty of ice with fresh lemon and mint. For the best flavor and safety, consume your sun tea within 24-48 hours.
How to marinade chicken for the grill?
[IMAGE_10]
Why we love this
The perfect marinade is the secret weapon of any grill master, transforming humble chicken into a juicy, flavor-packed masterpiece. It’s all about the chemistry of acid, fat, and seasoning working together to tenderize the meat and infuse it with layers of aromatics. When that marinated chicken hits the hot grates, the sugars in the marinade caramelize into those beautiful, charred grill marks that smell like the very essence of summer cookouts.
Ingredients
- 1.5 lbs chicken thighs or breasts
- 1/2 cup extra virgin olive oil (the fat)
- 1/4 cup balsamic vinegar or lemon juice (the acid)
- 3 cloves garlic, smashed and minced
- 1 tablespoon honey or brown sugar (the sweetener for char)
- 1 teaspoon dried oregano and 1 teaspoon smoked paprika
- 1 teaspoon salt and 1/2 teaspoon black pepper
How to make it
- In a medium glass bowl or a heavy-duty zip-top bag, whisk together the olive oil, acid, garlic, sweetener, and spices. The oil carries the flavors into the meat, while the acid breaks down the tough proteins, ensuring a tender result.
- If using chicken breasts, use a meat mallet to pound them to an even thickness. This ensures that the entire piece of meat cooks at the same rate, preventing the thin ends from drying out before the center is done.
- Place the chicken in the marinade, ensuring every inch is coated. Squeeze as much air out of the bag as possible before sealing; this maximizes the surface contact between the liquid and the meat.
- Refrigerate for at least 30 minutes, but ideally 4-6 hours. Do not marinade with heavy acid (like lemon juice) for more than 12 hours, or the texture of the chicken can become mushy or ‘cooked’ by the acid.
- Remove the chicken from the fridge 20 minutes before grilling to take the chill off. This helps the meat cook more evenly.
- Preheat your grill to medium-high. Clean the grates thoroughly and oil them lightly using a paper towel dipped in oil held with tongs.
- Place the chicken on the grill and leave it undisturbed for 5-6 minutes to develop a crust. Flip only once. Use a meat thermometer to ensure the internal temperature reaches 165°F. Let the meat rest for 5 minutes before slicing to allow the juices to redistribute.
Conclusion
Creating the internet’s favorite simple food board isn’t about perfection; it’s about the abundance of flavors and the joy of variety. By combining these hot, grilled elements with crisp, refreshing salads and sweet seasonal treats, you create an interactive dining experience that caters to every craving. So, grab your largest platter, gather your favorite people, and let the food be the star of your next great summer story. Happy hosting!