

There is a certain magic that happens when a table is covered in vibrant colors, enticing textures, and the hum of happy conversation. We’ve all seen those stunning, viral food boards on our feeds—the ones that look like a still-life painting come to life—and thought, “I wish I could host like that.” But the secret to a truly viral aesthetic food board isn’t about perfection; it’s about the soul you pour into every individual dish. It’s about the golden hour light hitting a perfectly seared steak or the way a dewy glass of sun tea catches the afternoon glow.
Creating a food board is more than just assembling snacks; it’s an act of love and a celebration of the season. Whether you are gathering friends for a backyard sunset or just want to elevate a Tuesday night dinner, these recipes are designed to be the stars of your spread. We are focusing on simple, high-quality ingredients and techniques that yield maximum visual and flavor impact. Get ready to transform your kitchen into a creative studio and your dining table into a masterpiece.
How to grill summer steak?

Why we love this
There is nothing quite like the primal, smoky aroma of a steak hitting a white-hot grill on a humid summer evening. The way the exterior develops a salty, charred crust—the Maillard reaction in all its glory—while the center remains a buttery, tender pink is pure culinary poetry. Each bite offers a satisfying contrast between the rugged, flame-kissed edges and the rich, succulent juices that pool on your tongue, reminding us why grilling is the ultimate summer ritual.
Ingredients
- 2 thick-cut Ribeye or New York Strip steaks (at least 1.5 inches thick)
- 2 tablespoons coarse Kosher salt
- 1 tablespoon freshly cracked black pepper
- 3 cloves of garlic, smashed
- 2 sprigs of fresh rosemary
- High-smoke point oil (like avocado or grapeseed oil)
- 3 tablespoons unsalted butter
How to make it
- Tempering: Take your steaks out of the refrigerator at least 45-60 minutes before grilling. Bringing them to room temperature ensures even cooking throughout the meat.
- Seasoning: Pat the steaks completely dry with paper towels; moisture is the enemy of a good sear. Liberally coat all sides, including the edges, with salt and pepper.
- Preheating: Crank your grill to high heat (450°F-500°F). If using charcoal, wait until the coals are covered in grey ash.
- Searing: Lightly oil the grill grates. Place the steaks down and leave them undisturbed for 4-5 minutes to develop a deep crust. Use tongs to flip once.
- The Butter Baste: For a viral finish, place a small cast-iron skillet on the cooler side of the grill. Add butter, smashed garlic, and rosemary. Once melted, spoon this fragrant fat over the steaks during the last 2 minutes of cooking.
- Testing: Use an instant-read thermometer. Pull the steaks at 130°F for medium-rare.
- Resting: This is the most critical step. Place the steaks on a warm plate and tent with foil for 10 minutes. This allows the fibers to relax and reabsorb those precious juices.
How to make pasta salad?

Why we love this
A great pasta salad is a symphony of textures—the bounce of al dente noodles, the crisp snap of fresh bell peppers, and the creamy crumble of feta cheese all dancing in a zesty vinaigrette. It’s the ultimate “make-ahead” dish that actually gets better as it sits, as the pasta absorbs the herbaceous oils and vinegars. Eating this feels like a Mediterranean vacation, full of bright acidity and garden-fresh brightness that cuts through the heat of a summer day.
Ingredients
- 1 lb Rotini or Farfalle pasta
- 1 cup cherry tomatoes, halved
- 1 English cucumber, diced
- 1/2 red onion, finely minced
- 1/2 cup Kalamata olives, sliced
- 1/2 cup crumbled Feta cheese
- Vinaigrette: 1/2 cup olive oil, 1/4 cup red wine vinegar, 1 tsp dried oregano, 1 clove minced garlic, salt, and pepper.
How to make it
- Pasta Prep: Boil a large pot of heavily salted water—it should taste like the sea. Cook the pasta for exactly one minute less than the package instructions for a perfect “al dente” bite that won’t get mushy when dressed.
- Shocking: Drain the pasta and immediately rinse it under cold running water. This stops the cooking process and removes excess starch, preventing the noodles from sticking together.
- The Emulsion: In a small jar, combine all vinaigrette ingredients and shake vigorously until the oil and vinegar have fully emulsified into a cloudy, thick dressing.
- Assembly: In a massive bowl, toss the cooled pasta with the tomatoes, cucumbers, onions, and olives.
- Dressing: Pour the vinaigrette over the mixture while the pasta is still slightly damp, which helps the dressing cling to the grooves of the noodles.
- Finishing: Fold in the feta cheese gently so it doesn’t break down into a paste.
- Chilling: Let the salad sit in the fridge for at least 2 hours before serving to allow the flavors to marry and the pasta to fully hydrate with the dressing.
How to make watermelon salad?
Why we love this
There is something daring and delightful about the combination of ice-cold, sugary watermelon and salty, pungent feta. This salad is a visual showstopper on any board, with its vibrant pink cubes contrasted against dark green mint leaves and white cheese. Every bite is an explosion of hydration and refreshing flavor, finished with the subtle, earthy heat of freshly cracked black pepper and the sophisticated tang of a balsamic glaze.
Ingredients
- 1 small seedless watermelon, cubed
- 1/2 cup Feta cheese, cubed or crumbled
- 1/4 cup fresh mint leaves, chiffonade
- 1/2 small red onion, thinly sliced (optional)
- 2 tablespoons extra virgin olive oil
- Balsamic glaze for drizzling
- Flaky sea salt
How to make it
- Chilling: Ensure your watermelon is ice-cold. A room-temperature watermelon salad loses its refreshing appeal.
- Cubing: Cut the watermelon into uniform 1-inch cubes. Precision here adds to the “aesthetic” look of the final board.
- The Onion Trick: If using red onion, soak the slices in ice water for 10 minutes. This removes the harsh bite while keeping the crunch. Pat dry before adding.
- Layering: On a flat platter (rather than a deep bowl), scatter the watermelon cubes in a single, slightly overlapping layer.
- Garnishing: Evenly distribute the feta and the onion over the melon. Sprinkle the mint chiffonade (thin ribbons) over the top just before serving to prevent wilting.
- Dressing: Drizzle high-quality olive oil across the platter. The fat helps carry the flavors.
- The Finish: Right before guests arrive, drizzle the balsamic glaze in a zigzag pattern and finish with a pinch of flaky sea salt to make the sweetness pop.
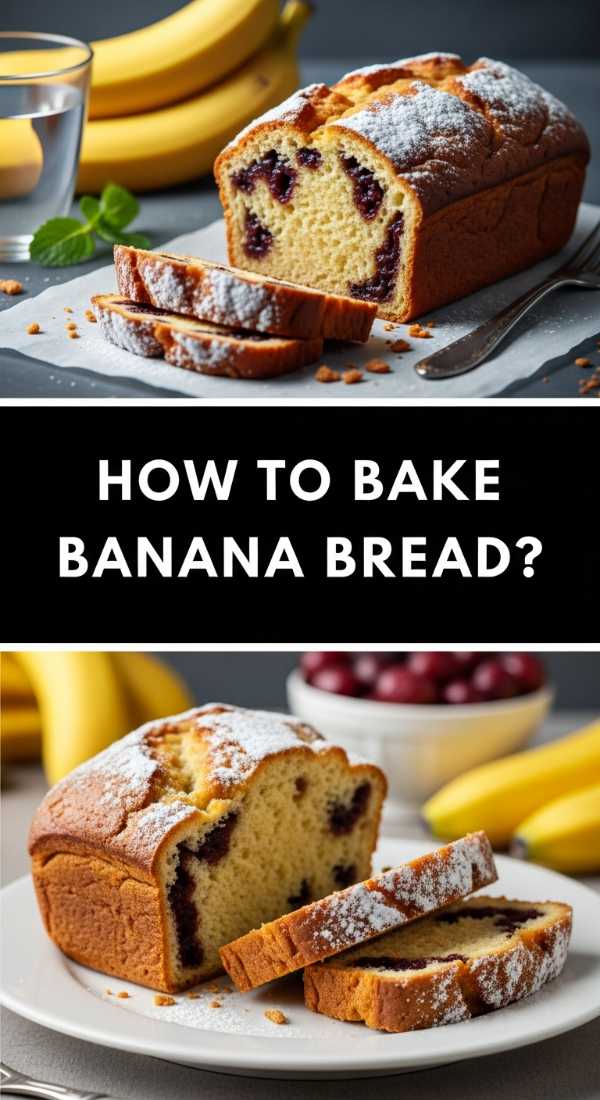
How to bake banana bread?
Why we love this
Walking into a house where banana bread is baking is like receiving a warm, culinary hug. The aroma is intoxicating—a mixture of caramelized sugar, toasted nuts, and the deep, floral scent of overripe fruit. This isn’t just a snack; it’s a comfort food icon. A perfect slice is dense yet moist, with a dark, crackly top crust that yields to a tender, golden interior that practically melts in your mouth when spread with a bit of salted butter.
Ingredients
- 3 very ripe bananas (the more spots, the better)
- 1/3 cup melted unsalted butter
- 3/4 cup granulated sugar
- 1 large egg, beaten
- 1 teaspoon vanilla extract
- 1 teaspoon baking soda
- Pinch of salt
- 1.5 cups all-purpose flour
How to make it
- Preheating: Set your oven to 350°F (175°C) and grease a 4×8 inch loaf pan thoroughly with butter or non-stick spray.
- Mashing: In a large mixing bowl, mash the peeled bananas with a fork until they are a mostly smooth liquid with only a few small chunks remaining for texture.
- The Wet Mix: Stir the melted butter into the mashed bananas. Add the sugar, beaten egg, and vanilla extract. Whisk until the sugar is somewhat dissolved and the mixture is pale.
- The Dry Mix: Sprinkle the baking soda and salt directly over the wet mixture and stir.
- Folding: Gently fold in the flour using a spatula. Do not overmix! Stir only until the white streaks of flour disappear. Overmixing develops gluten, which makes the bread tough rather than tender.
- Baking: Pour the batter into the prepared pan. Bake for 50 to 60 minutes.
- The Visual Cue: The bread is done when the top is a deep golden brown and a toothpick inserted into the center comes out clean or with just a few dry crumbs.
- Cooling: Let it cool in the pan for 10 minutes before transferring to a wire rack. This prevents the bread from collapsing.
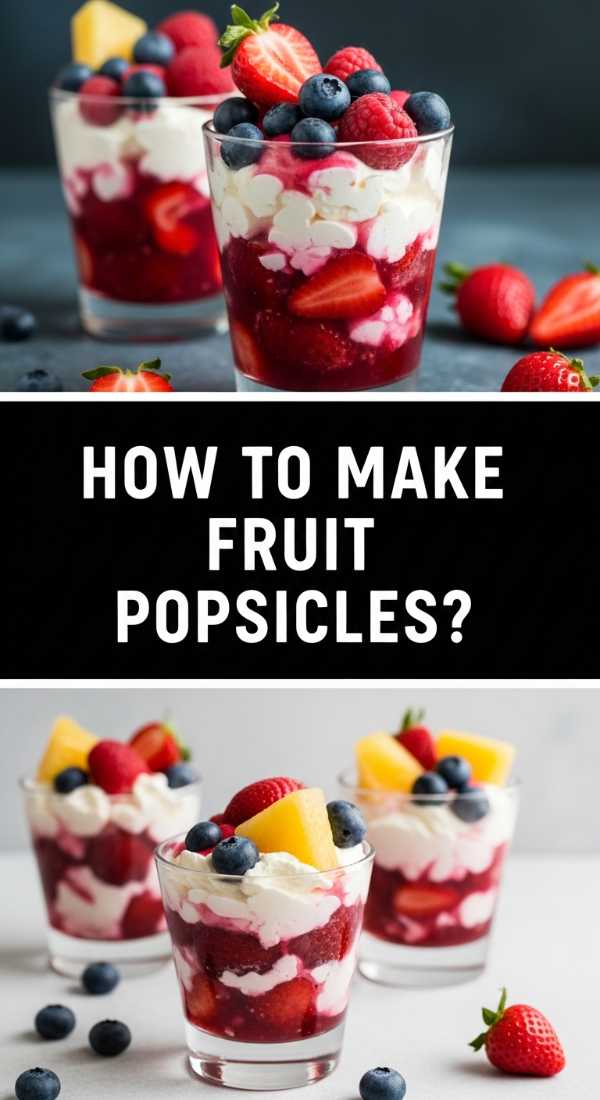
How to make fruit popsicles?

Why we love this
Fruit popsicles are the ultimate childhood nostalgia reinvented for the aesthetic era. Using real, whole fruit creates a beautiful, stained-glass effect when held up to the light. They are icy, refreshing, and naturally sweet, providing a guilt-free way to cool down. The texture of frozen berries or slices of kiwi suspended in juice or coconut milk adds a sophisticated, artisanal touch to your food board that pre-packaged treats simply can’t match.
Ingredients
- 2 cups of mixed fresh fruit (sliced strawberries, blueberries, kiwi rounds, mango chunks)
- 2 cups of liquid base (coconut water, lemonade, or blended fruit juice)
- 1 tablespoon honey or agave (optional)
- A squeeze of fresh lime juice
How to make it
- Preparation: Wash and slice your fruit. Thinner slices of kiwi or strawberry look more “aesthetic” as they can be pressed against the sides of the popsicle molds.
- The Base: Whisk your liquid base with the sweetener and lime juice until fully incorporated.
- Arrangement: Place the fruit slices into the molds first. Use a chopstick to push them against the walls of the mold so they are visible once frozen.
- Pouring: Carefully pour the liquid base into each mold, leaving about a 1/4 inch of space at the top to allow for expansion as the liquid freezes.
- The Stick: Insert the popsicle sticks. If your mold doesn’t have a lid to hold them straight, freeze the pops for 1 hour first, then insert the sticks once the mixture is slushy.
- Freezing: Freeze for at least 6-8 hours, preferably overnight, in the coldest part of your freezer.
- Unmolding: To remove the pops without breaking them, run the outside of the mold under warm water for 10-15 seconds. Gently wiggle the stick to release.
How to make chicken salad?

Why we love this
A classic chicken salad is a masterclass in balance. You have the savory, tender protein combined with the sharp crunch of celery, the sweetness of halved grapes, and the buttery richness of pecans. It’s a creamy, decadent dish that somehow feels light enough for a garden party. When served on a food board alongside buttery croissants or artisanal crackers, it becomes a sophisticated centerpiece that guests will keep coming back to for “just one more bite.”
Ingredients
- 2 lbs cooked chicken breast, shredded or diced
- 1 cup mayonnaise (Duke’s or Hellman’s for best flavor)
- 1 tablespoon Dijon mustard
- 1 cup red grapes, halved
- 1/2 cup celery, finely diced
- 1/4 cup toasted pecans, chopped
- 1 tablespoon fresh tarragon or dill, chopped
- Salt and pepper to taste
How to make it
- The Chicken: Use a rotisserie chicken for ease, or poach chicken breasts in aromatics (onion, peppercorns) until they reach 165°F. Shred the chicken while still slightly warm so it absorbs the flavors better.
- The Dressing: In a small bowl, whisk the mayo, Dijon, and herbs. Season with a generous amount of black pepper. The mustard adds a necessary tang to cut through the mayo’s richness.
- The Mix: Combine the cooled chicken with the celery, grapes, and pecans in a large bowl.
- Folding: Pour the dressing over the chicken mixture. Use a large spoon to fold everything together until every piece is coated but not swimming in sauce.
- Flavor Check: Taste and add salt as needed. The flavors will mute slightly when cold, so ensure it is well-seasoned.
- Resting: Cover and refrigerate for at least 1 hour. This allows the celery and grapes to release a tiny bit of juice, which thins the dressing into a perfect, silky consistency.
- Plating: Serve in a hollowed-out bell pepper or a beautiful ceramic bowl garnished with extra herbs.
How to bake pound cake?

Why we love this
Pound cake is the queen of the dessert board because of its versatility and its incredible, dense crumb. It’s a cake that doesn’t scream for attention with frosting; instead, it relies on the high-quality flavor of real butter and vanilla. A perfect pound cake has a fine, tight grain and a golden-brown exterior that is slightly chewy. It’s the perfect vessel for soaking up macerated fruit juices or being toasted and topped with a dollop of whipped cream.
Ingredients
- 1 cup (2 sticks) unsalted butter, softened to room temperature
- 1 cup granulated sugar
- 4 large eggs, room temperature
- 2 teaspoons vanilla extract
- 1/2 teaspoon salt
- 1.5 cups all-purpose flour
How to make it
- The Butter Secret: Cream the softened butter and sugar together for at least 5 minutes using a stand mixer. You want the mixture to be pale, fluffy, and significantly increased in volume. This aeration is what gives the cake its lift.
- Egg Addition: Add the eggs one at a time, beating well after each addition. If the mixture looks curdled, add a tablespoon of your measured flour to bring it back together.
- Flavoring: Stir in the vanilla and salt.
- The Flour Fold: Turn the mixer to the lowest setting and add the flour gradually. Mix only until just combined. Over-mixing at this stage will result in a tough, rubbery cake.
- Prep the Pan: Heavily butter and flour a loaf pan. For an extra aesthetic touch, use a decorative bundt pan.
- Baking: Bake at 325°F (160°C) for 60-70 minutes. The lower temperature prevents the outside from burning before the dense interior is cooked.
- Testing: A skewer should come out clean. Let the cake rest in the pan for 20 minutes before inverting it onto a cooling rack.
How to make rotel dip?

Why we love this
Rotel dip is the ultimate “crowd-pleaser” that brings a sense of fun and approachability to any food board. It is unapologetically gooey, spicy, and savory. The way the melted cheese wraps around bits of seasoned meat and tangy diced tomatoes with green chilies is sheer snack perfection. It’s the kind of dish that disappears in minutes, leaving guests scraping the bottom of the bowl with their last tortilla chip, making it an essential element for a viral party spread.
Ingredients
- 1 lb Velveeta or high-quality melting cheese, cubed
- 1 can (10 oz) Ro-Tel Diced Tomatoes and Green Chilies (undrained)
- 1 lb ground sausage or lean ground beef
- 1 teaspoon taco seasoning or cumin
- Fresh cilantro for garnish
How to make it
- Browning: In a large skillet, brown the ground meat over medium-high heat. Use a wooden spoon to break it into very small crumbles. Drain the excess fat thoroughly.
- Seasoning: Stir the taco seasoning into the meat to ensure the flavor is built into the protein, not just the sauce.
- Melting: Lower the heat to medium-low. Add the cubed cheese and the entire can of Ro-Tel (do not drain the liquid; the tomato juice helps create the right consistency).
- Stirring: Stir constantly with a silicone spatula. Gentle heat is key; if the cheese gets too hot too fast, it can become oily or grainy.
- The Slow Cooker Option: If you want to keep it warm for a long party, transfer the mixture to a mini crockpot on the “warm” setting.
- Consistency Check: If the dip is too thick, stir in a splash of whole milk or heavy cream until it reaches your desired scoop-ability.
- Serving: Pour into a bowl and top with fresh cilantro and a few fresh jalapeño slices for a pop of green.
How to brew sun tea?
Why we love this
Sun tea is the epitome of slow, intentional living. There is something deeply poetic about letting the sun’s natural rays gently extract the flavor from tea leaves over several hours. The result is a mellow, smooth brew that lacks the bitterness sometimes found in boiled tea. Served in a large glass dispenser with floating lemon wheels and sprigs of mint, it becomes a functional piece of decor for your summer board, glowing like liquid amber in the light.
Ingredients
- 8-10 black or herbal tea bags
- 1 gallon of filtered water
- Fresh mint sprigs
- 1 lemon, thinly sliced
- Honey or simple syrup to taste
How to make it
- The Vessel: Use a very clean 1-gallon glass jar or dispenser. Plastic can leach flavors when heated by the sun, so glass is essential for both flavor and aesthetics.
- Loading: Fill the jar with cool, filtered water. Remove the paper tags from the tea bags and drop them in, or tie the strings to the handle of the jar.
- Steeping: Place the jar in a spot that receives direct, intense sunlight (like a porch or a sunny windowsill). Let it sit for 3 to 5 hours. You will see the color slowly bleed out of the bags and swirl into the water.
- Timing: Do not exceed 5 hours, as the tea can begin to develop bacteria if left in the lukewarm sun for too long.
- Infusing: Once the tea is a deep amber color, remove the tea bags. Add your lemon slices and mint sprigs while the tea is still warm to help them release their oils.
- Sweetening: Add your liquid sweetener now so it dissolves easily.
- Chilling: Refrigerate immediately. Serve over plenty of ice to maintain that crisp, refreshing temperature.
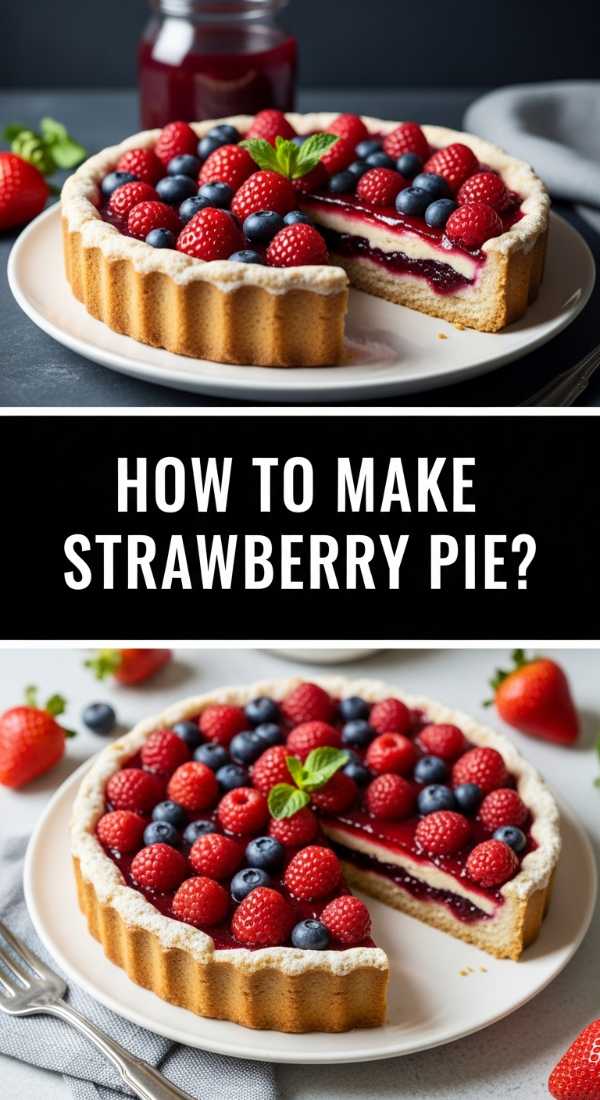
How to make strawberry pie?
[IMAGE_10]
Why we love this
A fresh strawberry pie is a celebration of peak-season produce. Unlike baked fruit pies, this version uses a glossy, ruby-red glaze to coat fresh, uncooked berries, preserving their natural snap and bright, floral sweetness. Nestled in a buttery, flaky crust and topped with a cloud of whipped cream, it is the crown jewel of any dessert spread. Each slice is a vibrant explosion of red that looks stunning on a board and tastes like the very essence of summer.
Ingredients
- 1 pre-baked 9-inch pie crust
- 6 cups fresh strawberries (hulled and halved)
- 1 cup sugar
- 3 tablespoons cornstarch
- 1 cup water
- 1 small package (3 oz) strawberry gelatin
- Whipped cream for serving
How to make it
- The Crust: Blind bake your pie crust until it is golden brown and completely crisp. A soggy bottom will ruin the fresh berry experience. Let it cool entirely.
- The Berries: Select the reddest, most fragrant strawberries. Wash them, hull them, and ensure they are bone-dry before putting them in the crust. Moisture on the berries will prevent the glaze from sticking.
- The Glaze Base: In a small saucepan, whisk together sugar, cornstarch, and water. Bring to a boil over medium heat, stirring constantly.
- Thickening: Continue to cook for about 2 minutes until the mixture becomes thick and clear. It should look like a heavy syrup.
- The Color: Remove from heat and stir in the dry strawberry gelatin powder until dissolved. This provides the iconic red color and helps the pie set firmly.
- Assembly: Arrange the fresh berries in the cooled crust. Pour the warm (not hot) glaze evenly over the strawberries, ensuring you get into all the nooks and crannies.
- Setting: Refrigerate the pie for at least 3-4 hours until the glaze is firm. Serve with a massive dollop of homemade whipped cream.
The Art of the Final Spread
Creating a viral food board is about more than just the recipes; it’s about the arrangement. Place your larger bowls—like the Rotel dip and chicken salad—first to create anchors. Fill in the gaps with the colorful watermelon salad and slices of pound cake. Don’t be afraid to let colors bleed into each other and to use fresh herbs as “fillers” to give the board a lush, overflowing look. Remember, the best boards are the ones that invite people to dig in, get a little messy, and enjoy the beautiful flavors of life together.