

Have you ever walked into a room and felt an immediate sense of peace, like the walls themselves were giving you a warm hug? We’ve all scrolled through those viral home tours, sighing over the perfect balance of texture, light, and personality that seems so effortless yet completely unattainable. Our homes are more than just structures; they are the backdrop to our most precious memories, and the wall aesthetic we choose sets the entire rhythm of our daily lives.
Creating a viral-worthy home isn’t about spending a fortune; it’s about intentionality and the tactile experience of your space. It is about how the morning light hits a textured plaster or how a burst of greenery can make a cramped apartment feel like a botanical sanctuary. In this guide, we are diving deep into the art of the wall, turning every vertical surface into a conversation piece that reflects your unique soul.
How to Style a Green Wall Design for Refreshing Indoor Vibes
Why we love this
There is something inherently healing about bringing the outdoors in, and a living green wall is the ultimate expression of that connection. Imagine the subtle, earthy aroma of damp moss and fresh ferns wafting through your living room while the vibrant, multi-tonal greens provide a visual rest for tired eyes. It’s not just a decoration; it’s a breathing, oxygen-producing masterpiece that hums with life, making your home feel like a lush, secluded glade far away from the bustle of the city.
Essential Elements:
- Modular wall planters or a pocket system.
- Selection of low-light plants (Pothos, Philodendron, Ferns).
- High-quality organic potting soil mixed with perlite.
- Integrated drip irrigation system or a long-neck watering can.
- Full-spectrum LED grow lights for darker corners.
How to make it
- Begin by selecting a wall that can support the weight of wet soil; ideally, install a moisture-resistant barrier like a PVC sheet over the drywall to prevent rot.
- Mount your modular bracket system, ensuring it is perfectly level using a laser level; use heavy-duty wall anchors since the structure will become significantly heavier once watered.
- Prepare your plants by gently removing them from their nursery pots and loosening the root balls to encourage outward growth into the new system.
- Pack the planter pockets with a well-draining soil mix, inserting the largest plants at the bottom to create a foundation and trailing vines at the top for a waterfall effect.
- Install your irrigation lines, checking for clogs or leaks, and set a timer for early morning watering to allow the foliage to dry throughout the day.
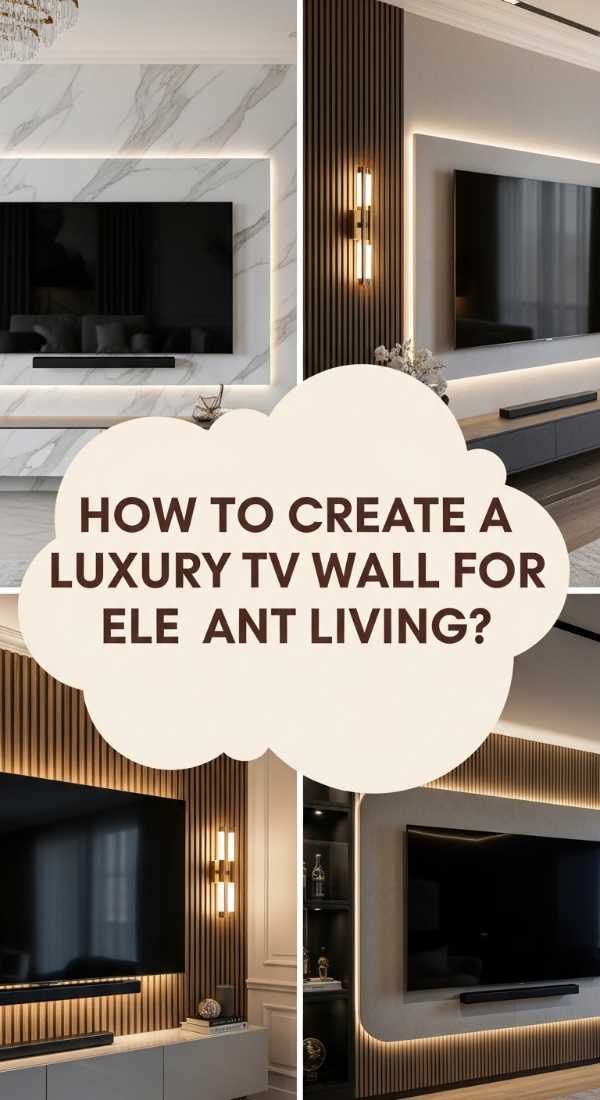
How to Create a Luxury TV Wall Design for Elegant Home Entertainment
Why we love this
The television is often the elephant in the room, but a luxury TV wall transforms it into a sophisticated focal point. Picture sleek, book-matched marble slabs or rich, dark walnut slats backlit by a warm, amber glow that eliminates harsh glare. The texture of the stone or wood adds a layer of quiet opulence, making movie nights feel like an exclusive cinematic experience in a high-end lounge where every detail is curated for comfort and style.
Essential Elements:
- Large-format porcelain tiles or wood slat panels.
- Recessed LED strip lighting with a dimmer switch.
- Ultra-slim articulating wall mount.
- In-wall cable management conduits.
- Floating media console in a matte finish.
How to make it
- Start by mapping out the exact dimensions of your TV and the surrounding panels on the wall using painter’s tape to visualize the final scale.
- Install the recessed conduit boxes behind where the TV will sit and at the floor level to hide all power and HDMI cables completely from view.
- Apply your chosen cladding—if using stone, use a high-bond thin-set mortar; if using wood slats, use a combination of construction adhesive and finish nails for a seamless look.
- Mount the LED strips into a recessed channel along the perimeter of the feature wall to create a soft halo effect that adds depth and hides any wall imperfections.
- Hang the TV on its mount, ensuring it is centered within the frame of the panels, and use a spirit level to guarantee a perfectly horizontal alignment.
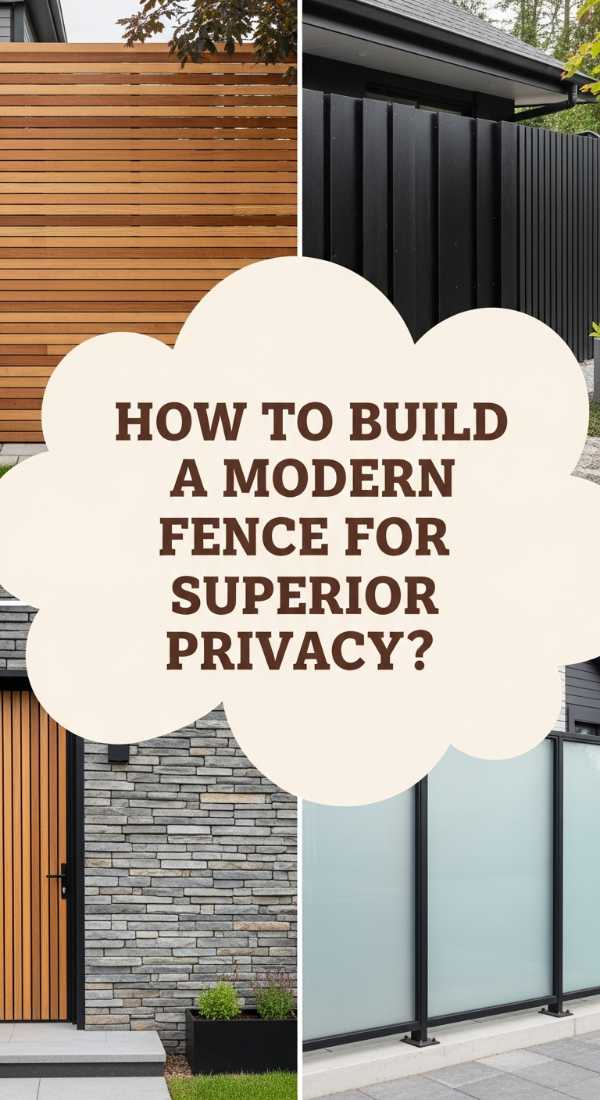
How to Build a Modern Fence Wall Design for Superior Outdoor Privacy
Why we love this
A modern fence is more than a boundary; it is a frame for your outdoor life that offers a sense of security and architectural beauty. The scent of stained cedar or the cool touch of matte black metal slats creates an outdoor room that feels private and expensive. It catches the shifting shadows of the afternoon sun, creating a rhythmic pattern that turns your backyard into a minimalist retreat where you can truly breathe and disconnect.
Essential Elements:
- Horizontal cedar or composite slats.
- Powder-coated aluminum posts.
- Stainless steel wood screws.
- Concrete mix for post foundations.
- UV-resistant outdoor wood stain or sealer.
How to make it
- Dig post holes every 6 to 8 feet, reaching below the frost line to ensure stability; use a post-hole digger for clean, vertical sides.
- Set the aluminum posts in concrete, using a plumb bob to ensure they are perfectly vertical, and allow the concrete to cure for at least 48 hours before adding weight.
- Install the horizontal slats starting from the top and working down, using 1/2 inch spacers between each board to allow for airflow and wood expansion.
- Pre-drill all holes in the wood to prevent splitting, and use a countersink bit so the screw heads sit flush or slightly below the surface for a professional finish.
- Apply a high-quality stain using a sprayer for even coverage, focusing on the end grains of the wood to prevent moisture absorption and graying.
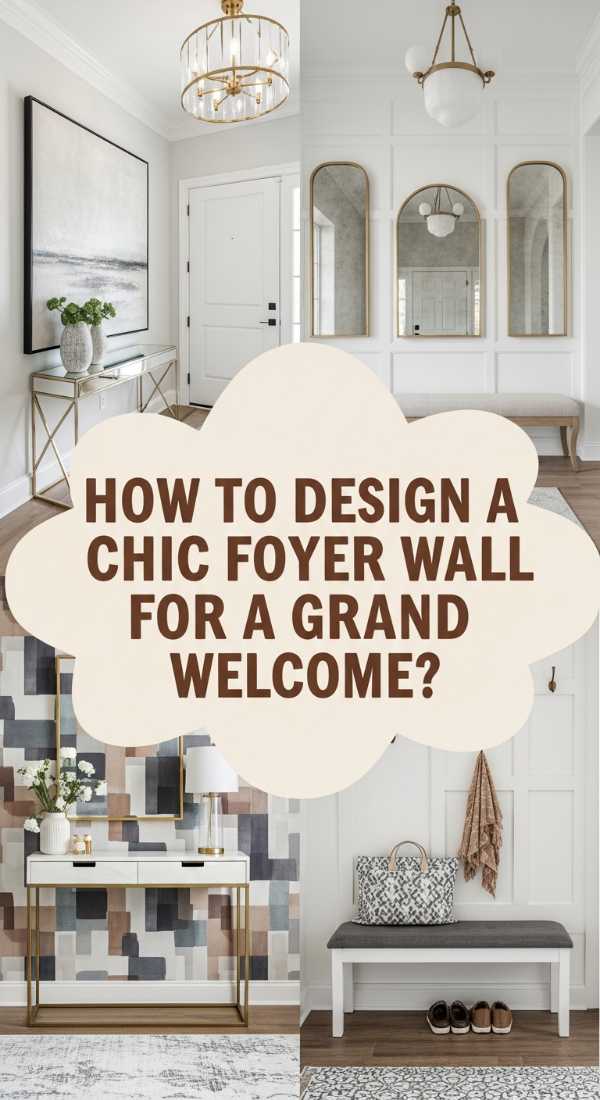
How to Design a Chic Entrance Foyer Wall for a Grand Welcome

Why we love this
Your foyer is the first chapter of your home’s story, and a chic wall design ensures it’s a captivating one. We love the way a well-placed oversized mirror can double the light in a hallway, reflecting the smile of a guest as they enter. Combined with a textured limewash paint or delicate molding, it creates an atmosphere of curated warmth that says, “you are welcome here,” before you’ve even said a word.
Essential Elements:
- Limewash paint or high-end textured wallpaper.
- Statement wall-mounted mirror.
- Minimalist floating shelf or narrow console table.
- Designer wall sconces for ambient lighting.
- Decorative hooks or a small piece of abstract art.
How to make it
- Prepare the wall by sanding down any bumps and applying a dedicated primer if you are using limewash, as the mineral paint needs a specific surface to bond with.
- Apply the limewash in a “criss-cross” motion using a large masonry brush, building up thin layers to create the cloudy, mottled texture that gives the wall its depth.
- Measure the exact center point of the wall at eye level (roughly 57-60 inches) to hang your mirror, ensuring you use heavy-duty anchors suited for your wall type.
- Hardwire the sconces on either side of the mirror to create a balanced, symmetrical look that provides soft, flattering light for anyone entering the home.
- Style the floating shelf with one or two high-quality items—a ceramic bowl for keys and a single branch in a vase—to maintain a clean, viral aesthetic.
How to Upgrade Living Room Wall Designs for a Sophisticated Mood
Why we love this
Upgrading your living room walls with architectural details like picture frame molding adds a timeless, European elegance that never goes out of style. The way the shadows play within the recessed panels during the golden hour creates a sense of history and depth, even in a brand-new build. It makes the room feel anchored and intentional, providing a sophisticated backdrop for both quiet reading and lively evening cocktails.
Essential Elements:
- Primed MDF or pine decorative molding.
- Miter box and saw for 45-degree angle cuts.
- Construction adhesive (Liquid Nails) and a brad nailer.
- Caulk and wood filler.
- Premium matte finish paint in a moody hue.
How to make it
- Design your panel layout on paper first, ensuring the spacing between the boxes and the ceiling/floor is consistent (usually 3-4 inches).
- Mark the wall with a pencil and level, then cut your molding pieces at 45-degree angles using the miter saw for perfect corner joins.
- Apply a thin bead of adhesive to the back of the molding and secure it to the wall with the brad nailer, checking for level at every single step.
- Fill the nail holes with wood filler and caulk the seams where the molding meets the wall to create a seamless, built-in appearance.
- Once the caulk is dry, paint the entire wall—molding included—in a single color to give it that modern, monolithic, and high-end sophisticated look.
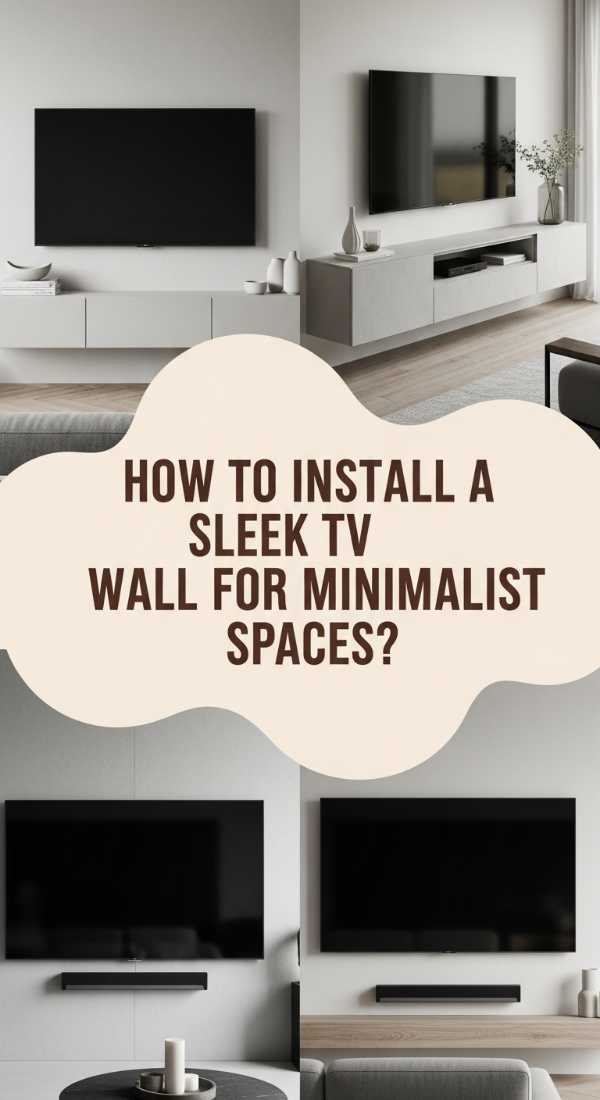
How to Install a Sleek Modern TV Wall Design for Minimalist Spaces

Why we love this
For the minimalist at heart, a sleek TV wall is all about the power of subtraction. We love how a hidden mounting system and a monochromatic color palette can make a large screen almost disappear into the design. It’s about clean lines and the absence of clutter, allowing the architecture of the room to shine while providing a high-tech entertainment hub that doesn’t overwhelm the visual senses.
Essential Elements:
- Recessed “In-Wall” TV mount.
- Matte black or dark grey accent paint.
- Hidden storage panels or a handle-less media unit.
- Soundbar with a flush-mount bracket.
- Velcro cable ties and wire sleeves.
How to make it
- Cut an opening in the drywall between the studs to install a recessed media box, which allows the TV to sit almost perfectly flush against the wall.
- Paint the designated TV area in a dark, matte shade; this helps the black screen blend in when it’s turned off, reducing its visual impact on the room.
- Run all power and data cables through the wall, using brush-plate inserts to keep the entry and exit points looking professional and tidy.
- Attach the soundbar directly below the TV with no visible gap, ensuring the wires are fed directly back into the wall through a dedicated hole.
- Install handle-less cabinetry at the base to house gaming consoles or routers, ensuring you use “push-to-open” hardware for a completely smooth exterior.
How to Detail an Artistic Green Wall Design for Lush Sanctuary Feelings

Why we love this
An artistic green wall takes the concept of a vertical garden and turns it into a curated piece of art. By mixing different textures—the soft fuzziness of reindeer moss, the waxy sheen of succulents, and the trailing elegance of ivy—you create a tapestry of life. It’s a sensory experience that feels like a secret garden hidden within your home, providing a lush sanctuary where the air feels cleaner and the world feels quieter.
Essential Elements:
- Custom wood or metal frame.
- Preserved moss and air plants (for low maintenance).
- Hot glue gun or floral wire.
- Cork backing or foam board.
- Spotlight lighting to highlight textures.
How to make it
- Build or purchase a deep-set frame and line the back with a lightweight foam board or cork sheet to provide a surface for attaching the plants.
- Lay the frame flat on the floor and map out your design, placing larger “anchor” plants first to create a sense of movement and flow across the canvas.
- Use a high-temperature glue gun to secure preserved mosses in varied colors (forest green, lime, and chartreuse) to cover every inch of the backing.
- Tuck in air plants or dried eucalyptus branches using floral wire, creating 3D elements that break the plane of the frame for added artistic depth.
- Once the glue is fully set, mount the frame using a heavy-duty z-bar hanger, which allows the piece to sit flush and secure against the wall.
How to Craft a High End Fence Wall Design for Architectural Curb Appeal
Why we love this
High-end fencing is the jewelry of your home’s exterior. We are obsessed with the combination of raw materials like smooth poured concrete and warm tropical hardwoods like Ipe. It creates an architectural statement that signals quality and craftsmanship from the sidewalk. It’s a design that evolves with the light, casting long, dramatic shadows and providing a stunning first impression that lasts.
Essential Elements:
- Ipe or Teak horizontal boards.
- Poured concrete pillars or smooth-rendered masonry.
- Black stainless steel hardware.
- Low-voltage integrated cap lighting.
- Precision spacing jigs.
How to make it
- Construct concrete forms for your pillars, ensuring they are reinforced with rebar for longevity, and pour a smooth, high-strength concrete mix.
- Once the concrete has cured for 7 days, remove the forms and sand any rough edges for a high-end, “silky” stone-like finish.
- Attach heavy-duty metal U-channels to the sides of the pillars to hold the wooden slats; this prevents the need for visible screws on the front of the fence.
- Slide the hardwood slats into the channels, using 1/4 inch spacers to maintain a perfect, consistent gap throughout the entire run.
- Wire in low-voltage LED lights under the top cap of the fence to wash the wood grain in light at night, highlighting the architectural detail.
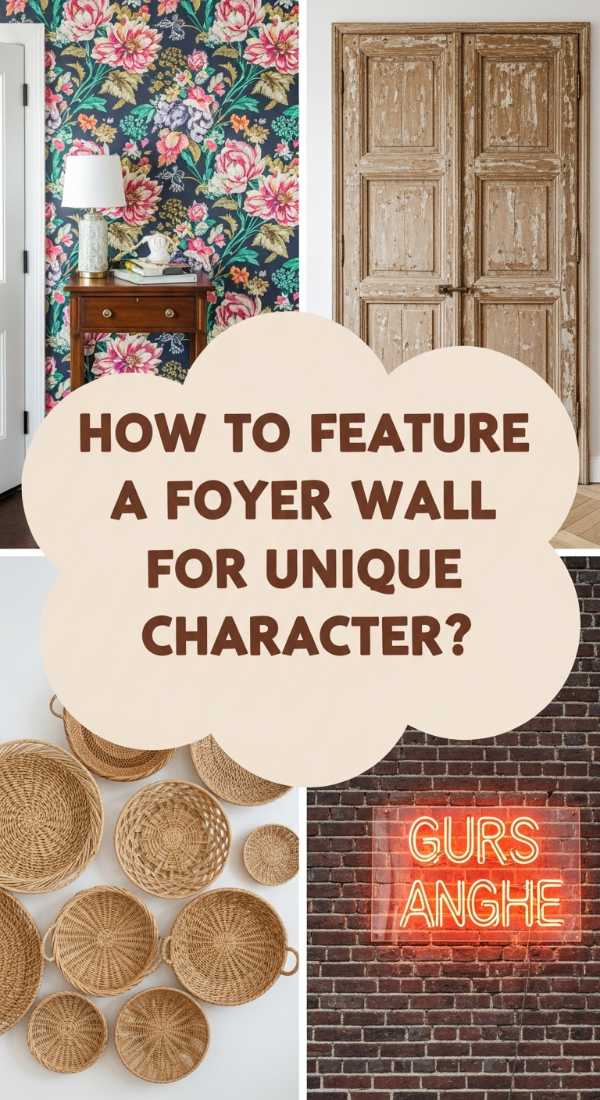
How to Feature a Decorative Entrance Foyer Wall Design for Unique Character

Why we love this
A decorative entrance wall is your chance to be bold and showcase your personality. Whether it’s a vintage-inspired gallery wall or a single, stunning piece of oversized textile art, this design choice adds unique character that sets your home apart. We love how a mix of textures—metal, glass, and fabric—can create a tactile greeting that feels both storied and fresh, inviting guests to linger and look closer.
Essential Elements:
- Assorted vintage frames or a large textile hanging.
- Picture-hanging rail system or brass nails.
- Battery-operated LED picture lights.
- Small wall-mounted pedestal for a sculpture.
- Coordinating paint color for the “backing” wall.
How to make it
- Paint your foyer wall in a color that provides high contrast to your art—think a deep navy or a warm terracotta to make the pieces pop.
- Lay your collection out on the floor first to find the perfect arrangement; take a photo of the layout to use as a guide during installation.
- Start with the largest, central piece and work outwards, keeping the spacing between frames roughly 2-3 inches for a cohesive “gallery” look.
- Install battery-operated picture lights above the most significant pieces to add a professional, museum-like quality without the need for an electrician.
- Add a small, inconspicuous wall pedestal at chest height to display a 3D object like a ceramic bust or a piece of driftwood to break the 2D plane.
How to Plan a Statement Living Room Wall Design for Bold Interior Impact
[IMAGE_10]
Why we love this
The statement wall is the heartbeat of a room. It’s a fearless design choice, like a hand-painted mural or a floor-to-ceiling library, that demands attention and sparks conversation. We love the way a bold statement wall can define the function of a space, turning a standard living room into a sophisticated library or a modern art gallery. It’s an investment in your home’s “wow” factor that pays off every time you walk into the room.
Essential Elements:
- Custom built-in shelving or a high-contrast mural.
- Integrated library ladder (if using shelves).
- Bold paint colors or high-end designer wallpaper.
- Adjustable track lighting for focused illumination.
- Oversized decorative objects (vases, books, globes).
How to make it
- If opting for built-ins, use a cabinet grade plywood and finish with a high-gloss lacquer for a luxury look that reflects light beautifully.
- Secure the shelving units to the wall studs using L-brackets hidden behind the shelves to ensure they can handle the weight of a full book collection.
- For a mural approach, use a projector to trace your design onto the wall, ensuring the scale is appropriate for the height of your ceilings.
- Install a black track lighting system on the ceiling 2 feet away from the wall, angling the heads to highlight specific shelves or areas of the mural.
- Style the wall using the “rule of thirds,” mixing vertical books, horizontal stacks, and negative space to keep the eye moving and prevent the design from feeling cluttered.
Conclusion
Transforming your home’s walls is more than a weekend project; it’s a journey toward creating a space that truly resonates with who you are. Whether you choose the living vibrancy of a green wall, the quiet luxury of marble and wood, or the bold personality of a gallery foyer, these designs turn your home into a sanctuary that is as functional as it is beautiful. Remember, the most viral-worthy homes aren’t just the ones that look good in photos—they’re the ones that feel like home. So, grab your tools, pick a wall, and start creating your own masterpiece.