

The Ultimate Backyard Organization Board That’s Going Viral
There is something inherently magical about that first step outside on a warm Saturday morning, coffee in hand, as the sun begins to dance across the surface of the pool. For years, my backyard was a chaotic landscape of sun-faded noodles, soggy towels draped over mismatched chairs, and the constant, low-grade stress of tripping over a rogue inflatable flamingo. I realized that the ‘vacation feeling’ I was chasing wasn’t about the size of the pool or the price of the patio furniture; it was about the serenity that only comes with true, intentional organization.
That is why I created the Backyard Organization Board—a visual and functional masterplan that has completely transformed my outdoor living space from a cluttered mess into a high-end sanctuary. This isn’t just about cleaning up; it’s about curate-ing an experience that rivals a five-star Mediterranean resort. Since sharing glimpses of this system on social media, the response has been overwhelming, and today I am peeling back the curtain to show you exactly how to achieve this viral look in your own slice of paradise.
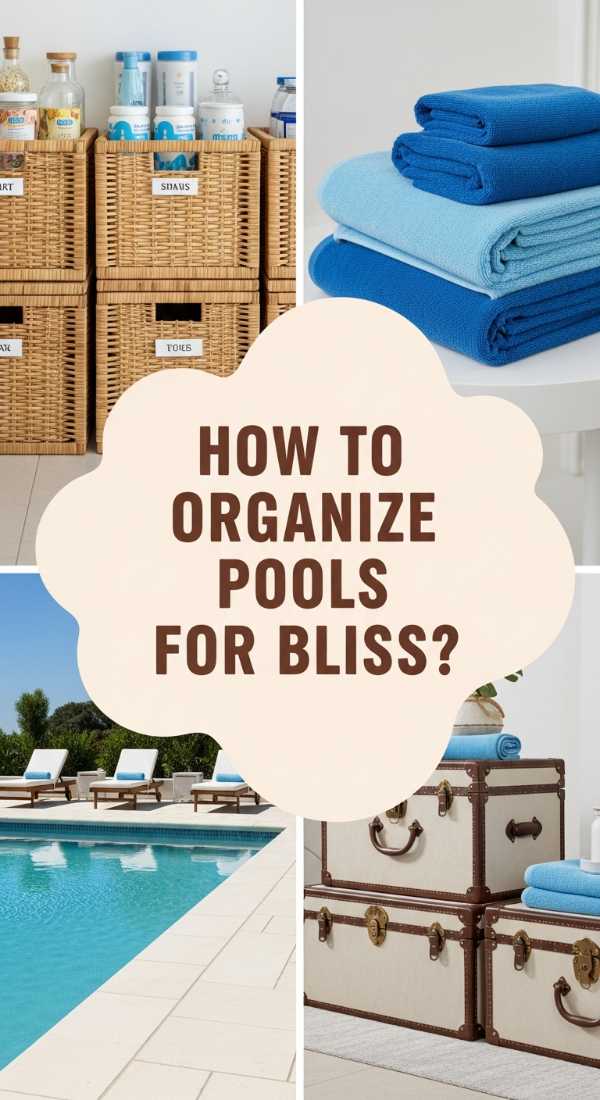
How to Organize a Pool Area for Absolute Backyard Bliss
Why we love this
We love this approach because it treats the pool area as an extension of the home’s interior design, creating a seamless transition that feels expensive and deeply intentional. There is a specific sensory joy in seeing a clean perimeter where the only sound is the rhythmic splashing of water rather than the scraping of plastic bins. The visual clarity of a well-organized pool deck allows your eyes to rest on the natural beauty of your landscaping, while the scent of salt and sunscreen lingers in a space that feels curated, airy, and grounded in total peace.
Essential Elements:
- Weather-resistant resin storage bins in neutral tones
- Custom waterproof labels for easy sorting
- Designated ‘zones’ for active play and quiet lounging
- Heavy-duty outdoor baskets for heavy pool toys
- Uniform sunscreen and lotion dispensers
How to make it
- Begin by auditing every single item in your pool area; discard any punctured floats or sun-bleached toys that no longer spark joy or function correctly.
- Divide your space into three distinct zones: The Wet Zone (immediate pool perimeter), The Lounge Zone (seating area), and The Utility Zone (where the heavy lifting happens).
- Install large, ventilated resin bins in the Utility Zone to house bulky items like vacuums and skimmer nets, ensuring they are accessible but hidden from the primary line of sight.
- Place a set of matching, weighted baskets near the Lounge Zone for daily essentials like goggles and dive rings, using labels to ensure everything returns to its home at sunset.
- Finish the look by positioning your furniture to follow the natural flow of traffic, ensuring there are clear paths of at least 36 inches to prevent a cramped, cluttered feeling.
How to Build a Chic Towel Station for Ultimate Summer Vibes

Why we love this
This towel station is the crown jewel of the viral organization board because it combines high-fashion aesthetics with rugged, outdoor durability. Imagine the soft, tactile sensation of grabbing a warm, sun-dried towel from a beautiful wooden structure that smells faintly of cedar and expensive citrus candles. It eliminates the ‘towel-on-the-fence’ eyesore and replaces it with a structured, boutique-hotel element that makes every guest feel pampered from the moment they step out of the water and into the plush embrace of a perfectly placed wrap.
Essential Elements:
- Reclaimed cedar or teak wood planks
- Heavy-duty matte black hooks
- Outdoor-grade wood sealant or stain
- A small side table for ‘fresh’ and ‘used’ bins
- Potted lavender or rosemary for natural fragrance
How to make it
- Select your wood source, ideally cedar or teak for their natural resistance to rot and moisture; sand the planks until they are buttery smooth to the touch.
- Apply two coats of a high-quality UV-resistant outdoor sealant, allowing at least 24 hours between coats to ensure the wood is fully protected against the elements.
- Measure and mark your hook placements at least 10 inches apart to allow towels enough space to breathe and dry efficiently without overlapping.
- Secure the station to a sturdy vertical surface, such as a fence post or exterior wall, using galvanized screws that won’t rust or stain the wood over time.
- Place a decorative, breathable wicker basket at the base for discarded wet towels, and top the station with a small planter of fragrant herbs to elevate the sensory experience.
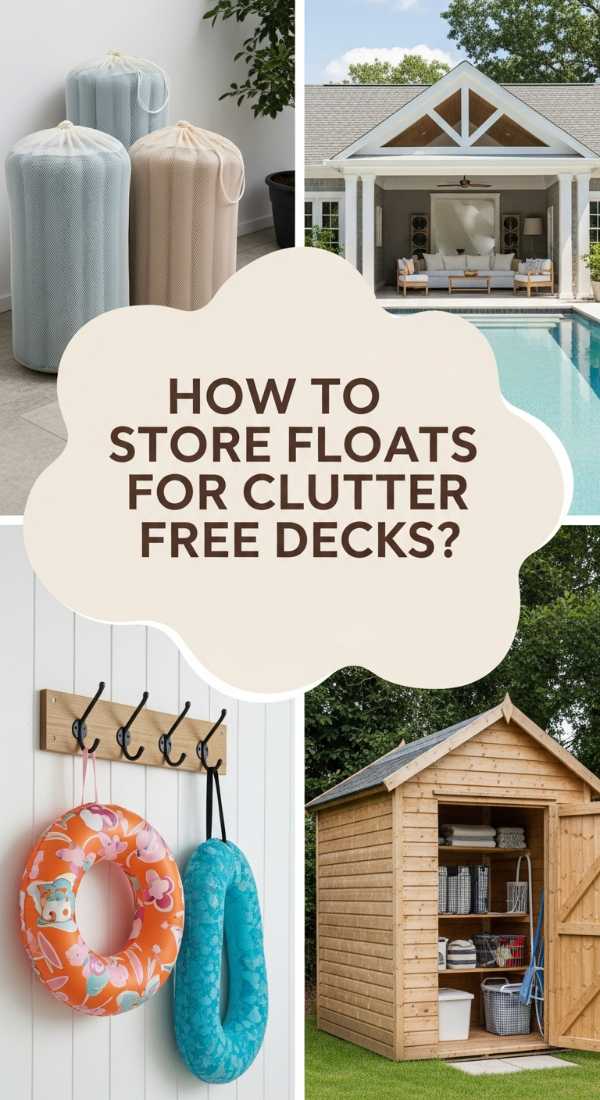
How to Store Pool Floats for a Clutter Free Oasis
Why we love this
There is nothing that ruins a backyard aesthetic faster than a pile of colorful plastic floats drifting across the lawn like tumbleweeds. We love this storage solution because it tames the chaos of varying shapes and sizes, turning a jumble of vinyl into a neat, organized collection. The feeling of walking across a clear, unobstructed deck is incredibly liberating, allowing the texture of the cool stone or warm wood underfoot to be the primary focus, while your favorite floats remain protected from the wind and sun damage that leads to premature fading.
Essential Elements:
- PVC piping or specialized float racks
- Bungee cords or mesh netting
- Wall-mounted brackets for vertical lift
- UV-protective spray for float longevity
- A handheld electric pump for quick deflation
How to make it
- Identify a ‘dead space’ in your yard, such as the area behind a shed or a narrow side yard, to serve as your dedicated float repository.
- Construct a simple vertical rack using 1-inch PVC pipes, creating slots that allow floats to stand upright rather than being stacked on top of one another.
- If space is limited, install heavy-duty wall brackets and use mesh netting to create a ‘float hammock’ that keeps inflatables off the ground and allows for air circulation.
- Group floats by size and frequency of use, keeping the most popular items at eye level for easy grabbing by kids and adults alike.
- Always rinse floats with fresh water to remove chlorine before storing, as this prevents the vinyl from sticking together and preserves the vibrant colors for seasons to come.
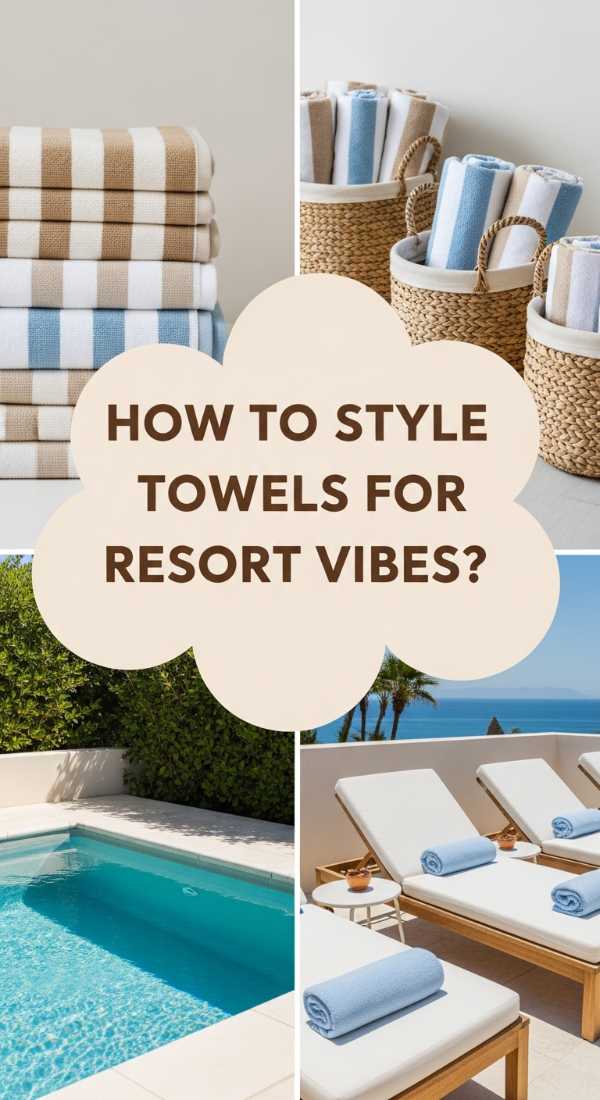
How to Style Pool Towels for Luxury Resort Feelings
Why we love this
Styling towels is the secret sauce that takes a backyard from ‘nice’ to ‘extraordinary.’ We love this technique because it plays with visual rhythm and color theory to create a sense of calm and luxury. The sight of perfectly rolled, uniform towels in shades of crisp white or soft seafoam evokes an immediate emotional response of relaxation and indulgence. It’s a small detail that pays massive dividends in how you feel when you use the space, transforming a simple chore into an act of self-care that makes every swim feel like a spa treatment.
Essential Elements:
- High-gsm (grams per square meter) cotton towels
- A consistent color palette (monochromatic or coastal)
- Woven seagrass or hyacinth baskets
- Small wooden tags or labels
- Fabric softener with a clean, linen scent
How to make it
- Commit to a single color or a very tight palette of 2-3 shades; this uniformity is what creates the professional ‘resort’ look instantly.
- Use the ‘Hotel Roll’ technique: fold the towel in half lengthwise, then roll it tightly from one end to the other, ensuring the edges are tucked in for a clean cylinder shape.
- Place the rolled towels horizontally into a deep, textured basket, stacking them in a pyramid or grid pattern for maximum visual impact.
- Position the basket in a shaded area near the primary lounging spot, ensuring it is elevated off the ground to prevent moisture wicking from the deck.
- Rotate the towels weekly, even if they aren’t used, to keep them smelling fresh and to prevent any dust or outdoor debris from settling into the fibers.
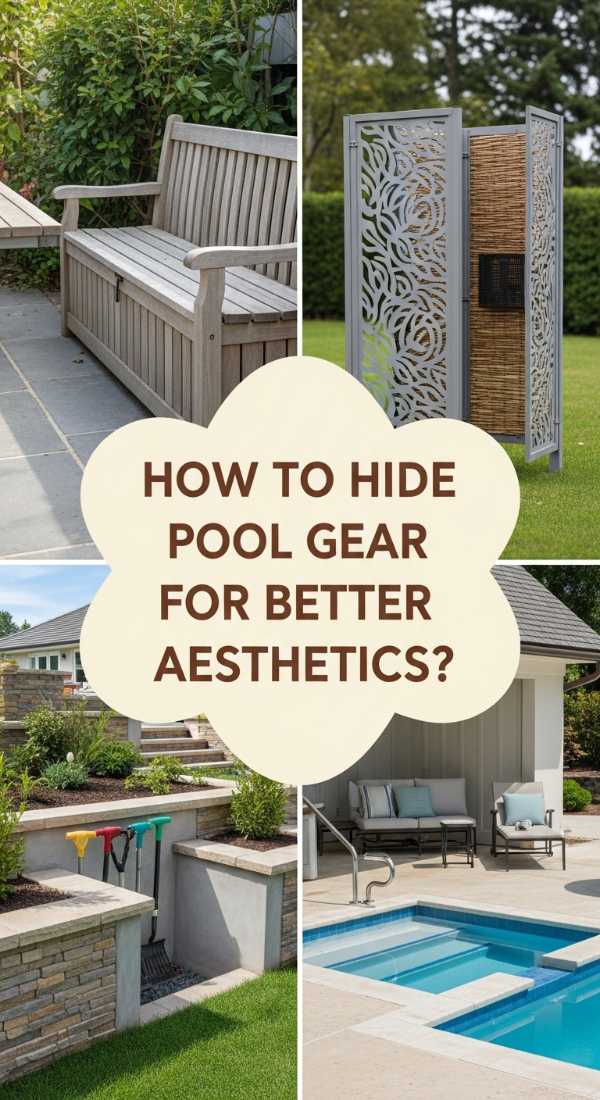
How to Create Secret Pool Storage for a Seamless Aesthetic
Why we love this
The beauty of secret storage lies in its mystery; it allows you to have all the functional necessities of pool ownership without any of the visual noise. We love this because it appeals to the minimalist heart, offering a clean, ‘blank canvas’ look where everything has a place but nothing is seen. There is a profound sense of satisfaction in knowing that your chemicals, pumps, and cleaning tools are mere inches away, yet your guests only see beautiful architectural lines and lush greenery, maintaining the illusion of an effortless paradise.
Essential Elements:
- Louvered privacy screens
- Faux-stone or wood-paneled storage boxes
- Hinged benches with interior compartments
- Camouflaged utility covers
- Magnetic latches for a hardware-free look
How to make it
- Evaluate your utility equipment and measure the footprint needed for a custom enclosure that provides at least 6 inches of clearance for ventilation.
- Build or purchase a louvered screen that matches your home’s siding or deck material, ensuring the slats are angled to provide airflow while blocking the view.
- Integrate storage into your seating by building ‘box benches’ with lids that double as lounge areas; use hydraulic hinges to make opening and closing effortless.
- Use ‘deck boxes’ that are specifically designed to mimic natural textures like stone or wicker, placing them symmetrically to make them look like intentional design features.
- Paint any visible pipes or utility boxes in a matte dark green or black to help them recede into the shadows of your landscaping.
How to Craft DIY Float Holders for Sustainable Backyard Fun
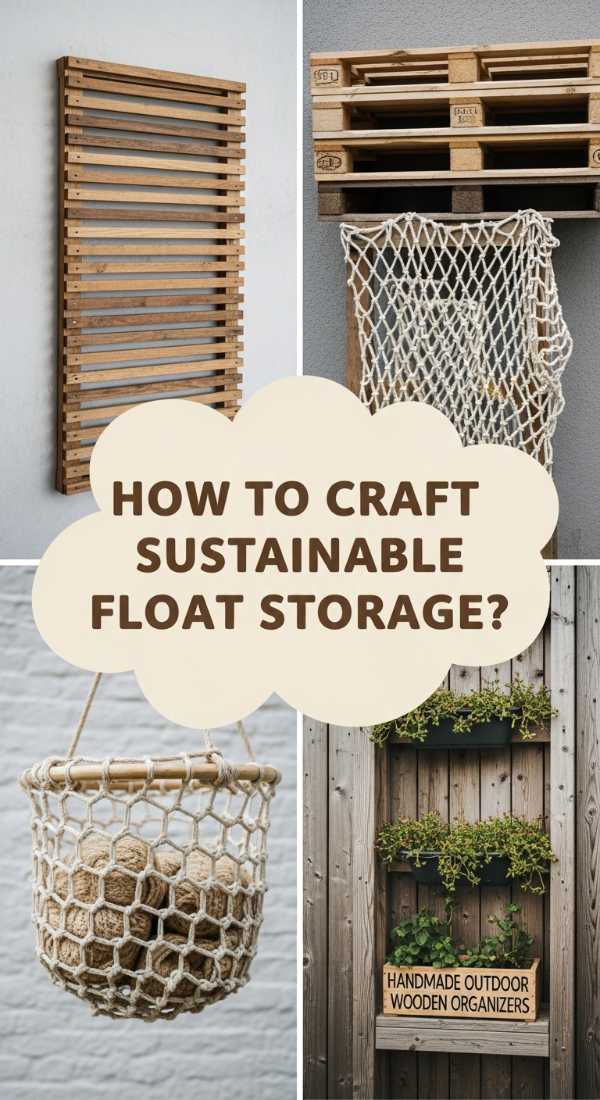
Why we love this
This DIY approach is for the eco-conscious soul who finds beauty in repurposed materials and handmade charm. We love this because it adds a layer of ‘soul’ to the organization board, using natural textures like jute rope and weathered wood that feel grounded and authentic. There is a rustic, beachy aroma that comes with using natural fibers, and the handmade nature of these holders creates a conversation piece that feels far more special than anything you could buy at a big-box retailer, all while keeping your yard perfectly tidy.
Essential Elements:
- Thick manila or jute rope
- Stainless steel eye bolts
- Drill and masonry bits
- S-hooks for hanging smaller items
- Weatherproofing wax for the rope
How to make it
- Map out a series of vertical lines on an exterior wall or fence where you can hang oversized floats without them touching the ground.
- Install stainless steel eye bolts at the top and bottom of each designated line, ensuring they are screwed into a solid stud for maximum weight capacity.
- Thread your thick rope through the top eye bolt, securing it with a nautical knot (like a bowline), and pull it taut to the bottom bolt.
- Use smaller lengths of rope or S-hooks to create ‘loops’ along the main vertical line where the valves of the floats can be hooked or tucked.
- Apply a light coating of weatherproofing wax to the rope to prevent it from fraying or molding during the humid summer months.
How to Select Minimalist Towel Racks for Modern Poolside Living

Why we love this
For the modern enthusiast, minimalist towel racks offer a sleek, industrial edge that defines the ‘viral’ look of 2024. We love these for their sharp lines and matte finishes which contrast beautifully against the organic blue of the pool water. There is a satisfying weight to high-quality metal racks that suggests permanence and quality. They don’t just hold towels; they act as sculptural elements that frame the pool area, providing a clean, architectural silhouette that looks just as good empty as it does when draped with soft textiles.
Essential Elements:
- Powder-coated aluminum or stainless steel frames
- Freestanding ladder designs or wall-mounted bars
- Anti-slip rubber feet for pool deck safety
- Slim profiles for small-footprint areas
- Matte black or brushed gold finishes
How to make it
- Choose a rack with a ‘ladder’ design if you have multiple guests; the tiered bars allow for staggered drying which is essential for air circulation.
- Opt for powder-coated finishes, as these are specifically engineered to withstand the corrosive effects of chlorine and salt air without chipping.
- Position the rack in a high-sun area to utilize natural heat for faster drying, ensuring it is at least 5 feet away from the splash zone to keep dry towels dry.
- If using a freestanding model, ensure the base is weighted or wide enough to resist being tipped over by a stiff summer breeze.
- Clean the rack weekly with a mild soap and water solution to remove any mineral buildup from pool water, maintaining that pristine, matte finish.
How to Master Poolside Harmony for Total Relaxation
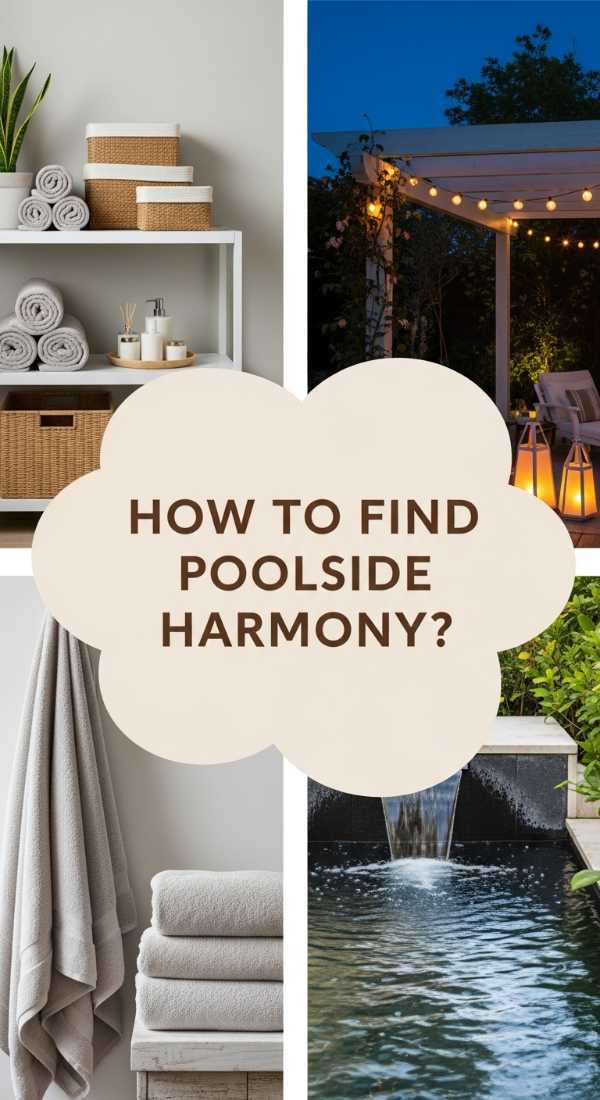
Why we love this
Mastering poolside harmony is less about the ‘stuff’ and more about the ‘flow’ of the energy in your backyard. We love this concept because it focuses on the psychological impact of organization—the way your heart rate slows down when you aren’t looking at a tangled hose or a messy pile of shoes. This is about creating a sensory experience where the sound of wind chimes, the scent of jasmine, and the visual order of your furniture work in symphony to transport you away from the stresses of daily life and into a state of deep, restorative rest.
Essential Elements:
- Zoned lighting (string lights, lanterns, and path lights)
- Scented outdoor candles or essential oil diffusers
- Plush, outdoor-rated throw pillows
- Strategic placement of potted plants for privacy
- A dedicated ‘tech-free’ bin for phones and devices
How to make it
- Begin by clearing all non-essential items from your line of sight when you are sitting in your primary lounging chair; if you can see it, it’s a distraction.
- Layer your lighting by using warm-toned LEDs at different heights: low path lights, mid-level lanterns on tables, and overhead string lights for a ‘canopy’ effect.
- Incorporate natural privacy barriers using tall grasses or potted palms to create a ‘cocoon’ feeling that shields you from neighbors and street noise.
- Create a ‘relaxation station’ with a small weather-proof box containing sunblock, a book, and a refreshing face mist, so you never have to leave your chair once you’ve settled in.
- Practice a ’10-minute reset’ every evening where you return all items to their designated zones, ensuring you wake up to a harmonious space every single morning.
How to Design Hidden Deck Storage for Clean Outdoor Spaces
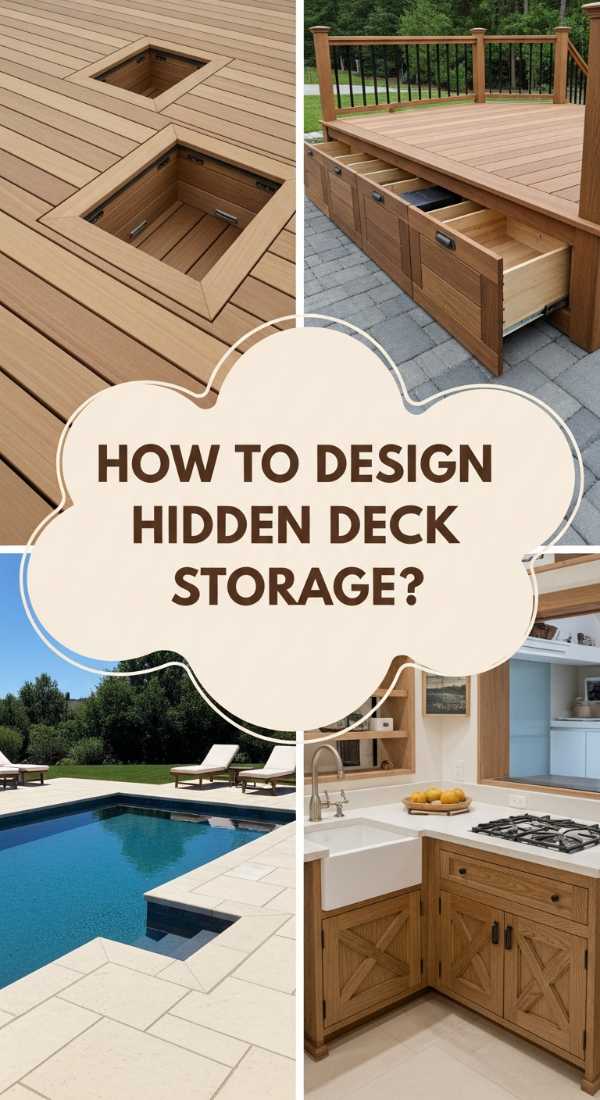
Why we love this
Hidden deck storage is the ultimate ‘pro-level’ move for a viral-worthy backyard. We love this because it utilizes the often-wasted space beneath your feet, turning a structural necessity into a brilliant organizational tool. There is something incredibly clever and satisfying about a trap door or a hidden drawer that glides out from under a step. It keeps the surface of your deck completely clear for entertaining, while housing everything from furniture covers to extra cushions in a space that is protected, dry, and entirely out of mind until needed.
Essential Elements:
- Heavy-duty drawer slides for under-deck access
- Hinged deck boards for trap-door style storage
- Waterproof liners for the interior compartments
- Matching deck hardware (hidden fasteners)
- Ventilation grates to prevent moisture buildup
How to make it
- Identify the highest point of your deck where there is at least 12 inches of clearance between the joists and the ground.
- Install a heavy-duty, outdoor-rated drawer system between the joists, ensuring the drawer face is finished with the exact same decking material for a seamless look.
- If building a trap-door, use a piano hinge for a low profile and ensure the ‘lid’ is reinforced to handle the same weight capacity as the rest of the deck.
- Line the storage cavity with a durable, waterproof membrane to protect your items from rising ground moisture and insects.
- Incorporate a small, discreet finger-pull or a magnetic latch so that no bulky handles interrupt the smooth surface of your beautiful decking.
How to Arrange Vertical Float Storage for Small Space Efficiency
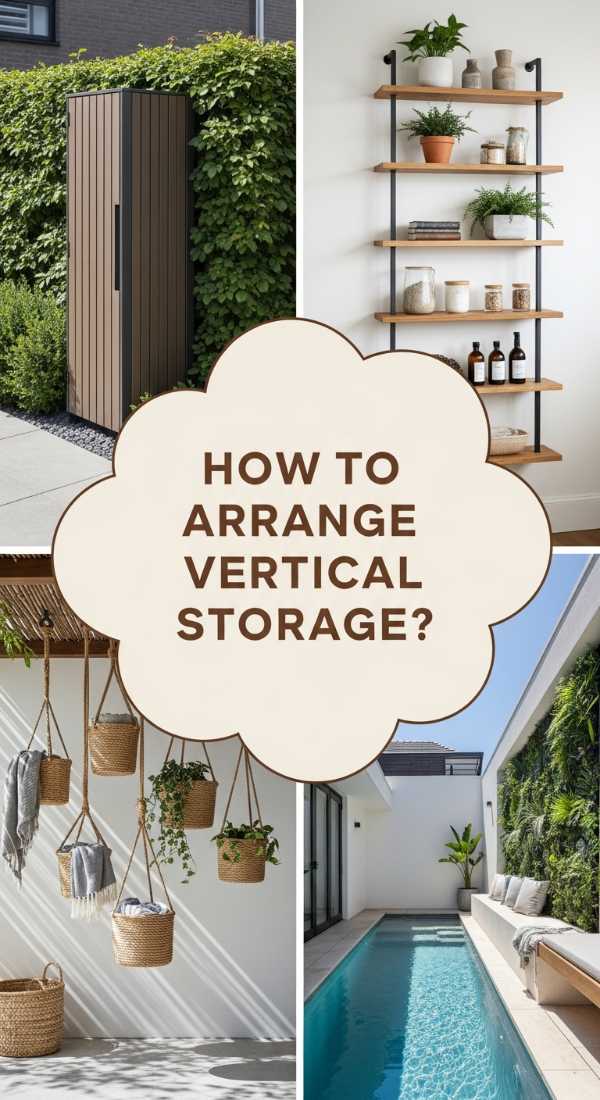
Why we love this
Vertical storage is the hero of the small backyard, and we love it for its sheer efficiency and graphic visual appeal. By taking your organization ‘up’ instead of ‘out,’ you reclaim valuable square footage for walking and lounging. There is a playful, art-gallery vibe to seeing colorful floats displayed vertically against a dark fence or a clean white wall. It turns your pool gear into a temporary art installation, celebrating the fun of summer while keeping the ground-level environment crisp, clean, and completely unobstructed for maximum movement.
Essential Elements:
- Heavy-duty wall hooks or ‘J-hooks’
- Cargo netting or bungee cords
- A sturdy fence or exterior wall
- Leveling tool for perfect alignment
- Weather-resistant mounting hardware
How to make it
- Measure the height of your tallest floats and mark a horizontal line across your fence or wall to serve as your mounting guide.
- Space your J-hooks approximately 24 inches apart, using a level to ensure the line is perfectly straight for that professional, viral aesthetic.
- For thinner floats, use two hooks side-by-side to ‘cradle’ the float; for thicker loungers, use a single heavy-duty hook through the handle or valve loop.
- If you have a collection of noodles, install a vertical PVC tube or a mesh bag attached to the wall to keep them upright and contained.
- Always hang floats with the ‘front’ facing out to create a uniform look, and group them by color for an extra ‘Instagrammable’ touch that pops against your backyard backdrop.
Conclusion
Transforming your backyard with the Ultimate Organization Board is more than just a home improvement project; it is a commitment to your own well-being. By implementing these viral-worthy strategies—from secret deck storage to chic towel stations—you are creating a space that breathes, inspires, and relaxes. Summer is fleeting, and every moment spent searching for a dry towel or tripping over a float is a moment lost. Take the time to organize your oasis today, and enjoy a season of absolute, unshakeable backyard bliss.