
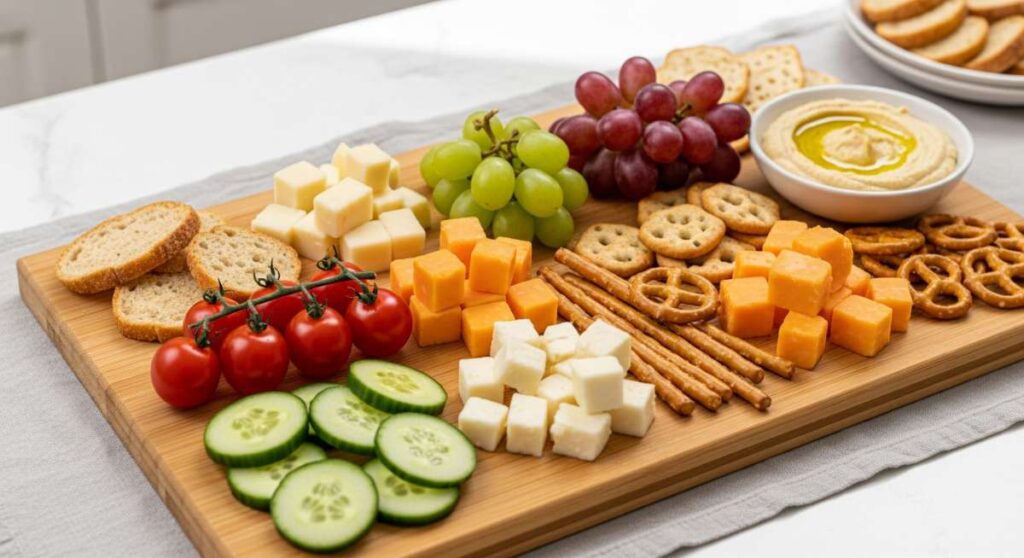
The Simple Food Board Trend You Need to Try This Weekend
There is something inherently magical about gathering around a table, isn’t there? Lately, my social media feeds have been overflowing with a trend that captures this feeling perfectly: the food board. It’s not just about cheese and crackers anymore; it’s about creating a curated, edible landscape that tells a story of the season and the milestones we celebrate. Whether you are hosting a graduation brunch or a cozy garden party, these boards are the ultimate way to slow down and savor the moment.
The beauty of this trend lies in its approachability. You don’t need to be a professional chef to assemble something that looks like a work of art. It’s about the textures, the vibrant colors of fresh produce, and that warm, fuzzy feeling of sharing a meal with the people you love. This weekend, I’m diving deep into the elements that make a board truly spectacular, from tart spring rhubarb to celebratory treats that mark life’s biggest achievements.
How to decorate graduation cakes?

Why we love this
A graduation cake is more than just a dessert; it is a centerpiece of achievement that glows with the pride of a major life milestone. We love the way a beautifully decorated cake can anchor a celebration board, offering a smooth, velvet-like texture of buttercream contrasted with the delicate crunch of gold leaf. The aroma of fresh vanilla and sugar wafting through the room instantly creates a festive atmosphere, while the sight of personalized touches makes the graduate feel truly seen and celebrated in their moment of glory.
Ingredients
- Pre-baked 3-layer cake
- Swiss meringue buttercream
- Edible gold leaf or metallic sprinkles
- Fresh, organic edible flowers
- Custom acrylic cake topper
- Piping bags and assorted tips (1M, 2D)
How to make it
- Begin by applying a thin ‘crumb coat’ of buttercream to your chilled cake layers. Use an offset spatula to smooth the frosting, ensuring no crumbs will peek through the final layer. Chill in the refrigerator for 30 minutes until firm.
- Apply a generous second layer of buttercream. For a professional look, use a bench scraper held at a 45-degree angle against the rotating cake stand to achieve perfectly vertical, smooth sides and sharp top edges.
- Prepare your piping bags with a star tip. Pipe small, elegant rosettes around the bottom perimeter of the cake, maintaining steady pressure to ensure uniform size.
- Using sterilized tweezers, carefully apply fragments of edible gold leaf to the sides of the cake. Do this in a draft-free room, as the leaf is incredibly light and will fly away with the slightest breeze.
- Arrange your edible flowers in a crescent shape on one side of the cake top. Cluster the larger blooms first, then tuck in smaller petals and leaves for a balanced, botanical aesthetic.
- Insert your custom topper at a slight angle for better visibility in photos, ensuring it is pushed deep enough into the cake to remain stable throughout the party.
How to make rhubarb jam?

Why we love this
Rhubarb jam is like capturing the essence of springtime in a glass jar. Its vibrant, ruby-red hue looks stunning on any food board, providing a tangy, sharp contrast to creamy cheeses or buttery scones. The aroma during the simmering process is intoxicating—a mix of earthy stalks and sweet sugar caramelizing into a thick, glossy preserve. Each bite offers a satisfyingly chunky texture that bursts with a bright acidity, reminding us of garden-fresh harvests and sunny afternoons.
Ingredients
- 4 cups chopped fresh rhubarb (1-inch pieces)
- 1.5 cups granulated sugar
- 1 tablespoon fresh lemon juice
- 1 teaspoon vanilla bean paste
- A pinch of sea salt
How to make it
- In a large, heavy-bottomed saucepan, combine the chopped rhubarb and sugar. Let the mixture sit for about 30 minutes at room temperature; this process, known as maceration, draws out the juices and creates a natural syrup.
- Place the pan over medium-low heat and stir constantly until the sugar has completely dissolved. You will see the rhubarb begin to soften and release its vibrant red pigment into the syrup.
- Increase the heat to medium-high and bring the mixture to a rolling boil. Stir in the lemon juice and sea salt. The lemon juice provides the necessary acidity to help the natural pectins set the jam.
- Maintain the boil for 10-15 minutes, stirring frequently to prevent the bottom from scorching. Use a wooden spoon to mash some of the larger rhubarb chunks against the side of the pot if you prefer a smoother consistency.
- Test for doneness using the ‘plate test’: place a small spoonful of jam on a chilled plate. If it wrinkles when pushed with your finger after a minute, it is ready.
- Remove from heat, stir in the vanilla bean paste for a floral finish, and ladle into sterilized jars, leaving a quarter-inch of headspace before sealing.
How to bake graduation cupcakes?
Why we love this
Cupcakes are the ultimate grab-and-go joy for a busy party, and graduation-themed ones bring a playful, nostalgic energy to your food board. We love the individual portioning which allows for a variety of flavors, all topped with clouds of whipped frosting that melt in your mouth. The sight of a dozen perfectly uniform cupcakes, each crowned with a miniature chocolate mortarboard, creates a sense of whimsy and celebration that guests of all ages find irresistible.
Ingredients
- 2.5 cups all-purpose flour
- 1.5 cups sugar
- 1 cup whole milk
- 2 large eggs, room temperature
- Miniature chocolate squares (Ghirardelli)
- Sour belt candy or fruit leather (for tassels)
- Miniature peanut butter cups (for the base of the cap)
- Melted chocolate (for assembly)
How to make it
- Preheat your oven to 350°F (175°C) and line a cupcake tin with high-quality paper liners. In a large bowl, whisk together your dry ingredients before folding in the wet ingredients until just combined—over-mixing will lead to tough cupcakes.
- Fill each liner about two-thirds full to ensure they rise with a flat enough top for decorating. Bake for 18-20 minutes, or until a toothpick inserted in the center comes out clean with just a few moist crumbs.
- While the cupcakes cool completely on a wire rack, assemble your graduation caps. Place a miniature peanut butter cup upside down. Dab a small amount of melted chocolate on top and press a chocolate square firmly onto it.
- Cut thin strips of sour belt candy to act as the tassel. Use another tiny drop of melted chocolate to adhere the ‘tassel’ to the center of the chocolate square, topping it with a small round sprinkle or ‘button’.
- Pipe a generous swirl of buttercream onto each cooled cupcake. For a professional look, start from the outside edge and spiral inward, pulling the tip up quickly at the center to create a peak.
- Carefully place your assembled chocolate graduation caps onto the center of the frosting peaks just before serving.
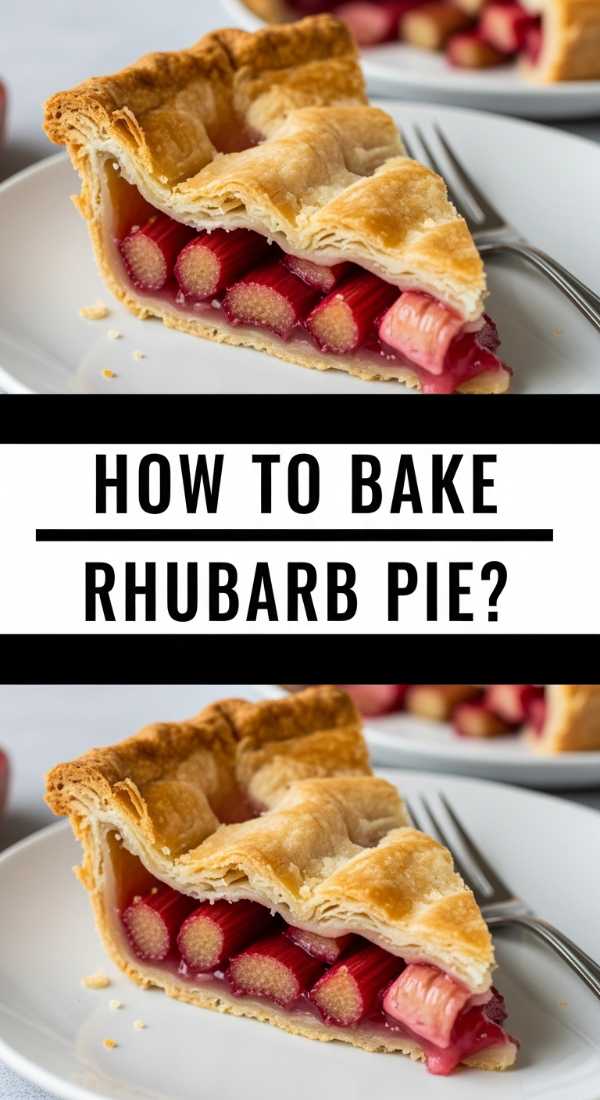
How to bake rhubarb pie?

Why we love this
A rhubarb pie is the undisputed queen of the spring table, offering a sophisticated balance of tart fruit and buttery, flaky pastry. We love the rustic charm of a golden-brown lattice crust that allows the bubbling, magenta filling to peek through. The aroma of cinnamon and baking dough fills the home with a sense of comfort, while the first bite delivers a textural symphony of crisp crust and tender, jammy fruit that is both refreshing and indulgent.
Ingredients
- Double pie crust (homemade or store-bought)
- 5 cups sliced rhubarb (1/2 inch thick)
- 1.25 cups sugar
- 1/3 cup cornstarch (to thicken the juices)
- 1 teaspoon orange zest
- 1 tablespoon cold butter, cubed
- 1 egg (for egg wash)
How to make it
- Roll out the bottom half of your pie dough on a floured surface until it is about 12 inches in diameter. Gently drape it over a 9-inch pie plate, pressing it into the corners without stretching the dough. Chill the base while you prepare the filling.
- In a large bowl, toss the sliced rhubarb with sugar, cornstarch, and orange zest. Ensure every piece of fruit is coated; the cornstarch is crucial here as rhubarb releases a significant amount of liquid during baking.
- Pour the fruit mixture into the prepared pie shell and dot the top with the small cubes of cold butter. This adds a rich silkiness to the sauce as it forms inside the pie.
- Roll out the second piece of dough and cut it into 1-inch wide strips. Weave these strips over the fruit in a lattice pattern, tucking the ends under the bottom crust and crimping the edges with a fork or your fingers to seal.
- Brush the entire top of the lattice with a beaten egg wash and sprinkle with a bit of coarse sugar for extra crunch.
- Bake at 400°F (200°C) for the first 20 minutes to set the crust, then reduce the heat to 350°F (175°C) and bake for another 35-45 minutes until the crust is deep golden and the filling is bubbling thickly through the lattice.
How to style graduation cookies?

Why we love this
Styling graduation cookies is where edible art meets personal celebration. We love the crisp, clean lines of royal icing and the way a simple sugar cookie can be transformed into a diploma, a gown, or a year-stamped medallion. These cookies add a high-end, bespoke feel to your food board, offering a satisfying snap and a sweet, buttery finish. They act as the perfect conversation pieces, drawing guests in to admire the intricate details before they take a bite.
Ingredients
- Batch of chilled sugar cookie dough
- Royal icing (stiff and flooding consistencies)
- Gel food coloring (school colors)
- Fine-tipped edible ink markers
- Clear sanding sugar
How to make it
- Roll your chilled dough to a consistent 1/4-inch thickness. Use graduation-themed cutters (caps, diplomas, stars) and bake until the edges are just barely beginning to turn golden. Allow them to cool for at least 2 hours; icing will melt on even a slightly warm cookie.
- Outline the perimeter of your shapes using ‘stiff’ consistency royal icing in a piping bag with a small round tip. This acts as a dam to hold the thinner icing in place.
- Thin out your remaining icing with drops of water until it reaches ‘flooding’ consistency (it should disappear into itself in about 10 seconds when stirred). Fill the center of the cookies with this icing, using a toothpick to pop any air bubbles.
- Let the base layer of icing dry completely—this usually takes 6 to 12 hours depending on humidity. A dry surface is essential for the next styling steps.
- Once dry, use the stiff icing again to add 3D details like the ‘tassel’ on the cap or the ‘ribbon’ on the diploma. This creates depth and visual interest.
- For a final touch of flair, use edible ink markers to write the graduate’s name or the graduation year in elegant script. If using sanding sugar, apply it while the detail icing is still wet so it adheres perfectly.
How to make lemon pesto?
Why we love this
Lemon pesto is a vibrant, citrusy twist on the classic basil sauce that brings a burst of sunshine to any board. We love its versatility; it can be drizzled over roasted vegetables, used as a dip for crusty bread, or tossed with pasta. The aroma is intensely fresh, combining the peppery scent of basil with the sharp, clean zing of lemon zest. The texture is rustic and slightly coarse, offering a satisfying mouthfeel that balances rich olive oil with bright, acidic notes.
Ingredients
- 2 cups fresh basil leaves, packed
- 1/2 cup freshly grated Parmesan cheese
- 1/3 cup toasted pine nuts or walnuts
- 2 large lemons (zest and juice)
- 2 cloves garlic, smashed
- 1/2 cup extra-virgin olive oil
- Salt and cracked black pepper
How to make it
- Start by toasting your nuts in a dry pan over medium heat for 3-5 minutes. Shake the pan constantly until they are golden and fragrant. This step is vital as it releases the essential oils and deepens the flavor profile of the pesto.
- In a food processor, pulse the garlic and toasted nuts together until they are coarsely chopped. Do not over-process at this stage; you want to maintain some texture.
- Add the fresh basil leaves and the zest of both lemons to the processor. Pulse in short bursts until the basil is broken down into small bits.
- While the processor is running on low, slowly stream in the extra-virgin olive oil. This creates an emulsion, ensuring the sauce is cohesive rather than oily.
- Add the lemon juice and grated Parmesan cheese. Pulse one or two more times just to combine. The acidity of the lemon juice will keep the green color vibrant, but it’s best served immediately.
- Taste and season generously with salt and pepper. If the pesto is too thick for your liking, add a teaspoon of warm water or a bit more oil to reach your desired consistency.
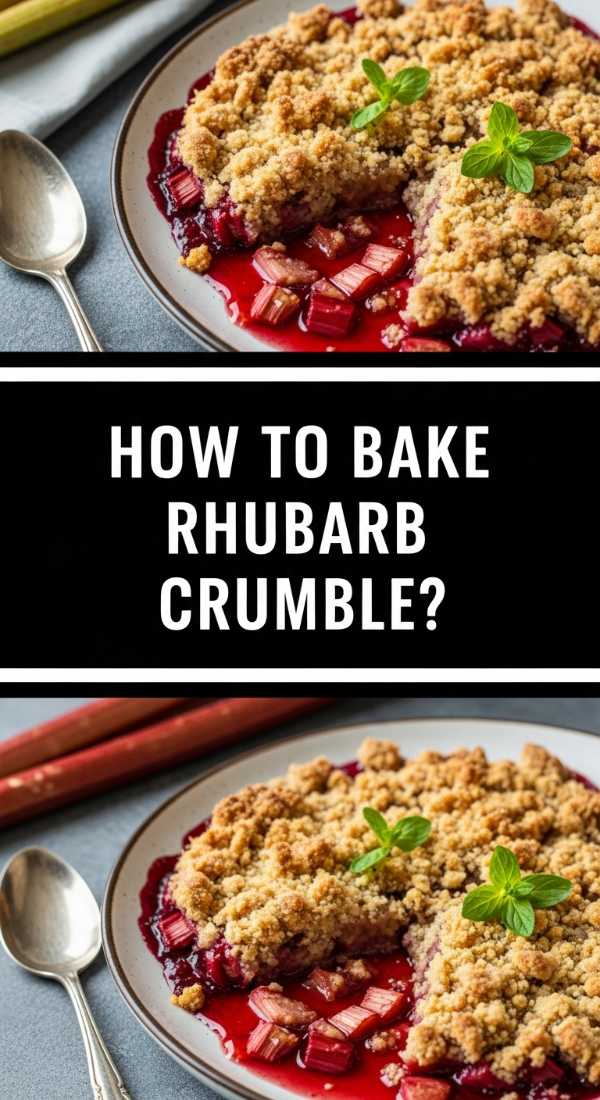
How to bake rhubarb crumble?

Why we love this
Rhubarb crumble is the ultimate ‘comfort’ addition to a food board, offering a warm, bubbling contrast to colder elements. We love the juxtaposition between the soft, melting fruit base and the craggy, buttery oat topping that shatters with every spoonful. The scent of cinnamon and nutmeg baking into the fruit creates a cozy, inviting environment, and the sweet-tart profile makes it an excellent companion to a scoop of cold vanilla bean ice cream.
Ingredients
- 6 cups chopped rhubarb
- 3/4 cup sugar
- 2 tablespoons flour (for the fruit)
- 1 cup rolled oats
- 1 cup brown sugar, packed
- 1 cup all-purpose flour (for the topping)
- 1/2 cup cold unsalted butter, cubed
- 1 teaspoon cinnamon
How to make it
- Preheat your oven to 375°F (190°C). In a large baking dish, toss the chopped rhubarb with the 3/4 cup sugar and 2 tablespoons of flour. Spread it out into an even layer so the fruit cooks at a consistent rate.
- In a separate bowl, combine the oats, brown sugar, 1 cup of flour, and cinnamon. Use your fingers or a pastry cutter to work the cold butter into the mixture.
- Continue working the butter until the mixture resembles coarse crumbs with some pea-sized chunks of butter remaining. This ‘rub-in’ method is the secret to a perfectly pebbled, crunchy topping.
- Sprinkle the crumble mixture evenly over the rhubarb. Do not press it down; you want it to remain light and airy so the heat can circulate through the topping.
- Bake for 35-45 minutes. You are looking for two visual cues: the fruit juices should be bubbling vigorously at the edges, and the topping should be a deep, toasted golden brown.
- Allow the crumble to rest for at least 15 minutes before serving. This allows the fruit juices to thicken slightly, making it easier to portion out onto your dessert board.
How to make coffee drinks?

Why we love this
No food board is complete without a beverage pairing, and artisanal coffee drinks bring a sophisticated, caffeinated energy to the table. We love the ritual of craft coffee—the sight of rich espresso swirling into creamy milk and the deep, roasted aroma that wakes up the senses. Whether it’s a velvety latte or a crisp cold brew, these drinks provide a bitter-sweet complexity that cleanses the palate between bites of sweet cakes and tart rhubarb.
Ingredients
- High-quality espresso beans (freshly ground)
- Whole milk or oat milk (for frothing)
- Simple syrup or flavored syrups (vanilla, lavender)
- Ice (for cold versions)
- Cinnamon or cocoa powder for dusting
How to make it
- For a hot latte, begin by pulling a double shot of espresso (about 2 ounces) into a warmed glass. The espresso should have a thick, caramel-colored crema on top.
- Steam your milk using a steam wand or an electric frother. Aim for ‘micro-foam’—this means the bubbles are so small they are invisible, resulting in a glossy, wet-paint texture. The temperature should reach about 150°F (65°C).
- Hold your cup at an angle and pour the steamed milk into the center of the espresso. As the cup fills, bring the milk pitcher closer to the surface to create a clean white finish or a simple heart design.
- For an iced coffee drink, fill a tall glass with large ice cubes (which melt slower than small ones). Pour in 4 ounces of cold brew concentrate or chilled espresso.
- Add your syrup of choice and stir well before topping with cold, frothed milk for a beautiful layered ‘cloud’ effect.
- Finish with a light dusting of cinnamon or cocoa powder through a small sieve to add a professional, cafe-style touch to your presentation.
How to frost sheet cakes?
Why we love this
Sheet cakes are the unsung heroes of large gatherings, and a perfectly frosted one is a sight to behold on a food board. We love the expansive ‘canvas’ a sheet cake provides for creative decorating, from smooth ombre gradients to textured palette knife strokes. The ratio of frosting to cake is often higher here, ensuring every bite is decadent and moist. It’s a nostalgic, crowd-pleasing format that feels both generous and elegantly modern when styled correctly.
Ingredients
- Rectangular sheet cake, cooled completely
- 4 cups American buttercream or cream cheese frosting
- Gel food colors
- Large offset spatula
- Bench scraper
- Decorating comb (optional)
How to make it
- Level your cake by using a long serrated knife to trim away any domed top, ensuring a perfectly flat surface. This makes the frosting process much smoother and the final result more professional.
- Place a large dollop of frosting in the center of the cake. Using your offset spatula, push the frosting toward the edges in a back-and-forth motion. Avoid lifting the spatula, as this can pull up crumbs from the cake.
- To create a ‘swoosh’ texture, use the tip of your spatula to create rhythmic, swirling indentations across the top of the cake. This is great for a rustic, effortless look.
- For a smooth finish, hold a bench scraper at a slight angle and drag it across the top of the cake in one long, continuous motion. Clean the scraper after every pass to ensure no streaks are left behind.
- If you want an ombre effect, divide your frosting into three bowls and tint them varying shades of the same color. Apply the darkest at one end, medium in the middle, and lightest at the other, then blend the seams gently with your spatula.
- Wipe the edges of your cake board or serving platter with a damp paper towel to remove any stray frosting, ensuring a clean and sharp presentation.
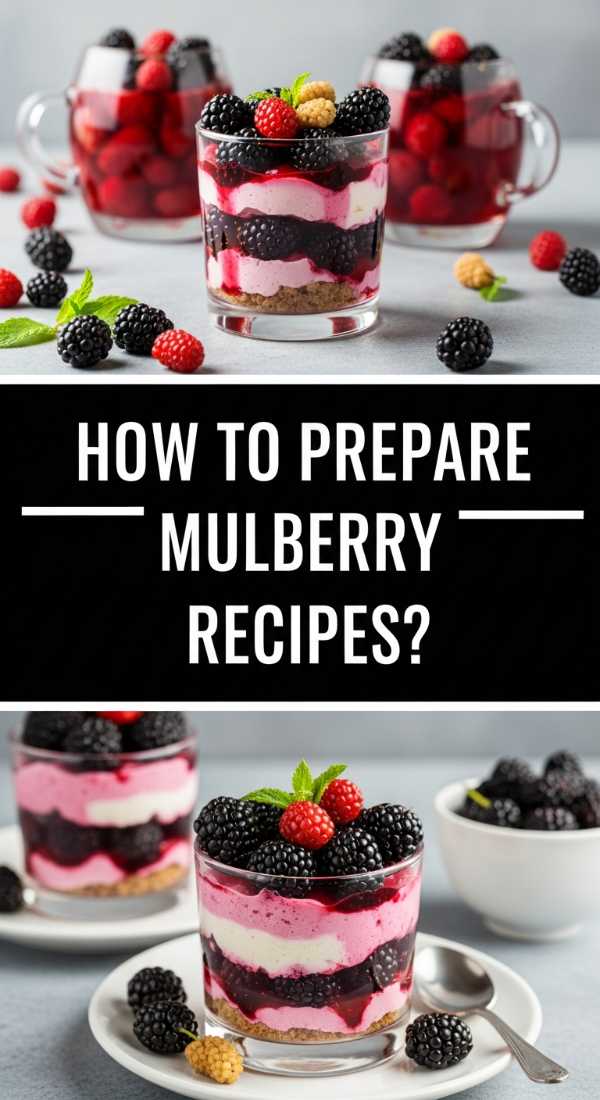
How to prepare mulberry recipes?
[IMAGE_10]
Why we love this
Mulberries are a fleeting, seasonal treasure that bring an air of mystery and wild foraging to your food board. We love their deep, dark purple juice that acts as a natural dye and their complex flavor—a mix of blackberry-like sweetness and a subtle earthy tartness. Preparing mulberries feels like a celebration of the landscape, and their unique, elongated shape adds a beautiful visual texture that you just can’t get with store-bought berries.
Ingredients
- 2 cups fresh mulberries (stems removed)
- 1/4 cup honey or maple syrup
- 1 tablespoon balsamic glaze (optional for savory)
- Fresh mint leaves
- Lemon zest
How to make it
- Start by carefully washing the mulberries in a bowl of cold water. Because they are very delicate, do not run them under a heavy stream of water. Gently pat them dry with a clean kitchen towel—be warned, they will stain!
- Use a pair of small kitchen shears to snip off the tiny green stems if they bother you, though they are edible and often go unnoticed in cooked recipes.
- For a simple mulberry compote, place the berries in a small saucepan with honey and a teaspoon of lemon zest. Simmer over low heat for 5-8 minutes until the berries soften and release their deep purple juices.
- If you are using them fresh on a board, toss the raw berries with a tiny amount of balsamic glaze and chopped mint. This elevates the earthy notes of the fruit and makes them a sophisticated pairing for goat cheese.
- For a mulberry tart, arrange the fresh berries in concentric circles over a pastry cream base. The dark color provides a stunning contrast against a pale cream.
- Always serve mulberry dishes with a warning to guests about the staining potential, perhaps providing elegant cocktail napkins to keep the celebration mess-free.
Wrapping Up Your Weekend Board
Creating a themed food board is about more than just the ingredients; it’s about the intention. Whether you’re celebrating a new graduate with custom cookies or simply enjoying the fleeting beauty of rhubarb season, these boards allow us to present food as an invitation to linger and talk. I hope these tips and recipes inspire you to clear off your largest wooden board this weekend and fill it with something truly special. Remember, the best boards are the ones shared with good company!