

There is something truly magical about the way a shared meal can anchor a memory, isn’t there? Last week, as I sat on my sun-drenched patio watching the afternoon light dance across a sprawling wooden board filled with treats, I realized that these moments of connection are what we live for. Whether it’s celebrating a hard-earned degree or simply welcoming the first tart stalks of spring, the ‘Viral Food Board’ has become my go-to canvas for storytelling through flavor. This isn’t just about eating; it’s about the art of assembly and the joy of seeing your loved ones reach for that one perfect bite.
Today, I’m sharing the ultimate guide to creating a viral-worthy spread that transitions seamlessly from graduation parties to cozy garden brunches. We’re diving deep into the textures of flaky rhubarb crusts, the zesty punch of fresh pesto, and the shimmering gold accents of celebratory sweets. Let’s create something beautiful together that tastes as good as it looks on your feed.
HOW TO DECORATE GRADUATION CAKES?

Why we love this
A graduation cake isn’t just a dessert; it’s a centerpiece of achievement that demands both elegance and flair. When you slice into a perfectly decorated cake, the contrast between the smooth, velvety buttercream and the sharp, clean lines of a fondant cap creates a visual symphony. The aroma of rich vanilla bean and sweet sugar fills the room, while the addition of edible gold leaf adds a shimmering, celebratory glow that catches the light beautifully. It feels like a crowning achievement in sugar form, making the graduate feel truly honored.
Ingredients
- Pre-baked layered cake (chilled)
- Silky Swiss Meringue Buttercream
- Black fondant for the mortarboard
- Edible gold leaf or gold luster dust
- Small graduation-themed sprinkles or pearls
- A sharp paring knife and offset spatula
How to make it
- Start by applying a thin ‘crumb coat’ of buttercream to your chilled cake. This locks in crumbs; chill for 20 minutes until firm.
- Apply a thick second layer of buttercream. Use a bench scraper held at a 90-degree angle to the turntable to create perfectly smooth, vertical sides.
- Roll out your black fondant to 1/8 inch thickness. Cut a perfect square for the top of the cap and a long strip for the base. Let these air-dry for an hour to hold their shape.
- Assemble the fondant cap on top of the cake, using a small dab of frosting as ‘glue’.
- Using a fine-tipped brush, apply gold luster dust (mixed with a drop of clear vanilla extract) to the edges of the cake or the tassel of the cap for a metallic pop.
- Finish by pressing edible pearls around the base of the cake for a sophisticated, polished look.
HOW TO BAKE RHUBARB PIE?

Why we love this
There is nothing quite like the rustic charm of a freshly baked rhubarb pie, where the tart, ruby-red stalks break down into a jammy, crimson filling. As it bakes, the kitchen is enveloped in a heavenly scent of buttery pastry and sweet-tart fruit that makes your mouth water instantly. The crust should be incredibly flaky, shattering into golden shards with every forkful, providing the perfect buttery vessel for the tangy, vibrant fruit. It’s a sensory experience that balances the sharpness of the spring harvest with the comforting warmth of a home-cooked classic.
Ingredients
- Double pie crust (chilled)
- 5-6 cups fresh rhubarb, cut into 1/2 inch pieces
- 1 1/4 cups granulated sugar
- 1/4 cup cornstarch
- 1/2 teaspoon ground cinnamon
- 1 tablespoon unsalted butter (cubed)
- Egg wash (1 egg beaten with 1 tablespoon water)
How to make it
- Preheat your oven to 425°F (220°C). Roll out the bottom crust and fit it into a 9-inch pie plate, leaving an inch overhang.
- In a large bowl, toss the sliced rhubarb with sugar, cornstarch, and cinnamon until every piece is evenly coated. Let it sit for 10 minutes to release juices.
- Pour the filling into the crust and dot the top with small cubes of butter to add richness to the sauce.
- Roll out the second crust and cut into strips to create a lattice top. Weave the strips over and under, then crimp the edges tightly to seal.
- Brush the top generously with egg wash and sprinkle with coarse sugar for a professional, crunchy finish.
- Bake for 45-50 minutes. If the edges brown too quickly, cover them with foil. The pie is done when the juices are bubbling thick and the crust is deep golden brown.
HOW TO MAKE GRADUATION CUPCAKES?
Why we love this
Graduation cupcakes offer a delightful, handheld way to celebrate big milestones without the fuss of cutting a cake. Imagine a moist, chocolatey base topped with a swirl of frosting so light it feels like a cloud, finished with a miniature chocolate ‘cap’ that brings a smile to everyone’s face. The texture is a perfect marriage of soft sponge and creamy topping, with the added snap of a chocolate square decoration. They are visually stunning when lined up on a board, creating a sea of tassels and caps that look professional and festive.
Ingredients
- 12 baked chocolate or vanilla cupcakes
- Stiff buttercream frosting (white or school colors)
- Ghirardelli chocolate squares (for the cap tops)
- Mini peanut butter cups or chocolate truffles (for the cap base)
- Sour belt candies or licorice (for tassels)
- M&Ms or small candies (for the button)
How to make it
- Frost your cupcakes with a large round piping tip to create a flat, sturdy surface for the ‘mortarboard’ to sit on.
- Unwrap the mini peanut butter cups and place them upside down in the center of the frosting.
- Use a tiny dot of melted chocolate to stick a chocolate square onto the top of each peanut butter cup.
- Cut your sour belt or licorice into thin, 1-inch strips and fray the end with a knife to look like a tassel.
- Attach the tassel to the center of the chocolate square using another dot of melted chocolate, then top with an M&M ‘button’.
- Chill the cupcakes for 10 minutes to ensure the decorations are set before displaying them on your viral food board.
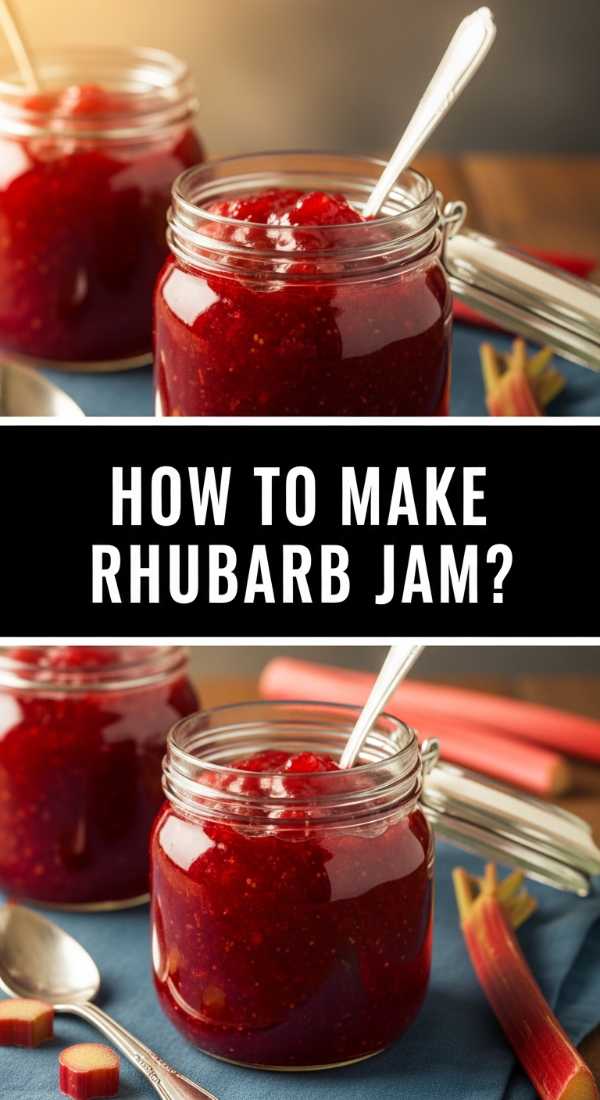
HOW TO MAKE RHUBARB JAM?
Why we love this
Making rhubarb jam is like capturing the very essence of spring in a jar, resulting in a vibrant, jewel-toned spread that glows with a deep pink hue. The aroma as it simmers on the stove is intoxicating—a mix of bright citrus and earthy sweetness that fills the entire house. On the tongue, it’s a brilliant balance of zingy acidity and smooth, sugary goodness that pairs perfectly with a warm buttered scone. The texture is thick and luscious, with soft bits of fruit that melt away, making every breakfast feel like a special occasion.
Ingredients
- 2 lbs fresh rhubarb, chopped into small bits
- 4 cups granulated sugar
- 1/4 cup fresh lemon juice
- 1 teaspoon lemon zest
- 1/2 teaspoon vanilla bean paste (optional)
How to make it
- Combine the chopped rhubarb and sugar in a heavy-bottomed pot. Let it macerate for at least 2 hours (or overnight) until the sugar has dissolved into a syrup.
- Bring the mixture to a boil over medium-high heat, stirring constantly with a wooden spoon to prevent scorching.
- Add the lemon juice and zest. The acidity helps the natural pectin in the rhubarb set the jam.
- Boil the mixture rapidly for 10-15 minutes. Use a candy thermometer to reach 220°F (104°C), or use the ‘plate test’ (place a spoonful on a cold plate; if it wrinkles when pushed, it’s done).
- Stir in the vanilla bean paste at the very end for an extra layer of floral aroma.
- Ladle the hot jam into sterilized jars, leaving 1/4 inch headspace, and seal tightly. Let them cool undisturbed for 24 hours.
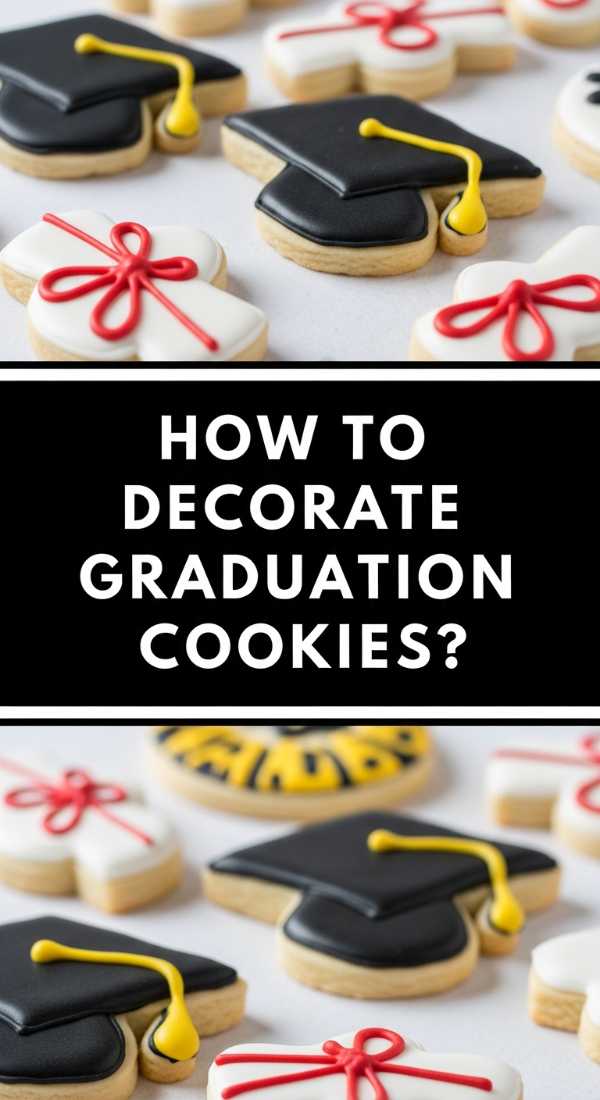
HOW TO DECORATE GRADUATION COOKIES?
Why we love this
Graduation cookies are the ultimate edible art, turning a simple sugar cookie into a personalized tribute to a graduate’s hard work. The snap of a perfectly baked shortbread combined with the smooth, sweet crunch of royal icing is incredibly satisfying to the senses. You can customize them with school colors, names, and dates, creating a bespoke collection that looks like it came from a high-end bakery. The visual appeal of a tray of diploma-shaped cookies tied with tiny icing ribbons is enough to make any party spread go viral instantly.
Ingredients
- Batch of sugar cookies (cut into diplomas and caps)
- Royal icing (stiff and flooding consistencies)
- Gel food coloring (school colors)
- Fine-tipped piping bags
- Edible ink markers (for fine details)
How to make it
- Outline your cookies using the ‘stiff’ consistency icing. This acts as a dam to keep the inner icing from spilling over the edges.
- Fill (or ‘flood’) the inside of the outlines with the thinner consistency icing. Use a toothpick to pop any tiny air bubbles and move the icing into the corners.
- Let the base layer dry completely for at least 6-8 hours until it is hard to the touch.
- Once dry, use the stiff icing to pipe details like the ‘scroll’ lines on a diploma or the year of graduation on the cap.
- For a professional touch, use edible ink markers to write the graduate’s name in delicate calligraphy once the icing is fully set.
- Add a final flourish of edible glitter or gold dust to make the cookies sparkle under the party lights.
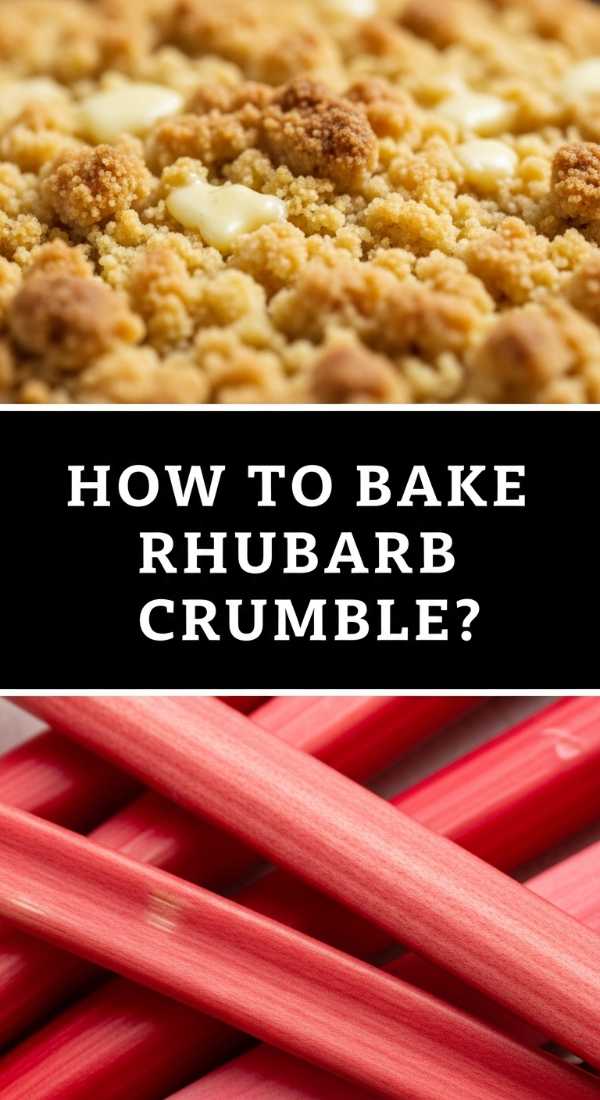
HOW TO BAKE RHUBARB CRUMBLE?

Why we love this
Rhubarb crumble is the epitome of comfort food, offering a delightful play of textures between the bubbling, molten fruit and the crunchy, buttery oat topping. As it comes out of the oven, the edges are caramelized and chewy, while the center remains soft and saucy with the bright tang of rhubarb. The scent of toasted oats, cinnamon, and brown sugar creates an inviting atmosphere that beckons everyone to the kitchen. It’s best enjoyed warm, with a scoop of cold vanilla bean ice cream slowly melting into the nooks and crannies of the golden crumble.
Ingredients
- 4 cups chopped rhubarb
- 1/2 cup sugar (for the fruit)
- 1 cup rolled oats
- 1 cup all-purpose flour
- 1 cup brown sugar (packed)
- 1/2 cup cold unsalted butter (cubed)
- 1 teaspoon cinnamon
How to make it
- Preheat your oven to 375°F (190°C). Grease an 8×8 inch baking dish with butter.
- Toss the chopped rhubarb with the 1/2 cup of white sugar and spread it evenly across the bottom of the dish.
- In a separate bowl, combine the oats, flour, brown sugar, and cinnamon.
- Using your fingers or a pastry cutter, work the cold butter into the flour mixture until it looks like coarse crumbs with some pea-sized chunks of butter remaining.
- Sprinkle the crumble mixture generously over the rhubarb, pressing down slightly so it adheres to the fruit.
- Bake for 35-40 minutes until the fruit juices are thick and bubbling through the topping and the oats are a deep, toasty golden brown.
HOW TO WHIP COFFEE DRINKS?
Why we love this
There is a unique thrill in watching liquid coffee transform into a thick, aerated foam that looks like silk. Whipped coffee, or Dalgona, is a sensory delight; the bitterness of the coffee is mellowed by the aeration, resulting in a toffee-colored cream that sits majestically atop cold milk. The first sip provides a contrast between the warm, dense foam and the ice-cold liquid beneath, creating a luxurious mouthfeel that rivals any high-end coffee shop. It’s an aesthetically pleasing drink that adds a touch of modern trendiness to any brunch board.
Ingredients
- 2 tablespoons instant coffee granules
- 2 tablespoons granulated sugar
- 2 tablespoons boiling water
- 1 cup milk of choice (dairy or oat works best)
- Ice cubes
How to make it
- In a medium glass bowl, combine the instant coffee, sugar, and boiling water. The ratio must be 1:1:1 for the foam to stabilize.
- Using a hand mixer or a wire whisk, beat the mixture vigorously. If using a mixer, start on low and move to high speed.
- Continue whisking for about 2-5 minutes. You are looking for the mixture to change from dark brown to a light tan, and for it to hold stiff peaks like a meringue.
- Fill a glass with ice and pour in your milk until it’s about 3/4 full.
- Dollop the thick coffee foam on top of the milk using a spoon.
- For a viral look, garnish with a sprinkle of cocoa powder or a cinnamon stick before stirring gently to enjoy.
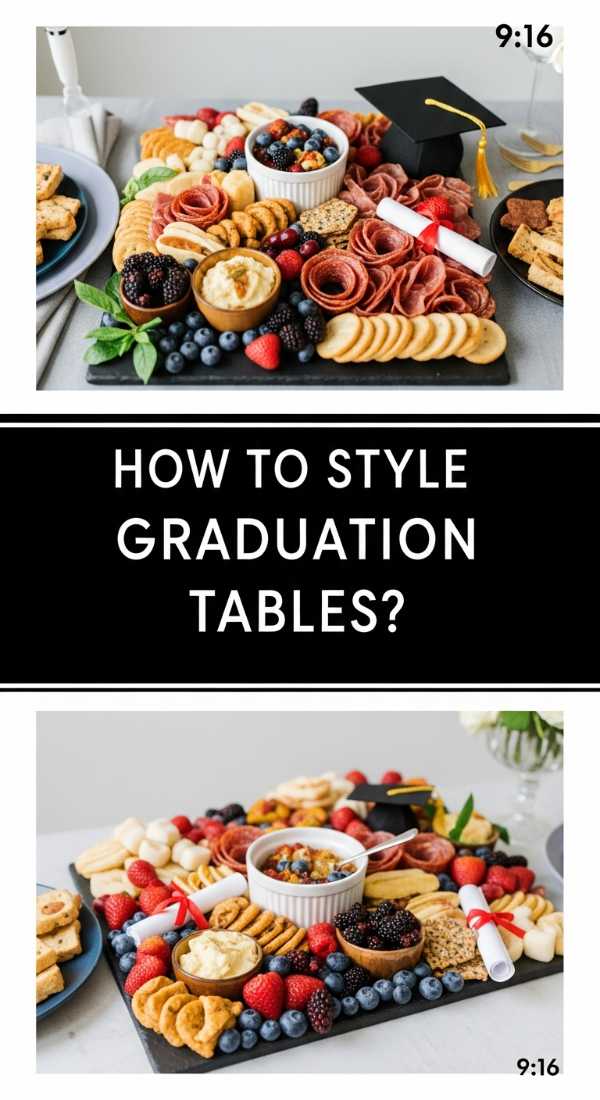
HOW TO STYLE GRADUATION TABLES?
Why we love this
Styling a graduation table is about more than just decor; it’s about creating a narrative of success and future possibilities. A well-styled table uses layers of texture—linen runners, polished silverware, and crisp paper accents—to create a sense of occasion. The visual harmony of school colors blended with neutral tones makes the space feel sophisticated rather than cluttered. When you walk into a room with a thoughtfully curated table, you feel the weight of the achievement and the warmth of the celebration, making it the perfect backdrop for photos and memories.
Ingredients
- Linen table runner in a neutral or school color
- Tiered serving platters (for height)
- Vases with fresh greenery or flowers
- Customized place cards or graduation ‘advice’ cards
- Fairy lights or candles
- Themed confetti or gold stars
How to make it
- Start with a clean, neutral base. Lay down your runner to create a central line for your food and decor.
- Incorporate height. Place your graduation cake or largest food board on a raised stand in the center to create a focal point.
- Layer your serving pieces. Use smaller plates and bowls of varying heights around the centerpiece to keep the eye moving.
- Add organic elements. Tuck sprigs of eucalyptus or small floral arrangements into the gaps between platters to soften the look.
- Scatter ‘interactive’ elements like polaroid cameras or advice cards where guests can write notes to the graduate.
- Adjust your lighting. Dim the overhead lights and use fairy lights or tea candles to create a warm, inviting glow that makes the glassware sparkle.
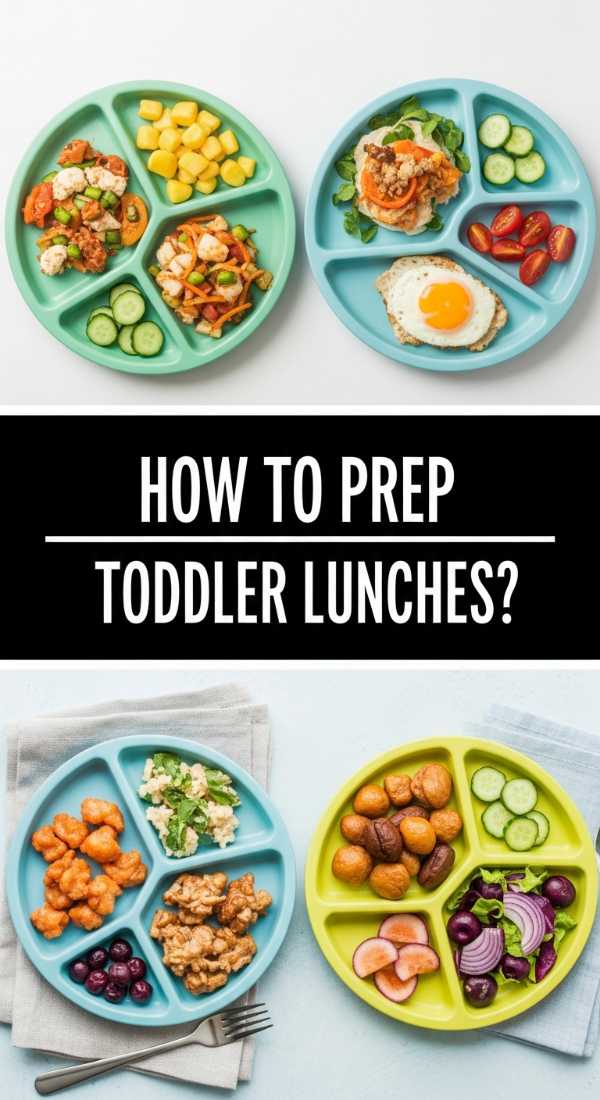
HOW TO PREP TODDLER LUNCHES?
Why we love this
Prepping toddler lunches is an exercise in creativity and color, turning mundane nutrition into an exciting discovery. The sight of a bento box filled with star-shaped cucumbers, bright berries, and rolled-up deli meats is enough to entice even the pickiest eater. The textures are varied—crunchy, soft, and juicy—ensuring that every bite is a new experience for little hands. There is a deep satisfaction in knowing you’ve created a balanced, safe, and visually appealing meal that nourishes their bodies while making lunchtime the highlight of their day.
Ingredients
- Whole grain bread or wraps
- Lean protein (turkey, ham, or hard-boiled eggs)
- Colorful veggies (carrots, cucumbers, bell peppers)
- Fresh fruit (strawberries, grapes—halved lengthwise)
- Cheese slices or cubes
- Small cookie cutters
How to make it
- Safety first: Always cut grapes, cherry tomatoes, and large pieces of meat into thin, lengthwise strips to prevent choking.
- Use small cookie cutters to turn bread and cheese into fun shapes like stars, hearts, or animals. This increases the ‘fun’ factor significantly.
- Organize the food in a multi-compartment bento box. This keeps flavors separate and makes the meal look organized and inviting.
- Include a variety of colors. Aim for at least three different colors from fruits and vegetables to ensure a range of vitamins.
- Add a ‘dip’ like hummus or yogurt in a small, leak-proof container; toddlers love the sensory experience of dipping.
- Prep ahead by washing and cutting veggies at the start of the week, but assemble the morning of to keep the bread from getting soggy.
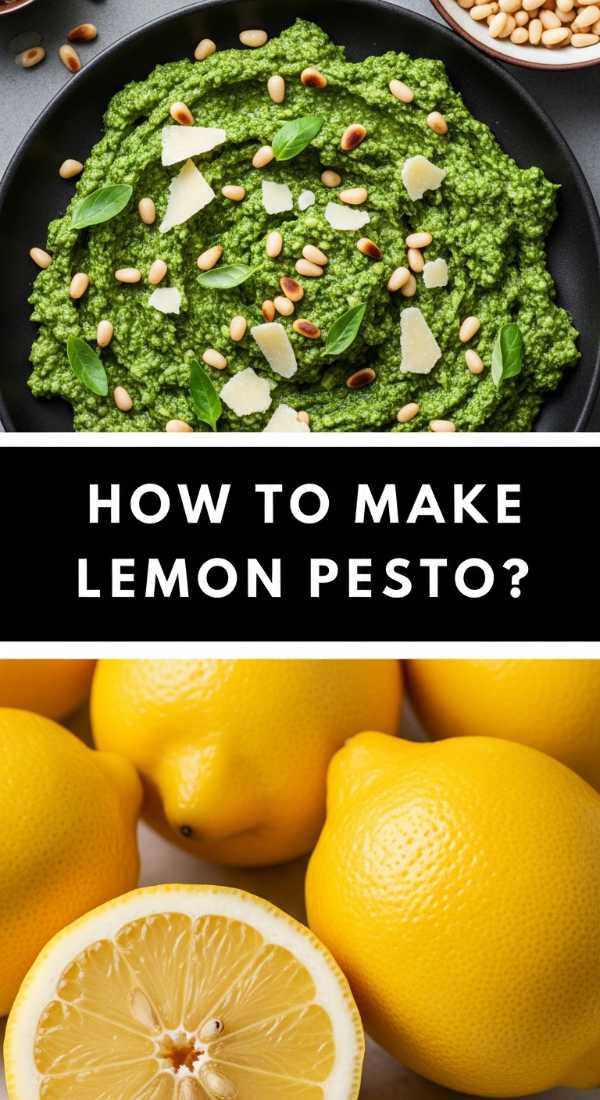
HOW TO MAKE LEMON PESTO?
[IMAGE_10]
Why we love this
Lemon pesto is a vibrant, sunshine-filled twist on the classic Italian sauce, bursting with the fragrance of fresh basil and the zesty punch of citrus. The aroma is incredibly uplifting—earthy herbs meet the sharp, clean scent of lemon zest—instantly making any kitchen feel like a summer garden. It has a bright, grassy flavor that is cut through by the richness of toasted pine nuts and salty parmesan cheese. This pesto isn’t just a sauce; it’s a versatile condiment that adds a layer of sophisticated brightness to pasta, roasted veggies, or even spread across a viral food board.
Ingredients
- 2 cups packed fresh basil leaves
- 1/2 cup freshly grated Parmesan cheese
- 1/3 cup pine nuts (toasted)
- 2 cloves garlic (peeled)
- 1/2 cup extra virgin olive oil
- Zest of 2 large lemons
- 2 tablespoons fresh lemon juice
- Pinch of sea salt
How to make it
- In a small dry pan, toast the pine nuts over medium heat for 2-3 minutes until they are golden and fragrant. Watch them closely as they burn quickly!
- In a food processor, pulse the basil leaves and garlic until they are roughly chopped.
- Add the toasted pine nuts, Parmesan cheese, lemon zest, and lemon juice. Pulse again until the mixture is a coarse paste.
- While the processor is running on low, slowly drizzle in the olive oil in a steady stream. This emulsifies the sauce, creating a smooth, creamy texture.
- Taste and add a pinch of sea salt. If the pesto is too thick, add an extra teaspoon of olive oil or lemon juice.
- Store in a jar with a thin layer of olive oil on top to prevent browning, and use it to brighten up everything from grilled chicken to crusty bread.
Wrapping It All Up
Creating a viral food board is about more than just following recipes; it’s about the love and intention you pour into every detail. Whether you’re celebrating a new graduate or enjoying the tart snap of seasonal rhubarb, these dishes are designed to bring people together. I hope this guide inspires you to get into the kitchen, play with textures and colors, and create something that your friends and family will remember long after the last bite is gone. Happy hosting!