
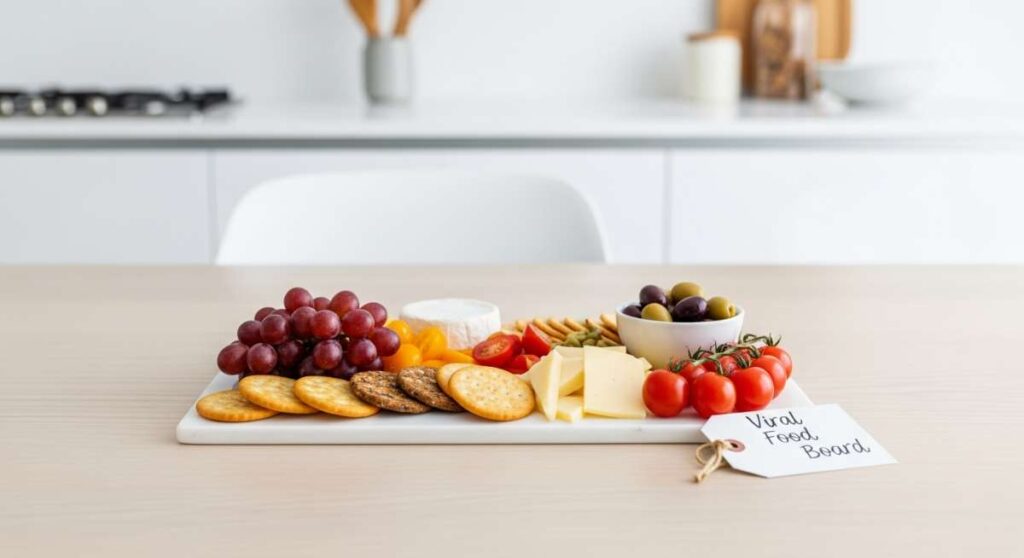
The Lazy Host’s Secret: A Viral Food Board in 3 Steps
We’ve all been there: the sun is setting, the wine is chilled, and your friends are about to knock on the door, yet your kitchen looks like a disaster zone. There is a certain kind of magic in hosting, but the pressure to deliver a Pinterest-perfect spread can often suck the joy right out of the evening. I used to spend hours sweating over complicated hors d’oeuvres, only to be too exhausted to actually enjoy the conversation once the party started.
That’s when I discovered the ‘Lazy Host’s Secret’—the viral food board. It’s not just a meal; it’s a centerpiece, a conversation starter, and a stress-reliever all rolled into one. By focusing on high-quality ingredients and simple assembly, you can create a spread that looks like it took all day but actually leaves you with plenty of time to refresh your drink and enjoy the sunset. Let’s dive into the components that will make your board the talk of the season.
How to make a classic strawberry pie

Why we love this
There is nothing quite like the scent of sun-ripened strawberries mingling with a buttery, golden crust to signal that summer has truly arrived. This classic pie offers a symphony of textures: the initial crunch of the flaky pastry giving way to a luscious, jammy center that bursts with tart sweetness. When served slightly warm, the vibrant red glaze glistens under the kitchen lights, promising a nostalgic experience that feels like a hug in dessert form, especially when topped with a dollop of cold, whipped cream.
Ingredients
- 2 pints fresh strawberries, hulled and halved
- 1 cup granulated sugar
- 3 tablespoons cornstarch
- 1 tablespoon lemon juice
- 1/4 teaspoon salt
- Double crust pie dough (store-bought or homemade)
- 1 egg (for egg wash)
- 1 tablespoon coarse sugar
How to make it
- Begin by preheating your oven to 425°F (220°C). Roll out half of your chilled pie dough on a floured surface until it is about 12 inches in diameter. Carefully drape it over a 9-inch pie plate, pressing it gently into the bottom and sides without stretching the dough, which prevents shrinkage.
- In a large mixing bowl, toss the prepared strawberries with the sugar, cornstarch, lemon juice, and salt. Ensure the cornstarch is evenly distributed to prevent clumps in your filling. Let this mixture sit for about 10 minutes to allow the berries to release their natural juices.
- Pour the fruit mixture into the prepared bottom crust. Roll out the second half of the dough and place it over the top, or cut it into strips to create a lattice pattern for a more professional, breathable finish.
- Crimp the edges of the pie together to seal in the juices. Brush the top crust with a beaten egg wash and sprinkle generously with coarse sugar for that signature bakery-style sparkle.
- Bake at 425°F for the first 15 minutes to set the crust, then reduce the heat to 375°F (190°C) and bake for another 35-45 minutes. Look for a deep golden-brown crust and filling that is bubbling thick through the vents before removing it from the oven to cool completely.
How to make the best rotel dip

Why we love this
This dip is the ultimate crowd-pleaser, delivering a decadent, molten river of cheese infused with the savory depth of browned meat and the bright, zesty kick of diced tomatoes and green chilies. Its aroma is instantly recognizable and comforting, filling the room with a smoky, salty scent that draws guests to the table like a magnet. The smooth, velvety texture coats every chip perfectly, providing a rich mouthfeel that is punctuated by the occasional spicy bite, making it an addictive addition to any social gathering.
Ingredients
- 1 lb ground beef or breakfast sausage
- 1 block (16 oz) Velveeta cheese, cubed
- 1 can (10 oz) RoTel Diced Tomatoes and Green Chilies
- 1/2 teaspoon garlic powder
- 1/2 teaspoon onion powder
- Tortilla chips for serving
How to make it
- Place a large skillet over medium-high heat. Add the ground beef or sausage and cook until entirely browned, breaking it into small crumbles with a wooden spoon. Drain the excess fat thoroughly to ensure the dip remains smooth and not greasy.
- Reduce the heat to low. Add the cubed Velveeta cheese to the skillet. It is crucial to use low heat here to prevent the cheese from scorching or becoming grainy; slow melting is the secret to the perfect texture.
- Stir in the can of RoTel (do not drain the liquid, as it provides essential flavor and acidity) along with the garlic and onion powder.
- Continue to stir the mixture constantly until the cheese is completely melted and the dip is a uniform, silky consistency.
- Transfer the dip to a small slow cooker on the ‘warm’ setting for serving. This ensures the dip stays liquid and dippable throughout the duration of your party.
How to pack beach snacks

Why we love this
Packing the perfect beach snack box is an art form that transforms a standard day at the shore into a gourmet seaside retreat. Imagine reaching into a cold cooler to find crisp, chilled grapes and perfectly portioned salty snacks, all while the salt air breezes past you. The contrast of the hot sun on your skin with the refreshing, hydrating crunch of fresh cucumber or watermelon creates a sensory balance that defines the quintessential summer experience, ensuring everyone stays fueled and happy without the mess of sand-filled sandwiches.
Ingredients
- Firm fruits (grapes, apple slices with lemon, melon chunks)
- Sturdy crackers or pita chips
- Hard cheeses (cheddar, gouda)
- Pre-cut vegetables (carrots, bell peppers)
- Individual hummus or dip cups
- Insulated cooler and ice packs
How to make it
- Select your containers wisely; airtight, rigid plastic containers are superior to bags because they prevent delicate snacks from being crushed under the weight of ice or other gear.
- Wash and thoroughly dry all produce before packing. Excess moisture is the enemy of freshness and can lead to soggy snacks by midday.
- Slice your cheeses and firm vegetables into bite-sized pieces that are easy to grab with fingers, eliminating the need for cutlery on the sand.
- Layer your cooler strategically. Place heavy ice packs or frozen water bottles at the bottom, followed by the heaviest and most temperature-sensitive items (like dairy or dips). Place lighter items like crackers or fruit on top.
- Ensure everything is tightly sealed to keep out both the heat and the sand. A professional tip: pack snacks in ‘shifts’ so you aren’t opening the cooler more than necessary, which helps maintain the internal cold temperature.
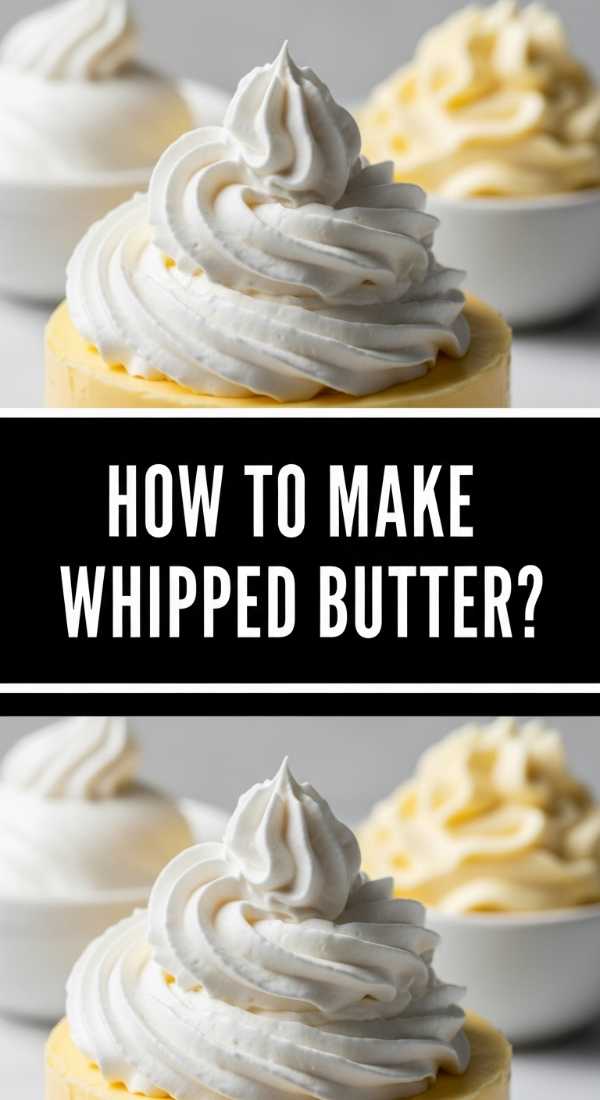
How to make whipped butter
Why we love this
Whipped butter is the definition of simple luxury, turning a basic condiment into an ethereal, cloud-like spread that melts instantly upon contact with warm bread. The process aerates the fat, creating a texture that is impossibly light and silky, while intensifying the creamy, milky notes of the butter. When spread across a crusty baguette, it fills the senses with a rich, comforting aroma and a delicate mouthfeel that feels far more sophisticated than a standard stick of butter, making even the simplest meal feel like a high-end brunch.
Ingredients
- 1 cup (2 sticks) high-quality unsalted butter, softened to room temperature
- 1/2 teaspoon flaky sea salt
- 1 tablespoon heavy cream (optional, for extra fluff)
- Optional: Fresh herbs or honey for flavoring
How to make it
- Ensure your butter is truly at room temperature. It should be soft enough that a finger leaves an indentation easily, but not so soft that it is melting or oily. This is the most critical step for achieving volume.
- Place the butter in the bowl of a stand mixer fitted with the whisk attachment (a hand mixer also works well). Start on low speed to break up the sticks.
- Gradually increase the speed to high. Whisk for at least 5-7 minutes. You are looking for the butter to change color from a deep yellow to a pale ivory and for its volume to nearly double.
- Stop the mixer and scrape down the sides of the bowl. Add the sea salt and the optional heavy cream if you want an even lighter, spreadable texture.
- Whisk for another 2 minutes until perfectly smooth and airy. Serve immediately in a beautiful ramekin or store in the fridge—just remember to bring it back to room temperature before serving to maintain that ‘whipped’ feel.
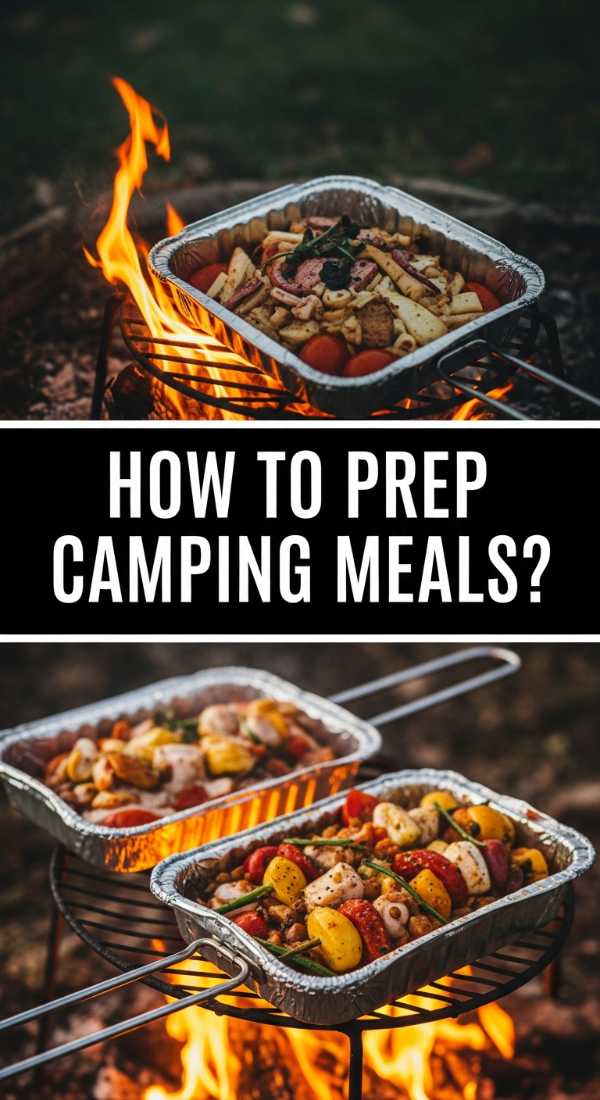
How to prep camping meals
Why we love this
There is a primal satisfaction in eating a hearty meal cooked over an open flame, surrounded by the quiet rustle of the forest. Prepping your camping meals ahead of time means you can swap the stress of chopping in the dirt for the joy of watching the fire crackle. The aroma of smoky protein and caramelized vegetables cooking in foil packets creates a rustic, mouth-watering scent that defines outdoor living, providing a warm, nourishing reward after a long day of hiking or exploring.
Ingredients
- Protein of choice (chicken breast, smoked sausage, or shrimp)
- Sturdy vegetables (potatoes, corn, zucchini, onions)
- Heavy-duty aluminum foil
- Olive oil or butter
- Pre-mixed seasoning (garlic powder, paprika, salt, pepper)
How to make it
- Do all your ‘wet’ work at home. Chop your vegetables and proteins into uniform, bite-sized pieces. Uniformity ensures that everything in the packet cooks at the same rate, preventing raw potatoes and overcooked meat.
- Toss your ingredients in a large bowl with olive oil and your spice blend. Make sure every piece is well-coated to prevent sticking to the foil.
- Lay out large squares of heavy-duty aluminum foil. Place a portion of the mixture in the center. Fold the sides up and over, crimping the edges tightly to create a sealed ‘tent’ that will trap steam.
- Label each packet with a permanent marker if you have different dietary options. Freeze the packets if you are camping in 2 days; they will act as extra ice in your cooler and thaw slowly.
- When ready to cook, place the packets on a grill grate over the campfire coals (avoid the direct high flames). Cook for 20-30 minutes, turning once, until the potatoes are tender and the meat has reached a safe internal temperature.
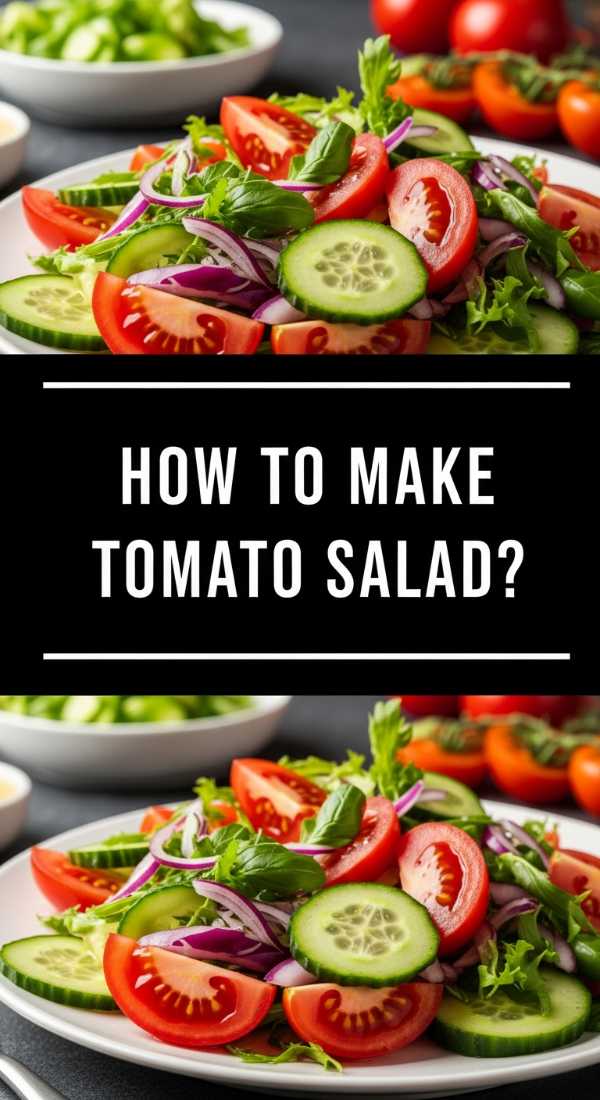
How to make tomato salad
Why we love this
A true tomato salad is a celebration of peak summer, highlighting the vibrant colors and explosive flavors of heirloom varieties. The scent is intoxicating—a mix of earthy vines, sharp balsamic, and the peppery fragrance of fresh basil. Each bite offers a refreshing burst of acidity balanced by the sweetness of the fruit and the richness of high-quality olive oil. It is a dish that feels light and healthy, yet incredibly indulgent, providing a cool, juicy contrast to grilled meats or heavy breads on a hot afternoon.
Ingredients
- 2 lbs assorted heirloom tomatoes (different sizes and colors)
- 1/4 cup extra virgin olive oil
- 2 tablespoons balsamic glaze or high-quality vinegar
- 1/2 red onion, very thinly sliced
- 1/2 cup fresh basil leaves, torn
- Flaky sea salt and freshly ground black pepper
How to make it
- Slice your larger tomatoes into thick rounds or wedges, and halve any smaller cherry tomatoes. Using a variety of shapes and sizes creates more surface area for the dressing to cling to and looks stunning on the plate.
- Place the sliced red onions in a small bowl of cold water for 10 minutes while you prep the rest. This ‘mellows’ the raw bite of the onion, making it sweet and crisp rather than overpowering.
- Arrange the tomatoes on a large, shallow platter. Do not pile them too high; you want each slice to have a chance to be seasoned. Sprinkle generously with sea salt and let them sit for 5 minutes; the salt draws out the juices, which will mix with the oil to create a natural dressing.
- Drain the onions and scatter them over the tomatoes, followed by the torn basil leaves.
- Drizzle the olive oil and balsamic glaze over the top just before serving. Finish with a final crack of black pepper. Avoid refrigerating this salad, as cold temperatures ruin the delicate texture and flavor of the tomatoes.
How to grill summer veggies

Why we love this
Grilling summer vegetables transforms humble produce into charred, caramelized treasures that carry the unmistakable essence of woodsmoke. The heat of the grill intensifies the natural sugars in peppers and onions, while giving zucchini and asparagus a tender-crisp texture that is far superior to steaming. The visual appeal of deep grill marks against vibrant greens and yellows makes for a stunning platter that smells like a backyard celebration, offering a healthy yet deeply satisfying component to your viral food board.
Ingredients
- Assorted vegetables (bell peppers, zucchini, yellow squash, asparagus, red onion)
- 3 tablespoons olive oil
- 2 cloves garlic, minced
- 1 teaspoon dried oregano or thyme
- Salt and pepper
- Lemon wedges for finishing
How to make it
- Prepare your grill for medium-high heat (about 400°F). Ensure the grates are scrubbed clean and lightly oiled to prevent the vegetables from sticking.
- Slice your vegetables into large, flat pieces. For example, cut zucchini lengthwise into thick planks and onions into thick rounds held together by the root. Larger surface areas produce better char marks and are less likely to fall through the grates.
- In a large bowl, whisk together the olive oil, minced garlic, oregano, salt, and pepper. Toss the vegetables in this mixture until they are thinly and evenly coated.
- Place the vegetables on the grill. Start with the ‘hard’ vegetables like peppers and onions, which take longer. Add the ‘soft’ vegetables like zucchini and asparagus a few minutes later.
- Grill for 3-5 minutes per side. You are looking for distinct char marks and a slight softening, but the vegetables should still have some ‘snap’ to them. Squeeze fresh lemon juice over the hot veggies as soon as they come off the grill to brighten the flavors.
How to make summer dinner

Why we love this
Summer dinner should feel like an extension of the day—light, breezy, and effortlessly communal. We love this approach because it emphasizes fresh, raw ingredients paired with quick-cooking proteins, minimizing time spent over a hot stove. It’s the feeling of a shared platter in the center of a patio table, where the aromas of lemon, garlic, and fresh herbs waft through the warm air. This style of eating encourages lingering over the meal, focusing on conversation and the slow transition from golden hour into twilight.
Ingredients
- 1 lb grilled chicken strips or chilled poached shrimp
- 1 bunch fresh arugula or mixed greens
- 1 cup cooked quinoa or farro (optional)
- Handful of toasted pine nuts or slivered almonds
- Lemon-tahini or simple vinaigrette dressing
How to make it
- Choose a base that doesn’t require high heat right before eating. If using grains like quinoa, cook them in the morning and let them chill in the fridge; this prevents the greens from wilting when you assemble the meal later.
- Prepare your protein using high-heat, short-duration methods. Grilling chicken or searing shrimp takes less than 10 minutes and adds a savory, smoky depth that anchors the lighter elements of the meal.
- Use a very large, shallow bowl or a wooden board for assembly. Lay down a bed of greens first, followed by the chilled grains.
- Arrange the protein on top in a decorative pattern. Scatter your toasted nuts and any leftover grilled vegetables from earlier over the surface.
- Drizzle the dressing only at the very last moment. For a viral look, serve the dressing in a small jar on the side so guests can customize their portions, keeping the rest of the spread crisp and vibrant.
How to bake fruit pie

Why we love this
Baking a fruit pie from scratch is a sensory journey that rewards patience with a masterpiece of golden pastry and bubbling, concentrated fruit flavor. As the pie bakes, the kitchen fills with the scent of caramelized sugar and warm spices, creating an atmosphere of cozy abundance. We love the contrast between the shattering crispness of a well-executed crust and the soft, yielding interior of the fruit, making every slice a perfectly balanced bite of tartness and sweet, buttery richness.
Ingredients
- 5-6 cups fresh fruit (peaches, blueberries, or apples)
- 3/4 cup sugar (adjust based on fruit sweetness)
- 1/4 cup all-purpose flour or instant clear-jel
- 1 teaspoon cinnamon
- 1 tablespoon cold butter, cut into small pieces
- Chilled pie crust (top and bottom)
How to make it
- Preheat your oven to 400°F (200°C). If using stone fruit like peaches, blanch them quickly in boiling water to slip the skins off easily before slicing them into uniform wedges.
- In a bowl, combine the fruit with sugar, flour, and spices. The flour is essential; it reacts with the fruit juices as they heat up, creating a thick syrup rather than a watery mess that soaks the bottom crust.
- Fit your bottom crust into the pie plate. Pour the fruit mixture in and dot the top of the fruit with the small pieces of cold butter. This adds a subtle richness to the filling as it melts.
- Place the top crust on. Use a sharp knife to cut several large vents in the center. These vents are crucial; they allow steam to escape, which prevents the crust from becoming soggy and helps the filling thicken properly.
- Bake for 45-60 minutes. A professional tip for fruit pies: place the pie on a foil-lined baking sheet on the bottom rack of the oven. This catches any drips and ensures the bottom crust gets enough direct heat to brown perfectly.
How to serve cheesy dip

Why we love this
Serving a cheesy dip is all about the ‘wow’ factor—that moment when the golden, bubbly crust is broken to reveal a steaming, stretchy interior. The sight of long strings of melted mozzarella or gruyère is a visual cue for indulgence that never fails to get a reaction. The aroma of toasted cheese and garlic is universally loved, creating an inviting atmosphere that encourages guests to gather close, dip their bread, and share in the gooey, savory delight of a dish made for communal enjoyment.
Ingredients
- 2 cups shredded cheese blend (mozzarella, cheddar, parmesan)
- 8 oz cream cheese, softened
- 1/2 cup sour cream or Greek yogurt
- 2 cloves garlic, minced
- Fresh parsley for garnish
- Toasted baguette slices or crackers
How to make it
- In a medium bowl, beat the softened cream cheese with the sour cream and garlic until smooth and lump-free. This base provides the creaminess that keeps the dip dip-able even as it cools.
- Fold in 1.5 cups of the shredded cheese blend. Reserve the remaining half cup for the top to create that essential golden crust.
- Spread the mixture into a small cast-iron skillet or oven-safe ceramic dish. Smooth the top with a spatula to ensure even melting.
- Sprinkle the remaining cheese over the top. Bake at 375°F (190°C) for 20 minutes until the dip is bubbling around the edges.
- Switch the oven to ‘broil’ for the last 2-3 minutes. Watch it closely! You want the cheese on top to develop brown, toasted spots which add a complex, nutty flavor. Garnish with fresh parsley and serve immediately while the cheese is at its stretchiest.
Conclusion: The Art of the Effortless Spread
Creating a viral food board isn’t about perfection; it’s about the joy of sharing good food with the people you love. By mastering these simple components—from the crunch of a perfect summer salad to the molten indulgence of a cheesy dip—you’re not just serving a meal; you’re creating an experience. Remember, the best host is a relaxed host. So, take these tips, prep what you can, and let the board do the heavy lifting for your next gathering. Happy hosting!