

I remember the first time I hosted a summer gathering and realized I’d spent more time in the kitchen than with my favorite people. That’s when I discovered the magic of the food board—a trend that TikTok has turned into a total art form. There’s something so grounding about laying out a spread of fresh, vibrant ingredients and letting everyone graze at their own pace, isn’t there? It turns a meal into a conversation, an experience that feels both effortless and deeply intentional.
Today, I’m sharing the viral simple food board ideas that have been living rent-free in my head (and on my FYP). From the delicate florals of spring cakes to the smoky sizzle of summer grilling boards, these are the recipes that bring the season to life on your table. Whether you’re a seasoned host or just looking for a way to make Tuesday night feel a bit more special, these ideas are designed to be as beautiful as they are delicious. Let’s dive into the sensory joy of seasonal boards!
How to Decorate Spring Cakes?

Why we love this
There is a whimsical, ethereal quality to a spring cake that instantly lifts the spirit. Imagine the delicate scent of vanilla bean and lemon zest filling your kitchen while you gently press pressed pansies or fresh lavender into velvet-soft Swiss meringue buttercream. The texture is a dream—light, airy sponge meeting a frosting so smooth it feels like silk on the tongue. It’s not just a dessert; it’s a centerpiece that captures the very essence of a garden in bloom, turning any afternoon tea into a fairy-tale moment.
Ingredients
- 2 layers of vanilla sponge cake
- 4 cups Swiss meringue buttercream
- Assorted edible flowers (pansies, violas, or lavender)
- Fresh raspberries
- Gold leaf flakes (optional)
- Offset spatula and piping bag
How to make it
- Begin by chilling your cake layers for at least two hours; cold cakes are much easier to crumb coat and won’t shed crumbs into your final frosting layer.
- Place your first layer on a rotating cake stand and apply a thin layer of buttercream with an offset spatula, ensuring it is perfectly level before adding the second layer.
- Apply a thin ‘crumb coat’ of frosting over the entire cake to seal in moisture and stray crumbs, then refrigerate for 30 minutes until the surface is firm to the touch.
- Apply the final thick layer of buttercream, using a bench scraper held at a 45-degree angle while spinning the stand to create a flawlessly smooth, professional finish.
- Gently press your clean, dry edible flowers into the sides of the cake in a cascading pattern, using the warmth of your fingertip to lightly adhere the petals to the frosting.
- Finish with a light dusting of gold leaf or a few fresh berries at the base for a rustic yet sophisticated look that looks like it came straight from a boutique bakery.
How to Cook Spring Dinners?

Why we love this
Spring dinners are all about the transition from heavy comfort food to the bright, snappy flavors of new growth. We love the way a sheet pan of roasted asparagus and salmon smells when it’s drizzled with lemon-herb butter—fresh, citrusy, and deeply satisfying without being heavy. The contrast between the tender, flaky fish and the crisp-tender crunch of green vegetables provides a textural playground that feels like a reset for the palate. It is the culinary equivalent of opening the windows on the first warm day of the year.
Ingredients
- 2 large salmon fillets
- 1 bunch of fresh asparagus, trimmed
- 3 tablespoons olive oil
- 2 lemons (sliced and juiced)
- 4 cloves garlic, minced
- Fresh dill and parsley
- Flaky sea salt and cracked black pepper
How to make it
- Preheat your oven to 400°F (200°C) and line a large rimmed baking sheet with parchment paper to ensure easy cleanup and prevent the delicate fish skin from sticking.
- Toss the trimmed asparagus in a bowl with olive oil, half the minced garlic, and a generous pinch of salt until every spear is glistening and well-coated.
- Place the salmon fillets in the center of the tray and rub them with the remaining garlic and lemon juice, then season heavily with black pepper to create a flavorful crust.
- Arrange the asparagus and lemon slices around the salmon, ensuring they are in a single layer so they roast and caramelize rather than steam.
- Bake for 12-15 minutes; you’ll know the salmon is perfectly cooked when it reaches an internal temperature of 145°F or flakes easily with a fork while remaining translucent in the very center.
- Garnish immediately with a handful of chopped fresh herbs to add a final burst of aromatic oils and bright color before serving.
How to Make Rotel Dip?
Why we love this
This is the ultimate crowd-pleaser that dominates every game day and backyard hangout for a reason. The aroma of sizzling spicy sausage mixed with the creamy, velvety melt of high-quality cheese is enough to make anyone’s mouth water. It’s thick, indulgent, and has that perfect kick of heat from the green chilies that keeps you coming back for ‘just one more’ dip. The way the golden, gooey cheese clings to a salty corn chip is pure snack heaven, creating a nostalgic comfort that never goes out of style.
Ingredients
- 1 lb ground breakfast sausage or chorizo
- 16 oz processed cheese (like Velveeta), cubed
- 1 can (10 oz) Rotel (diced tomatoes and green chilies)
- 1/2 cup sour cream
- 1/4 cup chopped cilantro
- Bag of sturdy tortilla chips
How to make it
- In a large heavy-bottomed skillet or Dutch oven, brown the sausage over medium-high heat, breaking it into very small crumbles with a wooden spoon until it is deeply caramelized and no longer pink.
- Drain the excess fat thoroughly to ensure your dip remains smooth and doesn’t become oily or separated as it sits.
- Lower the heat to medium-low and add the cubed cheese and the entire can of Rotel (do not drain the liquid, as this provides the necessary moisture and flavor base).
- Stir constantly with a silicone spatula to prevent the cheese from scorching on the bottom of the pan until the mixture is completely melted and homogenous.
- Whisk in the sour cream at the very end to add a tangy richness and a silkier texture that helps the dip stay pourable even as it cools slightly.
- Transfer to a warm slow cooker on the ‘keep warm’ setting and top with fresh cilantro to provide a bright contrast to the rich, savory flavors.
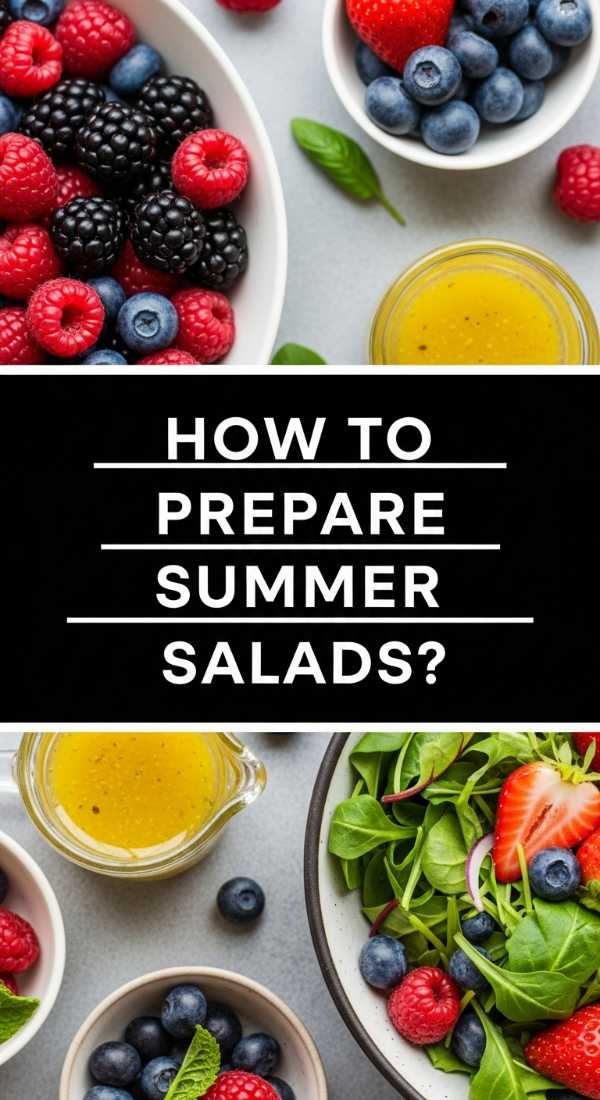
How to Prepare Summer Salads?
Why we love this
Summer salads are a masterclass in the balance of sweet, salty, and acidic flavors. We adore the combination of juicy, sun-ripened watermelon paired with the sharp, briny crumble of feta cheese and the cooling breath of fresh mint. It’s incredibly refreshing on a humid afternoon, offering a hydrating crunch that feels like a spa day on a plate. The vibrant reds, whites, and greens make for a stunning visual on any food board, reminding us that sometimes the simplest ingredients make the boldest statements.
Ingredients
- 6 cups cubed seedless watermelon (chilled)
- 1 cup crumbled feta cheese
- 1/2 cup thinly sliced red onion
- 1/2 cup fresh mint leaves, torn
- 2 tablespoons extra virgin olive oil
- 1 tablespoon balsamic glaze
- Flaky sea salt
How to make it
- Start with a very cold watermelon; chill it for at least 4 hours before slicing to ensure the fruit stays firm and refreshing when tossed with the other ingredients.
- Dice the watermelon into uniform 1-inch cubes and place them in a wide, shallow bowl or directly onto your serving board to avoid crushing the fruit under its own weight.
- Soak the sliced red onions in a small bowl of ice water for 10 minutes; this removes the harsh ‘bite’ and keeps them crisp and mild.
- Scatter the feta cheese and drained onions over the watermelon, then toss very gently with your hands or large spoons just until combined.
- Drizzle the olive oil and balsamic glaze in a zigzag pattern across the top, ensuring a bit of acidity hits every piece of fruit.
- Finish with the torn mint leaves and a sprinkle of flaky sea salt, which draws out the natural sugars of the melon for a complex, gourmet flavor profile.
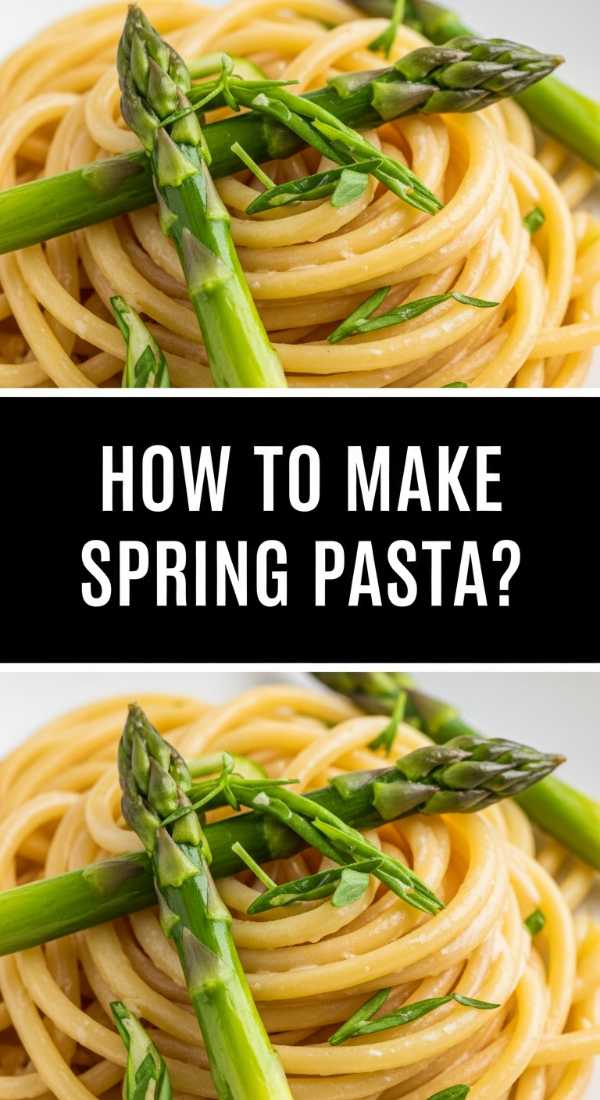
How to Make Spring Pasta?

Why we love this
There is nothing quite like a bowl of Spring Pasta to celebrate the return of the sun. The scent of sautéed garlic and shallots mingling with the brightness of lemon peel creates an aroma that is both comforting and energizing. We love the way a light, buttery sauce coats each strand of pasta without masking the delicate flavor of sweet peas and tender leeks. It’s a dish that feels sophisticated yet takes less than twenty minutes to prepare, making it the perfect ‘fancy’ weeknight meal to enjoy al fresco.
Ingredients
- 1 lb linguine or fettuccine
- 2 cups frozen or fresh sweet peas
- 2 leeks, white and light green parts only, sliced
- 3 cloves garlic, sliced thin
- 1/2 cup heavy cream
- 1/2 cup grated Parmesan cheese
- Zest and juice of 1 lemon
How to make it
- Bring a large pot of heavily salted water to a rolling boil—it should taste like the sea to properly season the pasta from the inside out.
- Cook the pasta until it is ‘al dente’ (usually 2 minutes less than the package instructions), adding the peas to the boiling water during the final 60 seconds of cooking.
- While the pasta cooks, sauté the sliced leeks and garlic in a large pan with olive oil over medium heat until they are soft and translucent, but not browned.
- Reserve 1 cup of starchy pasta water before draining; this liquid gold is the secret to a creamy, emulsified sauce that sticks to the noodles.
- Add the drained pasta, peas, cream, and half the reserved water to the leek mixture, tossing vigorously over low heat to create a glossy coating.
- Stir in the Parmesan, lemon zest, and lemon juice, adding more pasta water as needed to reach your desired consistency, and serve immediately with a crack of black pepper.
How to Bake Spring Cookies?
Why we love this
Baking spring cookies is a sensory delight that turns your kitchen into a fragrant bakery. We love the subtle, floral notes of lavender mixed with the sharp tang of lemon, resulting in a shortbread that is crisp on the edges and melt-in-your-mouth soft in the middle. The golden hue of the cookies against a dusting of powdered sugar looks like scattered sunlight. It’s the kind of treat that pair perfectly with a cold glass of iced tea, offering a sophisticated sweetness that isn’t overwhelming.
Ingredients
- 1 cup unsalted butter, softened
- 1/2 cup granulated sugar
- 2 cups all-purpose flour
- 1 tablespoon dried culinary lavender
- Zest of 2 lemons
- 1/2 teaspoon salt
- 1/2 cup powdered sugar (for dusting)
How to make it
- Cream the softened butter and granulated sugar together in a stand mixer for at least 3-5 minutes until the mixture is pale, fluffy, and doubled in volume.
- Pulse the culinary lavender in a spice grinder or crush it with a mortar and pestle to release the essential oils before adding it to the butter mixture along with the lemon zest.
- Gently fold in the flour and salt by hand using a spatula; over-mixing at this stage will develop gluten and result in a tough cookie rather than a delicate crumb.
- Roll the dough into a log using plastic wrap and refrigerate for at least one hour; this prevents the cookies from spreading too thin in the oven.
- Preheat your oven to 325°F (160°C) and slice the chilled dough into 1/2-inch thick rounds, placing them on a parchment-lined sheet.
- Bake for 12-15 minutes until the edges are just barely beginning to turn a pale golden brown, then let them cool completely before dusting with powdered sugar.
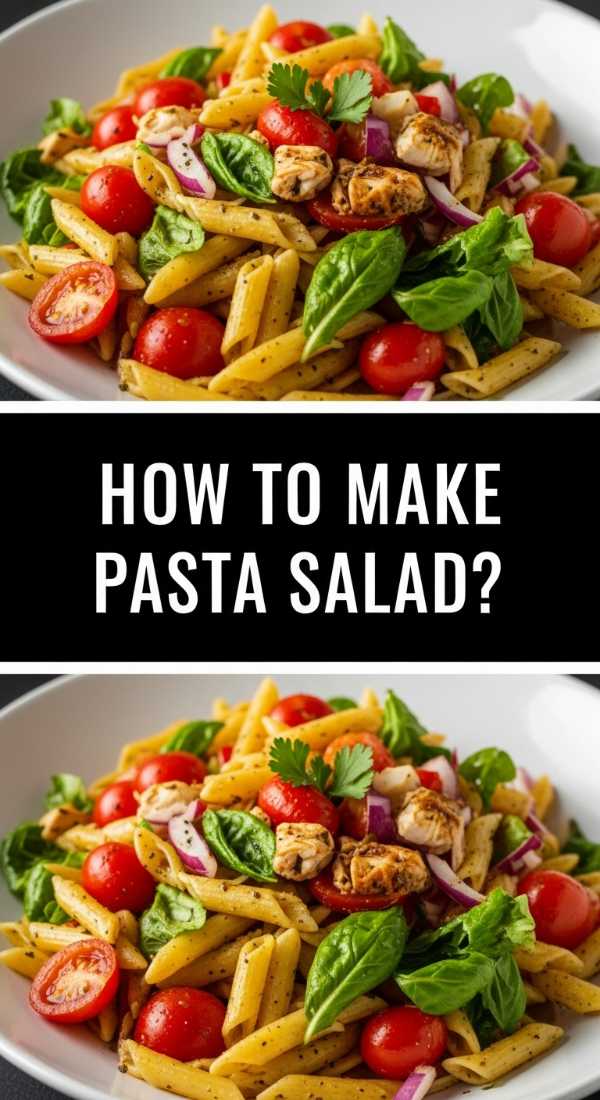
How to Make Pasta Salad?

Why we love this
The beauty of a pasta salad board is in its versatility and the explosion of textures it offers. We love the contrast between the chewy, al dente rotini and the sharp, crisp snap of bell peppers and cucumbers. When tossed in a zesty Italian vinaigrette, the pasta absorbs the herbs and vinegar, becoming more flavorful with every passing hour. It’s the ultimate make-ahead dish that actually tastes better the next day, making it a staple for busy hosts who want a reliable, vibrant side that everyone loves.
Ingredients
- 1 lb rotini or fusilli pasta
- 1 cup cherry tomatoes, halved
- 1/2 cup black olives, sliced
- 1 cup fresh mozzarella pearls
- 1/2 cup diced salami or pepperoni
- 1 cup Italian vinaigrette dressing
- Fresh basil leaves
How to make it
- Cook the pasta in boiling salted water until it is slightly past al dente; pasta for salad should be a bit softer as it firms up significantly once chilled and dressed.
- Drain the pasta and immediately rinse it under cold running water to stop the cooking process and wash away excess starch, which prevents the noodles from sticking together.
- In a very large mixing bowl, combine the cooled pasta with the tomatoes, olives, mozzarella, and meat, ensuring an even distribution of colors and textures.
- Pour over half of the dressing and toss thoroughly, then cover and refrigerate for at least 2 hours to allow the flavors to marry and the pasta to absorb the vinaigrette.
- Just before serving, add the remaining dressing; the pasta will have soaked up the first batch, so this second addition ensures the salad is moist and glossy.
- Garnish with torn fresh basil and a sprinkle of Parmesan cheese to add a final layer of herbaceous aroma and salty finish.
How to Make Summer Desserts?

Why we love this
When the sun is blazing, we crave desserts that are cool, creamy, and bursting with the season’s harvest. These no-bake berry cheesecake jars are the perfect answer. We love the way the tartness of fresh macerated strawberries cuts through the rich, whipped cream cheese filling. The buttery graham cracker crumble at the bottom provides a satisfying crunch that anchors the airy mousse. Serving them in individual jars on a board makes them feel like little treasures, perfect for a casual backyard gathering where you want something impressive but low-stress.
Ingredients
- 8 oz cream cheese, softened
- 1 cup heavy whipping cream
- 1/2 cup powdered sugar
- 1 teaspoon vanilla extract
- 2 cups mixed berries (blueberries, strawberries, raspberries)
- 1 cup crushed graham crackers
- 2 tablespoons melted butter
How to make it
- Mix the crushed graham crackers with melted butter and press a tablespoon of the mixture into the bottom of small glass jars or cups to create a firm base.
- In a cold metal bowl, whip the heavy cream until stiff peaks form, then set it aside in the refrigerator to keep it from melting.
- In a separate bowl, beat the softened cream cheese, powdered sugar, and vanilla together until the mixture is completely smooth and free of any lumps.
- Gently fold the whipped cream into the cream cheese mixture using a large metal spoon, being careful not to deflate the air you’ve worked into the cream.
- Pipe or spoon the cheesecake mixture into the jars over the graham cracker base, leaving about an inch of space at the top for the fruit.
- Top with a generous spoonful of fresh berries that have been tossed in a little sugar to release their juices, and chill for at least 3 hours before serving to allow the mousse to set.
How to Master Grilling Recipes?

Why we love this
There is an primal, smoky magic to grilling that defines the summer experience. We love the sound of the sizzle as honey-garlic chicken skewers hit the hot grates, and the way the sugars in the marinade caramelize into beautiful, charred grill marks. The aroma of wood smoke and savory meat drifting through the air is the ultimate invitation to eat. It creates a rustic, bold flavor profile that you simply can’t achieve in a kitchen, turning a simple dinner into an event that feels festive and full of life.
Ingredients
- 2 lbs chicken breast or thighs, cubed
- 1/2 cup honey
- 1/4 cup soy sauce
- 4 cloves garlic, minced
- 1 tablespoon fresh ginger, grated
- Bell peppers and red onions, cut into chunks
- Wooden or metal skewers
How to make it
- Whisk together the honey, soy sauce, garlic, and ginger to create a marinade; reserve 1/4 cup of this liquid to use as a finishing glaze later.
- Marinate the chicken cubes in the remaining sauce for at least 30 minutes (or up to 4 hours) in the refrigerator to deeply infuse the meat with flavor.
- If using wooden skewers, soak them in water for at least 30 minutes prior to use to prevent them from catching fire on the hot grill.
- Thread the chicken alternately with the peppers and onions, ensuring the pieces are snug but not packed too tightly so the heat can circulate around all sides.
- Preheat your grill to medium-high heat (about 400°F) and oil the grates lightly to prevent sticking.
- Grill the skewers for 10-12 minutes, turning every 3 minutes and brushing with the reserved glaze during the final 2 minutes of cooking for a sticky, glossy finish.
How to Cook Spring Soup?
[IMAGE_10]
Why we love this
Spring soup is a vibrant, silky celebration of green. We love a classic pea and mint soup because it feels incredibly light yet surprisingly luxurious. The color is a stunning, electric green that looks beautiful on a wooden board surrounded by crusty bread and radishes. The flavor is a sophisticated dance between the sweetness of the peas and the sharp, cooling finish of the mint. It’s the perfect transition dish for those cool spring evenings when you want something warm but still want to taste the coming season.
Ingredients
- 4 cups fresh or frozen peas
- 1 large white onion, diced
- 2 cloves garlic, minced
- 4 cups vegetable broth
- 1/2 cup fresh mint leaves
- 1/4 cup heavy cream or coconut milk (optional)
- Salt and lemon juice to taste
How to make it
- Sauté the onion and garlic in a large pot with a splash of olive oil over medium heat until they are soft and translucent, about 5-7 minutes.
- Add the vegetable broth and bring to a gentle simmer, then add the peas and cook for only 3-5 minutes; overcooking the peas will turn them a dull olive color rather than bright green.
- Remove the pot from the heat and stir in the fresh mint leaves, allowing them to wilt slightly in the hot liquid.
- Use an immersion blender (or transfer in batches to a standard blender) to puree the soup until it is completely smooth and velvety.
- Stir in the cream if using for extra richness, and add a squeeze of fresh lemon juice to brighten the flavors and balance the sweetness of the peas.
- Serve warm or chilled, garnished with a few extra peas, a swirl of cream, and a tiny sprig of mint for a professional presentation.
Conclusion: Embracing the Board Lifestyle
Building these food boards has completely changed the way I look at hosting. It’s no longer about a perfect three-course meal; it’s about creating a space where people feel comfortable to lean in, try a bit of everything, and stay a while. Whether you’re decorating a cake with spring blooms or grilling up skewers for a summer night, the goal is always the same: connection through beautiful, simple food. I can’t wait to see which of these boards you try first!
Frequently Asked Questions
Still have questions about creating the perfect seasonal spread? Here are a few tips to help you master the art of the viral food board.