

The 5-Minute Viral Food Board That Everyone is Craving
There is something undeniably magical about the way food brings us together, especially when it’s presented on a sprawling, vibrant board that looks more like a work of art than a meal. I remember the first time I set down a massive, curated spread for my best friends; the room went quiet for a split second before erupting into laughter and the clinking of glasses. It wasn’t just about the cheese or the crackers; it was about the shared experience of picking and choosing flavors that told a story of the season.
Lately, my kitchen has been a whirlwind of ruby-red rhubarb and graduation gold, as I’ve been perfecting the ultimate ‘Viral Simple Food Board.’ This board isn’t just a trend; it’s a lifestyle. It’s about taking those humble garden ingredients and celebratory treats and arranging them in a way that feels indulgent yet effortless. Whether you’re celebrating a milestone or just a Tuesday afternoon, these recipes are the building blocks for a gathering people will be talking about for months.
How to make rhubarb jam?

Why we love this
There is nothing quite like the transformation of tart, fibrous rhubarb stalks into a shimmering, ruby-hued jam that glows in the morning light. As it simmers on the stove, the kitchen fills with a bright, nostalgic aroma that balances sharp acidity with the deep, caramel-like sweetness of sugar. When spread over a warm, buttered piece of sourdough, the texture is velvety yet holds onto those tiny, softened fruit fibers that provide a delightful homemade character. It’s a sensory wake-up call that feels like capturing the essence of spring in a glass jar.
Ingredients
- 4 cups fresh rhubarb, chopped into 1/2 inch pieces
- 1 1/2 cups granulated sugar
- 1 tablespoon fresh lemon juice
- 1 teaspoon lemon zest
- 1/2 teaspoon pure vanilla extract
How to make it
- Begin by preparing your rhubarb: wash the stalks thoroughly and discard any leaves (they are toxic!). Slice the stalks into uniform half-inch pieces to ensure even cooking and breakdown.
- In a heavy-bottomed saucepan, combine the chopped rhubarb and the sugar. Stir them together and let the mixture sit for about 30 minutes; this allows the sugar to macerate the fruit, drawing out the natural juices.
- Place the saucepan over medium-low heat. Stir constantly until the sugar has completely dissolved and the mixture begins to look syrupy.
- Increase the heat to medium and bring the mixture to a gentle boil. Add the lemon juice and zest. The acidity in the lemon helps the natural pectin in the rhubarb set the jam.
- Cook for 15 to 20 minutes, stirring frequently to prevent the bottom from scorching. You’ll notice the rhubarb breaking down into a thick, translucent sauce.
- To test for doneness, place a small spoonful on a chilled plate. If it wrinkles when pushed with your finger, it’s ready. Stir in the vanilla extract at the very end.
- Pour the hot jam into sterilized jars, leaving a quarter-inch of headspace. Allow to cool completely before sealing and storing in the refrigerator.
How to design graduation cakes?
Why we love this
Designing a graduation cake is about more than just flour and sugar; it’s about capturing a moment of immense pride and the threshold of a new journey. The sight of a multi-tiered masterpiece, draped in smooth-as-silk Swiss meringue buttercream and topped with a miniature mortarboard, evokes a sense of accomplishment that words often fail to convey. The texture of the sponge should be light and airy, providing a soft contrast to the structured elegance of the external decorations, while the colors usually reflect the hard-earned school spirit of the graduate.
Ingredients
- Pre-baked cake layers (your favorite flavor)
- 4 cups vanilla buttercream frosting
- Black fondant for the cap
- Gold luster dust or yellow frosting for the tassel
- Edible pearls or sprinkles
How to make it
- Start with completely cooled cake layers. Level the tops with a serrated knife so they sit perfectly flat; this prevents the ‘leaning tower’ effect as you stack.
- Apply a thin layer of buttercream—the ‘crumb coat’—over the entire cake to lock in any loose bits. Chill the cake in the refrigerator for 20 minutes until the frosting is firm to the touch.
- Apply the final layer of frosting. For a professional look, use a bench scraper held at a 90-degree angle against the rotating cake stand to achieve sharp, clean edges.
- Roll out your black fondant to 1/4 inch thickness. Cut a square for the top of the mortarboard and a thick strip to form the cylindrical base. Let these dry slightly so they hold their shape before assembling with a dab of water.
- Place the fondant cap on the center of the cake. Use a piping bag with a small round tip to create a ‘tassel’ hanging off the side of the cap using yellow frosting or gold-painted fondant.
- Finish by piping a decorative border around the base of the cake using a star tip, and use an edible marker to write the graduation year or the student’s name in elegant script.
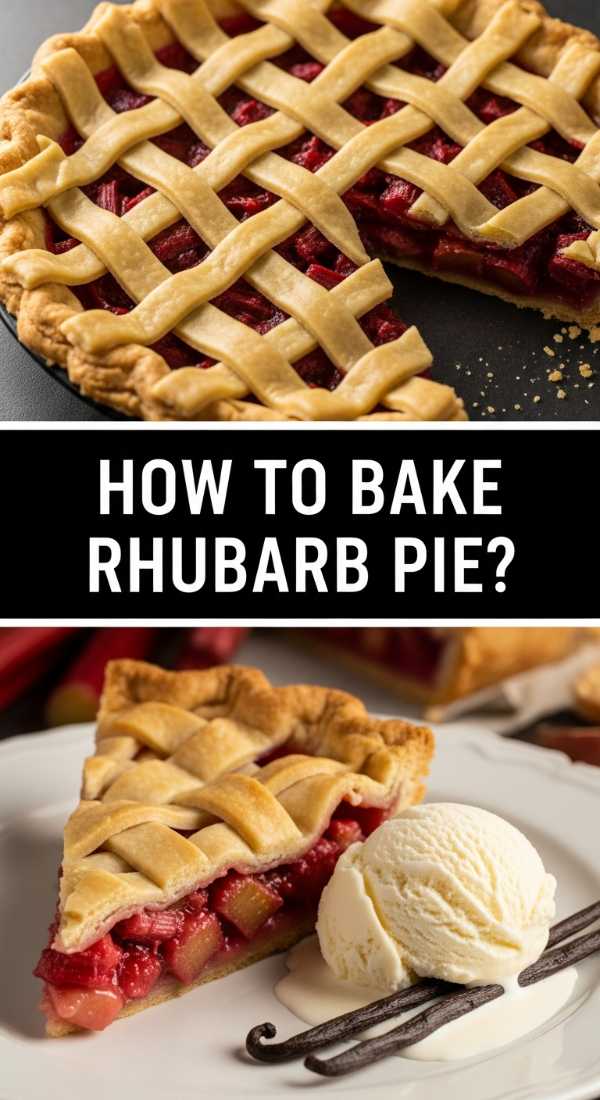
How to bake rhubarb pie?

Why we love this
Rhubarb pie is the quintessential comfort food, offering a rustic charm that is hard to beat. When you pull it from the oven, the sight of the thick, pink juices bubbling through a golden-brown lattice crust is enough to make anyone’s mouth water. The aroma is a complex blend of buttery pastry and the sharp, tangy scent of cooked fruit, softened by a hint of cinnamon. Each bite offers a perfect equilibrium: the shatteringly crisp crust giving way to a warm, jammy interior that is both tart and sweet, especially when served with a melting scoop of vanilla bean ice cream.
Ingredients
- Double pie crust (homemade or store-bought)
- 5 cups rhubarb, cut into 1/2 inch pieces
- 1 1/4 cups granulated sugar
- 1/4 cup cornstarch
- 1/2 teaspoon ground cinnamon
- 1 tablespoon cold butter, cubed
- 1 egg (for egg wash)
How to make it
- Preheat your oven to 400°F (200°C). Roll out your bottom crust and fit it into a 9-inch pie plate. Keep the second crust in the fridge so the butter stays cold and flaky.
- In a large mixing bowl, toss the sliced rhubarb with the sugar, cornstarch, and cinnamon. The cornstarch is crucial as it binds with the juices to prevent a ‘soggy bottom.’
- Pour the rhubarb mixture into the prepared bottom crust. Dot the top of the fruit with the small cubes of cold butter to add richness and a silky mouthfeel to the filling.
- Roll out the second crust and cut into strips to create a lattice top. Weave the strips over and under each other, then crimp the edges to seal the pie.
- Whisk the egg with a tablespoon of water and brush the lattice generously. Sprinkle with a little extra sugar for a crunchier texture.
- Bake for 45 to 55 minutes. You are looking for the crust to be a deep golden brown and the filling to be visibly bubbling in the center.
- Allow the pie to cool for at least 3 hours before slicing. This ‘resting’ period is vital for the filling to set properly so it doesn’t run everywhere when cut.
How to style graduation cupcakes?
Why we love this
Graduation cupcakes are the ultimate crowd-pleaser because they offer personalized joy in a single, handheld bite. There is something so whimsical about seeing a dozen little ‘graduates’ lined up on a platter, each topped with its own tiny cap and tassel. The texture of a well-made cupcake—moist, tender, and topped with a cloud of frosting—is the perfect vehicle for creative styling. Using school colors in the liners and the frosting creates an immediate visual impact that makes the graduate feel celebrated in every detail of the party.
Ingredients
- 12 baked cupcakes
- 2 cups stiff buttercream frosting
- 12 chocolate squares (like Ghirardelli)
- 12 miniature peanut butter cups
- Sour belt candy or fruit leather (for tassels)
- M&Ms or small round candies
How to make it
- Ensure your cupcakes are fully cooled. If they are even slightly warm, the frosting will melt and your decorations will slide off.
- Pipe a small, flat swirl of frosting on top of each cupcake. This acts as the ‘glue’ for your graduation cap.
- Invert a miniature peanut butter cup and place it in the center of the frosting swirl. This forms the base of the mortarboard.
- Place a small dot of melted chocolate or frosting on top of the peanut butter cup, then press a chocolate square firmly onto it.
- Cut your sour belt candy into thin, 1-inch strips. Fringe the ends of the strips with a pair of clean kitchen scissors to look like a tassel.
- Attach the ‘tassel’ to the center of the chocolate square using a tiny dab of frosting, and finish by placing an M&M or small candy on top to cover the connection point.
- Arrange the cupcakes on a tiered stand, alternating school colors if you used colored frosting, for a high-impact display.
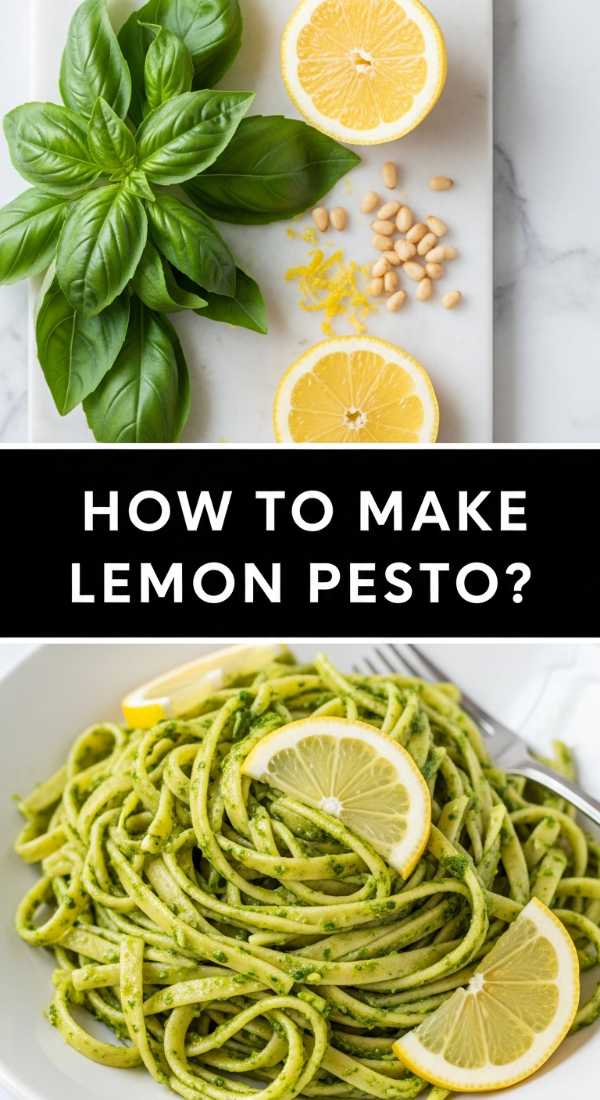
How to make lemon pesto?
Why we love this
Lemon pesto is a bright, citrusy twist on the classic Genovese version that feels like pure sunshine on a plate. The aroma is incredible—the spicy, herbaceous scent of fresh basil hit by the sharp, clean fragrance of lemon zest and the nuttiness of toasted pine nuts. It has a vibrant, neon-green color that pops against pasta or grilled fish. The flavor is a sophisticated dance of salty Parmesan, rich olive oil, and a zesty acidity that cuts through the fat, leaving your palate feeling refreshed and craving another bite.
Ingredients
- 2 cups fresh basil leaves, packed
- 1/2 cup freshly grated Parmesan cheese
- 1/3 cup pine nuts, toasted
- 2 cloves garlic, peeled
- 1/2 cup extra-virgin olive oil
- Zest and juice of 1 large lemon
- Salt and black pepper to taste
How to make it
- Start by toasting your pine nuts in a dry skillet over medium-low heat. Shake the pan constantly until they are golden and fragrant (about 3-5 minutes). Do not walk away; they burn in seconds!
- In a food processor, combine the basil leaves, toasted pine nuts, and garlic. Pulse several times until the mixture is coarsely chopped.
- Add the Parmesan cheese, lemon zest, and lemon juice. Pulse again to combine. The lemon juice will help preserve the bright green color of the basil.
- While the processor is running on a low setting, slowly drizzle in the extra-virgin olive oil in a thin, steady stream. This creates an emulsion, making the pesto creamy and smooth.
- Taste the pesto and season with salt and freshly ground black pepper. Adjust the lemon juice if you want it more ‘zingy.’
- Store in a glass jar. To prevent browning, pour a thin layer of olive oil over the top to seal out the air before putting the lid on.
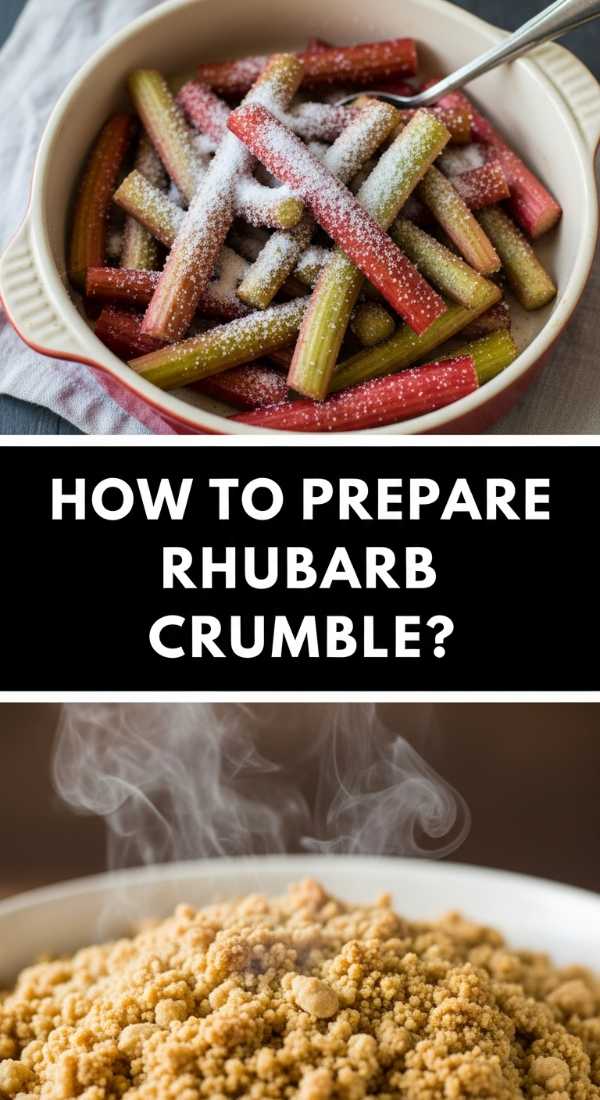
How to prepare rhubarb crumble?

Why we love this
Rhubarb crumble is the dessert for those who love a texture play: the contrast between the bubbling, tart fruit floor and the crunchy, buttery oat ceiling is divine. As it bakes, the smell of toasted oats, brown sugar, and cinnamon wafts through the house, creating an atmosphere of cozy warmth. The rhubarb softens into a luscious, tangy compote that stains the bottom of the crumble topping a beautiful pink. It’s a dish that demands to be eaten warm, with a cold stream of heavy cream or a scoop of vanilla ice cream slowly melting into the nooks and crannies.
Ingredients
- 6 cups rhubarb, cut into 1-inch pieces
- 3/4 cup granulated sugar
- 1 tablespoon flour (for the fruit)
- 1 cup rolled oats
- 1 cup all-purpose flour
- 1 cup brown sugar, packed
- 1/2 cup cold unsalted butter, cubed
- 1 teaspoon cinnamon
How to make it
- Preheat your oven to 375°F (190°C) and grease a 9×13 inch baking dish.
- In a large bowl, toss the rhubarb with the granulated sugar and the single tablespoon of flour. Spread the fruit evenly across the bottom of your baking dish.
- In a separate bowl, combine the oats, 1 cup of flour, brown sugar, and cinnamon. Mix well to ensure the spices are evenly distributed.
- Using a pastry cutter or your fingers, work the cold, cubed butter into the oat mixture. You want to achieve a texture of ‘clumpy sand’—don’t overmix it into a paste; those butter chunks are what create the crunch.
- Sprinkle the crumble mixture evenly over the rhubarb. Don’t press it down; keeping it loose allows the heat to circulate and crisp up the oats.
- Bake for 35 to 45 minutes. The top should be a deep golden brown, and you should see the rhubarb juices bubbling vigorously around the edges.
- Let it stand for 10 minutes before serving. This allows the juices to thicken slightly so the crumble isn’t too watery.
How to decorate graduation cookies?

Why we love this
Decorating graduation cookies is an exercise in edible art that allows you to customize a celebration like no other. The smooth, matte finish of dried royal icing provides a perfect canvas for intricate designs, from tiny diplomas tied with ribbons to the graduate’s future college logo. There is a satisfying ‘snap’ to a well-baked sugar cookie, followed by the sweet, vanilla-forward melt of the icing. These cookies are often the stars of the dessert table because they are so visually striking and serve as wonderful party favors that guests can take home.
Ingredients
- Baked sugar cookies (circles, gowns, and caps)
- Royal icing (stiff and flooding consistencies)
- Gel food coloring (school colors)
- Piping bags and small round tips
- Edible gold leaf or metallic dust
How to make it
- Outline your cookies first using the ‘stiff’ consistency royal icing. This creates a dam that will hold the thinner icing in place. Let the outlines dry for about 10 minutes.
- ‘Flood’ the center of the cookies with the thinner icing. Use a toothpick or a scribe tool to pop any tiny air bubbles and to push the icing into the corners of your outline.
- Allow the flooded base to dry completely—this usually takes at least 6 to 12 hours depending on humidity. It must be rock hard before you add details on top.
- Using the stiff icing and a very fine tip, pipe the details: the ‘2024’ year, the lines of a diploma, or the folds of a graduation gown.
- For a touch of luxury, mix a tiny bit of vodka or lemon extract with gold luster dust to create a ‘paint.’ Use a food-safe brush to highlight the tassels or the edges of the diploma.
- If you are layering colors, let each color dry for at least an hour before adding the next one next to it to prevent the colors from ‘bleeding’ into each other.
How to host italian dinner?

Why we love this
Hosting an Italian dinner is about embracing the ‘slow food’ philosophy—it’s an evening where the meal is the main event and the conversation flows as freely as the wine. The atmosphere is defined by the aroma of simmering marinara, roasted garlic, and fresh oregano. It’s a sensory experience that feels communal and generous, with large platters of pasta and crusty bread passed hand-to-hand. There’s a rustic elegance to a long table set with simple linens and candles, creating a warm glow that makes every guest feel like part of the family.
Ingredients
- Antipasto platter (cured meats, olives, artichokes)
- Fresh pasta (tagliatelle or pappardelle)
- Homemade tomato or meat sauce
- Fresh basil and Parmigiano-Reggiano
- Good quality Italian wine (Chianti or Pinot Grigio)
- Tiramisu or Cannoli for dessert
How to make it
- Start with the ‘Ambiance’: Set a long table with a neutral tablecloth, clusters of candles, and small vases of fresh herbs like rosemary or basil. Put on a playlist of classic Italian jazz or opera.
- Begin the evening with an ‘Aperitivo’ hour. Serve a light drink like an Aperol Spritz alongside an antipasto board. This allows guests to settle in while you finish the main course.
- For the ‘Primi’ (first course), serve a pasta dish. The secret is to cook the pasta until it is just ‘al dente’ and finish it in the sauce with a splash of pasta water to create a silky coating.
- Keep the ‘Secondi’ (main course) simple—perhaps a roasted chicken with lemon and herbs or a platter of grilled vegetables. Italian cooking is about high-quality, simple ingredients.
- Serve the meal family-style. Placing large bowls and platters in the center of the table encourages interaction and a relaxed, unhurried pace.
- End with a ‘Dolce’ (sweet) and a round of espresso or Limoncello. Don’t rush the guests out; the best Italian dinners end with hours of conversation after the plates are cleared.
How to brew fun coffee?

Why we love this
Brewing ‘fun’ coffee is all about elevating your daily caffeine ritual into a moment of pure indulgence. It’s the visual delight of seeing dark espresso marbling through creamy milk, topped with a mountain of velvety foam and a drizzle of caramel. The aroma of freshly ground beans mixed with sweet syrups like lavender or toasted marshmallow is an instant mood lifter. It turns a functional drink into a treat that feels like a boutique cafe experience in your own kitchen, complete with the satisfying texture of cold foam or the warmth of a spiced latte.
Ingredients
- Freshly ground coffee beans or espresso
- Milk of choice (oat and whole milk froth best)
- Flavor syrups (vanilla, caramel, or seasonal fruit)
- Whipped cream or cold foam
- Garnish (cinnamon, cocoa powder, or dried flowers)
How to make it
- Start with a high-quality base. Whether you use an espresso machine, a French press, or a moka pot, ensure your water is filtered and your beans are freshly ground to avoid bitterness.
- Flavor the ‘bed’: Add your syrups or spices (like a pinch of cinnamon or cardamom) directly into the bottom of the cup before you pour the coffee. This ensures the flavor is integrated throughout the drink.
- Texture the milk. If making a hot drink, steam the milk to about 150°F (65°C)—too hot and you’ll scald the milk, losing its natural sweetness. If making a cold drink, use a handheld frother to turn cold milk and a splash of syrup into a thick ‘cold foam.’
- Pour the coffee over the syrup, then gently pour the milk. If you want layers, pour the milk slowly over the back of a spoon.
- Top with your ‘fun’ elements: a generous swirl of whipped cream, a dusting of cocoa, or even a few dried lavender buds for an aesthetic touch.
- Serve in a clear glass to show off the beautiful gradients and layers you’ve created.
How to make rhubarb scones?
[IMAGE_10]
Why we love this
Rhubarb scones are the ultimate tea-time luxury, offering a sophisticated balance of textures: a crisp, sugar-dusted exterior that shatters into a tender, buttery, and slightly flaky crumb. The pockets of roasted rhubarb add bursts of tart moisture that contrast beautifully with the rich, cream-based dough. As they bake, the butter melts and creates steam, lifting the scones into tall, proud triangles. The smell is intoxicating—sweet cream and tart fruit—making them the perfect centerpiece for a food board or a quiet morning with a cup of Earl Grey.
Ingredients
- 2 cups all-purpose flour
- 1/3 cup sugar (plus extra for topping)
- 1 tablespoon baking powder
- 1/2 teaspoon salt
- 6 tablespoons cold unsalted butter, grated
- 1 cup fresh rhubarb, finely diced
- 1/2 cup heavy cream (plus extra for brushing)
- 1 egg
How to make it
- Preheat your oven to 400°F (200°C) and line a baking sheet with parchment paper.
- In a large bowl, whisk together the flour, sugar, baking powder, and salt.
- The secret to flakiness: Grate your cold butter using a box grater and toss it into the flour. Use your fingers to quickly coat the butter bits in flour until the mixture resembles coarse crumbs.
- Gently fold in the finely diced rhubarb. Ensure the pieces are small so they don’t weigh down the dough.
- In a small measuring cup, whisk the heavy cream and egg together. Pour this into the flour mixture and stir with a fork just until the dough starts to come together. Do not overwork it!
- Turn the dough onto a floured surface and pat it into a 7-inch disc. Cut the disc into 8 wedges.
- Place the wedges on the baking sheet, brush the tops with a little extra heavy cream, and sprinkle generously with coarse sugar for a crunchy lid.
- Bake for 18 to 22 minutes until the tops are golden brown and the scones feel firm to the touch. Serve warm with clotted cream or the rhubarb jam we made earlier.
Conclusion
Creating a viral food board is less about following a strict set of rules and more about embracing the joy of variety and the beauty of seasonal ingredients. From the tart zest of rhubarb to the celebratory spark of graduation treats, these recipes offer something for every palate. The next time you find yourself in the kitchen, remember that the best meals are the ones that are shared with love, laughter, and a touch of creative flair. Happy hosting!