

The 5-Minute Food Board That’s Taking Over Social Media
We’ve all been there: guests are arriving in twenty minutes, the house is a whirlwind of last-minute tidying, and you still haven’t figured out what to serve that feels both effortless and sophisticated. There’s something magical about the way a shared platter brings people together, breaking down the barriers of formal dining and inviting everyone to dive into a communal experience of flavors and textures. This viral simple food board concept isn’t just about eating; it’s about the laughter shared over a perfectly seared steak and the collective sigh of delight when someone pulls apart a piece of warm, cheesy bread.
The secret to the ‘5-minute board’ isn’t that you cook everything in five minutes, but that you assemble a stunning array of pre-prepped, high-impact dishes that look like a professional catering spread. By focusing on a few star elements—like succulent shrimp or golden roasted potatoes—you create a visual feast that is as Instagrammable as it is delicious. Let’s walk through the ultimate components that will make your next gathering the talk of your social circle, featuring cozy comforts and elevated classics that never go out of style.
How to make shrimp pasta?
Why we love this
There is an undeniable elegance to a perfectly executed shrimp pasta, where the briny sweetness of the sea meets the citrusy brightness of fresh lemon and the pungent warmth of sautéed garlic. Each strand of pasta should be slicked with a light, buttery emulsion that carries the essence of the ocean, creating a dish that feels incredibly light yet deeply satisfying. Imagine the aroma of sizzling garlic and butter wafting through your kitchen, signaling the start of a meal that is both refreshing and comforting, perfect for an alfresco dinner under the stars.
Ingredients
- 1 lb Large shrimp, peeled and deveined
- 1/2 lb Linguine or spaghetti
- 4 cloves Garlic, minced
- 1/2 cup Dry white wine
- 2 tbsp Butter
- 1 Lemon, zested and juiced
- Fresh parsley, chopped
- Red pepper flakes (optional)
How to make it
- Bring a large pot of salted water to a rolling boil and cook your pasta according to the package directions until it is just ‘al dente,’ meaning it still has a slight bite to it.
- While the pasta cooks, pat the shrimp completely dry with paper towels to ensure a good sear; season them generously with salt and a pinch of black pepper.
- Heat a large skillet over medium-high heat with a splash of olive oil; once the oil is shimmering, add the shrimp in a single layer and cook for 1-2 minutes per side until they turn pink and opaque.
- Remove the shrimp from the pan and set aside; in the same pan, melt the butter and add the minced garlic, stirring constantly for 30 seconds until fragrant but not browned.
- Pour in the white wine to deglaze the pan, scraping up any flavorful brown bits from the bottom, and let it simmer until the liquid is reduced by half.
- Stir in the lemon juice and zest, then toss in the cooked pasta and a splash of reserved pasta water, tossing vigorously to create a silky sauce.
- Return the shrimp to the pan, garnish with fresh parsley and red pepper flakes, and serve immediately while the steam is still rising.
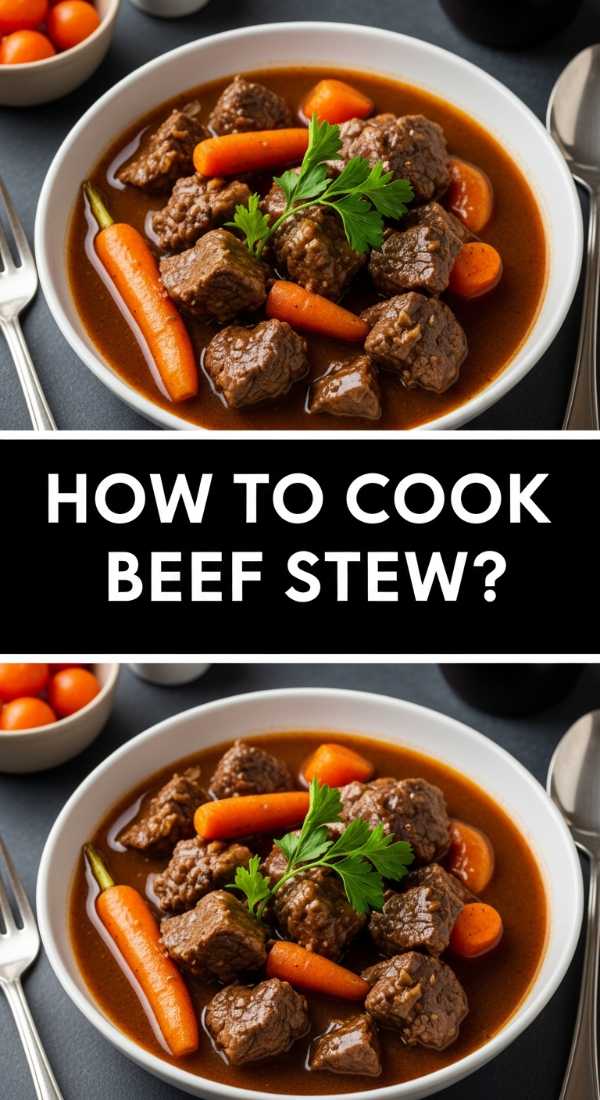
How to cook beef stew?

Why we love this
Beef stew is the culinary equivalent of a warm, wool blanket on a rainy afternoon, offering a depth of flavor that only comes from patience and slow-simmering. The beef becomes so tender it practically melts at the touch of a fork, while the carrots and potatoes soak up the rich, savory gravy until they are bursting with earthy goodness. It’s the kind of meal that fills the entire house with a hearty, rustic aroma, promising a night of cozy indulgence and pure, unadulterated comfort that feeds the soul just as much as the body.
Ingredients
- 2 lbs Beef chuck, cut into 1-inch cubes
- 4 large Carrots, sliced
- 3 large Potatoes, cubed
- 1 Onion, chopped
- 3 cups Beef broth
- 2 tbsp Tomato paste
- 1 cup Red wine
- Fresh thyme and rosemary
How to make it
- Start by dredging your beef cubes in a light coating of seasoned flour, which will help thicken the stew later and provide a beautiful crust during the searing process.
- Heat a heavy-bottomed Dutch oven over medium-high heat with oil and sear the beef in batches, ensuring each piece is deeply browned on all sides; do not crowd the pan or the meat will steam instead of sear.
- Remove the meat and add the chopped onions to the pot, cooking until they are translucent and slightly caramelized to build a sweet base of flavor.
- Stir in the tomato paste and cook for 2 minutes until it darkens, then pour in the red wine to deglaze, using a wooden spoon to lift the ‘fond’ from the bottom of the pot.
- Add the beef broth, the seared meat, carrots, potatoes, and the bundles of fresh herbs; bring the mixture to a gentle boil before reducing the heat to a very low simmer.
- Cover the pot tightly and let it braise for 2 to 3 hours, checking occasionally to ensure the liquid is at a lazy bubble; the meat is done when it breaks apart easily with no resistance.
- Adjust the seasoning with salt and pepper at the very end, and allow the stew to rest for 10 minutes before serving to let the flavors fully marry.
How to grill juicy steak?

Why we love this
A perfectly grilled steak is a testament to the power of fire and high-quality ingredients, featuring a crust that is salty and charred, giving way to a center that is buttery and incredibly tender. The sensory experience is unparalleled: the sizzle of the fat hitting the hot grates, the intense aroma of woodsmoke and aging beef, and that first bite where the juices overflow with savory richness. It’s a celebratory dish that commands attention and satisfies the most primal of cravings with its bold, smoky, and sophisticated flavor profile.
Ingredients
- 2 Ribeye or New York Strip steaks (at least 1.5 inches thick)
- Coarse sea salt and cracked black pepper
- 2 tbsp Unsalted butter
- 2 cloves Garlic, smashed
- Fresh rosemary sprigs
- High-smoke point oil (like grapeseed)
How to make it
- Remove your steaks from the refrigerator at least 45 minutes before cooking to allow them to reach room temperature; this ensures even cooking throughout the entire cut of meat.
- Pat the steaks extremely dry with paper towels—moisture is the enemy of a good crust—and season them aggressively with coarse salt and black pepper on all sides, including the edges.
- Preheat your grill or a heavy cast-iron skillet to very high heat until it is just starting to smoke; lightly oil the surface to prevent the meat from sticking.
- Place the steaks down and sear undisturbed for 3-4 minutes per side for a medium-rare finish, looking for a dark, mahogany-colored crust to form.
- During the last 2 minutes of cooking, add the butter, garlic, and rosemary to the pan (if using a skillet) and spoon the melting, flavored butter over the steaks repeatedly.
- Use a meat thermometer to check for doneness: pull the steaks at 130°F (54°C) for medium-rare, as the temperature will rise during the resting phase.
- Crucially, let the steaks rest on a cutting board for at least 10 minutes before slicing; this allows the muscle fibers to relax and reabsorb the juices, ensuring every bite is succulent.
How to bake cheesy bread?

Why we love this
There is nothing quite as universally beloved as warm bread stuffed with an obscene amount of melted cheese, acting as the ultimate crowd-pleaser for any gathering. The contrast between the crunchy, golden-brown crust of the loaf and the gooey, stretching strands of mozzarella creates a textural masterpiece that is impossible to resist. Infused with garlic butter and herbs, every bite is a decadent explosion of salty, savory joy that makes you want to reach for just one more piece until the entire loaf has vanished into thin air.
Ingredients
- 1 large Italian loaf or Baguette
- 2 cups Shredded Mozzarella
- 1/2 cup Grated Parmesan
- 1/2 cup Butter, softened
- 3 cloves Garlic, minced
- 1 tbsp Fresh parsley, chopped
How to make it
- Preheat your oven to 375°F (190°C) and line a baking sheet with parchment paper or foil for easy cleanup of any escaping cheese.
- Using a serrated knife, cut diagonal slits into the loaf of bread about 1 inch apart, being careful not to cut all the way through the bottom crust.
- In a small bowl, mix the softened butter with the minced garlic and chopped parsley until it forms a smooth, aromatic paste.
- Generously spread the garlic butter inside each slit, ensuring the interior of the bread is well-coated for maximum flavor infusion.
- Stuff a generous amount of shredded mozzarella and parmesan into each opening, packing it in so that the cheese is visible at the top of the slits.
- Wrap the loaf loosely in aluminum foil and bake for 10 minutes, then open the foil and bake for an additional 5-7 minutes until the bread is toasted and the cheese is bubbly and golden.
- Let the bread cool for just a minute so the cheese sets slightly, then serve warm so your guests can enjoy the satisfying ‘cheese pull.’
How to make potato casserole?

Why we love this
A potato casserole is the ultimate comfort food, characterized by paper-thin slices of potato bathed in a luxurious, garlicky cream sauce and topped with a shimmering layer of melted cheddar. The way the edges of the potatoes turn crispy and caramelized while the centers remain soft and velvety creates a harmony of textures that is simply divine. It’s a dish that feels like home, evoking memories of holiday dinners and family gatherings where the side dish often steals the spotlight from the main course with its rich, indulgent profile.
Ingredients
- 3 lbs Yukon Gold potatoes, peeled and thinly sliced
- 2 cups Heavy cream
- 2 cups Shredded Sharp Cheddar
- 3 cloves Garlic, minced
- 1 tsp Thyme leaves
- Salt and pepper to taste
How to make it
- Preheat your oven to 400°F (200°C) and butter a large baking dish thoroughly to prevent the potatoes from sticking to the sides.
- Using a mandoline or a very sharp knife, slice the potatoes into uniform rounds about 1/8-inch thick; uniformity is key to ensuring all the potatoes cook at the same rate.
- In a medium saucepan, heat the heavy cream with the minced garlic, thyme, salt, and pepper over low heat until it just begins to simmer, allowing the flavors to infuse the liquid.
- Layer half of the sliced potatoes in the baking dish, overlapping them slightly, and sprinkle with half of the shredded cheese.
- Add the remaining potatoes in another layer, then pour the warm cream mixture evenly over the top, pressing down slightly to ensure the potatoes are submerged.
- Cover the dish tightly with foil and bake for 45 minutes; then remove the foil, top with the remaining cheese, and bake for another 20 minutes.
- The casserole is finished when the potatoes are tender when pierced with a knife and the top is a deep, bubbly golden-brown.
How to bake apple pie?

Why we love this
An apple pie cooling on a windowsill is the quintessential image of home baking, offering a nostalgic blend of tart fruit, warming cinnamon, and a crust so flaky it shatters upon impact. The scent of cooking apples and caramelized sugar is intoxicating, promising a dessert that balances sweetness with a hint of acidity and a rich, buttery finish. It’s more than just a pie; it’s a sensory journey into the heart of autumn, best enjoyed warm with a scoop of melting vanilla bean ice cream that pools into the spiced apple filling.
Ingredients
- 6-7 large Granny Smith apples, peeled and sliced
- 1/2 cup Granulated sugar
- 1/2 cup Brown sugar
- 2 tbsp Cinnamon
- 1/4 tsp Nutmeg
- 2 pie crusts (homemade or store-bought)
- 1 tbsp Butter, cubed
- 1 Egg (for egg wash)
How to make it
- Preheat your oven to 425°F (220°C). In a large mixing bowl, toss the sliced apples with both sugars, cinnamon, nutmeg, and a pinch of salt until the fruit is thoroughly coated.
- Let the apple mixture sit for about 15 minutes; this allows the juices to release, which prevents a soggy bottom crust during the baking process.
- Fit one pie crust into the bottom of a 9-inch pie plate, trimming the edges so they hang about half an inch over the rim.
- Mound the apple mixture into the crust, discarding some of the excess liquid if there is too much, and dot the top of the fruit with the small cubes of butter.
- Place the second crust over the top—either whole with vent slits cut in the center or cut into strips for a decorative lattice pattern.
- Crimp the edges of the top and bottom crusts together to seal them tightly; brush the top with a beaten egg and sprinkle with a little extra sugar for a professional shine.
- Bake for 45-50 minutes, covering the edges with foil if they brown too quickly, until the crust is golden and the filling is bubbling through the vents.
How to fry crispy chicken?

Why we love this
The perfect fried chicken is a masterpiece of culinary engineering, featuring a craggy, ultra-crisp exterior that shatters to reveal meat that is incredibly succulent and bursting with juice. Each bite offers a symphony of seasoned flour and rendered fat, with just enough spice to keep the palate excited without overwhelming the natural flavor of the poultry. It’s a soul-satisfying indulgence that represents the peak of comfort food, turning a simple dinner into a festive occasion that leaves everyone reaching for the last piece in the basket.
Ingredients
- 2 lbs Chicken thighs or drumsticks
- 2 cups Buttermilk
- 2 cups All-purpose flour
- 1 tbsp Paprika
- 1 tsp Garlic powder
- 1 tsp Onion powder
- 1/2 tsp Cayenne pepper
- Neutral oil for frying (like peanut or vegetable)
How to make it
- Place the chicken pieces in a large bowl and cover them with buttermilk; refrigerate for at least 4 hours, or ideally overnight, to tenderize the meat and infuse it with moisture.
- In a separate shallow dish, whisk together the flour, paprika, garlic powder, onion powder, cayenne, salt, and plenty of black pepper to create a flavorful dredge.
- Heat at least 2 inches of oil in a heavy skillet or Dutch oven to exactly 350°F (175°C); using a thermometer is essential for maintaining the correct temperature.
- Remove a piece of chicken from the buttermilk, let the excess drip off, and dredge it thoroughly in the flour mixture, pressing the flour into the skin to create those coveted ‘crags.’
- Carefully lower the chicken into the hot oil, frying in batches to avoid dropping the oil temperature; cook for 6-8 minutes per side until the internal temperature reaches 165°F (74°C).
- Once deep golden-brown, remove the chicken and place it on a wire cooling rack set over a baking sheet rather than paper towels; this keeps the bottom from getting soggy.
- Let the chicken rest for 5 minutes before serving to allow the juices to redistribute, ensuring the first bite is as moist as possible.
How to cook salmon fillets?
Why we love this
Salmon is the crown jewel of healthy eating, offering a rich, fatty texture that pairs beautifully with a variety of bold glazes and fresh herbs. When cooked properly, the skin becomes as crisp as a potato chip while the flesh remains tender and slightly translucent, flaking away in large, buttery shards at the touch of a fork. The natural oils in the fish provide a sophisticated mouthfeel that is both indulgent and light, making it the perfect centerpiece for a food board that aims to balance decadence with wholesome, vibrant ingredients.
Ingredients
- 4 Salmon fillets (6 oz each)
- 2 tbsp Olive oil
- 1 tbsp Honey
- 1 tbsp Soy sauce
- 1 tsp Grated fresh ginger
- Lemon wedges for serving
How to make it
- Begin by taking the salmon out of the fridge 20 minutes early and patting the skin side extremely dry with paper towels; this is the secret to achieving that restaurant-quality crispy skin.
- Season the flesh side of the fillets with salt and pepper; in a small bowl, whisk together the honey, soy sauce, and grated ginger to create a simple but potent glaze.
- Heat a non-stick or stainless steel skillet over medium-high heat with olive oil; once the oil is shimmering and near its smoke point, place the salmon skin-side down in the pan.
- Press down firmly on each fillet with a spatula for 30 seconds to prevent the skin from curling, then let it cook undisturbed for about 4-5 minutes until the skin is very crispy.
- Carefully flip the fillets and immediately brush the crispy skin with the prepared honey-soy glaze, allowing it to drip down the sides into the pan.
- Cook for an additional 2-3 minutes for medium-rare, or until the fish reaches your desired level of doneness; the glaze will bubble and thicken slightly in the heat.
- Remove the salmon from the pan and serve immediately with a fresh squeeze of lemon juice to cut through the richness of the fish and the sweetness of the glaze.
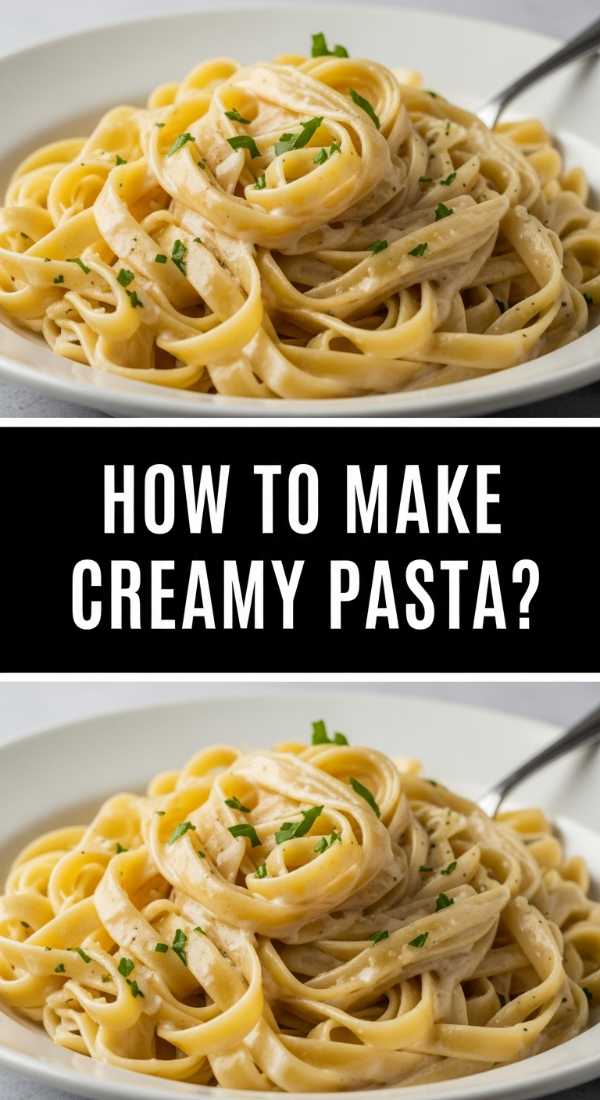
How to make creamy pasta?

Why we love this
Creamy pasta is the ultimate blank canvas for culinary creativity, offering a silken, velvet-like sauce that clings to every curve of the noodle in a warm, cheesy embrace. The aroma of simmering cream and nutty parmesan cheese is enough to make anyone’s mouth water, promising a meal that is profoundly satisfying and elegantly simple. Whether finished with a grating of fresh nutmeg or a sprinkle of cracked black pepper, this dish represents the pinnacle of comfort, turning a few humble ingredients into a luxurious experience that feels like a treat for the senses.
Ingredients
- 1 lb Fettuccine or Pappardelle
- 1 cup Heavy cream
- 1/2 cup Unsalted butter
- 1.5 cups Freshly grated Parmesan cheese
- Pinch of Nutmeg
- Freshly cracked black pepper
How to make it
- Boil your pasta in a large pot of heavily salted water until it is just short of al dente; it will finish cooking in the sauce, so you want it to have a firm center.
- While the pasta boils, melt the butter in a large skillet over medium heat, then pour in the heavy cream and bring it to a very gentle simmer.
- Allow the cream to reduce slightly for about 3-4 minutes, whisking occasionally until it thickens just enough to coat the back of a spoon.
- Turn the heat down to low and gradually whisk in the grated parmesan cheese one handful at a time, ensuring each addition is fully melted before adding the next to avoid clumps.
- Once the sauce is smooth, add a pinch of nutmeg and a generous amount of black pepper; then, using tongs, transfer the pasta directly from the water into the sauce.
- Add a splash of starchy pasta water to the pan and toss everything together over low heat for 1-2 minutes, allowing the pasta to absorb the cream and the sauce to become glossy.
- Serve immediately in warmed bowls, topped with an extra dusting of parmesan for that final touch of cheesy perfection.
How to roast potato wedges?
[IMAGE_10]
Why we love this
Roast potato wedges are the unsung heroes of the food board, providing a rustic, salty crunch that complements almost any dip or main protein. When roasted at high heat, the exterior develops a thick, golden crust seasoned with aromatic herbs, while the inside stays light, fluffy, and steaming hot. There is a simple, honest joy in picking up a wedge and feeling that initial crunch before hitting the soft center, making them an addictive addition that guests will find themselves returning to again and again throughout the evening.
Ingredients
- 4 large Russet potatoes
- 3 tbsp Olive oil
- 1 tsp Garlic powder
- 1 tsp Dried rosemary, crushed
- 1/2 tsp Smoked paprika
- Sea salt and black pepper
How to make it
- Preheat your oven to 425°F (220°C) and place a large rimmed baking sheet inside the oven while it heats; a preheated pan ensures the potatoes start searing the moment they hit the surface.
- Scrub the potatoes clean and cut each one into 8 uniform wedges; for the best texture, soak the cut wedges in a bowl of cold water for 30 minutes to remove excess starch.
- Drain the potatoes and pat them thoroughly dry with a clean kitchen towel—this is the most important step for ensuring they actually roast rather than steam.
- In a large bowl, toss the dry wedges with olive oil, garlic powder, crushed rosemary, smoked paprika, salt, and pepper until every surface is evenly coated.
- Carefully remove the hot baking sheet from the oven and spread the potatoes out in a single layer, ensuring they aren’t touching so the air can circulate around each wedge.
- Roast for 20 minutes, then use a spatula to flip each wedge over; roast for another 15-20 minutes until they are deeply browned and crisp on all sides.
- Remove from the oven and sprinkle with a final touch of flaky sea salt while they are still glistening with oil, then serve hot with your favorite dipping sauce.
Conclusion
Creating a viral-worthy food board is less about following strict rules and more about embracing the joy of variety and the warmth of shared meals. Whether you’re piling up crispy chicken, layering creamy pasta, or arranging perfectly roasted potato wedges, the goal is to create an inviting landscape of flavors that encourages guests to explore and enjoy. These ten recipes provide the perfect foundation for a versatile spread that can be adapted for any season or occasion. So, grab a large wooden board, channel your inner stylist, and get ready to host a gathering that will be remembered long after the last bite is gone!