
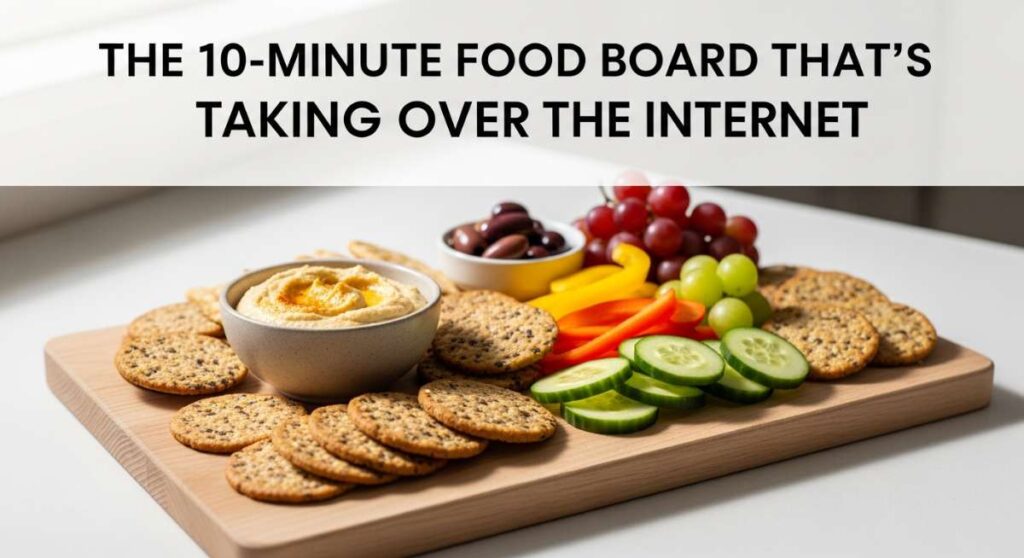
There is something almost magical about the way food brings people together, isn’t there? Last Friday, I found myself with a house full of friends, no plan for dinner, and only ten minutes to spare before everyone got hangry. That’s when it hit me: the ‘Viral Simple Food Board.’ Instead of stressing over individual plates, I laid everything out on my largest wooden board, creating a tapestry of textures and flavors that felt like a celebration rather than a last-minute scramble. It’s not just about eating; it’s about the shared experience of reaching for a bite, the laughter over a shared dip, and the visual feast that starts the meal before a single fork is lifted.
Since that night, I’ve realized that this board isn’t just a trend—it’s a lifestyle shift. It’s about ditching the perfectionism of five-course meals for something that feels lived-in, warm, and deeply personal. Whether you are craving something sweet, salty, or soul-warming, these ten recipes are the building blocks of the ultimate food board that is currently taking over the internet. Grab your favorite board, and let’s dive into the recipes that will make your next gathering unforgettable.
How to make gooey chocolate chip cookies?
Why we love this
There is nothing quite like the aroma of browning butter and vanilla wafting through the house to signal that comfort is on the way. These cookies are the crown jewel of any dessert board, offering a divine contrast between the crisp, golden-brown edges and a center that is so soft it practically melts on your tongue. When you pull them apart, the sight of molten dark chocolate stretching into thin ribbons is pure sensory bliss, while a tiny sprinkle of sea salt on top cuts through the richness, making every bite feel like a sophisticated indulgence.
Ingredients
- 2 1/4 cups all-purpose flour
- 1 tsp baking soda
- 1 tsp sea salt
- 1 cup unsalted butter, softened
- 3/4 cup granulated sugar
- 3/4 cup packed brown sugar
- 1 tsp vanilla extract
- 2 large eggs
- 2 cups semi-sweet chocolate chips
How to make it
- Begin by preheating your oven to 375°F (190°C). It is crucial to let the oven reach full temperature to ensure the edges crisp up quickly while the center stays doughy.
- In a medium bowl, whisk together the flour, baking soda, and salt. Sifting these together ensures there are no clumps, resulting in a smoother dough texture.
- In a large stand mixer bowl, cream the softened butter with both granulated and brown sugars. Beat on medium-high speed for about 3-5 minutes until the mixture looks pale and fluffy; this aeration is key to a light cookie.
- Add the eggs one at a time, beating well after each addition, then stir in the vanilla extract.
- Gradually fold in the dry ingredients using a spatula. Do not overmix; stop as soon as no streaks of flour remain to avoid a tough cookie.
- Fold in the chocolate chips by hand. Scoop rounded tablespoons onto ungreased baking sheets, leaving about 2 inches of space between them.
- Bake for 9 to 11 minutes. Look for the edges to turn a light golden brown while the centers still look slightly underbaked and soft.
- Let them cool on the baking sheet for 5 minutes before transferring to a wire rack. This allows the residual heat to finish cooking the centers perfectly.
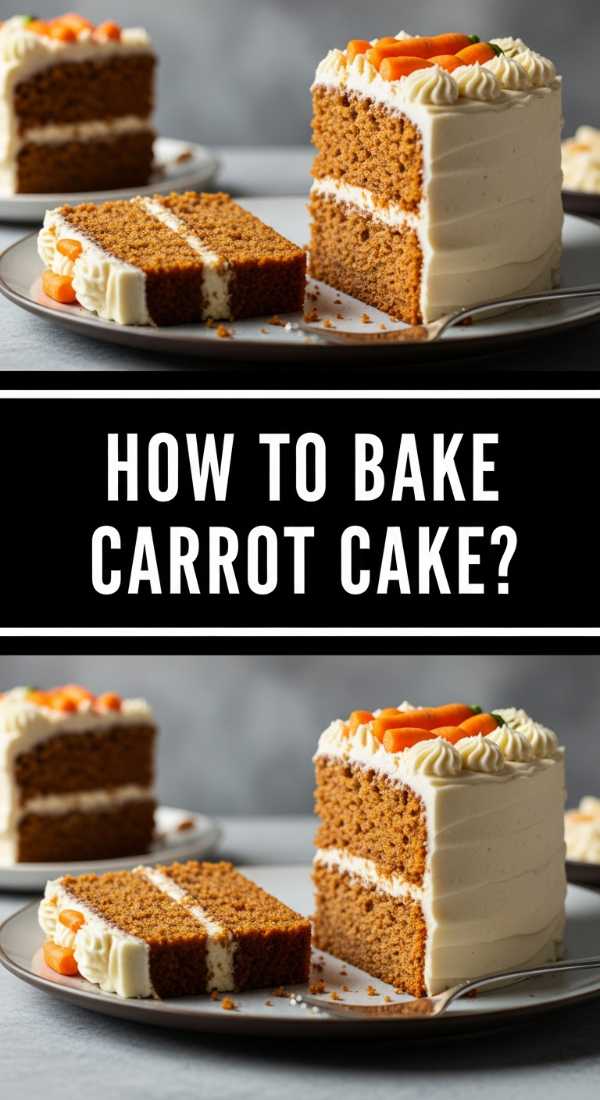
How to bake moist carrot cake?
Why we love this
A truly great carrot cake is a masterclass in texture and spice, bringing a rustic elegance to your food board. The crumb is incredibly moist, almost velvety, thanks to the infusion of oil and the natural juices from freshly grated carrots. As you take a bite, you’re met with the warm, earthy notes of cinnamon and nutmeg, followed by the crunch of toasted walnuts and the tangy, silky-smooth embrace of cream cheese frosting that balances the sweetness with a bright, clean finish.
Ingredients
- 2 cups all-purpose flour
- 2 cups sugar
- 1 tsp baking powder
- 1 tsp baking soda
- 1 tsp ground cinnamon
- 3 cups finely grated carrots
- 1 cup vegetable oil
- 4 large eggs
- 1/2 cup chopped walnuts
- Cream cheese frosting (for topping)
How to make it
- Preheat your oven to 350°F (175°C) and generously grease a 9×13 inch baking pan or two 9-inch round cake pans.
- In a large mixing bowl, combine the flour, sugar, baking powder, baking soda, and cinnamon. Use a whisk to ensure the leavening agents are evenly distributed through the flour.
- In a separate bowl, whisk the eggs and vegetable oil together until emulsified. Slowly pour the wet ingredients into the dry ingredients, stirring constantly with a wooden spoon until a thick batter forms.
- Fold in the finely grated carrots and chopped walnuts. It is important to grate the carrots yourself rather than buying pre-shredded ones, as fresh carrots provide more moisture.
- Pour the batter into the prepared pans and smooth the top with a spatula. Tap the pan on the counter to release any trapped air bubbles.
- Bake for 30 to 40 minutes. Test for doneness by inserting a toothpick into the center; it should come out clean or with just a few moist crumbs attached.
- Allow the cake to cool completely in the pan. If you frost a warm cake, the cream cheese frosting will melt and slide off.
- Spread a thick layer of cream cheese frosting over the top, using a swirling motion to create decorative peaks.
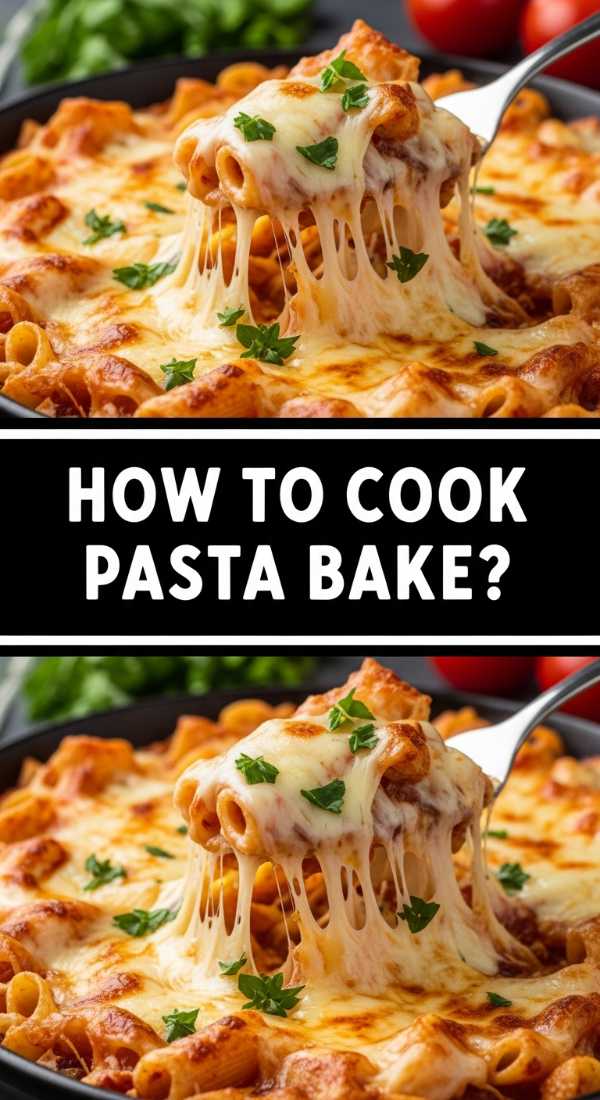
How to make cheesy pasta bake?
Why we love this
The cheesy pasta bake is the ultimate crowd-pleaser, providing a golden, bubbling centerpiece for a savory food board. Imagine breaking through a crust of toasted mozzarella and parmesan to find al dente pasta swathed in a rich, velvety tomato cream sauce. The aroma of roasted garlic and Italian herbs fills the air, while the cheese pulls create a visual spectacle that makes everyone reach for their forks immediately. It’s heavy, satisfying, and tastes like a warm hug on a cold evening.
Ingredients
- 1 lb ziti or penne pasta
- 24 oz marinara sauce
- 15 oz ricotta cheese
- 1 egg, lightly beaten
- 2 cups shredded mozzarella cheese
- 1/2 cup grated Parmesan cheese
- 2 cloves garlic, minced
- 1 tsp dried oregano
How to make it
- Preheat your oven to 375°F (190°C) and lightly grease a large baking dish.
- Boil a large pot of salted water and cook the pasta for 2 minutes less than the package directions for ‘al dente.’ The pasta will finish cooking in the oven, and this prevents it from becoming mushy.
- While the pasta cooks, mix the ricotta cheese, beaten egg, minced garlic, and oregano in a small bowl. The egg acts as a binder, giving the ricotta a light, souffle-like texture once baked.
- Drain the pasta and return it to the pot. Stir in the marinara sauce and half of the mozzarella cheese until well combined.
- Layer half of the pasta mixture into the baking dish. Dot the top with large spoonfuls of the ricotta mixture, then cover with the remaining pasta.
- Sprinkle the remaining mozzarella and the Parmesan cheese over the top in an even layer.
- Cover with foil and bake for 20 minutes. Then, remove the foil and bake for another 10-15 minutes until the cheese is browned and bubbling vigorously.
- Let it stand for 5 minutes before serving to allow the sauce to set slightly.
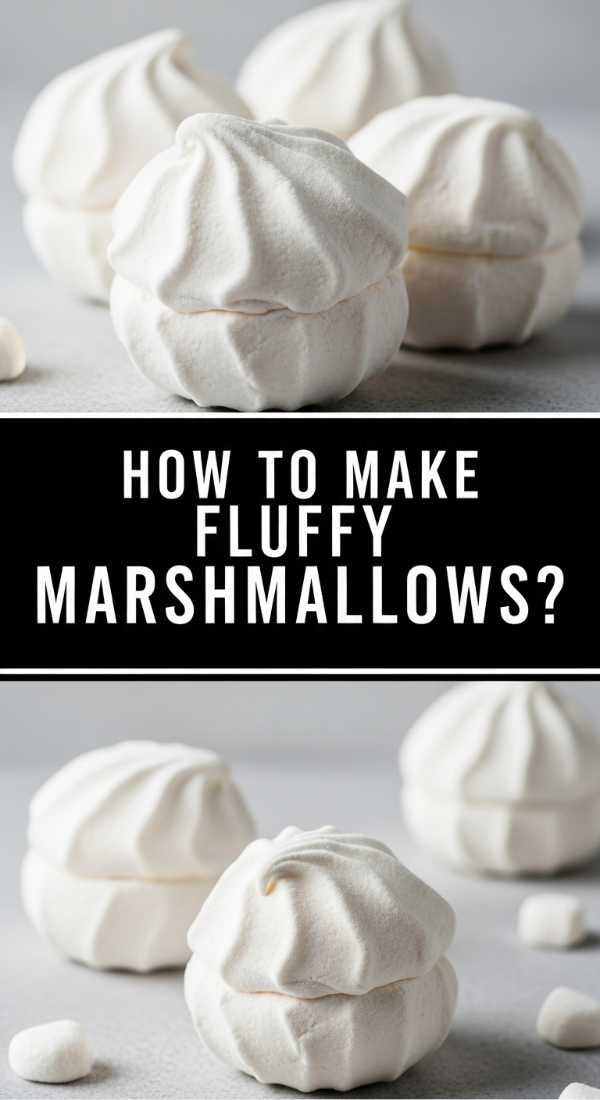
How to make fluffy marshmallows?
Why we love this
Homemade marshmallows are a revelation, far removed from the gummy, store-bought variety. They are like biting into a sweet, vanilla-scented cloud that dissolves instantly on the tongue. Their texture is impossibly light and bouncy, dusted with a fine coating of powdered sugar that creates a delicate puff of white with every movement. Adding these to a board brings a whimsical, artisanal touch that pairs perfectly with hot cocoa or dark chocolate squares for dipping.
Ingredients
- 3 packs unflavored gelatin
- 1 cup cold water, divided
- 1 1/2 cups granulated sugar
- 1 cup light corn syrup
- 1/4 tsp salt
- 1 tbsp vanilla extract
- 1/2 cup powdered sugar
- 1/4 cup cornstarch
How to make it
- In the bowl of a stand mixer, pour 1/2 cup of cold water and sprinkle the gelatin over it. Let it sit (bloom) for at least 10 minutes.
- In a medium saucepan, combine the remaining 1/2 cup water, granulated sugar, corn syrup, and salt. Place over medium-high heat and cover for 3 minutes.
- Uncover and clip a candy thermometer to the side. Cook the syrup until it reaches exactly 240°F (115°C). Immediately remove from heat.
- Turn the stand mixer on low speed and slowly pour the hot syrup down the side of the bowl into the gelatin. Once all syrup is in, increase the speed to high.
- Whip for 12-15 minutes until the mixture is very thick, lukewarm, and holds its shape. Add the vanilla in the final minute of whipping.
- While whipping, mix the powdered sugar and cornstarch. Dust a 9×9 inch pan generously with this mixture.
- Pour the marshmallow fluff into the pan and smooth the top with a damp spatula. Dust the top with more sugar/starch mix.
- Let sit uncovered for at least 4 hours or overnight. Turn out onto a board, cut into squares with a dusted knife, and toss each piece in the sugar mixture to coat the sticky sides.
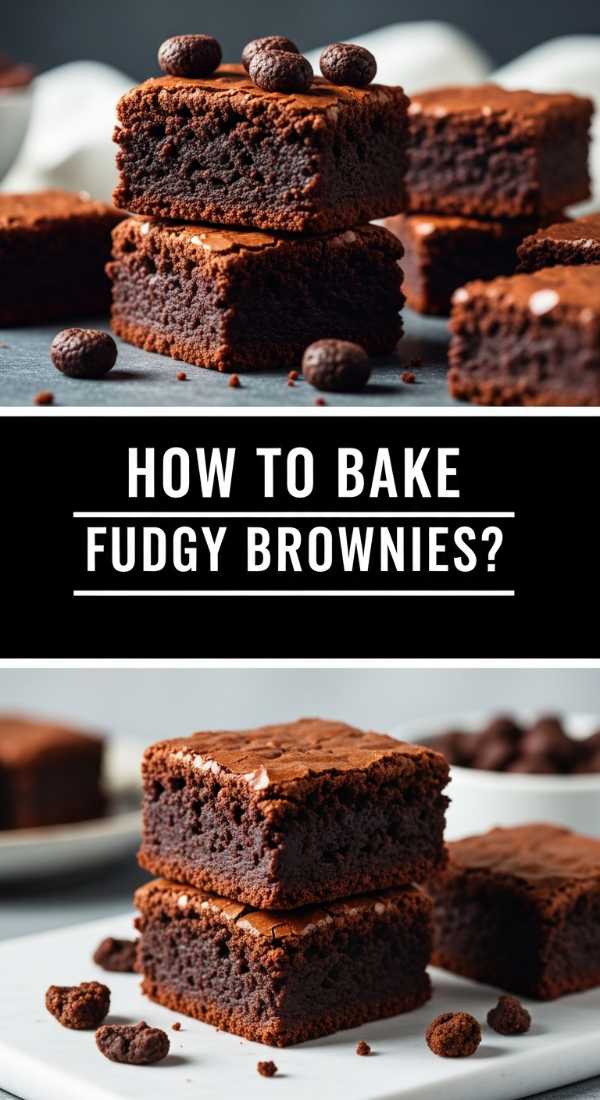
How to bake fudgy brownies?

Why we love this
A great brownie is defined by its decadent, fudgy interior and that iconic, tissue-thin crinkle top that shatters under the slightest pressure. These are not cakey; they are dense, rich, and packed with deep cocoa flavor that lingers long after the last bite. The sight of these dark, square treasures stacked on a board, perhaps drizzled with a bit of salted caramel, creates an irresistible focal point for chocolate lovers who crave that intense, chewy satisfaction.
Ingredients
- 1 cup unsalted butter, melted
- 2 cups granulated sugar
- 4 large eggs
- 1 tsp vanilla extract
- 3/4 cup cocoa powder
- 1 cup all-purpose flour
- 1/2 tsp salt
- 1/2 tsp baking powder
How to make it
- Preheat your oven to 350°F (175°C) and line an 8-inch square baking pan with parchment paper, leaving an overhang on the sides for easy removal.
- In a large bowl, whisk the melted butter and sugar together vigorously for about 2 minutes. This high sugar-to-fat ratio is what creates the shiny, crackly top.
- Add the eggs one at a time, whisking well after each, then stir in the vanilla extract. The batter should look glossy.
- Sift the cocoa powder, flour, salt, and baking powder directly into the wet ingredients. Sifting is vital here to prevent any dry cocoa lumps in your dense batter.
- Gently fold the dry ingredients into the wet using a rubber spatula. Stop as soon as the last streak of flour disappears; overmixing will incorporate too much air and make them cakey.
- Pour the batter into the prepared pan and spread evenly. Bake for 25 to 30 minutes.
- The “clean toothpick” rule doesn’t apply here. You want the toothpick to come out with wet, fudgy crumbs. If it’s clean, you’ve overbaked them!
- Allow the brownies to cool completely in the pan before lifting them out and slicing. This ensures clean edges and a set center.
How to make street tacos?

Why we love this
Street tacos bring a vibrant, festive energy to a food board, exploding with bright colors and bold, zesty flavors. The smell of charred corn tortillas and sizzling, marinated meat is enough to make anyone’s mouth water. Each taco is a perfect bite of tender protein, sharp white onion, and fresh cilantro, all brought together by a generous squeeze of lime that cuts through the savory fat. They are small, handheld, and encourage everyone to customize their plate with various salsas and radishes.
Ingredients
- 1 lb skirt steak or chicken thighs
- 2 tbsp soy sauce
- 1 tbsp lime juice
- 1 tsp cumin
- 2 cloves garlic, minced
- Small corn tortillas
- 1/2 cup chopped white onion
- 1/2 cup fresh cilantro, chopped
- Lime wedges for serving
How to make it
- In a bowl, whisk together the soy sauce, lime juice, cumin, and minced garlic. Add the meat and marinate for at least 30 minutes (or up to 4 hours) in the refrigerator.
- Heat a heavy cast-iron skillet or griddle over high heat until it starts to smoke slightly. You want a very hot surface to achieve a good sear.
- Place the meat in the pan. For steak, cook for 3-4 minutes per side for medium-rare. For chicken, cook until the internal temperature reaches 165°F.
- Remove the meat from the heat and let it rest on a cutting board for 5 minutes. This allows the juices to redistribute so the meat stays tender.
- While the meat rests, wipe the skillet and flash-fry the corn tortillas for 30 seconds per side until they have charred spots and are pliable.
- Finely dice the rested meat against the grain into small, bite-sized cubes.
- Assemble by placing a generous spoonful of meat onto two stacked tortillas (the second tortilla provides structural integrity).
- Top with a sprinkle of white onion, a pinch of cilantro, and serve immediately with a lime wedge on the side.
How to make apple crumble?

Why we love this
Apple crumble is the epitome of rustic comfort, offering a beautiful interplay between soft, cinnamon-spiced fruit and a crunchy, buttery topping. As it bakes, the apples break down into a luscious, syrupy jam that bubbles up around the edges of the golden oats. The warm scent of baked fruit and brown sugar is incredibly inviting, and when served warm on a board alongside a jar of vanilla bean cream, it becomes a dessert that feels both humble and deeply satisfying.
Ingredients
- 5 large Granny Smith apples, peeled and sliced
- 1/2 cup granulated sugar
- 1 tsp ground cinnamon
- 1 cup rolled oats
- 1 cup all-purpose flour
- 1 cup packed brown sugar
- 1/2 cup cold unsalted butter, cubed
How to make it
- Preheat your oven to 375°F (190°C). In a large bowl, toss the sliced apples with the granulated sugar and cinnamon until every slice is evenly coated.
- Transfer the apple mixture to a baking dish, spreading them out into an even layer.
- In another bowl, combine the oats, flour, and brown sugar. Mix well to break up any large clumps of sugar.
- Add the cold, cubed butter to the dry mixture. Use your fingers or a pastry cutter to work the butter in until the mixture looks like coarse crumbs with some pea-sized pieces of butter remaining. These pieces create the “crunch” as they melt and fry the flour/oats.
- Sprinkle the crumble mixture evenly over the apples. Do not press it down; you want it to remain loose so the heat can circulate.
- Bake for 35 to 45 minutes. The topping should be a deep golden brown and the apple juices should be thick and bubbling.
- Allow it to cool for at least 10 minutes before serving. This allows the juices to thicken further into a glaze.
How to cook chicken soup?
Why we love this
There is a profound, quiet beauty in a pot of homemade chicken soup. The broth is clear and golden, shimmering with tiny droplets of healthy fats and infused with the deep, savory essence of slow-cooked poultry and aromatic vegetables. Each spoonful offers tender morsels of chicken and soft, sweet carrots that have absorbed the flavor of the herbs. It is a restorative dish that adds a sense of nourishment and warmth to your table, especially when served in small, cozy mugs as part of a larger spread.
Ingredients
- 1 whole chicken (3-4 lbs)
- 3 large carrots, sliced
- 3 stalks celery, sliced
- 1 large onion, chopped
- 4 cloves garlic, smashed
- 2 bay leaves
- 1 tsp dried thyme
- Salt and pepper to taste
- 8 cups water
How to make it
- Place the whole chicken, onion, garlic, bay leaves, and thyme into a large stockpot. Pour in the water until the chicken is mostly submerged.
- Bring the water to a gentle boil over medium-high heat. Once it boils, immediately reduce the heat to low. A low simmer is essential for a clear broth; boiling too hard will turn the broth cloudy.
- Simmer for about 60 to 90 minutes, skimming off any foam that rises to the top with a spoon.
- Carefully remove the chicken from the pot and set it on a tray to cool. Strain the broth through a fine-mesh sieve into a clean pot to remove the spent aromatics.
- Add the sliced carrots and celery to the strained broth and simmer for 15-20 minutes until the vegetables are tender.
- While the vegetables cook, shred the chicken meat from the bones, discarding the skin and carcass.
- Return the shredded meat to the pot and season generously with salt and black pepper. Taste and adjust seasoning as needed.
- Serve hot, garnished with a little fresh parsley if desired.
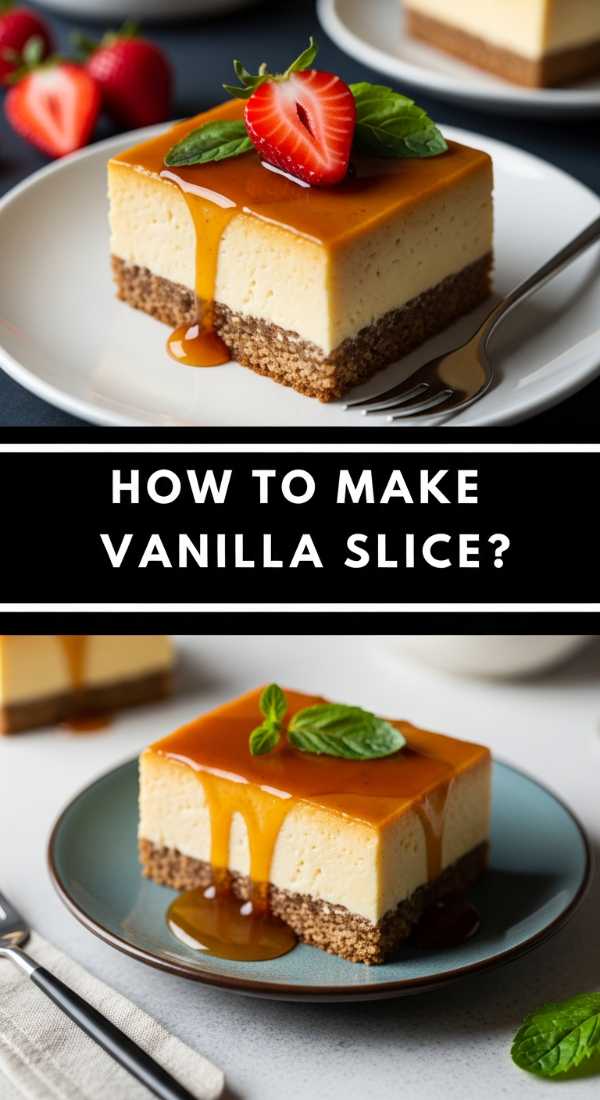
How to bake vanilla slice?
Why we love this
The vanilla slice, often called a ‘snot block’ in some parts of the world with affection, is a masterpiece of architectural pastry. It features two layers of impossibly crisp, flaky puff pastry sandwiching a thick, wobbling layer of silky vanilla bean custard. The top is finished with a smooth, sweet glaze that snaps when you bite into it. It’s a textural journey that feels decadent and nostalgic, providing a stunning, structured element to any dessert board that guests will reach for again and again.
Ingredients
- 2 sheets frozen puff pastry, thawed
- 2 cups whole milk
- 1/2 cup heavy cream
- 1/2 cup sugar
- 1/4 cup cornstarch
- 4 egg yolks
- 1 tbsp vanilla bean paste
- 1 cup powdered sugar (for glaze)
- 2 tbsp boiling water (for glaze)
How to make it
- Preheat your oven to 400°F (200°C). Prick the puff pastry sheets all over with a fork, place them between two sheets of parchment paper and two baking trays (to keep them flat), and bake for 15 minutes until golden and crisp. Let them cool.
- In a saucepan, bring the milk and cream to a simmer over medium heat.
- In a separate bowl, whisk the sugar, cornstarch, and egg yolks until pale. Slowly pour half of the hot milk into the egg mixture while whisking constantly (tempering) to prevent curdling.
- Pour the egg mixture back into the saucepan with the remaining milk. Cook over medium-low heat, stirring constantly with a whisk, until the mixture thickens into a heavy custard.
- Remove from heat and stir in the vanilla bean paste. Let the custard cool slightly, but it should still be pourable.
- Place one pastry sheet in the bottom of a square cake tin lined with parchment. Pour the warm custard over it and smooth the top. Place the second pastry sheet on top and press down gently.
- Refrigerate for at least 6 hours, or ideally overnight, to let the custard set firmly.
- Whisk the powdered sugar and boiling water to make a thick glaze. Spread over the top pastry sheet. Once set, use a serrated knife to gently saw through the layers into rectangles.
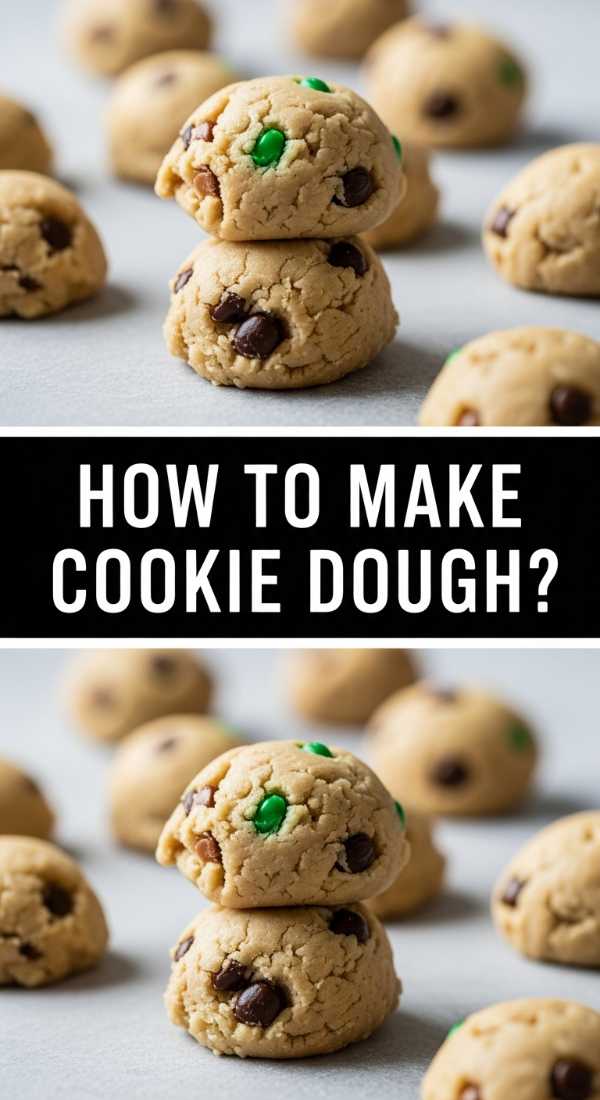
How to make edible cookie dough?
[IMAGE_10]
Why we love this
Edible cookie dough is the ultimate guilty pleasure made safe, allowing you to indulge in that nostalgic childhood joy without any of the risks. It has a delightful, slightly grainy texture from the sugar and flour, punctuated by the snap of mini chocolate chips. It smells like pure sweetness and vanilla, and its malleable nature makes it perfect for scooping onto a board alongside pretzels, fruit slices, or graham crackers. It’s playful, fun, and always the first thing to disappear at a party.
Ingredients
- 1 cup all-purpose flour
- 1/2 cup unsalted butter, softened
- 1/2 cup brown sugar
- 1/4 cup granulated sugar
- 1/4 tsp salt
- 2 tbsp milk
- 1/2 tsp vanilla extract
- 1/2 cup mini chocolate chips
How to make it
- First, you must heat-treat the flour to kill any bacteria. Spread the flour on a baking sheet and bake at 350°F (175°C) for 5-7 minutes, or until it reaches 160°F. Let it cool completely.
- In a medium bowl, cream together the softened butter, brown sugar, and granulated sugar until the mixture is light and fluffy.
- Stir in the salt, milk, and vanilla extract until fully incorporated. The milk provides the moisture that eggs usually would.
- Sift the cooled, heat-treated flour into the butter mixture. Use a spatula to fold it in until a thick, dough-like consistency forms.
- If the dough is too dry, add an extra teaspoon of milk. If it is too soft, chill it in the fridge for 20 minutes.
- Fold in the mini chocolate chips by hand so they are evenly distributed.
- Serve the dough in small bowls or rolled into bite-sized balls on your board.
- Store any leftovers in an airtight container in the refrigerator for up to one week.
Conclusion
Creating a 10-minute food board isn’t about the time spent in the kitchen; it’s about the intention behind the meal. By focusing on these viral, simple recipes, you can transform any gathering into an interactive feast that delights the senses and sparks conversation. Remember, the best boards are those that reflect your personal taste and the joy of sharing good food with the people you love. So, go ahead—clear off your counter, find your biggest board, and start building your own masterpiece tonight!
Frequently Asked Questions
Q: Can I make these recipes ahead of time?
A: Absolutely! Items like the cookie dough, marshmallows, and vanilla slice actually benefit from being made in advance, while the pasta bake and brownies can be reheated easily.
Q: What kind of board should I use?
A: A large wooden cutting board, a marble slab, or even a clean baking sheet lined with parchment paper works beautifully. The key is surface area!
Q: How do I keep the hot items warm on the board?
A: Place hot dishes like the pasta bake or chicken soup in ceramic bowls or small cast-iron pans that retain heat well, and place them on the board last.