

There is something almost magical about the way a beautifully arranged food board brings people together. I remember the first time I set one out on my weathered oak coffee table; within minutes, the room felt warmer, the conversation flowed easier, and the stresses of the week simply melted away into the background. It is not just about the food; it is about the intentionality of creating a space where everyone feels welcome to nibble, chat, and linger just a little bit longer.
Lately, the internet has been obsessed with this specific ’10-Minute Food Board’ concept, and honestly, I am here for it. It is the perfect solution for those of us who want to host without the high-stakes pressure of a formal five-course dinner. By combining a few homemade staples with fresh, seasonal produce, you can create a centerpiece that looks like a work of art but feels as comfortable as your favorite pair of slippers. Today, I am sharing the secrets to the components that make my boards go viral every single time.
How to Bake the Ultimate Lemon Cake
Why we love this
This lemon cake is the personification of a sunny afternoon spent in a blooming citrus grove. Its crumb is incredibly tender and moist, yielding effortlessly to the fork, while the aroma of fresh lemon zest and high-quality vanilla beans fills your entire home with a sense of pure joy. Each bite offers a perfect balance of zesty brightness and delicate sweetness, finished with a tart glaze that crackles slightly between your teeth, making it an irresistible addition to any afternoon spread.
Ingredients
- 1 ½ cups all-purpose flour
- 1 teaspoon baking powder
- ½ teaspoon salt
- 1 cup granulated sugar
- 2 large eggs
- ½ cup unsalted butter, softened
- ½ cup whole milk
- 2 tablespoons fresh lemon zest
- 3 tablespoons lemon juice
- 1 teaspoon vanilla extract
How to make it
- Preheat your oven to 350°F (175°C) and thoroughly grease a loaf pan with butter and a dusting of flour to ensure a clean release.
- In a medium bowl, whisk together the flour, baking powder, and salt until well-combined, which helps aerate the flour for a lighter texture.
- In a separate large mixing bowl, cream the softened butter and granulated sugar together using a hand mixer on medium-high speed for about 3-5 minutes until the mixture is pale, light, and fluffy.
- Add the eggs one at a time, beating well after each addition to ensure the emulsion stays stable and smooth.
- Stir in the lemon zest, lemon juice, and vanilla extract, noting how the citrus oils immediately perfume the batter.
- Begin adding the dry ingredients to the wet ingredients in three parts, alternating with the milk, starting and ending with the flour mixture. Mix only until just combined to avoid overworking the gluten.
- Pour the batter into the prepared pan and bake for 45-55 minutes, or until a toothpick inserted into the center comes out clean with just a few moist crumbs attached.
- Let the cake cool in the pan for 10 minutes before transferring it to a wire rack to cool completely before drizzling with an optional powdered sugar and lemon juice glaze.
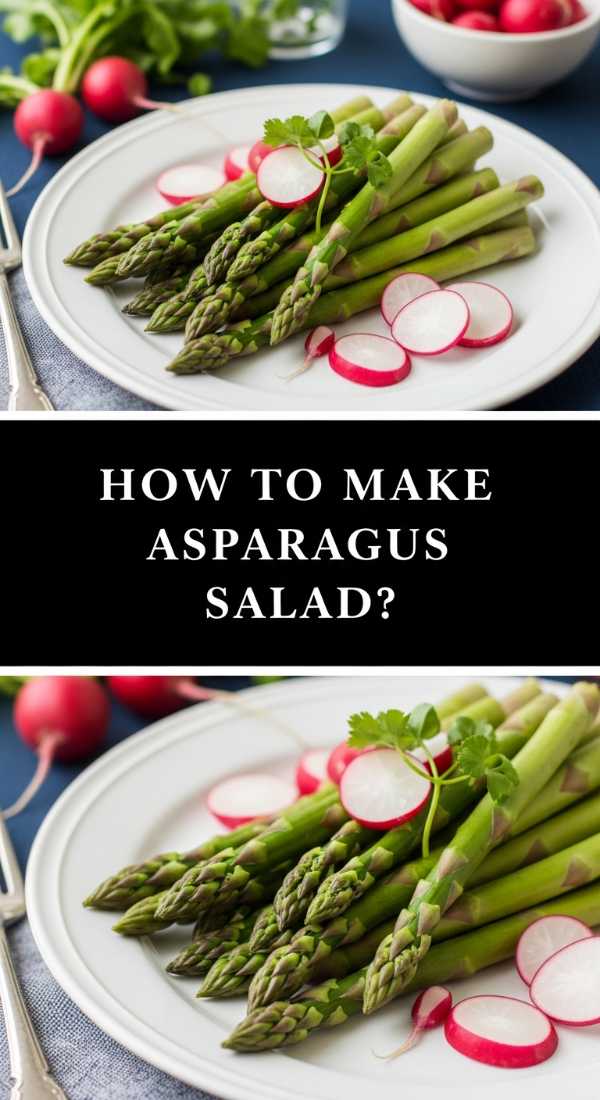
How to Make a Crisp Asparagus Salad

Why we love this
This salad is a celebration of spring’s most elegant vegetable, capturing a crunch that is both refreshing and deeply satisfying. The vibrant green stalks are shaved into delicate ribbons that soak up a sharp, mustardy vinaigrette, creating a texture that is light yet substantial. Topped with shavings of salty parmesan and toasted pine nuts, it offers a sophisticated interplay of earthy, nutty, and acidic flavors that cleanse the palate and brighten up any food board.
Ingredients
- 1 bunch fresh asparagus (medium thickness)
- 1 cup shaved Parmesan cheese
- ¼ cup toasted pine nuts
- 3 tablespoons extra virgin olive oil
- 1 tablespoon fresh lemon juice
- 1 teaspoon Dijon mustard
- Sea salt and freshly cracked black pepper to taste
How to make it
- Wash the asparagus thoroughly and snap off the woody bottom ends where they naturally break.
- Using a vegetable peeler, lay a stalk flat on a cutting board and peel from the base to the tip to create long, thin ribbons; repeat with all stalks until you have a pile of delicate green curls.
- In a small glass jar or bowl, whisk together the olive oil, lemon juice, Dijon mustard, salt, and pepper until the dressing is fully emulsified and thickened.
- Place the asparagus ribbons in a large chilled bowl and gently toss them with half of the dressing, using your hands or tongs to ensure every ribbon is lightly coated without breaking.
- Add the shaved Parmesan and toasted pine nuts, then drizzle the remaining dressing over the top just before serving.
- Allow the salad to sit for 5 minutes before serving so the acid in the lemon juice can slightly soften the raw asparagus while maintaining its signature snap.
How to Make Elegant Tea Sandwiches

Why we love this
There is a timeless charm to a perfectly constructed tea sandwich, bringing a touch of vintage sophistication to your modern food board. These bite-sized delights offer a cooling sensation from the crisp cucumber slices, paired with the silky richness of herb-infused cream cheese spread thin over soft, pillowy bread. They are the ultimate finger food, designed to be dainty enough to eat in two bites while delivering a concentrated burst of fresh, garden-inspired flavor that feels incredibly decadent.
Ingredients
- 1 loaf thin-sliced white or whole wheat bread
- 8 oz cream cheese, softened
- 1 tablespoon fresh dill, finely chopped
- 1 teaspoon lemon zest
- 1 English cucumber, thinly sliced
- Salt and white pepper to taste
- Unsalted butter, softened
How to make it
- In a small bowl, whip the softened cream cheese with the fresh dill, lemon zest, salt, and white pepper until it is light and spreadable.
- Lay out your bread slices and spread a very thin, even layer of softened butter on one side of every slice; this acts as a moisture barrier to prevent the bread from getting soggy.
- Spread a generous layer of the herb cream cheese over the buttered side of half the slices.
- Arrange the cucumber slices in a slightly overlapping pattern across the cream cheese, ensuring they cover the entire surface area of the bread.
- Place the remaining bread slices on top, butter-side down, to close the sandwiches.
- Using a very sharp serrated knife, carefully trim the crusts off all four sides of the sandwiches to create clean, straight edges.
- Cut each large sandwich into three vertical fingers or four small triangles, wiping the knife blade between cuts to ensure the edges stay pristine and white.
How to Make Tangy Sourdough Crackers

Why we love this
These crackers are the unsung heroes of the snack world, providing a robust, fermented tang that cuts through rich cheeses and creamy dips with ease. Their texture is exceptionally crisp, with a satisfying shatter that reveals layers of airy bubbles formed during the baking process. Sprinkled with flaky sea salt and dried herbs, they offer a rustic, artisanal feel that makes your food board look like it was curated by a professional chef while reducing kitchen waste in the most delicious way possible.
Ingredients
- 1 cup sourdough starter discard
- 1 cup all-purpose flour
- ¼ cup unsalted butter, melted
- 1 teaspoon fine sea salt
- 2 tablespoons dried herbs (like rosemary or thyme)
- Flaky sea salt for topping
How to make it
- Preheat your oven to 325°F (165°C) and prepare two large baking sheets with parchment paper or silicone baking mats.
- In a medium bowl, combine the sourdough discard, flour, melted butter, fine salt, and dried herbs, stirring until a cohesive, slightly tacky dough forms.
- Divide the dough into two equal portions and place one portion directly onto a piece of parchment paper.
- Roll the dough out as thin as possible—ideally about 1/16th of an inch; the thinner the dough, the crispier the final cracker will be.
- Lightly brush the surface with a tiny bit of water or olive oil and sprinkle generously with flaky sea salt.
- Use a pizza cutter or a sharp knife to score the dough into squares or rectangles, but do not separate them yet.
- Bake for 20-25 minutes, rotating the pans halfway through, until the crackers are a deep golden brown and feel firm to the touch.
- Remove from the oven and let them cool completely on the pan; they will continue to crisp up as they reach room temperature before you snap them along the scored lines.
How to Cook Vibrant Pea Soup

Why we love this
This soup is like a bowl of pure liquid spring, boasting an emerald green hue that is as visually stunning as it is flavorful. The texture is velvety smooth, coating the back of a spoon with a richness that comes from blending sweet, young peas with a touch of heavy cream or coconut milk. It has a natural, earthy sweetness that is punctuated by the brightness of fresh mint, creating a soothing yet refreshing dish that can be served warm or chilled as a sophisticated shooter on your board.
Ingredients
- 4 cups frozen or fresh shelled peas
- 1 large shallot, minced
- 2 cloves garlic, smashed
- 4 cups vegetable broth
- ¼ cup fresh mint leaves
- 2 tablespoons olive oil
- ½ cup heavy cream (optional)
- Salt and black pepper to taste
How to make it
- In a large pot or Dutch oven, heat the olive oil over medium-low heat and sauté the minced shallots and garlic for about 5 minutes until they are translucent and fragrant, being careful not to let them brown.
- Increase the heat to medium and add the peas, stirring for 2 minutes to coat them in the flavored oil.
- Pour in the vegetable broth and bring the mixture to a gentle simmer; cook for about 5-8 minutes if using frozen peas, or until fresh peas are tender but still bright green.
- Remove the pot from the heat and stir in the fresh mint leaves, which provide a cooling aromatic finish.
- Using an immersion blender or a high-speed countertop blender, puree the soup until it is completely smooth and silk-like in texture.
- Stir in the heavy cream if using, then season generously with salt and pepper to taste.
- If the soup is too thick, add a splash more broth until you reach your desired consistency; serve immediately with a swirl of cream or a few reserved whole peas for garnish.
How to Roast Golden Herb Chicken

Why we love this
There is nothing quite as comforting as the scent of roasting chicken infused with woodsy herbs like rosemary and thyme. The skin becomes incredibly thin and crackling-crisp, protecting the succulent, juicy meat underneath that pulls away from the bone with almost no effort. It provides a hearty, savory anchor for your food board, offering a protein-rich component that feels sophisticated yet deeply grounded in home-cooked tradition, perfect for pairing with tangy mustards or fruit preserves.
Ingredients
- 1 whole chicken (approx. 4 lbs) or 4 large chicken breasts
- 3 tablespoons olive oil
- 1 tablespoon kosher salt
- 1 teaspoon black pepper
- 4 cloves garlic, minced
- 2 tablespoons fresh rosemary, chopped
- 2 tablespoons fresh thyme, chopped
- 1 lemon, halved
How to make it
- Preheat your oven to 425°F (220°C); a high temperature is essential for achieving that sought-after crispy, golden skin.
- Pat the chicken completely dry with paper towels; any moisture on the skin will cause it to steam rather than crisp.
- In a small bowl, mix the olive oil, salt, pepper, garlic, rosemary, and thyme to create a thick herb paste.
- Rub the herb paste all over the chicken, making sure to get it under the skin of the breast for maximum flavor penetration.
- Place the lemon halves inside the cavity (or alongside the breasts) to infuse the meat with a subtle citrus steam as it roasts.
- Place the chicken in a roasting pan and cook for 15 minutes at high heat, then reduce the oven to 375°F (190°C) and continue roasting until the internal temperature reaches 165°F (74°C) at the thickest part.
- Remove from the oven and let the meat rest for at least 15 minutes before carving; this allows the juices to redistribute throughout the meat, ensuring every slice is moist and flavorful.
How to Make a Glossy Strawberry Tart

Why we love this
This tart is a visual masterpiece, featuring concentric circles of ruby-red strawberries resting on a bed of silky vanilla pastry cream. The contrast between the buttery, shortbread-like crust and the soft, sweet fruit creates a textural symphony that feels like a true indulgence. Finished with a shiny apricot glaze, the tart glistens under the light, beckoning guests to take a slice and enjoy the concentrated essence of summer berries and rich, creamy custard.
Ingredients
- 1 pre-baked 9-inch tart shell
- 2 cups fresh strawberries, hulled and sliced
- 1 cup milk
- 3 egg yolks
- ¼ cup granulated sugar
- 2 tablespoons cornstarch
- 1 teaspoon vanilla bean paste
- 2 tablespoons apricot jam (for glaze)
How to make it
- To make the pastry cream, whisk the egg yolks, sugar, and cornstarch in a medium bowl until pale and thick.
- Heat the milk in a saucepan over medium heat until it just begins to simmer, then slowly temper the egg mixture by pouring in a small amount of hot milk while whisking constantly.
- Pour the entire mixture back into the saucepan and cook over medium heat, whisking vigorously, until the custard thickens to a pudding-like consistency.
- Remove from heat, stir in the vanilla bean paste, and transfer to a bowl; cover with plastic wrap pressed directly onto the surface to prevent a skin from forming and chill for 2 hours.
- Once chilled, spread the pastry cream evenly into the pre-baked tart shell using an offset spatula.
- Arrange the strawberry slices in a decorative circular pattern, starting from the outside edge and working your way toward the center.
- Warm the apricot jam in the microwave for 20 seconds, strain out any lumps, and gently brush the warm glaze over the strawberries to give them a professional, high-gloss finish.
How to Make Fluffy Sourdough Pancakes
Why we love this
These are not your average pancakes; the addition of sourdough starter gives them a complex, slightly nutty depth of flavor that balances perfectly with sweet maple syrup. They are incredibly airy and light, with a distinct lift that makes them stack beautifully on a brunch-themed food board. Each pancake has a delicate, golden-brown lattice on the surface and a soft, pillowy interior that melts in your mouth, making them a comforting and slightly sophisticated morning treat.
Ingredients
- 2 cups sourdough starter (discard or active)
- 1 large egg
- 2 tablespoons vegetable oil
- ½ teaspoon salt
- 1 teaspoon baking soda
- 1 tablespoon granulated sugar
How to make it
- In a large mixing bowl, whisk together the sourdough starter, egg, and oil until the mixture is uniform and smooth.
- In a small ramekin, mix the salt, baking soda, and sugar together to ensure they are evenly distributed.
- Add the dry ingredients to the starter mixture and fold gently; you will notice the batter immediately begin to foam and expand—this is the reaction that creates the fluffiness, so do not over-mix.
- Heat a non-stick griddle or large cast-iron skillet over medium heat and lightly grease with a small amount of butter or oil.
- Drop ¼ cup portions of batter onto the hot griddle, leaving enough space between them for easy flipping.
- Cook until bubbles form on the surface and the edges look set and matte, usually about 2-3 minutes.
- Flip carefully and cook for an additional 1-2 minutes until the second side is a deep golden brown; serve immediately while warm for the best texture.
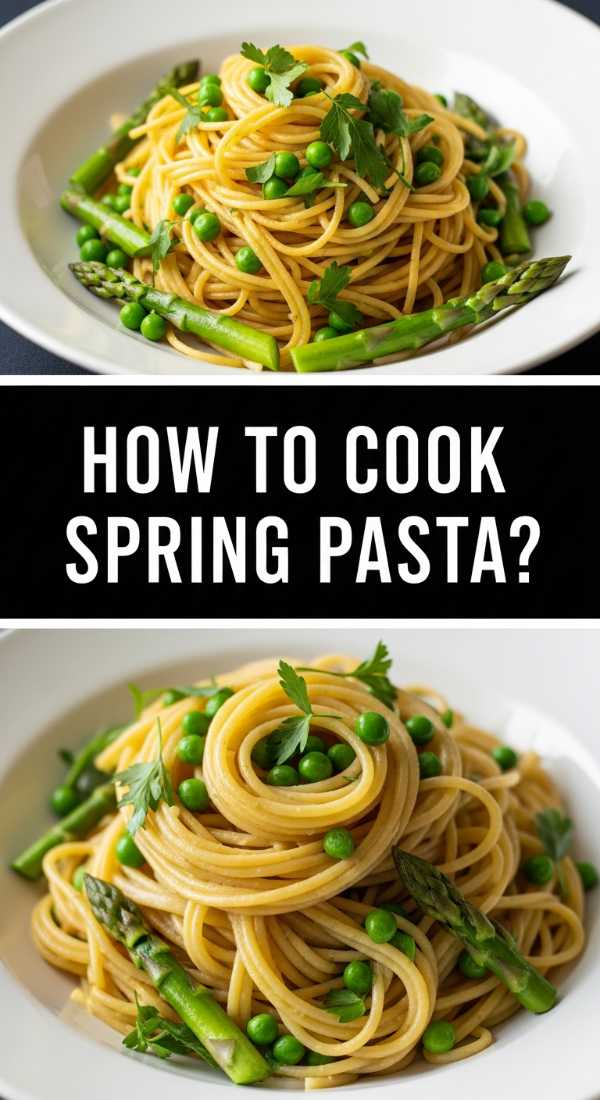
How to Cook Zesty Spring Pasta

Why we love this
This pasta dish feels like a breath of fresh air, utilizing the lightest ingredients to create a meal that is satisfying without being heavy. The al dente noodles are tossed in a simple sauce of garlic, olive oil, and starchy pasta water, which creates a silky coating that clings to every strand. Flecked with bright green peas, tender herbs, and a generous squeeze of lemon, it is a vibrant and aromatic dish that celebrates the simplicity of high-quality seasonal ingredients.
Ingredients
- 12 oz spaghetti or linguine
- 2 cups frozen peas or asparagus tips
- 3 tablespoons extra virgin olive oil
- 3 cloves garlic, thinly sliced
- ½ teaspoon red pepper flakes
- ½ cup freshly grated Pecorino Romano
- Handful of fresh parsley, chopped
- Juice of half a lemon
How to make it
- Bring a large pot of heavily salted water to a rolling boil and cook the pasta according to package directions, but subtract 2 minutes from the recommended time for a true al dente bite.
- While the pasta cooks, heat the olive oil in a large skillet over medium-low heat; add the sliced garlic and red pepper flakes, cooking slowly for 3-4 minutes until the garlic is golden and fragrant but not burnt.
- Three minutes before the pasta is done, add the peas or asparagus tips directly into the boiling pasta water to blanch them quickly.
- Before draining, reserve at least 1 cup of the starchy pasta water—this is the secret to a glossy sauce.
- Drain the pasta and vegetables and add them directly into the skillet with the garlic oil.
- Add half of the reserved pasta water and the Pecorino Romano, tossing vigorously over medium heat to emulsify the cheese and water into a light, creamy sauce.
- Finish with the fresh parsley and lemon juice, adding more pasta water if the dish seems too dry, and serve immediately with an extra sprinkle of cheese.
How to Sear Crispy Spring Salmon
[IMAGE_10]
Why we love this
Perfectly seared salmon is a masterclass in texture, offering a skin so thin and crispy it shatters like a chip, contrasted by flesh that is buttery and flakes apart with the lightest touch of a fork. The natural richness of the fish is enhanced by a quick sear, locking in moisture and creating a savory crust that is seasoned simply with salt and citrus. It is a stunning, high-protein addition to a food board that feels incredibly upscale yet takes only minutes to prepare at the stove.
Ingredients
- 2 large salmon fillets (6-8 oz each)
- 2 tablespoons high-smoke point oil (like avocado or grapeseed oil)
- 1 tablespoon unsalted butter
- 1 teaspoon sea salt
- ½ teaspoon cracked black pepper
- Fresh dill and lemon slices for garnish
How to make it
- Remove the salmon from the refrigerator 15 minutes before cooking to take the chill off, which ensures even cooking throughout the fillet.
- Pat the skin side of the salmon extremely dry with a paper towel; moisture is the enemy of a crispy skin. Season both sides generously with salt and pepper.
- Heat a stainless steel or cast-iron skillet over medium-high heat until it is shimmering hot but not smoking.
- Add the oil to the pan and carefully place the salmon fillets in the pan, skin-side down, pressing down gently with a spatula for 10 seconds to ensure the skin makes full contact with the heat.
- Allow the salmon to cook undisturbed for about 4-5 minutes, or until the skin is golden and crispy and the color of the fish has changed about three-quarters of the way up the side.
- Flip the fillets carefully and add the butter to the pan; once melted, baste the salmon with the hot butter for 1 minute for a rich finish.
- Remove the salmon from the pan while the center is still slightly translucent (medium-rare), as it will continue to cook for a minute once removed from the heat.
Final Thoughts on the Perfect Board
Building a viral-worthy food board isn’t about being a master chef; it’s about the joy of assembly and the love of sharing good food with the people you care about. Whether you are whipping up the tangy sourdough crackers or the glossy strawberry tart, each component adds a layer of texture and flavor that makes the final presentation feel special. So, grab your largest wooden board, pick a few of these recipes to try this weekend, and don’t forget to snap a picture before everyone dives in!