
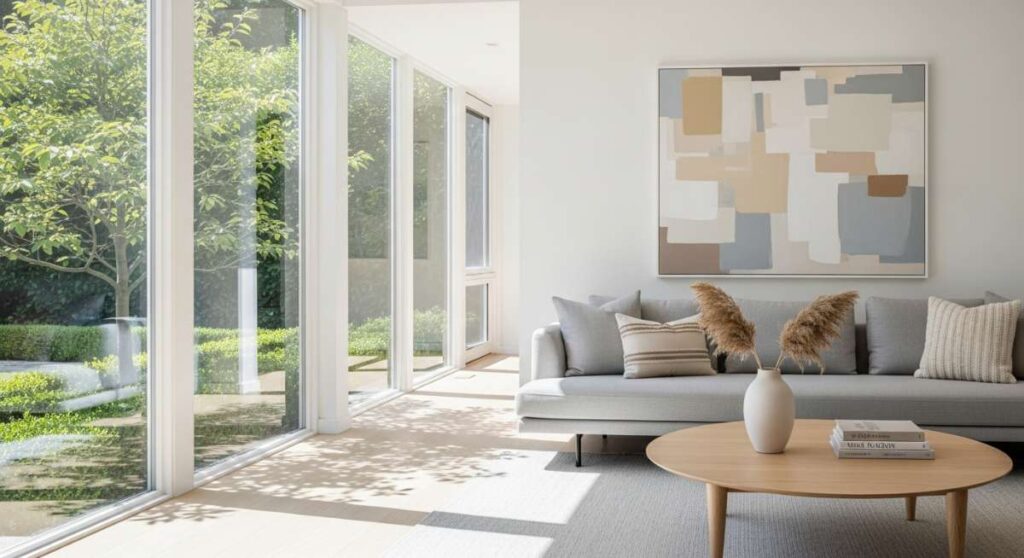
Sun-Drenched Spaces: A Guide to Modern Home Aesthetics
There is something inherently magical about the way the golden hour light spills across a freshly tidied room, catching the dust motes in a dance and highlighting the textures of our favorite sanctuaries. For me, a home has never just been about the square footage; it is about the way a space makes you feel when you kick off your shoes after a long day. It’s that sigh of relief when you see a perfectly styled corner or the spark of joy that comes from a garden blooming just outside your window.
Lately, I’ve been obsessed with the idea of ‘intentional living’—the practice of curating our environments to reflect our inner peace and our wildest dreams. Whether you are working with a sprawling backyard or a cozy studio apartment, the aesthetic you choose acts as the backdrop to your life’s most precious memories. In this guide, we’re diving deep into the art of the home, exploring everything from the nostalgia of ‘Grandma Chic’ to the practical magic of an organized workspace.
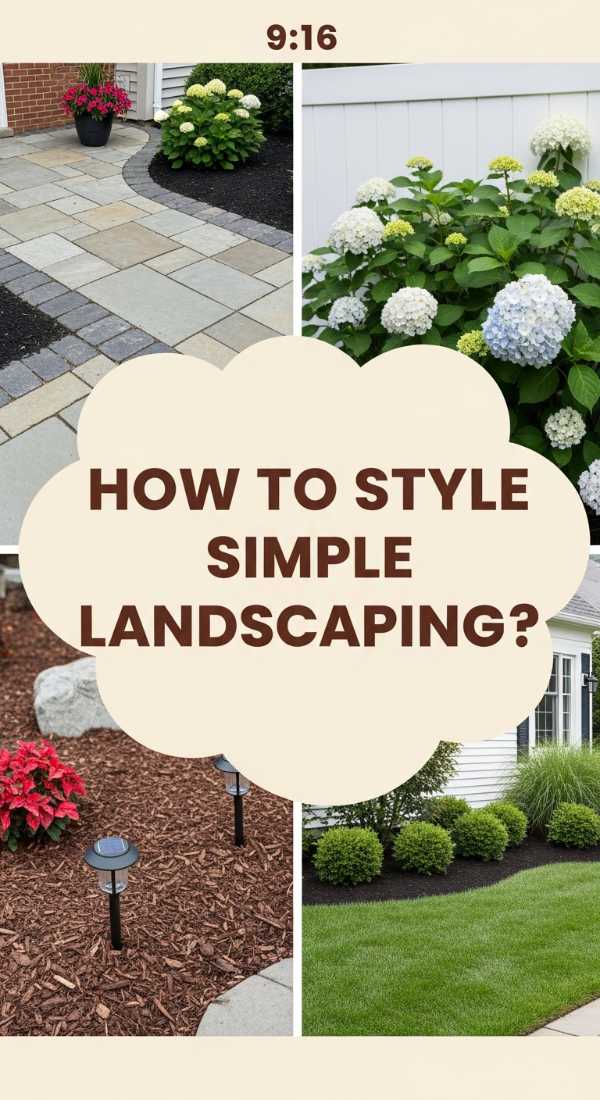
How to Create Simple Landscaping for Instant Front Yard Appeal
Why we love this
A well-manicured front yard is like a warm handshake for your home; it sets the tone before guests even step through the front door. We adore this approach because it combines the earthy, rich scent of fresh cedar mulch with the vibrant, structural green of hostas and boxwoods. There is a deep satisfaction in seeing crisp, clean lines against the sidewalk and the way a few strategically placed perennials can transform a tired patch of grass into a professional-looking estate entrance that feels both welcoming and expensive.
Essential Elements:
- Hardwood or cedar mulch in a dark espresso or classic red.
- Stone or plastic garden edging for defined borders.
- Low-maintenance perennials (Hostas, Daylilies, or Boxwoods).
- Solar-powered pathway lights.
- Large decorative rocks or boulders for texture.
How to make it
- Begin by defining your bed lines using a garden hose or spray paint to create soft, organic curves or sharp, modern angles along your walkway.
- Use a sharp spade or an edger tool to cut a 3-inch deep trench along your marked line, removing any grass or weeds within the designated area to create a blank canvas.
- Amend your soil with a layer of nutrient-rich compost to ensure your new plants have the best start, tilling it gently into the existing earth.
- Space your plants according to their mature width, ensuring the tallest specimens are toward the back and smaller groundcovers are in the front; dig holes twice as wide as the root ball.
- Install your edging material firmly into the trench you dug earlier, securing it with stakes to prevent shifting during heavy rains.
- Spread a 2-3 inch layer of mulch over the entire bed, being careful not to pile it directly against the stems of your plants, which can cause rot.
- Finish by installing solar lights at 3-foot intervals to highlight your hard work after the sun sets.
How to Design a Productive Office Desk Setup for a Better Work Cubicle

Why we love this
The modern cubicle often feels sterile, but with the right aesthetic, it can become a cockpit of creativity and calm. We love this setup because it prioritizes tactile comfort—the smoothness of a vegan leather desk mat, the soft glow of a warm-toned task lamp, and the grounding presence of a small succulent. It turns the ‘grind’ into a ritual, where every tool has a home and the visual clutter is replaced by a curated selection of items that inspire focus and quiet confidence throughout the workday.
Essential Elements:
- Ergonomic monitor riser.
- Neutral-toned desk mat (cork or leather).
- Small desk plant (Snake plant or Pothos).
- Noise-canceling headphones with a dedicated stand.
- A customized mood board or wire grid for inspiration.
How to make it
- Clear everything off your desk and wipe down all surfaces with a microfiber cloth to remove dust and create a fresh starting point.
- Place your monitor at eye level using a riser; your neck should be in a neutral position, looking straight ahead rather than down at the screen.
- Position your desk mat centrally; this defines your primary workspace and provides a soft surface for your wrists and mouse movement.
- Organize your cables using adhesive clips or sleeves, tucking them behind the desk legs to eliminate ‘visual noise’ and tangles.
- Set up a lighting hierarchy: use a dedicated LED task lamp for focused work and a small ambient light (like a salt lamp) to soften the harsh overhead fluorescent office lights.
- Introduce a ‘touch of life’ by placing a low-light plant in the corner of your desk to improve air quality and provide a visual break from the screen.
- Add a personal touch with a single framed photo or a minimalist mood board, ensuring it remains curated rather than cluttered.
How to Build a Cheap Pool Deck for Summer Backyard Vibes

Why we love this
There is nothing quite like the feeling of sun-warmed wood beneath your bare feet before you plunge into cool water. We love this budget-friendly pool deck because it democratizes luxury, using affordable materials like pressure-treated pine or reclaimed pallets to create a high-end ‘resort’ feel. The scent of wood sealant mixed with chlorine creates that quintessential summer aroma, while the elevated platform provides the perfect stage for lounging with a cold lemonade and a summer thriller.
Essential Elements:
- Pressure-treated 2×4 and 2×6 lumber.
- Concrete deck blocks for the foundation.
- Decking screws (galvanized or stainless steel).
- Waterproof wood stain or sealant.
- Outdoor rug and weather-resistant floor cushions.
How to make it
- Measure the height and circumference of your above-ground pool, then mark out a rectangular or semi-circle area on the ground for the deck footprint.
- Level the ground where your concrete deck blocks will sit; use a 4-foot level and a long straight board to ensure all blocks are perfectly even with each other.
- Cut your 2×6 pressure-treated boards for the outer frame and internal joists, spacing the joists 16 inches apart on center for maximum stability.
- Secure the frame to the deck blocks and check for levelness again; use shim pieces of wood if any corner is slightly lower than the others.
- Lay your 5/4 decking boards across the joists, using a nail or a spacer to maintain a consistent 1/8-inch gap between boards for drainage and expansion.
- Screw the boards down using two screws per joist, ensuring the heads are slightly countersunk so they don’t snag bare feet.
- Sand any rough edges or splinters and apply two coats of high-quality exterior stain to protect the wood from UV rays and water splashes.
How to Decorate a Patriotic Front Porch for a Festive Summer Welcome

Why we love this
A patriotic porch is a nostalgic nod to Americana, evoking memories of sparklers, parades, and homemade apple pie. We love this look for its bold, crisp palette of navy, crimson, and stark white, which pops beautifully against the natural greenery of a summer garden. The rhythmic swaying of a cloth bunting in the breeze adds a sense of movement and life to the house, making the entire neighborhood feel a little more festive and connected during the warm July months.
Essential Elements:
- Tea-stained or bright cotton American flag.
- Red, white, and blue pleated fan buntings.
- Woven wicker furniture with navy cushions.
- Large galvanized metal buckets filled with red geraniums.
- White rocking chairs.
How to make it
- Start with a deep clean: sweep the porch, wash the windows, and scrub the front door to ensure your decorations stand out against a pristine background.
- Hang your primary flag using a sturdy bracket mounted at a 45-degree angle near the entrance, ensuring it is positioned high enough not to touch the ground.
- Zip-tie or hook pleated buntings along the porch railing, spacing them evenly so the ‘swags’ drape at the same depth for a professional, symmetrical look.
- Layer your seating area by adding navy blue outdoor pillows to white rocking chairs or wicker benches to provide that high-contrast ‘nautical’ patriotic feel.
- Arrange galvanized buckets on either side of the door; fill them with potting soil and plant a mix of red geraniums, white petunias, and blue lobelia for a living flag effect.
- Place a coir doormat with a simple ‘Home’ or ‘Welcome’ message to ground the space and add a touch of natural texture.
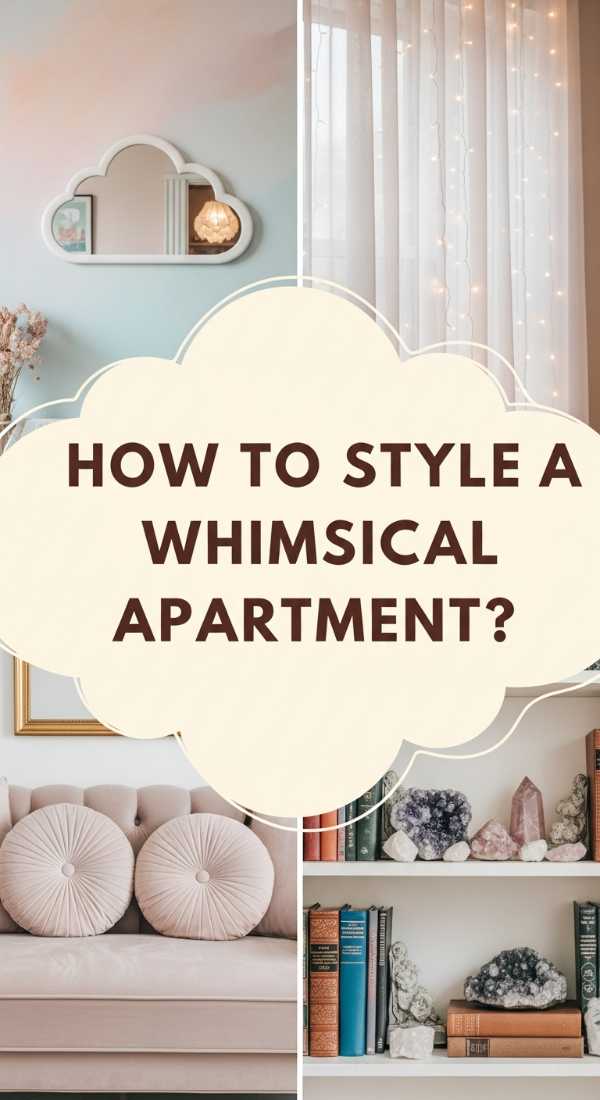
How to Style a Whimsical Apartment Aesthetic for a Dreamy Living Space
Why we love this
The whimsical aesthetic is an invitation to play, turning a standard apartment into an ethereal sanctuary that feels like it was plucked from a storybook. We love the softness of this style—the way sheer chiffon curtains catch the wind and fairy lights create a shimmering ‘stardust’ effect as evening falls. It’s a sensory delight filled with velvet textures, iridescent accents, and a sense of wonder that makes coming home feel like stepping into a peaceful, enchanted dreamscape far away from the city noise.
Essential Elements:
- Sheer white or pastel floor-to-ceiling curtains.
- Warm-white LED fairy lights or ‘curtain’ lights.
- Velvet floor pillows and oversized knit throws.
- Framed botanical prints or pressed flowers.
- Hanging macramé planters with trailing ivy.
How to make it
- Swap out heavy drapes for lightweight, sheer panels that allow natural light to diffuse beautifully across the room while maintaining a sense of airy privacy.
- Drape fairy lights behind the sheer curtains or along the ceiling perimeter; use command hooks to hide the wires and ensure the glow is soft and indirect.
- Create a ‘reading nook’ on the floor using a plush rug and several oversized velvet pillows in varying shades of lavender, mint, or dusty rose.
- Incorporate ‘living’ decor by hanging Pothos or Heartleaf Philodendron from the ceiling in macramé holders, allowing the vines to trail down the walls like a natural waterfall.
- Display a collection of vintage glassware or iridescent vases on a sunny windowsill to catch and refract light into tiny rainbows across your floors.
- Use scent to complete the mood; a vanilla or sandalwood candle adds a layer of warmth and coziness that heightens the whimsical atmosphere.
How to Grow a Hippie Garden for a Relaxing Boho Decor Sanctuary

Why we love this
A hippie garden is the ultimate antidote to the rigid, paved world. It’s a riot of color, scent, and sound where the wild is encouraged and the soul can breathe. We love the intentional chaos of this aesthetic—the aroma of blooming lavender and sage mixing with the gentle ‘clink’ of bamboo wind chimes. It is a place of ‘slow living’ where you can walk barefoot on moss, sit on a weathered bench, and feel completely immersed in the vibrant, unscripted beauty of nature.
Essential Elements:
- Wildflower seed mix (Zinnias, Cosmos, Poppies).
- Aromatic herbs (Lavender, Rosemary, Sage).
- Recycled wood or stone garden paths.
- Bamboo or copper wind chimes.
- A low meditation bench or colorful hammock.
How to make it
- Select a sunny spot and clear the area of large weeds, but keep the soil slightly ‘wild’ rather than perfectly leveled to maintain a natural, bohemian feel.
- Scatter a diverse mix of wildflower seeds generously across the soil; lightly rake them in and keep the area moist until the sprouts are 3 inches tall.
- Plant a ‘sensory border’ using lavender and rosemary near your seating area so that every time you brush past, the relaxing fragrance is released.
- Lay a winding path using irregular flagstones or reclaimed wood slices, filling the gaps with creeping thyme or moss to soften the edges.
- Hang wind chimes from a low-hanging tree branch or a tall shepherd’s hook to introduce a soothing auditory element to the garden.
- Install a hammock between two sturdy trees or set up a small wooden bench draped with an outdoor-safe ‘boho’ tapestry for long afternoons of reflection.
How to Organize Yard Tool Storage for a Cleaner Backyard Project Space

Why we love this
There is a unique kind of peace that comes from a perfectly organized shed or garage. We love this project because it turns a cluttered ‘junk’ corner into a sleek, functional command center. Imagine the satisfaction of seeing your shovels, rakes, and trowels lined up with military precision against a clean pegboard. It’s about the efficiency of knowing exactly where your favorite gloves are, and the visual beauty of seeing colorful tool handles contrasted against a minimalist, industrial-style storage wall.
Essential Elements:
- Wall-mounted heavy-duty pegboard.
- Assorted metal hooks and bins.
- Magnetic strips for small metal tools.
- A sturdy wooden workbench.
- Clear plastic bins for fertilizers and seeds.
How to make it
- Empty your entire storage area and sort tools into three piles: Keep, Donate, and Trash; clean the ‘keep’ items with a wire brush to remove rust and dirt.
- Mount the pegboard to your wall studs using spacers to ensure there is a gap behind the board for the hooks to fit securely.
- Install a heavy-duty magnetic strip at eye level for frequently used items like pliers, screwdrivers, and garden snips, keeping them within easy reach.
- Group your long-handled tools (shovels, rakes, brooms) and hang them vertically using ‘J’ hooks to maximize floor space.
- Label clear plastic bins for smaller items like irrigation parts, plant labels, and twine; store these on a sturdy shelving unit near your workbench.
- Install a small battery-powered LED light bar above the workbench so you can continue your potting or repair projects even as the evening light fades.
How to Craft Summer Table Centerpieces for the Perfect Outdoor Brunch

Why we love this
Outdoor dining is the pinnacle of summer living, and a thoughtful centerpiece is the crown jewel of the table. We love this aesthetic because it uses the vibrancy of the season—the zesty yellow of lemons, the silver-green of eucalyptus, and the warmth of flickering candles. It’s an effortless blend of elegance and rusticity that makes a simple brunch feel like a grand celebration, encouraging guests to linger over their iced coffee and enjoy the dappled sunlight through the trees.
Essential Elements:
- Long wooden dough bowl or a linen table runner.
- Fresh citrus (Lemons, Limes, or Oranges).
- Eucalyptus branches or olive sprigs.
- Unscented white pillar candles or floating tea lights.
- Small glass bud vases.
How to make it
- Lay a neutral linen runner down the center of your table to provide a soft, textured base that anchors the entire arrangement.
- Place a long wooden dough bowl in the center; fill it with a mix of whole lemons and limes to provide a bright, ‘citrus-fresh’ pop of color.
- Tuck fresh eucalyptus or olive branches around the fruit, allowing the leaves to spill over the sides of the bowl for a lush, organic look.
- Nestle three pillar candles of varying heights into the greenery, ensuring they are stable and away from any flammable leaves.
- Fill 3-5 small glass bud vases with a single white flower (like a gardenia or daisy) and scatter them along the runner for a delicate, tiered effect.
- Just before guests arrive, light the candles to add a warm, inviting glow that complements the natural daylight.
How to Install Vinyl Lattice Panels for a Private and Stylish Pool Area

Why we love this
Privacy doesn’t have to look like a fortress. We love vinyl lattice panels because they offer a chic, architectural solution to create a secluded oasis. The crisp white or charcoal finish looks stunning against the blue of the water, and the diamond pattern creates a beautiful play of shadows as the sun moves across the sky. It provides that essential ‘resort’ feeling of being tucked away in your own private world, shielded from the neighbors while still allowing a gentle breeze to flow through.
Essential Elements:
- 4×8 vinyl lattice panels.
- U-channel and H-channel vinyl moldings.
- Pressure-treated 4×4 posts.
- Stainless steel screws with matching colored caps.
- Climbing vines (Clematis or Jasmine).
How to make it
- Set your 4×4 pressure-treated posts into the ground using fast-setting concrete, ensuring they are exactly 48 inches apart and perfectly vertical.
- Slide the vinyl U-channel moldings onto the top and bottom edges of the lattice panel to give it a finished, professional look.
- Attach the H-channel molding to the inner sides of the posts; this acts as a ‘track’ for the lattice panel to slide into.
- Slide the lattice panel into the tracks, leaving a 1/4-inch gap at the top to allow for the vinyl to expand and contract in the summer heat.
- Secure the panel by driving screws through the molding and into the posts, using colored screw caps to hide the hardware for a seamless finish.
- Plant fast-growing climbing vines at the base of the lattice to eventually create a ‘living wall’ of green and fragrant flowers.
How to Curate a Vintage Grandma House Aesthetic for a Cozy Nostalgic Feel

Why we love this
The ‘Grandmacore’ aesthetic is a warm hug in interior design form. We love it because it celebrates the imperfect, the thrifted, and the cherished. It’s the aroma of cinnamon and old books, the intricate texture of hand-crocheted doilies, and the charming kitsch of floral porcelain. This style moves away from the cold ‘museum’ look of modern minimalism and instead embraces a cluttered, cozy warmth that makes every visitor feel like they can settle in with a cup of tea and stay for hours.
Essential Elements:
- Floral patterned wallpaper or textiles.
- Vintage lace doilies and embroidered linens.
- Thrifted porcelain teacups and mismatched plates.
- Antique brass frames and oil paintings.
- Velvet wingback chairs or tufted ottomans.
How to make it
- Start by visiting local thrift stores or antique malls to find ‘hero’ pieces like a scalloped-edge side table or a vintage brass lamp with a pleated shade.
- Layer your textiles: place a lace doily over a dark wood dresser, then top it with a collection of antique glass bottles and a stack of leather-bound books.
- Swap out modern throw pillows for cushions with floral needlepoint or cross-stitch designs to add that handmade, heirloom quality.
- Create a gallery wall using mismatched gold and wood frames containing botanical illustrations, old family photos, or thrifted landscape paintings.
- Incorporate a ‘tea station’ on a vintage silver tray, featuring a floral teapot and several mismatched bone china cups ready for use.
- Softly scent the room with lavender sachets or rosewater spray to evoke that classic, nostalgic ‘clean cottage’ aroma.
Conclusion
Creating a home that resonates with your personal aesthetic isn’t about following every trend—it’s about finding the elements that make you feel most alive. Whether you’re building a deck for summer parties or tucking a lace doily under a vintage lamp, these small acts of curation turn a house into a sanctuary. I hope this guide inspires you to open the windows, let the sun in, and start crafting a space that is as vibrant and unique as you are.