
There is a specific kind of magic that happens when you walk through your front door and feel an immediate sense of peace. Our homes are more than just four walls and a roof; they are the backdrop to our most precious memories and the sanctuary where we recharge our souls after a long day. I’ve always believed that you don’t need a massive budget to create a life that feels luxurious and deeply personal—you just need a little bit of intentionality and a dash of creative spark.
Lately, I’ve been obsessed with the idea of ‘effortless aesthetics’—those small, thoughtful touches that make a space feel lived-in yet curated. Whether it’s the way the light hits a thrifted vase or the soft hum of a perfectly balanced aquarium, these details anchor us in the present moment. Today, I’m sharing my ultimate guide to elevating your everyday, from the curb outside your door to the tiny digital details on your speakers, ensuring every corner of your world feels like a dream come true.
How to Create Simple Landscaping for Better Curb Appeal

Why we love this
There is nothing quite like the earthy, grounding scent of fresh cedar mulch and the vibrant pop of green against a freshly edged lawn to make you feel truly ‘at home’ before you even step inside. We love simple landscaping because it provides a visual handshake to the world, offering a crisp, clean aesthetic that feels both organized and organic. Imagine the tactile satisfaction of smooth river stones underfoot and the sight of perennial blooms dancing in the afternoon breeze, creating a welcoming atmosphere that increases your home’s value while soothing your spirit.
Essential Elements:
- Black or dark brown cedar mulch
- Natural stone or brick edging
- Drought-tolerant perennials (like Lavender or Hostas)
- Low-voltage LED path lights
- Handheld edger or spade
How to make it
- Start by defining your garden beds using a garden hose to map out organic, flowing curves rather than rigid straight lines for a more modern look.
- Use a sharp spade or a power edger to cut a 3-inch deep trench along your mapped line, removing any grass or weeds to create a crisp ‘V’ shape that prevents grass from creeping back in.
- Clear the soil of debris and lay down a layer of breathable landscape fabric, securing it with staples to ensure long-term weed suppression.
- Position your larger ‘anchor’ plants first, ensuring you leave at least 18 inches between them for growth, and dig holes twice as wide as the root ball to allow for easy soil expansion.
- Spread a 3-inch thick layer of mulch across the entire bed, taking care to leave a small gap around the stems of your plants to prevent rot, and finish by watering deeply to settle the soil and activate the mulch’s color.
How to Design an Office Desk Setup for a Productive Work Cubicle

Why we love this
Transforming a sterile cubicle into a personal sanctuary is a total game-changer for your mental clarity and creative output. We love this setup because it balances the hard edges of office furniture with soft textures, like a felt desk mat or a tiny succulent that breathes life into the space. The aroma of a subtle desktop essential oil diffuser, perhaps with hints of eucalyptus or lemon, cuts through the stale office air, creating a micro-environment where focus feels effortless and the hours seem to glide by in a state of productive flow.
Essential Elements:
- Ergonomic monitor riser or arm
- Neutral-toned felt or leather desk mat
- Adjustable warm-light desk lamp
- Noise-canceling headphones with a dedicated stand
- Small potted snake plant or ZZ plant
How to make it
- Begin by decluttering your entire surface, removing everything except your computer to establish a ‘tabula rasa’ or clean slate.
- Elevate your primary monitor so the top third of the screen is at eye level; this prevents neck strain and creates vertical space beneath for storing your notebook or keyboard when not in use.
- Lay down a high-quality desk mat to define your ‘work zone’ and provide a soft, warm texture for your forearms, which significantly increases comfort during long typing sessions.
- Position a task lamp on the side of your non-dominant hand to eliminate shadows across your workspace, choosing a bulb with a ‘warm white’ (2700K-3000K) color temperature to reduce eye fatigue.
- Incorporate one ‘living’ element, like a small plant, and one ‘sensory’ element, like a high-quality coaster for your coffee, to anchor the desk in a lifestyle aesthetic rather than just a utility one.
How to Curate JBL Speakers Wallpapers for Ultimate Audio Vibes

Why we love this
Music is an invisible architecture that shapes our mood, and having the digital display of your JBL speakers match that vibe is the ultimate ‘it-girl’ move for your home audio. We love curating these wallpapers because it turns a functional piece of tech into a piece of digital art that pulses with your favorite beats. Imagine a soft, grainy lo-fi sunset glow or a sharp, minimalist monochrome pattern reflecting the rhythm of the bass, turning your living room into a multi-sensory experience where the sight is just as immersive as the sound.
Essential Elements:
- JBL Portable App installed on your smartphone
- High-resolution (at least 1080p) aesthetic images or GIFs
- Color-coordinated playlist themes
- Bluetooth connectivity
How to make it
- Open your preferred design app, like Canva or Pinterest, and search for ‘abstract gradients’ or ‘retro vaporwave’ aesthetics to find images that evoke the mood of your favorite music genres.
- Ensure the aspect ratio of the image is optimized for your specific speaker model’s display; generally, a vertical or square crop works best to avoid awkward stretching.
- Connect your speaker to your phone and open the JBL Portable App, navigating to the ‘Light Show’ or ‘Display’ settings menu.
- Select the ‘Custom’ option and upload your curated image, then use the app’s color picker tool to match the surrounding LED ring colors to the dominant hues in your wallpaper.
- Set the brightness to approximately 70% to ensure the wallpaper remains vibrant without washing out the blacks, creating a deep, rich visual that syncs perfectly with your audio.
How to Build Cheap Pool Deck Ideas for an Affordable Oasis

Why we love this
There is nothing quite like the feeling of sun-warmed wood beneath your bare feet and the sound of splashing water on a lazy Saturday afternoon. We love these affordable pool deck solutions because they prove you don’t need a massive construction budget to create a high-end resort feeling in your own backyard. By using clever materials like treated timber or interlocking deck tiles, you can create a textured, multi-level space that smells faintly of cedar and sunscreen, turning an ordinary above-ground pool into a luxurious, integrated summer retreat.
Essential Elements:
- Pressure-treated 2×4 and 4×4 lumber
- Interlocking composite deck tiles
- Leveling gravel or sand
- Exterior-grade deck screws
- Weatherproof wood stain in ‘Honey’ or ‘Charcoal’
How to make it
- Measure the circumference of your pool and mark out a ‘landing’ area that is at least 4 feet wide to allow for safe movement and a few lounge chairs.
- Clear the grass and level the ground using a rake and leveling sand, then lay down a heavy-duty weed barrier topped with a thin layer of pea gravel for drainage.
- Construct a simple box frame using pressure-treated 2x4s, ensuring you use a spirit level at every corner; for above-ground pools, ensure the frame is freestanding and not attached directly to the pool walls.
- Install the decking boards or interlocking tiles across the frame, leaving a 1/8-inch gap between boards for wood expansion and water drainage.
- Sand any rough edges to prevent splinters and apply two thin coats of a high-quality semi-transparent stain, allowing 24 hours of drying time between coats to achieve a professional, weather-resistant finish.
How to Install Vinyl Lattice Panels for Garden Privacy
Why we love this
Creating a secret garden feel is all about layers and mystery, and vinyl lattice is the perfect tool for carving out a private sanctuary from the outside world. We love this look because it adds a delicate, romantic pattern to your outdoor space, filtering sunlight into beautiful dappled shadows that move with the trees. It’s incredibly low-maintenance, meaning you spend less time painting and more time sipping tea behind your elegant white or wood-grain screen, surrounded by the scent of climbing jasmine or climbing roses that love to weave through the grid.
Essential Elements:
- 4’x8′ Vinyl lattice panels
- Vinyl H-channel connectors and U-channel caps
- Pressure-treated 4×4 posts (if no existing structure)
- Stainless steel screws with matching vinyl caps
- Power drill and level
How to make it
- If installing against a fence, pre-drill oversized holes in the vinyl lattice; vinyl expands and contracts with the temperature, so the holes must be larger than the screw shank to prevent buckling.
- Slide the lattice panels into the U-channel caps at the top and bottom to give the edges a finished, professional look and to hide any uneven cuts.
- Mount the panels at least 2 inches off the ground to allow for debris clearance and to prevent the build-up of moisture at the base.
- Use a level to ensure the vertical lines of the lattice are perfectly plumb before driving your screws through the pre-drilled holes into your support posts.
- For a lush aesthetic, plant fast-growing climbers like Clematis at the base, gently weaving the first few tendrils through the bottom holes of the lattice to ‘train’ the plant upward.
How to Arrange Summer Table Centerpieces for Seasonal Hosting
Why we love this
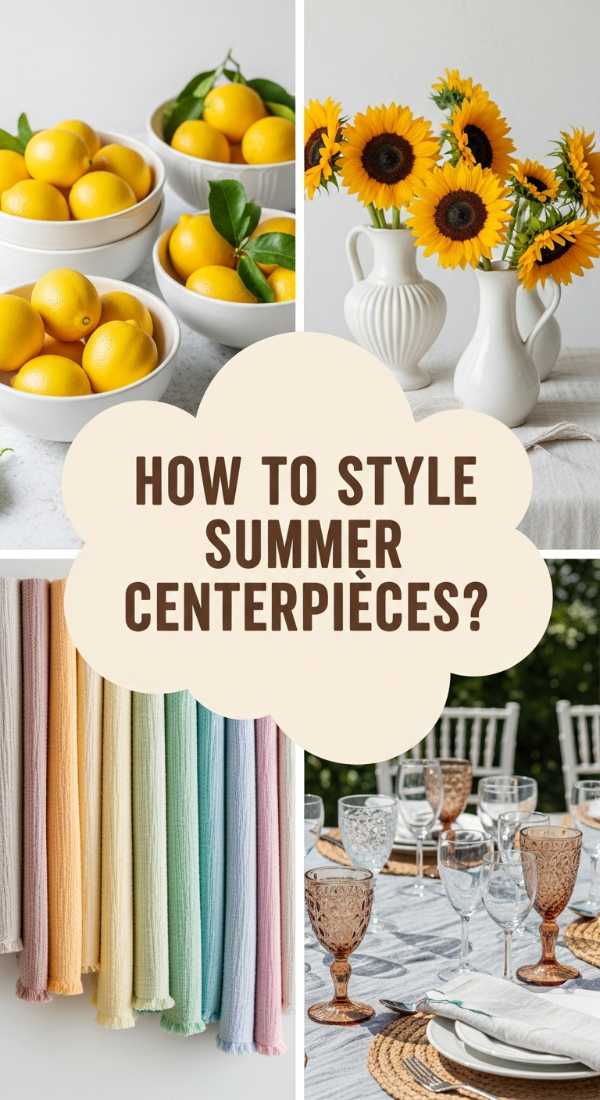
A beautiful summer table is an invitation to slow down and savor the flavors of the season with the people you love. We love this aesthetic because it’s a feast for the senses: the bright, citrusy scent of sliced lemons tucked into a vase, the cool touch of linen napkins, and the vibrant colors of fresh-cut zinnias. It creates a focal point that feels effortless and breezy, making even a simple midweek pasta dinner feel like a curated event under the golden hour sun.
Essential Elements:
- Clear glass hurricane vases in varying heights
- Fresh citrus fruits (lemons, limes, or oranges)
- Eucalyptus sprigs or seasonal wildflowers
- Unscented white pillar candles
- Natural jute or linen table runner
How to make it
- Place your linen runner down the center of the table, bunching it slightly to create organic ‘waves’ and texture rather than laying it perfectly flat.
- Take two glass vases—one slightly smaller than the other—and place the smaller one inside the larger one; fill the gap between the two with thinly sliced lemon rounds for a vibrant, nested look.
- Fill the inner vase with water and arrange your wildflowers, cutting the stems at different lengths to create a ‘wild’ and asymmetrical silhouette that looks like it was plucked from a meadow.
- Space out your pillar candles between the vases, ensuring they are placed on small glass coasters or nestled safely into the runner to prevent wax drips.
- Scatter a few loose sprigs of eucalyptus or a few whole lemons directly onto the runner around the base of the vases to ‘ground’ the arrangement and make it feel more expansive.
How to Style a Whimsical Apartment Aesthetic for Dreamy Living

Why we love this
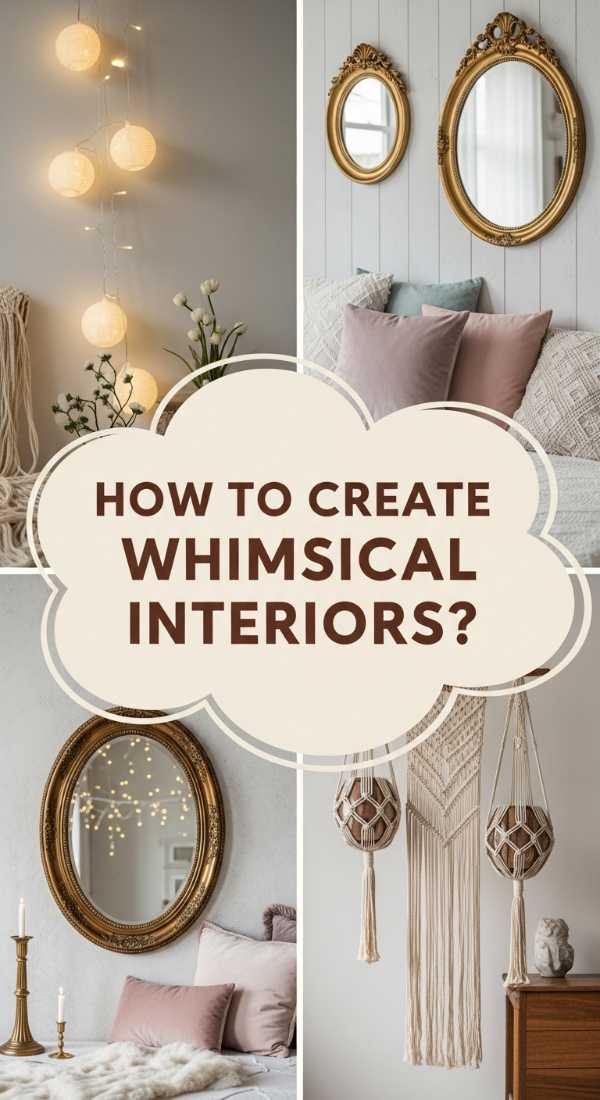
Whimsical living is all about embracing your inner child and surrounding yourself with things that spark pure, unadulterated joy. We love this aesthetic because it breaks all the ‘rules’ of traditional design, favoring soft textures, pastel hues, and lighting that feels like a warm hug. Imagine walking into a room filled with the soft glow of fairy lights reflected in iridescent glassware, where every corner holds a tiny surprise—a velvet mushroom pillow here, a vintage birdcage there—creating a space that feels like a soft, dreamy escape from the mundane world.
Essential Elements:
- Warm-toned fairy lights or ‘sunset’ lamps
- Pastel velvet throw pillows and chunky knit blankets
- Iridescent or colored glassware
- Sheer, floor-to-ceiling voile curtains
- Gallery wall of vintage-style botanical prints
How to make it
- Start with your lighting; swap out harsh overhead bulbs for several ‘pools’ of warm light using floor lamps and string lights draped casually over curtain rods or bookshelves.
- Layer your textures by placing a high-pile faux fur rug over a flat-weave base, which adds immediate visual depth and a luxurious ‘softness’ to the floor.
- Group your decor in ‘vignettes’ of three, mixing heights and materials—for example, a tall brass candlestick, a medium-sized ceramic bust, and a small trailing ivy plant.
- Hang sheer curtains high and wide to allow natural light to filter in softly, creating a hazy, ethereal glow during the day that highlights the pastel tones in your furniture.
- Incorporate ‘movement’ by adding items like a mobile or a silk ribbon tied around a vase, giving the room a dynamic, living energy that feels playful and light.
How to Plan Aquarium Setup Ideas for a Peaceful Home

Why we love this
There is a profound, meditative quality to watching a well-designed aquarium; the gentle bubbling of the filter and the slow, rhythmic movement of fish through lush green plants can lower your heart rate in minutes. We love this setup because it brings a piece of the natural world directly into your living room, acting as ‘living art.’ The vibrant green of aquatic moss against dark volcanic rock creates a stunning visual contrast that feels both sophisticated and deeply calming, providing a silent, shimmering focal point for your home.
Essential Elements:
- Rimless glass aquarium tank
- Nutrient-rich substrate (Aquasoil)
- Dragon stone or Seiryu stone for hardscaping
- Live aquatic plants (Anubias, Java Fern)
- High-CRI LED aquarium light
How to make it
- Begin by sloping your substrate from the back of the tank to the front; this ‘forced perspective’ creates the illusion of depth, making the tank look much larger and more professional.
- Arrange your stones following the ‘Rule of Thirds,’ placing your largest ‘main’ stone at one of the focal points rather than dead center for a more natural, balanced look.
- Mist your plants frequently while aquascaping to keep them hydrated; use long tweezers to tuck the roots of ‘carpeting’ plants firmly into the soil to prevent them from floating.
- Slowly fill the tank by pouring water over a small plate or a piece of bubble wrap; this prevents the rushing water from disturbing your carefully placed soil and plants.
- Install your LED light on a timer set for 6-8 hours a day to prevent algae growth while ensuring your plants have enough energy to produce the tiny oxygen bubbles known as ‘pearling.’
How to Embrace the Vintage Grandma House Aesthetic for Nostalgic Comfort

Why we love this
Often called ‘Grandmacore’ or ‘Cottagecore,’ this aesthetic is a love letter to the past, filled with the warmth of baked goods and the tactile comfort of handmade crafts. We love it because it prioritizes coziness and history over perfection, celebrating the chipped tea cup and the faded floral quilt. It’s an aesthetic that smells like dried lavender and old books, inviting you to curl up with a crossword puzzle in a velvet armchair and forget the digital noise of the 21st century for a while.
Essential Elements:
- Floral patterned wallpaper or textiles
- Thrifted porcelain tea sets and mismatched plates
- Cross-stitch or embroidered wall art
- Antique wooden side tables with ‘distressed’ finishes
- Scalloped edges on linens and lampshades
How to make it
- Visit local thrift stores to find ‘anchor’ pieces like a sturdy wooden rocking chair or a hutch; look for solid wood items that can be lightly sanded and waxed to bring back their original luster.
- Layer your textiles by draping a lace doily over a dark wood table, then topping it with a patterned tablecloth; the contrast in textures creates that signature ‘collected over time’ feel.
- Create a ‘clutter-core’ shelf by displaying functional vintage items, such as an old kitchen scale or a collection of milk glass vases, alongside stacks of second-hand books.
- Use ‘warm’ lighting exclusively—avoid anything blue or daylight-toned—and consider using clip-on pleated lampshades to soften the glow of your existing lamps.
- Incorporate fresh or dried flowers in every room, specifically varieties like carnations or baby’s breath that were popular in decades past, to add an organic, nostalgic touch.
How to Decorate Fall Baby Shower Themes for Autumn Arrivals
[IMAGE_10]
Why we love this
A fall baby shower is a celebration of ‘new life’ meeting the harvest season, and the aesthetic is nothing short of magical. We love this theme because it swaps the typical bright nursery colors for a sophisticated palette of terracotta, sage green, and cream, mirroring the changing leaves outside. The atmosphere is thick with the scent of spiced cider and the warmth of knit textures, creating a cozy, nurturing environment that honors the mother-to-be with the rustic elegance of the autumn season.
Essential Elements:
- White and ‘Cinderella’ heirloom pumpkins
- Dried pampas grass and wheat stalks
- Velvet table runners in burnt orange or cinnamon
- Hand-lettered wooden signage
- Cozy ‘waffle knit’ or flannel accents
How to make it
- Create a focal point by building a ‘diaper cake’ or a gift station flanked by various sizes of heirloom pumpkins in muted shades of sage, white, and peach.
- Arrange tall vases filled with dried pampas grass and eucalyptus at the entrance to create height and a ‘soft’ visual texture that feels premium and curated.
- For the tablescape, use a burnt orange velvet runner and scatter small gold-painted acorns or wooden confetti across it to add a touch of subtle shimmer.
- Set up a ‘hot cocoa or cider bar’ using rustic wooden crates for height, providing copper mugs and cinnamon sticks to tie the functional elements into the aesthetic theme.
- Hang a personalized ‘Little Pumpkin’ banner made of cardstock or felt, using twine rather than ribbon to maintain the rustic, organic feel of the autumn season.
Final Thoughts on Elevating Your Space
Designing a life you love isn’t about following the latest trends; it’s about curating a space that reflects your unique story and provides a haven for your soul. Whether you are planting a new garden or just changing the wallpaper on your speaker, every small action is a step toward a more intentional and beautiful life. Remember, the best aesthetic is one that makes you feel most like yourself.