

Have you ever spent hours scrolling through your feed, mesmerized by those perfectly manicured gardens and Pinterest-worthy patios, thinking, “I could never do that”? Trust me, I’ve been there. There is something so restorative about turning a patch of dirt or a cluttered corner into a sanctuary, but the overwhelm of where to start can be real. Today, I’m pulling back the curtain on the projects that are currently breaking the internet, showing you that a dream home isn’t bought—it’s built, one weekend at a time.
We are diving deep into everything from the rhythmic flow of a dry creek bed to the nostalgic glow of a reimagined teen bedroom. These aren’t just aesthetic upgrades; they are about creating spaces that reflect your soul and invite you to slow down. Whether you have a green thumb or you’re just picking up a hammer for the first time, there is a piece of magic here for everyone. Let’s roll up our sleeves and transform the ordinary into the extraordinary.
How to Build a Wood Trellis for a Lush Garden Oasis
Why we love this
There is nothing quite like the sight of emerald green vines creeping up a warm, cedar-scented trellis as the morning sun hits your garden. It adds a dramatic vertical element that turns a flat yard into a multi-dimensional escape, providing a sturdy skeleton for fragrant jasmine or heavy heirloom roses to cling to. The rough-hewn texture of the wood against the soft, delicate petals creates a visual harmony that feels both rustic and incredibly sophisticated. Standing in the shade of your own creation, hearing the leaves rustle against the slats, provides a deep sense of accomplishment and peace.
Essential Elements:
- Pressure-treated or cedar 2x4s for the main frame
- 1×2 wood lath strips for the decorative grid
- Outdoor-rated wood screws
- Wood glue (exterior grade)
- Spirit level and measuring tape
- Wood stain or sealant
How to make it
- Begin by measuring your desired height and width; for a standard garden trellis, 6 feet tall by 2 feet wide is a classic ratio that provides ample support.
- Cut your 2x4s to length to create the outer rectangular frame. Use a miter saw for clean 90-degree angles and lay them flat on a level surface to ensure the structure is perfectly square.
- Pre-drill holes at the corners to prevent the wood from splitting, then secure the frame using 3-inch exterior screws and a bead of wood glue for extra durability against the wind.
- Layout your horizontal 1×2 lath strips across the frame, spacing them approximately 8 to 10 inches apart. Use a spacer block (a scrap piece of wood) to ensure every gap is identical for a professional, symmetrical look.
- Layer your vertical lath strips over the horizontal ones to create a grid pattern. Secure each intersection with a small galvanized nail or a short wood screw, ensuring the tip doesn’t poke through the back.
- Apply a high-quality outdoor stain or UV-protectant sealer using a wide brush, working into all the crevices where the wood overlaps to prevent rot. Let it cure for 24 hours before securing it to your wall or sinking the posts into the ground.
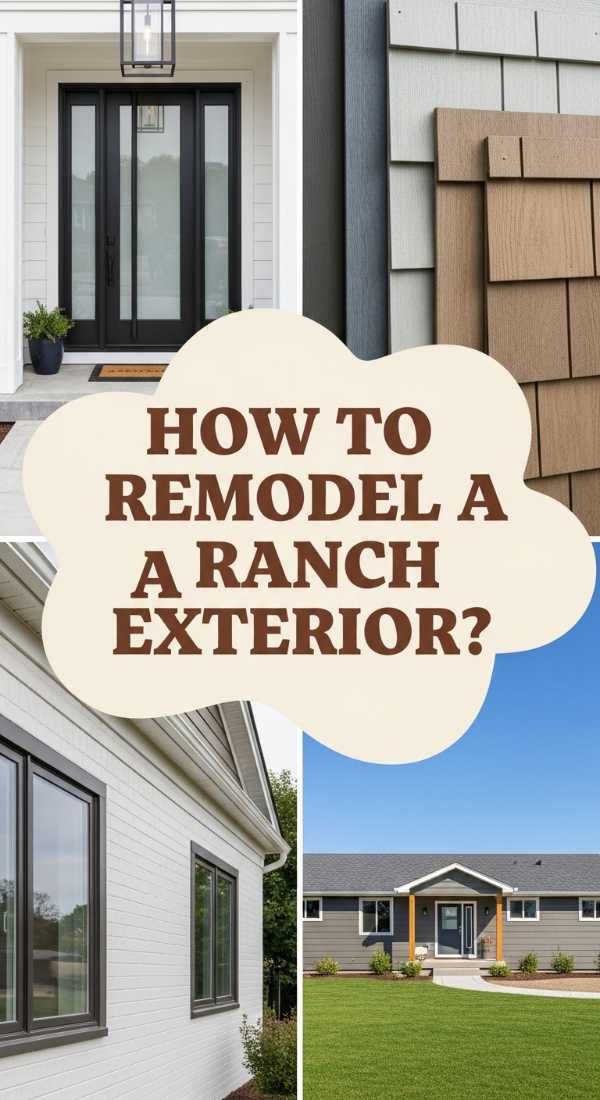
How to Modernize a Retro Ranch Exterior for Total Curb Appeal

Why we love this
Taking a dated, mid-century ranch and breathing new life into it is like watching a black-and-white film turn into Technicolor. We love this transformation because it honors the low-slung, honest architecture of the past while introducing the crisp, clean lines of modern design. Imagine the contrast of matte black hardware against freshly painted white brick, or the warmth of a natural wood front door greeting you at the end of the day. It’s about creating a home that looks intentional, expensive, and welcoming without the price tag of a full rebuild.
Essential Elements:
- High-quality masonry paint or specialized siding paint
- Updated matte black or brushed gold house numbers
- Modern wall-mounted exterior sconces
- Natural wood shutters or a new front door
- Power washer and heavy-duty cleaner
- Painter’s tape and high-density rollers
How to make it
- Start with a deep clean; use a power washer to remove decades of dirt, oxidation, and loose paint from the brick or siding. This is the most critical step for ensuring your new finish actually sticks.
- Patch any cracks in the masonry with a concrete filler and sand down any rough wooden trim. Tape off all windows, soffits, and light fixtures meticulously with professional-grade painter’s tape to ensure sharp, clean lines.
- Apply a high-bond primer if you are transitioning from a dark to a light color. Once dry, apply your main exterior paint using a sprayer for large areas and a roller for texture, ensuring you maintain a “wet edge” to avoid visible lap marks.
- Swap out dated, small light fixtures for oversized, modern lanterns or sleek cylinders. Ensure the mounting plate covers the old hole perfectly, and use outdoor-rated silicone caulk around the edges to keep moisture out.
- Install horizontal wooden slats over existing iron porch railings to create a contemporary look. Use a cedar or redwood stain to provide a warm, organic contrast to the cool tones of the new paint.
- Finalize the look by installing modern, sans-serif house numbers vertically near the entryway. Use a drill with a masonry bit for brick installations, and ensure they are level using a laser level for that perfect, high-end finish.
How to Design a Rock River Bed Landscape for a Zen Outdoor Retreat

Why we love this
There is a profound, meditative quality to a dry creek bed that mimics the natural flow of water through a desert canyon. The variety of textures—from the smooth, cool surfaces of river pebbles to the jagged, imposing presence of larger boulders—creates a visual journey for the eye to follow. It’s an eco-friendly way to manage drainage while adding a permanent structural element that looks beautiful in rain or shine. In the heat of summer, the cool greys and blues of the stones offer a psychological reprieve, making your garden feel like a hidden, mountainous sanctuary.
Essential Elements:
- A mix of river rocks, pea gravel, and large accent boulders
- Heavy-duty landscape fabric (weed barrier)
- Landscape staples or pins
- Shovel and metal rake
- Edging material (metal or plastic)
- Optional: Low-growing ornamental grasses
How to make it
- Map out the “river” path using a garden hose or spray paint, incorporating natural curves and meanders to mimic a real stream; avoid straight lines, as they look artificial.
- Excavate the path to a depth of about 4 to 6 inches, creating a slight “V” or “U” shape in the center to allow for water runoff. Slope the sides gently so rocks don’t slide toward the middle.
- Lay down professional-grade landscape fabric over the entire trench, overlapping seams by at least 12 inches. Secure the fabric tightly with landscape staples every foot to prevent it from shifting or allowing weeds to poke through.
- Place your largest “anchor” boulders first at the bends of the river or in small clusters. Dig them slightly into the ground so they look like they’ve been there for centuries rather than just sitting on top of the soil.
- Fill in the base with medium-sized river rocks (2-3 inches), then use smaller pea gravel to fill the gaps and create a realistic “sediment” look. Vary the colors and sizes to enhance the natural appearance.
- Finish by tucking drought-tolerant plants like Blue Fescue or Liriope along the “banks” of your rock river. This softens the hard edges of the stone and integrates the feature into the rest of your landscape seamlessly.
How to Create a Low Maintenance Flower Bed for Year Round Beauty

Why we love this
The dream of a lush, blooming garden often crashes against the reality of back-breaking weeding and constant watering, which is why we adore the low-maintenance approach. It’s about working with nature rather than against it, selecting hardy perennials that return more vigorously each year. Imagine a bed that transitions from the soft purples of lavender to the golden hues of coneflowers, all while staying suppressed under a thick, chocolate-colored layer of mulch. It provides that “English Garden” aesthetic with a fraction of the labor, leaving you more time to actually sit and enjoy the butterflies.
Essential Elements:
- Native perennial plants (e.g., Lavender, Coneflower, Hosta)
- Quality organic compost or soil conditioner
- Cardboard or thick newspaper (for sheet mulching)
- Premium wood mulch (cedar or hemlock)
- Slow-release organic fertilizer
- Drip irrigation kit (optional but recommended)
How to make it
- Identify your sun exposure (Full Sun vs. Shade) and select native plants suited for your specific zone; native plants are naturally resistant to local pests and require less supplemental water.
- Prepare the area using the “no-dig” method: lay down a layer of plain brown cardboard over the grass or weeds. This smothers existing growth and eventually decomposes into rich organic matter.
- Cut small holes through the cardboard where you want your plants to go. Dig a hole twice as wide as the root ball, mix in a handful of compost, and set your plant so the top of the root ball is level with the ground.
- Space your plants according to their mature size, not their current size. This prevents overcrowding and ensures good air circulation, which keeps fungal diseases at bay.
- Apply a 3-inch layer of high-quality mulch over the cardboard and around the plants, being careful not to let the mulch touch the actual stems of the plants (this prevents rot).
- Water deeply immediately after planting. For the first two weeks, monitor moisture daily, but once established, transition to deep, infrequent watering to encourage the roots to grow deep into the soil for maximum drought resistance.
How to Achieve Realistic Pantry Organization for a Stress Free Kitchen
![]()
Why we love this
There is an incredible, quiet power in opening a pantry door and seeing exactly what you have at a glance. It’s not just about the “aesthetic” of matching jars; it’s about the mental clarity that comes from removing visual noise. The smooth click of an airtight lid and the satisfying uniformity of labeled bins turn a chaotic chore like cooking dinner into a streamlined, almost artistic experience. This system respects your time and your budget, preventing the dreaded “triple-buy” of spices you already owned but couldn’t find.
Essential Elements:
- Clear airtight canisters (glass or BPA-free plastic)
- Woven or wire baskets for bulkier items
- Tiered shelf risers for canned goods
- Label maker or custom vinyl decals
- Lazy Susans (turntables) for oils and vinegars
- Uniform spice jars
How to make it
- Empty the entire pantry completely. This is the “messy middle” where you must confront every expired can and half-empty bag of flour. Group items by category (baking, snacks, grains, canned goods) on your counter.
- Wipe down all shelves with a microfiber cloth and a mild cleaner. This is the best time to add a fresh coat of paint or some pretty shelf liner to make the space feel bright and clean.
- Decant dry goods like pasta, cereal, and flour into clear, airtight containers. This keeps food fresh for longer and allows you to see inventory levels instantly. Tip: Tape the cooking instructions or expiration date to the bottom of the container.
- Use tiered risers for cans so you can see labels in the back row. Place a Lazy Susan in the corner or on a high shelf to make bottles of oil and vinegar easily accessible without knocking others over.
- Place “kid-friendly” snacks in low, open baskets that they can reach, and keep “sometimes” treats or heavy baking mixers on the highest or lowest shelves to maximize the prime real estate at eye level.
- Label every single container and bin. Use a consistent font or handwriting style to maintain a cohesive look. This is the secret step that ensures the rest of your family actually puts things back where they belong!
How to Use a Concrete Stencil for an Upscale Patio Transformation

Why we love this
Transforming a boring, grey concrete slab into a high-end “tiled” terrace feels like a magic trick. We love this project because it allows for total creative freedom—you can go for a classic Moroccan star pattern or a modern geometric grid. The finished surface feels cool and smooth under bare feet, and the visual weight of the pattern anchors your outdoor furniture, making the whole backyard feel like a legitimate outdoor room. It’s the ultimate way to get the look of expensive encaustic tile on a DIY budget.
Essential Elements:
- Large-scale concrete stencil
- Concrete-specific base paint and accent paint
- Long-handled paint roller and high-density foam rollers
- Stencil adhesive spray
- Concrete sealer (matte or gloss)
- Degreaser and stiff scrubbing brush
How to make it
- Deep clean the concrete using a heavy-duty degreaser and a pressure washer. Any oil or dirt left behind will cause the paint to peel within months. Let the concrete dry for at least 48 hours.
- Apply two coats of your base color using a long-handled roller. This will be the “grout” color of your pattern. Use a paint specifically formulated for exterior concrete or porches to ensure it can handle foot traffic.
- Starting in the most visible corner, spray the back of your stencil with a light mist of adhesive. Lay it flat and press firmly to ensure there are no gaps where paint could bleed under the edges.
- Load your foam roller with the accent paint, then roll it onto a piece of cardboard to remove the excess; the roller should be almost dry. Lightly dab or roll over the stencil in thin layers.
- Carefully lift the stencil and move to the next section, aligning the pattern using the built-in registration marks. If paint builds up on the stencil, stop and wash it to keep the lines crisp.
- Once the entire patio is dry, apply two coats of clear concrete sealer. This protects your hard work from UV rays, rain, and furniture scuffs, giving the patio a professional, finished sheen.
How to Style a Trendy Teen Room for Ultimate Nostalgic Vibes
Why we love this
The modern teen room is a beautiful blend of 90s nostalgia and futuristic tech, creating a cozy cocoon that feels deeply personal. We love the layering of soft textures—chunky knit throws, velvet pillows, and faux fur rugs—against the crisp glow of LED strip lights. It’s a space designed for dreaming, gaming, and self-expression. There is something so heartwarming about seeing a room that feels like a physical manifestation of a teenager’s personality, a safe harbor where they can truly be themselves.
Essential Elements:
- RGB LED light strips with remote
- Gallery wall kit or grid panels for photos
- Macrame or woven wall hangings
- Floor cushions or a bean bag chair
- Linen or jersey knit bedding
- Floating shelves for collectibles
How to make it
- Start with a neutral base on the walls—soft whites, warm greys, or muted sages work best to allow the decor to pop without making the room feel small or cluttered.
- Install LED light strips along the ceiling perimeter or behind the bed headboard. Hide the wires using plastic cord covers that can be painted the same color as the walls for a seamless look.
- Create a “vibe wall” using a mix of personal photos, vintage posters, and botanical prints. Use washi tape for a casual, changeable look that won’t damage the paint.
- Layer the bed with different textures. Start with a simple duvet cover, add a weighted blanket for comfort, and pile on 3-5 accent pillows in varying shapes and fabrics to create a luxurious “nest.”
- Incorporate a dedicated “hobby zone,” whether it’s a sleek desk for gaming or a cozy corner with a record player and floor cushions. This defines the space and makes it functional for more than just sleeping.
- Add a touch of life with low-maintenance plants like Pothos or Snake plants in hanging macrame holders. The green foliage adds a natural element that balances out the digital glow of the tech in the room.
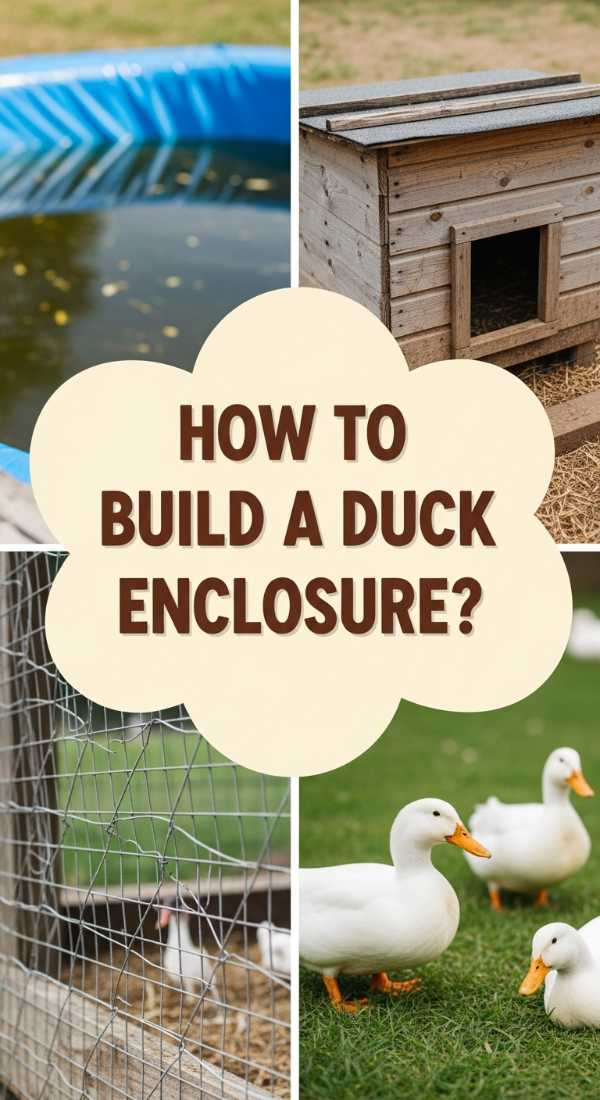
How to Construct a DIY Duck Enclosure for Happy Backyard Pets
Why we love this
There is a special kind of joy in hearing the happy, rhythmic “quack-quack” of ducks as they splash in their water. A well-built enclosure isn’t just a cage; it’s a tiny homestead that provides safety from predators while giving your feathered friends a comfortable place to nest. We love the rustic, farmhouse aesthetic of cedar wood and hardware cloth, which looks charming in any backyard. Watching your ducks settle into a clean, straw-filled house at night brings a sense of harmony and connection to the rhythms of nature.
Essential Elements:
- 2×4 lumber for the frame
- Hardware cloth (1/2 inch mesh)
- Exterior grade plywood for the roof and walls
- Corrugated roofing panels
- Heavy-duty latches and hinges
- Pea gravel or sand for the floor
How to make it
- Design the frame to allow for at least 4 square feet of space per duck. Use pressure-treated lumber for the base frame that touches the ground to prevent rot, and standard 2x4s for the uprights.
- Wrap the entire structure in hardware cloth, not chicken wire. Hardware cloth is much stronger and prevents predators like raccoons or foxes from breaking in. Bury the mesh 6 inches into the ground to stop digging predators.
- Build a raised “house” section within the run using plywood. Ensure it has plenty of ventilation holes near the roof to prevent moisture buildup (ducks breathe out a lot of humidity), but keep it draft-free at the floor level.
- Install a sloped roof using corrugated metal or plastic panels. Ensure there is a significant overhang to keep rain from blowing into the enclosure and soaking the bedding.
- For the flooring of the run, use a thick layer of pea gravel or coarse sand. This allows for excellent drainage—critical for ducks who love to make a mess with water—and is easy to hose down weekly.
- Secure all doors with predator-proof latches that require two steps to open (like a carabiner through a bolt latch). Add a ramp with small wooden “cleats” to help the ducks easily enter their raised house.
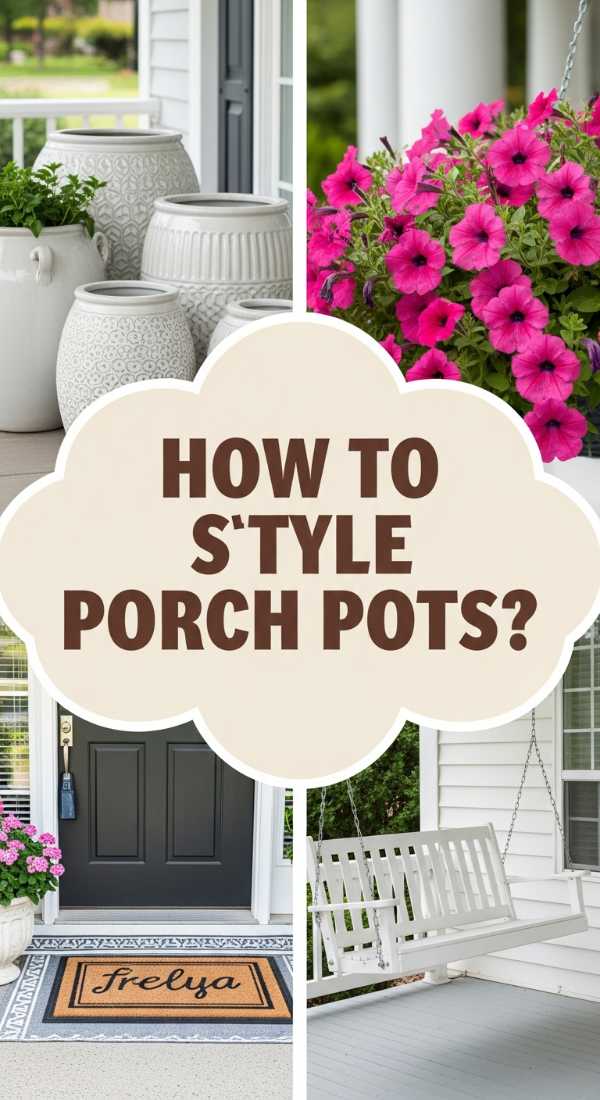
How to Arrange Front Porch Flower Pots for a Welcoming Home Entrance

Why we love this
Your front porch is the “handshake” of your home, and perfectly arranged flower pots make that first impression unforgettable. We love the “Thriller, Filler, Spiller” technique because it creates a professional, high-end look with zero guesswork. There is something incredibly inviting about the scent of fresh petunias or the architectural height of a centerpiece grass as you walk up the steps. It’s an instant boost of curb appeal that says, “someone who loves their home lives here,” and it changes beautifully with every passing season.
Essential Elements:
- A variety of large, weather-resistant pots (ceramic or resin)
- High-quality potting mix with perlite
- “Thriller” plants (e.g., Dracaena, Canna Lily, Fountain Grass)
- “Filler” plants (e.g., Geraniums, Marigolds, Lantana)
- “Spiller” plants (e.g., Sweet Potato Vine, Ivy, Bacopa)
- Water-soluble fertilizer
How to make it
- Choose a color palette before buying plants; a monochromatic look (all shades of pink) looks modern, while a complementary scheme (purple and yellow) looks vibrant and traditional.
- Select pots of varying heights to create a tiered effect. Ensure every pot has a large drainage hole in the bottom; if it doesn’t, use a masonry bit to drill one to prevent root rot.
- Fill the pots 3/4 full with fresh potting soil. Don’t use garden soil, as it’s too heavy and won’t drain properly in a container. Mix in a slow-release fertilizer at this stage.
- Plant your “Thriller” in the center (if the pot is seen from all sides) or the back (if it’s against a wall). This should be your tallest, most dramatic plant to draw the eye upward.
- Surround the thriller with your “Fillers.” These should be mounding plants that hide the “legs” of the thriller and make the pot look lush and full. Space them closely so no soil is visible.
- Tuck your “Spillers” around the very edge of the pot. As they grow, they will cascade over the sides, softening the hard edges of the container and adding a sense of movement to the arrangement.
How to Make Sparkling Glass Yard Art for a Whimsical Garden Path
[IMAGE_10]
Why we love this
When the afternoon sun hits a piece of colored glass nestled among the ferns, it creates a dancing light show that feels purely magical. We love this project because it breathes new life into forgotten thrift store finds—cobalt blue bottles, vintage glass plates, and crystal candy dishes. It adds a touch of whimsy and “Alice in Wonderland” charm to a garden path, providing a permanent pop of color even in the dead of winter. It’s a sustainable, creative way to make your outdoor space feel like an art gallery.
Essential Elements:
- Assorted colored glass pieces (vases, plates, bowls)
- Clear, waterproof glass adhesive (e.g., E6000 or silicone)
- Copper pipe or sturdy rebar for mounting
- Glass drill bit (optional)
- Rubbing alcohol for cleaning
- Protective gloves
How to make it
- Clean all glass pieces thoroughly with rubbing alcohol to remove any grease or labels. This is essential for a permanent bond; even a fingerprint can prevent the glue from sticking properly.
- Experiment with stacking your pieces on a flat table before gluing. Try placing a large plate at the base, followed by a vase, then a smaller bowl, and perhaps a crystal topper for a “glass totem” look.
- Apply a generous bead of waterproof glass adhesive to the contact points between the pieces. Press them together firmly and use masking tape to hold them in place while the glue cures (usually 24-48 hours).
- For a floating “flower” look, glue a small glass bud vase or a specialized copper pipe flange to the bottom of a glass plate arrangement. This will be the socket where the stake sits.
- Drive a length of copper pipe or rebar into the ground at your desired location. Ensure it is at least 12-18 inches deep so it won’t lean over when the heavy glass is placed on top.
- Carefully slide your glass creation onto the stake. If you used a vase as the base, it should sit securely over the pipe. Position it where it will catch the most sunlight to maximize the sparkling effect!
Conclusion
Creating a home and garden that you love doesn’t require a professional contractor or a limitless budget. It requires a bit of imagination, a few basic tools, and the willingness to get your hands a little dirty. From the structural beauty of a wooden trellis to the whimsical sparkle of recycled glass art, each of these projects is a step toward building a sanctuary that is uniquely yours. So, stop scrolling, pick the project that speaks to your heart, and start creating something beautiful today. Your future self—relaxing on that stenciled patio—will thank you.