
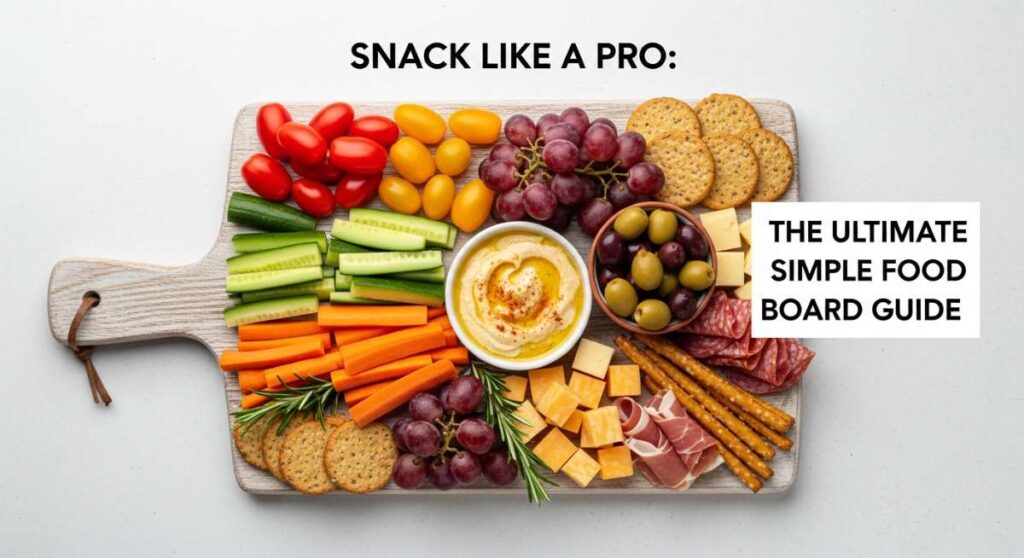
Snack Like a Pro: The Ultimate Simple Food Board Guide
There is something inherently magical about those long, honey-hued afternoons when the sun hangs low in the sky and the air smells like cut grass and charcoal. We’ve all been there—trying to host the perfect gathering while feeling overwhelmed by the kitchen heat. That’s why I fell in love with the ‘Simple Food Board’ concept; it’s less about perfection and more about the communal joy of sharing vibrant, seasonal bites that look like a work of art without the stress.
When you bring a massive board to the table, filled with textures and colors, the atmosphere immediately shifts. It invites your guests to lean in, to pick, to graze, and to truly connect. This guide is my love letter to summer hosting, featuring ten viral-worthy elements that will turn your next patio hangout into an unforgettable culinary experience that feeds both the belly and the soul.
How to make summer pasta

Why we love this
There is nothing quite like the silky, butter-slicked texture of a perfectly al dente summer pasta as it catches the golden afternoon light. This dish captures the very essence of the season—the bright, zesty tang of fresh lemon zest dancing against the earthy richness of garden-fresh basil. As you twirl each strand, the aroma of sautéed garlic and sweet cherry tomatoes bursting in the pan creates a fragrance that is both comforting and incredibly sophisticated, making every bite feel like a breezy Italian vacation.
Ingredients
- 1 lb Linguine or Spaghetti
- 2 cups Cherry tomatoes, halved
- 4 cloves Garlic, thinly sliced
- 1/2 cup Extra virgin olive oil
- 1 Lemon (juice and zest)
- Fresh basil leaves, torn
- Red pepper flakes
- Parmesan cheese, freshly grated
How to make it
- Bring a large pot of heavily salted water (it should taste like the sea) to a rolling boil. Add your pasta and cook for exactly one minute less than the package directions to ensure a true al dente bite.
- While the pasta cooks, heat olive oil in a wide skillet over medium-low heat. Add the sliced garlic and red pepper flakes, cooking slowly until the garlic is translucent and fragrant, but not browned, which takes about 3 to 4 minutes.
- Toss in the cherry tomatoes and increase the heat to medium. Sauté until the skins begin to blister and pop, releasing their sweet juices into the oil to create a natural, emulsified sauce.
- Reserve one cup of starchy pasta water before draining the noodles. Add the noodles directly into the skillet with the tomatoes.
- Pour in half of the reserved pasta water, the lemon juice, and the zest. Toss vigorously over high heat for 60 seconds. The starch from the water will marry with the oil and tomato juices to create a glossy coating. Add more water if it looks dry.
- Remove from heat, fold in the fresh basil and a generous handful of Parmesan, then serve immediately.
How to grill chicken kabobs

Why we love this
The primal scent of charred wood and caramelized meat is the definitive aroma of summer. These kabobs offer a spectacular contrast of textures: the chicken remains incredibly succulent and tender on the inside, protected by a vibrant, slightly crisp exterior seasoned with smoke and spice. Interspersed with hunks of bell pepper and red onion that have softened and sweetened over the flames, each skewer is a colorful celebration of outdoor cooking that brings everyone running to the grill.
Ingredients
- 2 lbs Chicken thighs, cut into 1.5-inch cubes
- 2 Bell peppers (red and green), cubed
- 1 Large red onion, cut into wedges
- 1/4 cup Olive oil
- 3 tbsp Soy sauce
- 2 tbsp Honey
- 1 tbsp Smoked paprika
- Wooden or metal skewers
How to make it
- If using wooden skewers, soak them in water for at least 30 minutes to prevent them from igniting on the grill.
- In a large bowl, whisk together olive oil, soy sauce, honey, and smoked paprika. Toss the chicken cubes in this marinade, ensuring every piece is coated. Cover and refrigerate for at least 1 hour, though 4 hours is ideal for maximum flavor penetration.
- Thread the chicken, peppers, and onions onto the skewers, alternating colors to make them visually striking. Do not pack the pieces too tightly; leaving a tiny bit of space ensures the heat can circulate and cook everything evenly.
- Preheat your grill to medium-high heat (about 400°F). Clean the grates thoroughly and lightly oil them to prevent sticking.
- Place skewers on the grill. Cook for 12-15 minutes, turning every 3-4 minutes. You are looking for distinct grill marks and an internal chicken temperature of 165°F.
- Remove from the grill and let them rest for 5 minutes before serving to allow the juices to redistribute back into the meat.
How to mix summer cocktails

Why we love this
There is a specific, crystalline sound that ice makes when it hits a glass on a humid day—a promise of instant relief. A well-mixed summer cocktail is a sensory journey, from the condensation pooling on the glass to the bright, herbaceous punch of muddled mint and lime. The balance of sweet fruit and tart citrus creates a refreshing effervescence that cleanses the palate and lifts the spirits, making it the essential companion for any food board spread under the sun.
Ingredients
- 2 oz White Rum or Gin
- 1 oz Fresh lime juice
- 3/4 oz Simple syrup
- Handful of fresh berries or cucumber slices
- 4-5 Mint leaves
- Club soda or sparkling water
- Ice (crushed or cubed)
How to make it
- In a sturdy glass or a cocktail shaker, place your fruit (berries or cucumber) and the mint leaves. Add the simple syrup.
- Use a muddler or the back of a wooden spoon to gently bruise the mint and crush the fruit. You want to release the oils and juices without pulverizing the mint into bitter green bits.
- Add the lime juice and your choice of spirit (rum for a tropical feel, gin for something botanical).
- Fill the shaker with ice and shake vigorously for about 15 seconds until the outside of the shaker feels frost-cold to the touch.
- Strain the mixture into a tall glass filled with fresh ice. If you prefer a more rustic look, you can pour the contents of the shaker directly into the glass (dirty pour).
- Top with a splash of club soda for fizz and garnish with an extra sprig of mint and a slice of lime.
How to roast street corn

Why we love this
Street corn, or Elote, is an explosion of flavor that hits every single taste bud at once. The kernels are charred to a smoky sweetness, providing a satisfying pop between your teeth, while the creamy layer of mayo and cotija cheese adds a rich, velvety depth. Finished with a dusting of chili powder and a squeeze of lime, it’s a messy, glorious, and deeply addictive treat that brings the vibrant energy of a summer festival right to your backyard table.
Ingredients
- 4 ears of Corn, shucked
- 1/4 cup Mayonnaise
- 1/2 cup Cotija cheese, crumbled
- 1 tsp Ancho chili powder or Tajin
- 1/4 cup Fresh cilantro, chopped
- 2 Limes, cut into wedges
How to make it
- Preheat your grill to medium-high. Place the shucked corn directly on the clean grates.
- Roast the corn for about 10-12 minutes, turning frequently. You want the kernels to be tender but with significant charred black spots on all sides for that signature smoky flavor.
- While the corn is hot, use a brush or a knife to coat each ear with a thin, even layer of mayonnaise. The heat from the corn will slightly melt the mayo, helping it adhere.
- Immediately roll the corn in the crumbled cotija cheese. The cheese should stick to the mayo coating.
- Dust the ears with chili powder or Tajin seasoning for a hint of spice and acidity.
- Sprinkle with fresh cilantro and serve with lime wedges on the side so guests can add a final hit of citrus right before biting in.
How to make watermelon salad

Why we love this
This salad is the ultimate study in culinary contrasts: the cold, crisp sweetness of watermelon meets the salty, creamy tang of feta cheese. It is incredibly hydrating and refreshing, offering a burst of coolness that cuts through the summer heat. The addition of paper-thin red onions provides a sharp crunch, while fresh mint leaves add a cooling herbal finish that lingers pleasantly, making it the most sophisticated and effortless side dish in your repertoire.
Ingredients
- 6 cups Watermelon, cubed and chilled
- 1 cup Feta cheese, crumbled
- 1/2 Red onion, very thinly sliced
- 1/2 cup Fresh mint leaves, torn
- 2 tbsp Extra virgin olive oil
- 1 tbsp Balsamic glaze (optional)
- Flaky sea salt
How to make it
- Start with a very cold watermelon. Cut it into uniform 1-inch cubes, discarding the rind. Placing the cubes in a colander for 5 minutes before assembling helps drain excess juice so the salad doesn’t get soggy.
- Slice the red onion as thin as possible—ideally using a mandoline. To mellow the bite of the onion, soak the slices in ice water for 10 minutes, then pat dry.
- In a large, shallow bowl, gently toss the watermelon cubes with the onion slices and half of the mint.
- Sprinkle the crumbled feta over the top. Avoid over-mixing once the feta is added, as it can make the watermelon look cloudy.
- Drizzle with high-quality extra virgin olive oil and the optional balsamic glaze for a touch of acidity and sweetness.
- Finish with a pinch of flaky sea salt and the remaining mint. Serve immediately while the watermelon is still icy cold.
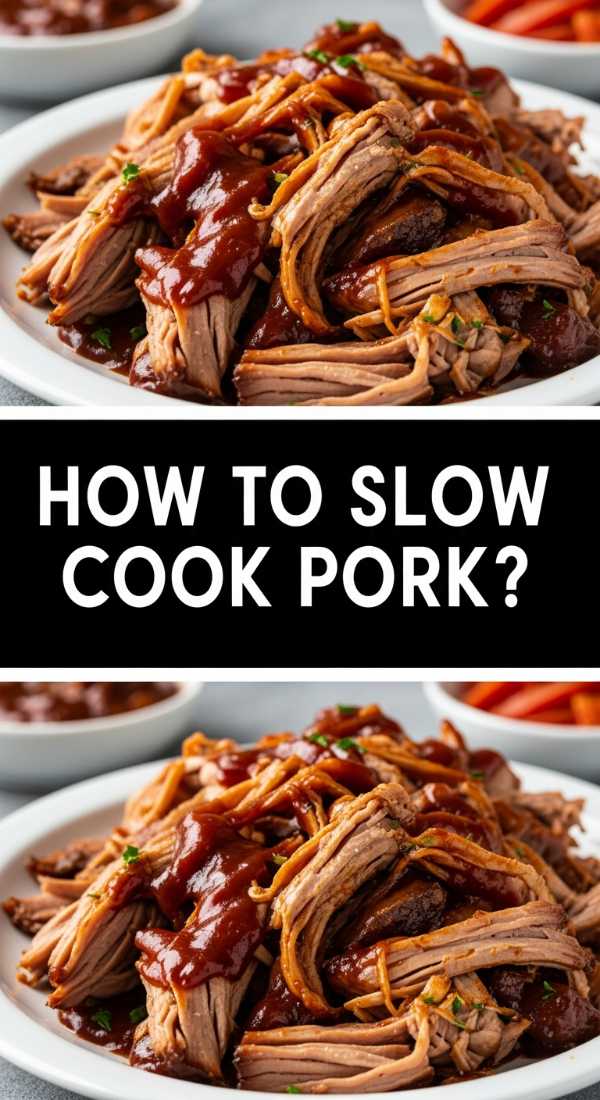
How to slow cook pork
Why we love this
There is a profound sense of satisfaction in food that takes its time. Slow-cooked pork becomes so tender it practically sighs and falls apart at the mere suggestion of a fork. The meat absorbs every nuance of the spice rub and liquid, resulting in a rich, deeply savory profile with caramelized edges that offer a concentrated burst of umami. It’s the ultimate low-effort, high-reward protein that fills the house with a mouthwatering aroma all day long.
Ingredients
- 4 lbs Pork butt or shoulder
- 2 tbsp Brown sugar
- 1 tbsp Smoked paprika
- 1 tbsp Garlic powder
- 1 cup Apple cider or BBQ sauce
- Salt and black pepper
How to make it
- Pat the pork shoulder dry with paper towels. In a small bowl, mix the brown sugar, paprika, garlic powder, salt, and pepper. Rub this mixture over the entire surface of the meat, pressing it in firmly.
- If you have time, sear the pork in a hot skillet with a tablespoon of oil for 3 minutes per side until a dark brown crust forms. This adds an incredible depth of flavor.
- Place the pork in the slow cooker. Pour the apple cider or your favorite BBQ sauce around the base (not directly over the spice rub to avoid washing it off).
- Cover and cook on LOW for 8 to 10 hours. Do not open the lid during the process; every time you peek, you lose heat and moisture.
- The pork is done when it reaches an internal temperature of about 205°F and shreds effortlessly with two forks.
- Remove the meat, shred it, and toss it back into the cooking juices for 10 minutes to soak up all that liquid gold before serving.
How to pack picnic sandwiches

Why we love this
A picnic sandwich is more than just lunch; it’s a carefully engineered vessel of flavor designed for travel. The magic happens during the resting phase, where the crusty bread absorbs just enough of the spreads and juices to become flavorful without losing its structural integrity. Biting into a well-packed sandwich reveals beautiful, compressed layers of deli meats, sharp cheeses, and crisp greens, making for a hearty, portable feast that tastes even better after a short hike or a drive to the beach.
Ingredients
- 1 large baguette or Ciabatta loaf
- 1/2 lb Prosciutto or Salami
- 1/2 lb Provolone cheese
- Roasted red peppers
- Arugula
- Pesto or Garlic Aioli
How to make it
- Slice the bread lengthwise. If using a baguette, remove a little bit of the soft interior crumb from the top half to make more room for fillings and prevent them from sliding out.
- Spread a generous, even layer of pesto or aioli on both sides of the bread. This acts as a moisture barrier to keep the bread from getting soggy.
- Layer your ingredients starting with the heaviest items. Place the meats down first, followed by the cheese. This creates a solid foundation.
- Add the roasted peppers and a thick layer of arugula. Season the greens with a tiny drizzle of olive oil and a pinch of salt.
- Close the sandwich and wrap it tightly in parchment paper, followed by a layer of plastic wrap or foil.
- Pro tip: Place a heavy cutting board or a couple of canned goods on top of the wrapped sandwich for about 20 minutes before packing it in your cooler. This compresses the layers so they stay together when sliced.
How to make hummingbird food

Why we love this
Bringing nature to your doorstep is one of the most serene joys of the warmer months. Hummingbird food is remarkably simple, but the reward is watching those iridescent jewels dart through the air with astonishing speed. There is a quiet, meditative quality to maintaining a feeder, knowing you are providing vital energy to these tiny creatures. The clear, homemade nectar is far better for them than store-bought versions with red dye, ensuring your garden becomes a healthy sanctuary for local wildlife.
Ingredients
- 1 part White granulated sugar
- 4 parts Water
How to make it
- Combine the sugar and water in a small saucepan. Use only plain white granulated sugar—honey, brown sugar, or artificial sweeteners can be harmful or even fatal to hummingbirds.
- Heat the mixture over medium heat, stirring constantly until the sugar is completely dissolved. You do not need to bring it to a full boil, but heating it helps the sugar incorporate and kills any bacteria in the water.
- Once dissolved, remove from heat and let it cool completely to room temperature. Never put hot nectar into a feeder, as it can warp the plastic and harm the birds.
- Clean your hummingbird feeder thoroughly with hot water and a bottle brush. Avoid using harsh soaps; a splash of vinegar is a great natural disinfectant.
- Fill the feeder with the cooled nectar. Store any extra nectar in a clean jar in the refrigerator for up to two weeks.
- Change the nectar every 3 to 5 days, or more often in extreme heat, to prevent fermentation and mold growth.
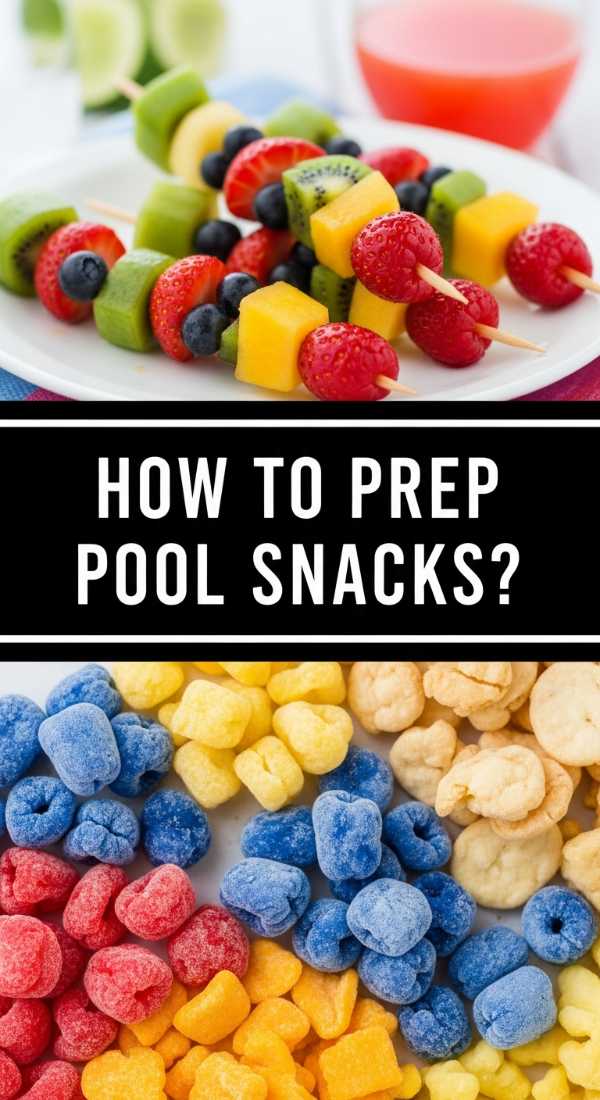
How to prep pool snacks
Why we love this
Poolside snacking requires a specific balance of hydration, salt, and ease. We love snacks that stay cool in the sun and can be eaten with one hand while lounging. The focus is on crisp, refreshing textures—think cold grapes that pop with sweetness, crunchy crackers that satisfy a salt craving after a swim, and dip-friendly veggies that keep things light. It’s about creating a colorful, grab-and-go spread that keeps the energy high and the vibes relaxed without making a mess.
Ingredients
- Frozen grapes
- Cucumber slices and carrot sticks
- Hummus or Tzatziki
- Pita chips or pretzels
- String cheese or meat sticks
How to make it
- Start by freezing green or red grapes on a baking sheet for at least 4 hours. These act as edible ice cubes that won’t get mushy in the heat.
- Slice cucumbers and carrots into sturdy spears or rounds. Keep them in a sealed container with a damp paper towel to maintain their crunch.
- Portion out dips like hummus or tzatziki into small, individual-sized cups. This prevents ‘double-dipping’ and keeps the main supply cold in the cooler.
- Use airtight containers for salty items like pita chips or pretzels to ensure they don’t lose their crispness in the humid air.
- Arrange everything in a shallow tray or a cooler bag with plenty of ice packs. Group items by ‘temperature need’—put the cheese and dips directly against the ice.
- Pack plenty of napkins and wet wipes; pool snacks are meant to be enjoyed with wet hands, and easy cleanup is key to a stress-free day.
How to grill crispy potatoes

Why we love this
Forget the oven—grilling potatoes transforms them into something extraordinary. These spuds boast a glass-like, golden-brown crust that shatters when you bite into it, revealing a fluffy, buttery interior that melts away. The high heat of the grill imparts a subtle charred flavor that you simply can’t achieve in a kitchen, and when tossed with fresh rosemary and sea salt, they become the undisputed star of any food board, bridging the gap between a snack and a side dish.
Ingredients
- 2 lbs Baby potatoes (Yukon Gold or Red), halved
- 3 tbsp Olive oil
- 1 tbsp Fresh rosemary, chopped
- 1 tsp Garlic powder
- Kosher salt and black pepper
How to make it
- Parboil the potatoes first. Place the halved potatoes in a pot of cold salted water, bring to a boil, and cook for 5-7 minutes. They should be slightly tender but not falling apart. This step is crucial for a fluffy interior and a crispy exterior.
- Drain the potatoes and let them steam dry in the colander for 2 minutes. The drier the surface, the crispier they will get on the grill.
- Toss the warm potatoes in a bowl with olive oil, rosemary, garlic powder, salt, and pepper until well coated.
- Preheat the grill to medium heat. Use a grill basket if you have one; otherwise, place the potatoes directly on the grates, cut-side down.
- Grill for 10-15 minutes, turning occasionally, until the skins are wrinkled and the cut sides are deeply golden and crispy.
- Remove from the heat and sprinkle with a final touch of flaky sea salt while they are still sizzling.
The Art of the Simple Board
Creating a viral food board isn’t about expensive ingredients; it’s about the intention behind the assembly. When you combine these grilled, fresh, and slow-cooked elements, you create a tapestry of flavors that celebrate the season. So, grab your biggest wooden plank, pour a cold drink, and enjoy the process of building something beautiful for the people you love.