
Slow Living & Soft Spaces: A Guide to Curating Your Aesthetic
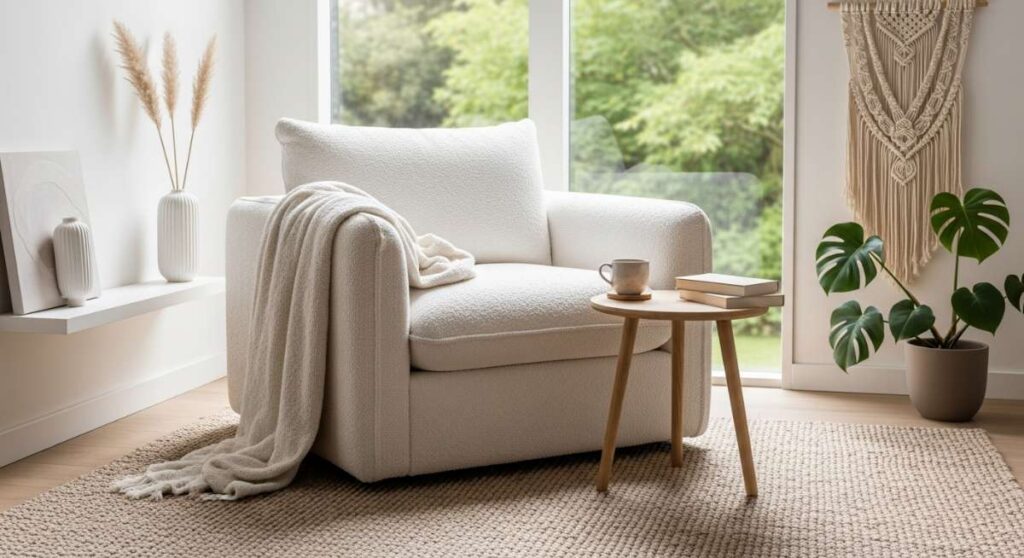
In a world that constantly demands more of our time and energy, there is a profound, quiet rebellion in choosing to slow down. It’s the feeling of lukewarm sunlight streaming through a sheer linen curtain, the scent of damp earth after a spring rain, and the tactile satisfaction of building something with your own two hands. Slow living isn’t just a trend; it’s a conscious return to the things that make us feel human, grounded, and deeply at peace within our own walls.
Creating an aesthetic home isn’t about chasing every passing fad, but rather about curating a space that breathes with you. It’s about the ‘soft spaces’—those corners of your life and home designed for lingering, dreaming, and nurturing. Whether you are planting a garden that thrives on its own or painting a deck to reflect the sky at dusk, these acts of DIY are love letters to your future self, ensuring that your environment remains a sanctuary of calm and beauty.
How to Grow a Low Maintenance Flower Bed for Year Round Beauty

Why we love this
There is nothing quite like the sight of a flower bed that looks effortlessly lush, where the colors seem to drift into one another like a watercolor painting. We love this approach because it rewards patience over constant labor; you get to enjoy the honeyed scent of perennials and the gentle hum of pollinators without spending every weekend weeding. It’s about creating a living tapestry that changes with the seasons, offering soft textures and vibrant pops of color that soothe the soul and elevate your home’s curb appeal throughout the entire year.
Essential Elements:
- Perennial plants (Lavender, Coneflowers, Sedum)
- High-quality organic compost
- Landscape fabric or heavy mulch
- Drip irrigation system (optional)
- Slow-release organic fertilizer
How to make it
- Begin by clearing the area of all existing weeds and grass. Use a garden fork to loosen the soil to a depth of about 12 inches, ensuring it is airy and ready for new life.
- Amend your soil by mixing in a 3-inch layer of organic compost. This provides the essential nutrients and drainage required for perennials to establish deep, healthy root systems.
- Lay out your plants while they are still in their pots to visualize the arrangement. Place taller varieties like Foxglove in the back and shorter, spreading plants like Creeping Thyme at the front for a tiered, voluminous look.
- Dig holes twice as wide as the root ball of each plant. Gently tease the roots before placing them in the ground, ensuring the top of the root ball is level with the soil surface.
- Apply a 2-to-3-inch layer of cedar mulch or pine bark around the plants. This is the secret to low maintenance; it suppresses weeds and retains moisture, meaning you’ll water less often and rarely have to pull a weed.
How to Build a DIY Planter Light Post for Instant Backyard Ambience

Why we love this
As the sun dips below the horizon, the right lighting can transform a simple backyard into an enchanted escape. These planter light posts provide a warm, golden glow that mimics the soft flicker of candlelight, casting long, romantic shadows across your patio. We love how they combine the organic beauty of overflowing flowers with the structural elegance of a classic lamppost, creating a dual-purpose piece that feels both functional and incredibly sophisticated for those long summer evenings spent under the stars.
Essential Elements:
- Large heavy-duty planters (ceramic or resin)
- Pressure-treated 4×4 wooden posts
- Quick-set concrete
- Solar-powered or hardwired outdoor lanterns
- Potting soil and trailing flowers (like Petunias or Ivy)
How to make it
- Center your 4×4 post inside the empty planter. Use a level to ensure the post is perfectly vertical, as even a slight tilt will be noticeable once the lantern is mounted.
- Mix your quick-set concrete in a bucket and pour it into the planter around the post, leaving about 4-6 inches of space at the top for soil. Hold the post steady for several minutes until the concrete begins to firm up.
- Once the concrete is fully cured (usually 24 hours), drill drainage holes into the side of the planter just above the concrete line to prevent water from pooling and rotting the wood.
- Attach your lantern to the top of the post. If using solar, ensure the sensors face the most sun-drenched part of your yard; if hardwired, run the conduit neatly down the back of the post.
- Fill the remaining space in the planter with high-quality potting soil and plant a variety of trailing vines and bright blooms to soften the base and add a burst of life to the structure.
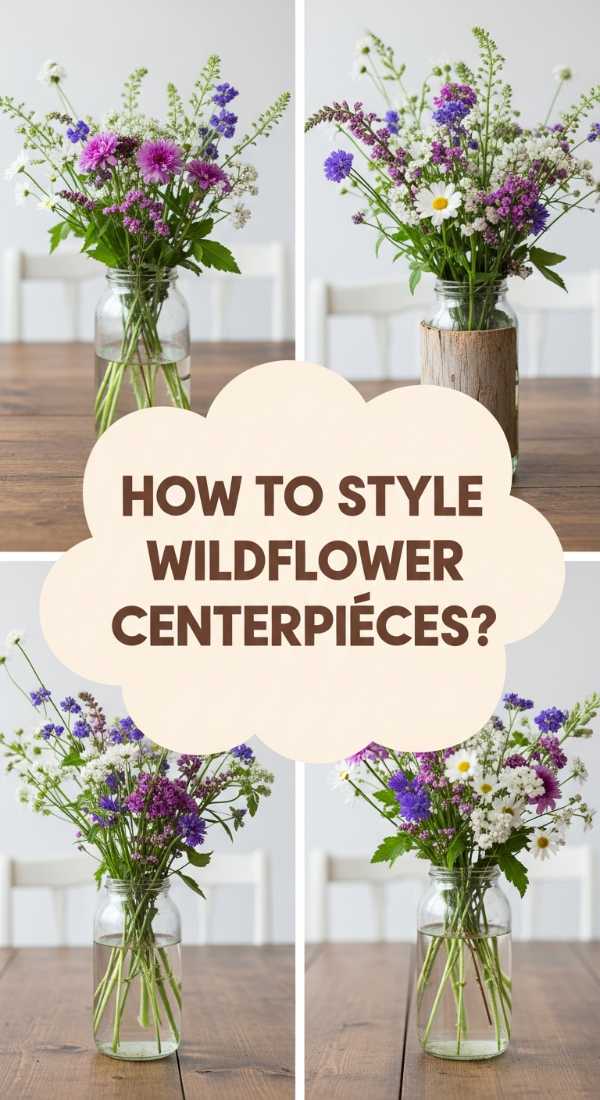
How to Arrange Wildflower Centerpieces for an Enchanted Round Table
Why we love this
A wildflower arrangement feels like a captured moment from a meadow, bringing the untamed beauty of the outdoors directly to your dining experience. There is a whimsical, ethereal quality to the way delicate stems of Queen Anne’s Lace and Zinnias dance together in a vase. We love this because it rejects the stiff formality of traditional bouquets, opting instead for a messy, organic elegance that encourages conversation and makes every meal feel like a special, sun-drenched garden party.
Essential Elements:
- A mix of focal flowers (Zinnias, Daisies) and filler (Baby’s Breath, Goldenrod)
- Varying heights of glass or ceramic vases
- Floral shears or sharp scissors
- Clear floral tape
- Fresh, cool water with flower food
How to make it
- Start by creating a ‘grid’ across the mouth of your vase using clear floral tape. This provides the structure needed to keep stems upright and exactly where you want them.
- Strip all leaves from the lower half of your stems. Any foliage submerged in water will decay quickly, creating bacteria that shortens the life of your flowers.
- Place your ‘filler’ greenery first. Aim for an asymmetrical shape that spills over the edges of the vase to create that ‘enchanted’ and overgrown aesthetic.
- Insert your focal flowers at varying heights and angles. Avoid symmetry; instead, group colors in small clusters to mimic how they naturally grow in the wild.
- Finish by adding ‘airy’ elements—thin, tall stems or delicate grasses—that sit above the main arrangement. This adds movement and a sense of lightness to the centerpiece.
How to Paint a Two Tone Deck for a Sophisticated Outdoor Space

Why we love this
The contrast of a two-tone deck creates an architectural depth that a single solid color simply cannot match. By pairing a deep, grounding charcoal or slate on the floorboards with a crisp, bright white or warm wood tone on the railings, you define the space like an outdoor living room. We love the way the light plays off the different surfaces, making the deck feel more like a high-end designer feature and providing a clean, modern backdrop for your outdoor furniture and potted plants.
Essential Elements:
- High-quality exterior deck stain or paint
- Painter’s tape (multi-surface)
- Power washer and stiff scrub brush
- Long-handle rollers and angled brushes
- Wood sealer (if using stain)
How to make it
- Thoroughly power wash the entire deck to remove dirt, mold, and old flaking paint. Let the wood dry completely for at least 48 hours; moisture trapped in the wood will cause the new paint to bubble.
- Apply your lighter color (usually the railings and balusters) first. Using a small angled brush for the edges and a mini-roller for flat surfaces ensures an even, streak-free finish.
- Once the railings are dry, use painter’s tape to meticulously mask off the bottom of the posts where they meet the deck floorboards. This prevents the darker floor color from bleeding upward.
- Apply the darker floor color using a long-handle roller. Work in the direction of the wood grain, doing two boards at a time from one end to the other to avoid ‘lap marks’ or uneven drying.
- Apply a second coat once the first is dry to the touch. Remove the painter’s tape while the second coat is still slightly tacky to ensure the cleanest possible line between the two colors.
How to Personalize a Pink Spring Wallpaper for a Fresh Seasonal Refresh

Why we love this
Pink isn’t just a color; in the world of slow living, it represents a soft, nurturing energy that brightens the spirit. Personalizing a spring wallpaper allows you to infuse your personality into the very walls of your home, creating a backdrop that feels both nostalgic and incredibly fresh. We love the way a customized floral or pastel pattern can catch the morning light, making a small room feel expansive, airy, and like a permanent bloom is happening right inside your sanctuary.
Essential Elements:
- Peel-and-stick pink floral or textured wallpaper
- Gold leaf kit or metallic paint pens
- Wallpaper smoothing tool
- Precision craft knife
- Hand-held sponge
How to make it
- Prepare your wall by wiping it down with a damp cloth to remove dust. Ensure the surface is completely dry and smooth; any bumps will show through the vinyl wallpaper.
- Hang your wallpaper panels from left to right, overlapping the edges by a tiny fraction to ensure no gaps appear if the material shifts. Use the smoothing tool to push air bubbles from the center outward.
- Once the wallpaper is installed, identify key elements in the pattern—like the center of a flower or the vein of a leaf—to highlight with your gold leaf or metallic pen.
- Apply a thin layer of adhesive to these small areas, wait for it to become ‘tacky,’ and gently press the gold leaf onto the surface. Buff away the excess with a soft, dry sponge.
- Use the precision craft knife to trim the excess wallpaper along the baseboards and ceiling for a professional, seamless look that feels custom-built for your space.
How to Build a DIY Duck Enclosure for a Happy Backyard Flock

Why we love this
There is a rhythmic, grounding joy in caring for a backyard flock, and ducks, with their quirky personalities and soft quacks, bring a unique charm to a slow-living lifestyle. We love this project because it prioritizes the well-being of the animals while maintaining a beautiful backyard aesthetic. A well-designed enclosure with clean lines and natural wood doesn’t just keep your ducks safe; it becomes a focal point of your homestead, representing a life lived in harmony with nature and the rewarding cycle of farm-to-table living.
Essential Elements:
- Hardware cloth (not chicken wire, for predator proofing)
- Pressure-treated lumber (2x4s and 4x4s)
- Corrugated roofing panels
- Self-locking gate latches
- Small pre-formed pond or heavy-duty basin
How to make it
- Level the ground where the enclosure will sit. Dig a trench 12 inches deep around the perimeter to bury the hardware cloth; this prevents burrowing predators like foxes from getting inside.
- Construct the frame using 2×4 lumber, ensuring the roof has a slight pitch so rain and snow slide off. Secure the joints with heavy-duty exterior screws for maximum stability.
- Attach the hardware cloth to the frame using a heavy-duty stapler, overlapping the seams. Ensure every inch is covered, as ducks are vulnerable at night.
- Install the corrugated roofing panels, securing them with roofing screws that have rubber washers to prevent leaks. This provides a dry, shaded area for the ducks to rest.
- Incorporate a ‘splash zone’ by sinking a pre-formed pond into the ground inside the run. Surround it with smooth river rocks to keep the area from becoming a muddy mess, ensuring your ducks stay clean and happy.
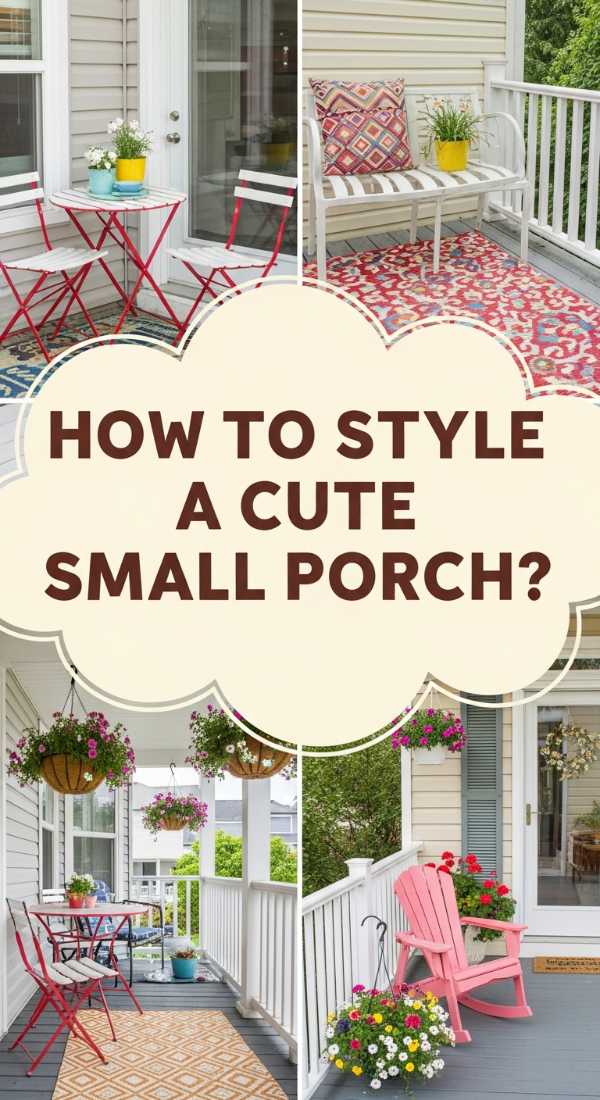
How to Style a Cute Small Porch for Big Summer Vibes
Why we love this
Even the smallest porch can become a portal to relaxation if styled with intention. We love the challenge of maximizing a tiny footprint to create a ‘soft space’ where you can sip iced tea and watch the neighborhood wake up. It’s about layers—the crunch of a jute rug, the softness of an outdoor pillow, and the fragrant greeting of potted jasmine. This transformation proves that you don’t need a sprawling estate to experience the luxury of outdoor living; you just need a few curated pieces that make you want to linger.
Essential Elements:
- Weather-resistant bistro set or floor cushions
- Outdoor area rug (Jute or recycled plastic)
- Tiered plant stands
- String lights or lanterns
- Seasonal wreath and welcome mat
How to make it
- Clear the porch completely and give it a deep clean. This blank slate allows you to see the true potential of the dimensions you are working with.
- Define the ‘living area’ by laying down an outdoor rug. Even in a small space, a rug anchors the furniture and makes the porch feel like an extension of your interior decor.
- Choose ‘vertical’ decor to save floor space. Use tiered plant stands or hanging baskets to bring greenery up to eye level, which creates a sense of enclosure and privacy.
- Add comfortable seating that fits the scale. A foldable bistro set is perfect for small decks, while oversized floor cushions can create a bohemian, relaxed vibe on a covered porch.
- Layer in the details: a soft throw for chilly evenings, a tray for drinks, and warm-toned string lights draped along the railing to create that irresistible summer glow after dark.
How to Implement Drainage Ideas for a Healthy Lush Lawn

Why we love this
Nothing disrupts the peace of a beautiful garden like a soggy, muddy lawn. Implementing smart drainage is the ultimate act of ‘slow’ maintenance—doing the hard work now so you can enjoy a perfect, emerald-green carpet for years to come. We love the satisfaction of a functional landscape that manages heavy rains gracefully. A healthy lawn isn’t just about the grass; it’s about the invisible systems underneath that allow the soil to breathe and the roots to thrive, resulting in a yard that feels firm and lush underfoot.
Essential Elements:
- Perforated drainage pipe
- Landscape filter fabric
- Gravel or river rock
- Catch basin or French drain kit
- Topsoil and grass seed
How to make it
- Identify the lowest point in your yard where water naturally pools. Dig a trench from this point to a suitable exit area (like a dry well or the street), ensuring a downward slope of at least 1 inch for every 8 feet.
- Line the trench with landscape filter fabric. This is crucial as it prevents silt and dirt from clogging the gravel and pipe over time, ensuring your drainage lasts for decades.
- Place a 2-inch layer of gravel at the bottom of the trench, then lay your perforated pipe on top with the holes facing downward. This allows water to enter the pipe from the bottom as the water table rises.
- Fill the rest of the trench with gravel to within 3 inches of the surface. Wrap the remaining filter fabric over the top of the gravel to create a fully enclosed ‘burrito’ of drainage.
- Cover the trench with topsoil and re-seed with grass. Within a few weeks, the drainage system will be completely invisible, and your lawn will remain dry even after the heaviest spring downpours.
How to Use Concrete Molds for a Custom Garden Pathway

Why we love this
There is something incredibly grounding about walking a path you laid yourself. Using concrete molds allows you to create the look of expensive cobblestone or slate at a fraction of the cost, giving your garden a structured, timeless feel. We love the way a winding pathway leads the eye through the yard, inviting exploration and creating a sense of mystery. Each stone becomes a permanent part of your home’s story, weathering beautifully over time and nestling into the surrounding greenery like it has always been there.
Essential Elements:
- Walkmaker concrete molds
- Quikrete or high-strength concrete mix
- Concrete pigment (optional for a stone look)
- Trowel and stiff brush
- Level and sand for the base
How to make it
- Mark out your path using a garden hose to create soft, natural curves. Excavate the area to a depth of 2 inches and tamp the soil down until it is firm and level.
- Spread a 1-inch layer of leveling sand over the excavated area. This provides a stable base and prevents the concrete ‘stones’ from cracking as the ground shifts with the seasons.
- Mix your concrete to a thick, ‘cake-batter’ consistency. If you want a more natural look, add a liquid charcoal or terracotta pigment to the water before mixing to give the concrete a variegated stone appearance.
- Place the mold on the sand and fill it with concrete using a shovel. Use a trowel to smooth the surface of each section, ensuring it is flush with the top of the mold.
- Lift the mold straight up after about 10 minutes. While the concrete is still damp, use a wet brush to smooth the edges or add a slight texture to the surface for better grip and a more authentic stone feel.
How to Design an Island Theme Backyard for Perpetual Vacation Feelings

Why we love this
An island-themed backyard is the ultimate expression of the ‘soft spaces’ philosophy—it is a dedicated zone for total relaxation and mental escape. We love how this aesthetic uses natural textures like bamboo, thatch, and oversized tropical leaves to create a sensory experience that mimics a seaside resort. It’s about the sound of wind through palm fronds and the sight of vibrant hibiscus flowers, turning your own backyard into a sanctuary where the stresses of the modern world simply melt away the moment you step outside.
Essential Elements:
- Potted palms (Majesty or Windmill palms)
- Bamboo fencing or privacy screens
- Tiki torches or solar-powered rattan lanterns
- Brightly colored outdoor textiles (teals, corals, yellows)
- Sand or pea gravel lounge area
How to make it
- Create ‘zones’ using bamboo screens to block out the sight of neighbors or fences. This creates an immediate sense of seclusion and privacy, essential for that ‘island getaway’ feeling.
- Design a central lounge area by clearing the grass and laying down a thick layer of pea gravel or play sand. This provides a distinct texture underfoot that immediately signals a change in environment.
- Incorporate ‘statement’ plants. Use large pots for palms and tropical ferns, which can be moved indoors during colder months. Group them together to create a dense, jungle-like canopy.
- Install lighting at multiple levels. Place lanterns on the ground, hang string lights above, and use tiki torches at the corners of the space to create a flickering, warm ambiance at night.
- Finish with sensory details: add a small water feature for the sound of trickling water, and choose outdoor cushions in bold, tropical prints to provide a comfortable, high-energy pop of color.
Cultivating Your Own Sanctuary
The journey toward a slow-living aesthetic is never truly finished—and that is the beauty of it. Each project, from the smallest wildflower arrangement to the most complex deck renovation, is an opportunity to check in with yourself and your environment. By choosing DIY projects that prioritize texture, light, and natural beauty, you aren’t just decorating; you are building a life that feels as good as it looks. Take it one step at a time, breathe in the scent of the fresh cedar or the new blooms, and enjoy the soft space you’ve created.