
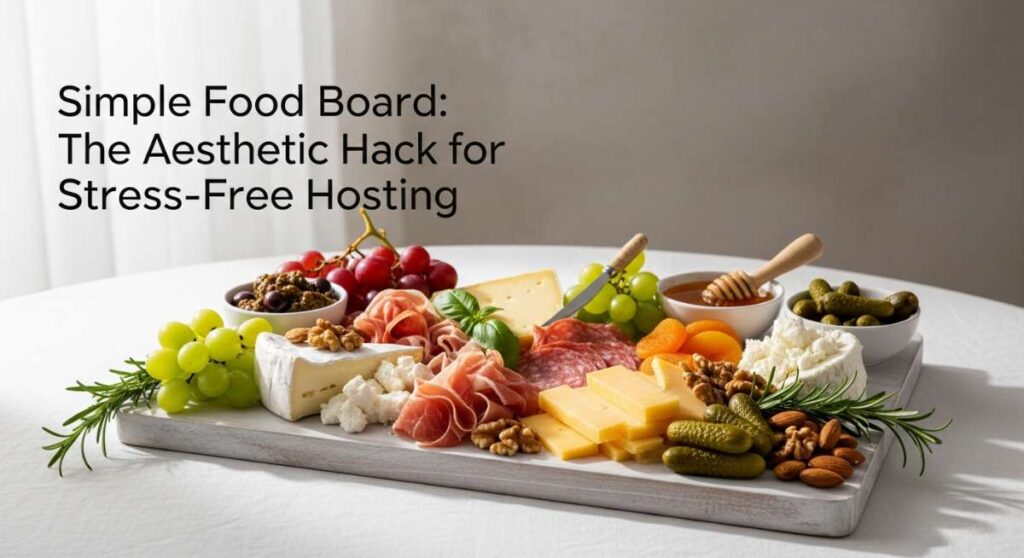
There is nothing quite like the flutter of excitement—and let’s be honest, a tiny bit of panic—that comes with hosting friends on a balmy Saturday afternoon. We all want to be that person who effortlessly floats from the kitchen with a stunning spread, but the reality is often a whirlwind of timers, messy counters, and missing the actual conversation. That is exactly why the ‘Simple Food Board’ has become my ultimate hosting hack; it turns the act of eating into an interactive, aesthetic event without the stress of a five-course meal.
The magic of a food board lies in its casual elegance. It says, ‘I care about you being here,’ without saying, ‘I spent five hours sweating over a stove.’ By focusing on high-quality ingredients and a few key cooked elements, you create a visual masterpiece that encourages grazing, laughter, and genuine connection. Today, I am sharing my favorite viral-inspired boards and recipes that will make you the hero of every summer gathering.
How to make easy meals?

Why we love this
We love the easy meal board because it transforms the mundane into a curated experience that feels like a luxury picnic. There is something deeply satisfying about the crunch of a toasted sourdough baguette paired with the creamy, velvet-like texture of a ripened Camembert. The aroma of fresh rosemary sprigs tucked between slices of salty, paper-thin prosciutto evokes a Mediterranean summer evening, while the vibrant colors of fresh berries and honeycomb create a visual feast that makes everyone feel instantly welcome and relaxed.
Ingredients
- Artisanal sourdough baguette
- Brie or Camembert cheese
- Prosciutto di Parma
- Fresh blackberries and raspberries
- Honey with the comb
- Salted Marcona almonds
- Fresh rosemary for garnish
How to make it
- Begin by selecting a large wooden board; oak or walnut provides a beautiful, rustic backdrop for the colors of the food.
- Place your cheeses at opposite ends of the board. For the Brie, slice a small wedge out so guests feel comfortable digging in immediately; a fully intact wheel can sometimes feel ‘too pretty’ to touch.
- Artfully fold your prosciutto by pinching the center of each slice and twisting it slightly to create a ‘ribbon’ effect, which adds height and texture to the board.
- Slice the baguette on a sharp diagonal into half-inch thick rounds. If you want a professional touch, lightly brush them with olive oil and toast them in a 375°F oven for 5 minutes until the edges are just starting to turn a golden, biscuity brown.
- Fill the remaining gaps with clusters of berries and small piles of almonds. Use the rosemary sprigs to tuck into any small ‘holes’ in the arrangement to provide a pop of green and a fresh, woody scent.
- Drizzle the honey over the cheese right before serving, ensuring it catches the light for that perfect viral-worthy shimmer.
How to make summer pasta?

Why we love this
Summer pasta is the ultimate comfort food that somehow feels light and refreshing at the same time. We love the way the zesty lemon juice cuts through the richness of the butter, creating a bright, citrusy aroma that fills the kitchen instantly. The sight of golden-brown garlic slivers dancing among ribbons of al dente linguine, topped with a snowdrift of freshly grated parmesan, is enough to make anyone’s mouth water. It’s a dish that captures the essence of golden hour in a single bowl.
Ingredients
- 1 lb Linguine or Tagliatelle
- 4 cloves of garlic, thinly sliced
- 2 lemons (zest and juice)
- 1/2 cup high-quality extra virgin olive oil
- 1/2 teaspoon red pepper flakes
- Fresh Italian parsley, chopped
- 1/2 cup grated Parmigiano-Reggiano
How to make it
- Bring a large pot of water to a rolling boil. Season it generously with kosher salt; it should taste like the sea to properly season the pasta from the inside out.
- Cook the pasta according to the package instructions, but aim for ‘al dente’—usually 1-2 minutes before the suggested time. The pasta should have a slight ‘bite’ or resistance in the center.
- While the pasta cooks, heat the olive oil in a large skillet over medium-low heat. Add the sliced garlic and red pepper flakes. Cook slowly, stirring constantly, until the garlic becomes translucent and just begins to turn a pale golden color. Do not let it brown too much, or it will become bitter.
- Reserve 1 cup of the starchy pasta water before draining the noodles. This liquid gold is the secret to a silky sauce.
- Add the cooked pasta directly into the skillet with the garlic oil. Pour in the lemon juice and half of the reserved pasta water.
- Toss vigorously with tongs over medium heat. The agitation helps the oil and water emulsify into a glossy sauce that clings to the pasta. If it looks dry, add more pasta water a tablespoon at a time.
- Remove from heat, stir in the lemon zest, parsley, and parmesan. The cheese will melt into the residual heat, creating a creamy finish without the need for heavy cream.
How to make rotel dip?

Why we love this
Rotel dip is the nostalgic, gooey heart of every party that we simply cannot get enough of. The savory scent of browned sausage mingling with melted, velvety cheese creates an irresistible invitation to the snack table. We love the contrast between the smooth, molten dip and the sharp, salty crunch of a sturdy tortilla chip. It’s spicy, creamy, and deeply satisfying, offering a bold kick of flavor from the green chilies that keeps everyone coming back for ‘just one more dip.’
Ingredients
- 1 lb Velveeta cheese, cubed
- 1 can (10 oz) Ro-Tel Diced Tomatoes and Green Chilies
- 1 lb ground pork sausage (spicy or mild)
- 1/4 cup chopped cilantro (optional)
- Tortilla chips for serving
How to make it
- In a large skillet over medium-high heat, crumble and cook the ground sausage. Use a wooden spoon to break it into very small pieces so the meat is evenly distributed throughout the dip.
- Sauté the sausage until it is deeply browned and slightly crispy on the edges. Drain the excess fat thoroughly using a colander or by dabbing with paper towels to ensure your dip isn’t greasy.
- In a slow cooker or a heavy-bottomed pot over low heat, combine the cubed Velveeta and the undrained can of Ro-Tel. Keeping the juice from the can is essential for the right consistency.
- Stir constantly if using a stovetop to prevent the cheese from scorching on the bottom. You are looking for a completely smooth, liquid-gold texture with no lumps of unmelted cheese.
- Fold in the cooked sausage and stir until fully integrated. If the dip is too thick, you can add a splash of whole milk or heavy cream to thin it out to your liking.
- Set your slow cooker to the ‘warm’ setting for serving. This prevents the cheese from setting into a firm block and keeps it dippable for hours. Top with fresh cilantro for a burst of color and freshness.
How to make summer salad?
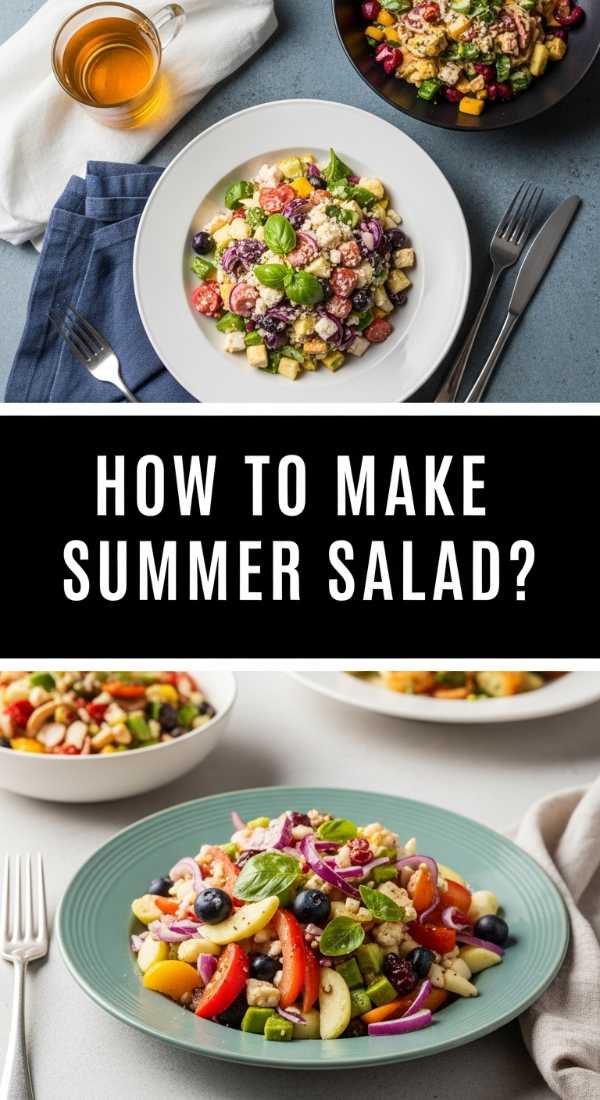
Why we love this
This summer salad is a masterclass in balance, playing with the sweet, the salty, and the peppery. We love the way the juice of a perfectly ripe peach runs down the side of a creamy mozzarella pearl, creating a natural dressing that is enhanced by the thick, syrupy drizzle of balsamic glaze. The scent of torn basil leaves adds an herbal freshness that cuts through the heat of the day, making every bite feel like a cooling, sophisticated treat that celebrates the very best of seasonal produce.
Ingredients
- 4 ripe peaches, sliced into wedges
- 8 oz fresh mozzarella pearls or torn Burrata
- 4 cups baby arugula
- 1/4 cup fresh basil leaves, torn
- 1/4 cup toasted pine nuts
- 2 tablespoons balsamic glaze
- Extra virgin olive oil and sea salt
How to make it
- Start by lightly toasting the pine nuts in a dry pan over medium heat for 2-3 minutes. Shake the pan frequently; they go from golden to burnt in seconds. Remove them as soon as they smell nutty and look tan.
- In a large, shallow bowl, create a bed of baby arugula. Drizzle very lightly with olive oil and a pinch of sea salt, tossing with your hands to ensure every leaf is coated but not weighed down.
- Arrange the peach wedges and mozzarella pearls over the arugula. For the best aesthetic, nestle the peaches into the greens rather than just dropping them on top.
- Scatter the torn basil leaves over the salad. Tearing the basil by hand rather than cutting it with a knife prevents the edges from bruising and browning, keeping the herb vibrant and fragrant.
- Just before serving, drizzle the balsamic glaze in a zig-zag pattern across the entire dish. This adds a visual ‘finish’ and a punch of acidity.
- Finish with a final sprinkle of flaky sea salt and the toasted pine nuts for a necessary crunch.
How to make healthy dinner?

Why we love this
A healthy dinner shouldn’t feel like a sacrifice, and this sheet-pan salmon is the perfect example of why we love nutritious cooking. The sight of the vibrant pink fish alongside charred, tender asparagus spears is incredibly appetizing. We love the way the skin of the salmon gets slightly crispy under the broiler while the interior remains buttery and flaky. The aroma of roasted lemon and garlic permeates the kitchen, promising a meal that is as satisfying and flavorful as it is good for the body.
Ingredients
- 2 large salmon fillets (center cut)
- 1 bunch thin asparagus, woody ends trimmed
- 2 tablespoons olive oil
- 1 lemon, thinly sliced into rounds
- 2 cloves garlic, minced
- 1 teaspoon dried oregano or thyme
- Sea salt and cracked black pepper
How to make it
- Preheat your oven to 400°F (200°C). For the easiest cleanup, line a large rimmed baking sheet with parchment paper or aluminum foil.
- Place the salmon fillets in the center of the pan and surround them with the asparagus spears. Ensure the asparagus is in a single layer so it roasts rather than steams.
- In a small bowl, whisk together the olive oil, minced garlic, and dried herbs. Drizzle this mixture evenly over both the fish and the vegetables.
- Season everything generously with salt and pepper. Place the lemon slices directly on top of the salmon fillets; this protects the delicate fish from drying out and infuses it with bright citrus notes.
- Bake for 12-15 minutes. The visual cue for doneness is when the salmon is opaque and flakes easily with a fork in the thickest part. The asparagus should be bright green with slightly charred tips.
- For an extra professional touch, turn the broiler on for the last 2 minutes of cooking to give the salmon and lemons a beautiful toasted color, but watch closely to prevent burning.
How to make summer sides?
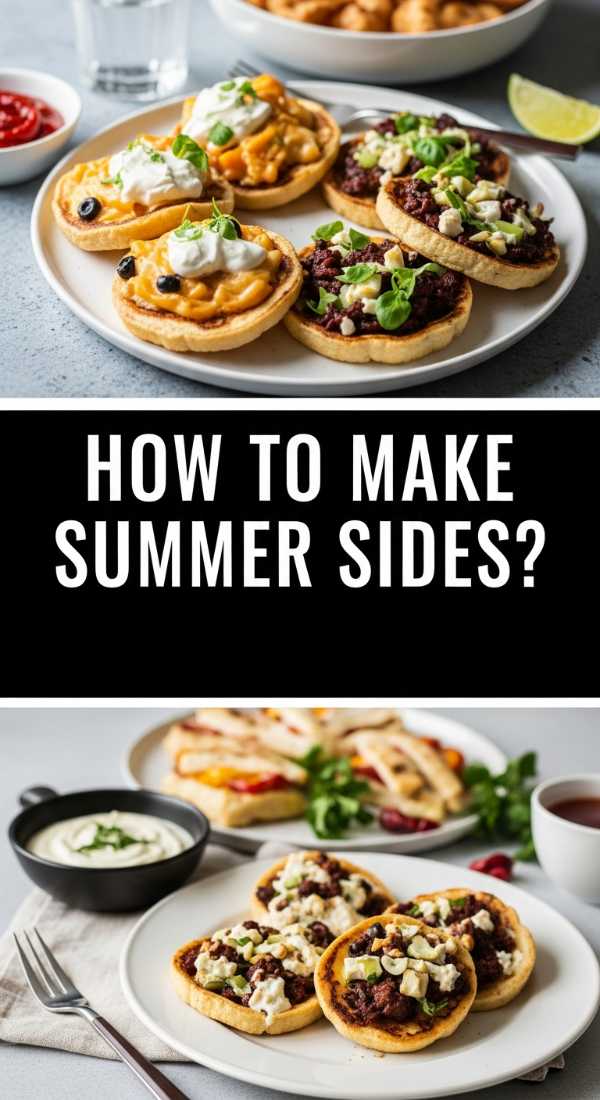
Why we love this
Summer sides are all about celebrating the harvest, and charred corn with herb butter is the absolute star of the show. We love the playful ‘pop’ of each sweet kernel and the way the smoky, charred exterior contrasts with the creamy, melting herb butter. The scent of lime juice hitting the warm corn creates a mouth-watering aroma that signifies the peak of grilling season. It’s a messy, joyful, and tactile eating experience that brings everyone together around the table.
Ingredients
- 6 ears of fresh sweet corn, husked
- 1/2 cup unsalted butter, softened
- 2 tablespoons fresh cilantro, minced
- 1/2 teaspoon smoked paprika
- 1 lime, cut into wedges
- Flaky sea salt
How to make it
- Prepare your herb butter by whipping the softened butter in a small bowl with the cilantro, smoked paprika, and a pinch of salt. Set this aside at room temperature so it stays spreadable.
- Heat your grill to medium-high heat. If you don’t have a grill, a cast-iron grill pan on the stovetop works beautifully to achieve those signature char marks.
- Place the husked corn directly onto the hot grates. Do not oil the corn first; the dry heat is what creates the best caramelization of the natural sugars.
- Grill the corn for about 10-12 minutes, turning every 2-3 minutes. You are looking for even charring—dark brown spots—across all sides of the ear.
- Remove the corn from the heat and immediately slather it with a generous portion of the herb butter. The heat of the corn will melt the butter, allowing it to seep into the crevices between the kernels.
- Squeeze fresh lime juice over the buttery corn and finish with a sprinkle of flaky salt. Serve immediately while the butter is still dripping and glossy.
How to grill best kabobs?

Why we love this
Grilling kabobs is a sensory delight that we love for its versatility and vibrant presentation. The sound of the steak sizzling on the hot grates, combined with the sweet, caramelizing smell of red onions and bell peppers, is the quintessential soundtrack to a summer evening. Each skewer is a perfectly portioned rainbow of textures—juicy, tender meat paired with the slight crunch of flame-kissed vegetables. It’s a fun, handheld way to enjoy a gourmet meal under the stars.
Ingredients
- 1.5 lbs top sirloin steak, cut into 1-inch cubes
- 2 bell peppers (red and green), cut into chunks
- 1 large red onion, cut into wedges
- 1/4 cup soy sauce
- 2 tablespoons honey
- 1 tablespoon grated ginger
- Metal or wooden skewers
How to make it
- If using wooden skewers, soak them in water for at least 30 minutes prior to grilling. This prevents them from catching fire or splintering on the grill.
- Whisk the soy sauce, honey, and ginger in a bowl. Add the steak cubes and marinate for at least 1 hour in the refrigerator. This breaks down the fibers in the meat, ensuring every bite is succulent.
- Thread the skewers, alternating between meat, pepper, and onion. Don’t pack them too tightly; leaving a tiny bit of space between items allows the heat to circulate and cook everything evenly.
- Preheat the grill to high heat. Clean the grates thoroughly and wipe them with an oil-soaked paper towel to create a non-stick surface.
- Place the kabobs on the grill and sear for 3-4 minutes per side. You want a dark, flavorful crust on the meat.
- Use a meat thermometer to check for doneness; for medium-rare, aim for an internal temperature of 135°F. Let the skewers rest for 5 minutes before serving to allow the juices to redistribute back into the meat.
How to make summer desserts?

Why we love this
We love summer desserts that are rustic and unpretentious, like a mixed berry galette. There is a primal joy in the scent of a buttery, flaky crust browning in the oven, mingled with the sweet, jammy aroma of bubbling blueberries and strawberries. The way the purple juices overflow the hand-folded edges creates a beautiful, stained-glass effect that looks intentionally artistic. Served warm with a scoop of cold vanilla bean ice cream, it is the perfect marriage of temperatures and textures.
Ingredients
- 1 refrigerated pie crust (or homemade)
- 2 cups mixed berries (blueberries, raspberries, sliced strawberries)
- 1/4 cup granulated sugar
- 1 tablespoon cornstarch
- 1 teaspoon vanilla extract
- 1 egg (for egg wash)
- Coarse sparkling sugar for topping
How to make it
- Preheat your oven to 400°F (200°C) and line a baking sheet with parchment paper.
- In a medium bowl, gently toss the berries with the granulated sugar, cornstarch, and vanilla extract. The cornstarch is crucial as it thickens the fruit juices so the bottom of your galette doesn’t get soggy.
- Unroll the pie crust onto the parchment paper. Use a rolling pin to flatten it slightly into a 12-inch circle; it doesn’t have to be perfect—the ‘rustic’ look is part of the charm.
- Mound the fruit mixture in the center of the dough, leaving a 2-inch border all the way around the edge.
- Carefully fold the edges of the dough up and over the fruit, pleating the crust as you go. The center of the fruit should still be exposed.
- Beat the egg with a teaspoon of water and brush this ‘egg wash’ over the pleated crust. This creates a professional, high-shine golden finish. Sprinkle the coarse sugar over the wet egg wash for a sweet crunch.
- Bake for 25-30 minutes until the crust is a deep golden brown and the fruit is vigorously bubbling. Let it cool for at least 15 minutes to allow the filling to set before slicing.
How to cook summer soup?

Why we love this
Summer soup is a revelation, especially when it’s a chilled, vibrant gazpacho. We love how refreshing and ‘alive’ this dish feels; it’s like eating a garden in a bowl. The aroma is dominated by fresh cucumber and bell peppers, while a hint of garlic and sherry vinegar provides a sophisticated zing. The texture is smooth yet substantial, providing a cooling relief on a humid afternoon. It’s the ultimate light starter that cleanses the palate and celebrates raw, peak-season ingredients.
Ingredients
- 2 lbs ripe Roma tomatoes, cored and chopped
- 1 English cucumber, peeled and chopped
- 1 red bell pepper, seeded and chopped
- 1/2 red onion, chopped
- 1 clove garlic
- 2 tablespoons sherry vinegar
- 1/3 cup extra virgin olive oil
- Salt and pepper to taste
How to make it
- Place the tomatoes, cucumber, pepper, onion, and garlic into a high-powered blender. If your blender is small, work in batches to ensure a consistent texture.
- Pulse until the vegetables are broken down, then switch to high speed. While the blender is running, slowly stream in the olive oil and sherry vinegar. This ’emulsification’ creates a creamy, orange-red soup that won’t separate.
- For a truly professional, silky-smooth result, pour the blended mixture through a fine-mesh sieve into a large bowl, using the back of a spoon to push the liquid through and discarding the pulp.
- Season with salt and pepper. The seasoning is vital here; taste and adjust until the flavors ‘pop.’
- Transfer the soup to the refrigerator for at least 2-4 hours. Chilling is the most important step in ‘cooking’ a gazpacho, as it allows the sharp flavors of the raw onion and garlic to mellow and meld together.
- Serve in chilled bowls or even small glass shooters for a party. Garnish with a tiny drizzle of oil and a few finely diced bits of the original vegetables for a beautiful, textural finish.
How to make party sandwiches?

Why we love this
Party sandwiches, specifically hot Italian sliders, are the ultimate crowd-pleaser that we love for their savory, melt-in-your-mouth goodness. The aroma of garlic butter and oregano baking onto sweet Hawaiian rolls is enough to draw a crowd to the kitchen instantly. We love the way the spicy salami and ham contrast with the mild, stretchy provolone cheese, all held together by a bun that is crispy on the top and soft in the middle. They are easy to grab, fun to eat, and always the first thing to disappear from the board.
Ingredients
- 1 pack (12 count) Hawaiian sweet rolls
- 1/2 lb deli ham, thinly sliced
- 1/4 lb hard salami, thinly sliced
- 6 slices provolone cheese
- 1/2 cup butter, melted
- 1 teaspoon garlic powder
- 1 tablespoon dried Italian seasoning
How to make it
- Preheat your oven to 350°F (175°C). Use a long serrated knife to slice the entire slab of Hawaiian rolls in half horizontally. Do not pull the rolls apart yet; keep them as two solid ‘sheets’ of bread.
- Place the bottom half of the rolls in a baking dish. Layer the ham evenly across the bread, followed by the salami.
- Place the slices of provolone over the meat, overlapping them so that every single bite of sandwich will have melted cheese. Place the top half of the rolls back on.
- In a small bowl, combine the melted butter, garlic powder, and Italian seasoning. Use a pastry brush to liberally coat the tops of the rolls with the flavored butter. This is what creates that irresistible golden crust.
- Cover the baking dish tightly with aluminum foil. This traps the steam, which softens the bread and melts the cheese without burning the tops. Bake for 10 minutes.
- Remove the foil and bake for an additional 5-7 minutes. Watch for the visual cue of the cheese bubbling out the sides and the buns turning a beautiful toasted mahogany.
- Let them sit for 2 minutes before using a knife to cut along the pre-marked lines of the rolls. Serve them warm while the cheese is at its stretchiest.
The Secret to Stress-Free Hosting
Hosting doesn’t have to be a performance; it should be a pleasure. By embracing the aesthetic and ease of the food board, you shift the focus from the ‘work’ of the kitchen to the ‘joy’ of the table. Whether you are serving a chilled summer soup or a tray of gooey sliders, remember that the best ingredient is always a relaxed host. So, grab a board, pick a recipe from this list, and get ready to host your most memorable—and stress-free—gathering yet!