
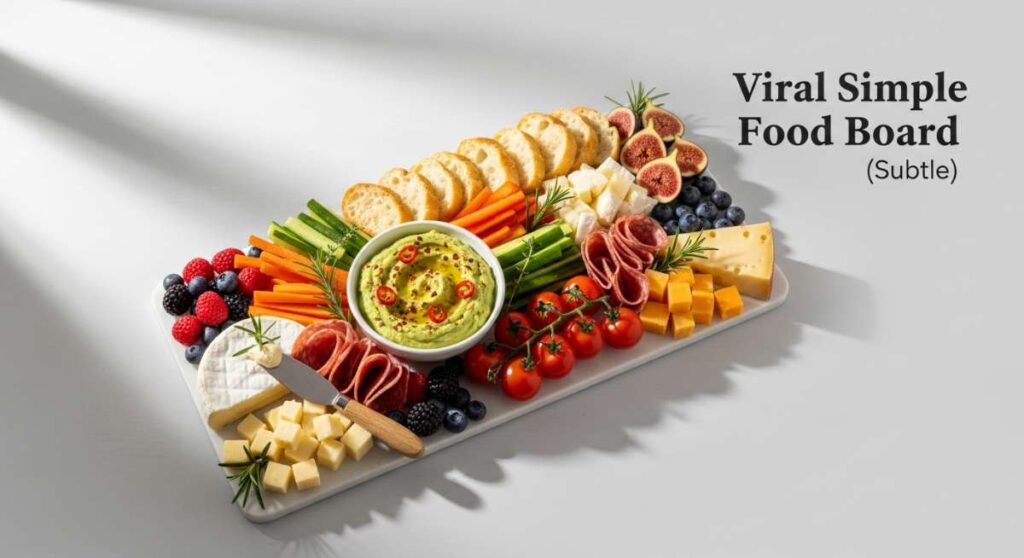
Simple, Aesthetic, and Viral: How to Build the Perfect Food Board
There is something undeniably magical about a perfectly curated food board. It’s more than just a meal; it’s a tactile, visual experience that brings people together, sparking conversation over shared bites and beautiful colors. I remember the first time I set out a massive grazing spread for my best friends—the way the room filled with the scent of fresh herbs and toasted bread, and how the aesthetic layout immediately became the backdrop for a dozen Instagram stories. That’s the power of the ‘viral’ board: it’s as much about the connection as it is about the flavor.
Building an aesthetic board doesn’t have to be intimidating or expensive. It’s about balance—mixing the warm, comforting dips with the crisp, fresh crunch of seasonal vegetables. In this guide, I’m taking you through my favorite components for a viral-worthy spread, from hearty ‘dirty’ spaghetti to the softest steamed dumplings. Whether you’re hosting a casual baseball watch party or a sophisticated spring dinner, these recipes are designed to look stunning on a platter and taste even better.
The secret is in the details: the way the sauce glimmers under the light, the pop of color from a fresh radish, and the satisfying steam rising from a fresh batch of dumplings. Let’s dive into these recipes and transform your next gathering into a viral sensation!
How to make creamy rotel dip?

Why we love this
This dip is the ultimate nostalgic comfort food, offering a luxurious, velvety texture that coats every chip perfectly. The aroma of melted cheese combined with the spicy, zesty scent of diced tomatoes and green chilies creates an irresistible invitation to dive in. There is something so satisfying about the contrast between the thick, gooey cheese and the savory, slightly salty browned meat that makes it a centerpiece of any grazing board. It’s the kind of dish that disappears in minutes because it hits every single flavor profile—creamy, salty, and just the right amount of heat.
Ingredients
- 16 oz Velveeta or processed melting cheese, cubed
- 1 can (10 oz) Rotel Original Diced Tomatoes and Green Chilies
- 1 lb ground breakfast sausage or lean ground beef
- 1/2 cup whole milk (optional, for desired consistency)
- 1 tsp taco seasoning or smoked paprika
- Fresh cilantro for garnish
How to make it
- Begin by placing a large skillet over medium-high heat. Add your ground sausage or beef, breaking it apart with a wooden spoon into small, uniform crumbles. Cook until the meat is thoroughly browned and no longer pink, which usually takes 7-10 minutes. Once cooked, drain the excess fat carefully to ensure your dip isn’t greasy.
- While the meat is browning, take your melting cheese and cut it into 1-inch cubes. This is a critical step because smaller, uniform cubes melt much faster and more evenly than a large block, preventing the bottom from burning while the top remains solid.
- Lower the heat to low-medium and add the cheese cubes to the skillet with the meat. Pour in the entire can of Rotel, including the liquid, as that juice contains all the spice and acidity needed to balance the richness of the cheese.
- Stir the mixture constantly with a heat-resistant spatula. As the cheese begins to liquefy, you can add a splash of milk if you prefer a thinner, pourable consistency. Keep the heat low to avoid scorching the dairy.
- Continue stirring until the mixture is completely smooth and bubbling gently. Sprinkle in your taco seasoning or paprika for an extra layer of depth. Transfer to a warm serving bowl or a small slow cooker to keep it gooey throughout your party, topping with fresh cilantro for a pop of color.
How to make spring lunch?

Why we love this
A spring lunch should feel like a breath of fresh air, celebrating the return of vibrant greens and crisp textures after a long winter. We love this because it focuses on the crunch of snap peas, the peppery bite of radishes, and the bright, citrusy zing of a lemon vinaigrette that awakens the palate. There’s a lightness to this dish that leaves you feeling energized rather than weighed down, making it the perfect aesthetic addition to a sunny afternoon board. The visual appeal of pastel greens and bright pinks creates a stunning plate that looks like it was plucked straight from a garden boutique.
Ingredients
- 2 cups fresh arugula or baby spinach
- 1 cup sugar snap peas, stringed and halved
- 4 large radishes, thinly sliced
- 1/2 cup crumbled feta or goat cheese
- 1/4 cup toasted sliced almonds
- Dressing: 3 tbsp olive oil, 1 tbsp lemon juice, 1 tsp honey, salt and pepper
How to make it
- Start by preparing your vegetables to ensure maximum crunch. Wash the arugula in cold water and use a salad spinner to dry it completely; wet leaves will prevent the dressing from adhering properly.
- Bring a small pot of salted water to a boil. Drop the snap peas in for exactly 60 seconds—a process called blanching. Immediately plunge them into a bowl of ice water. This stops the cooking process and locks in that brilliant emerald green color and snap-fresh texture.
- Use a mandoline slicer or a very sharp chef’s knife to cut the radishes into paper-thin translucent rounds. This allows the peppery flavor to be subtle rather than overwhelming and adds a professional, high-end look to your lunch board.
- In a small glass jar, combine the olive oil, fresh lemon juice, honey, salt, and cracked black pepper. Shake vigorously until the honey is fully incorporated and the dressing is emulsified into a cloudy, golden liquid.
- Assemble the salad by layering the greens first, followed by the blanched peas and radish slices. Drizzle the dressing just before serving to keep the leaves crisp. Finish by sprinkling the crumbled cheese and toasted almonds over the top for a creamy and nutty finish.
How to cook dirty spaghetti?

Why we love this
Dirty spaghetti is the ultimate soul-food fusion, combining the silky texture of classic Italian pasta with the deep, earthy, and savory flavors of a Southern-style meat base. We love it because it’s incredibly hearty and fragrant, filling the kitchen with the scent of sautéed bell peppers, onions, and rich spices. The ‘dirty’ element comes from the finely crumbled meat and aromatics that cling to every strand of pasta, ensuring that every bite is packed with umami. It’s a rustic, beautiful dish that looks amazing served in a large communal bowl in the center of a board, topped with plenty of fresh green herbs.
Ingredients
- 1 lb spaghetti noodles
- 1 lb ground beef or pork sausage
- 1 medium onion, finely diced
- 1 green bell pepper, finely diced
- 2 stalks celery, finely diced
- 3 cloves garlic, minced
- 2 tbsp tomato paste
- 1 cup beef broth
How to make it
- Bring a large pot of heavily salted water to a rolling boil. Add the spaghetti and cook for 1-2 minutes less than the package directions specify. This ‘al dente’ texture is vital because the pasta will finish cooking in the sauce, absorbing the flavors without becoming mushy. Reserve 1 cup of pasta water before draining.
- In a large deep skillet or Dutch oven, brown the ground meat over medium heat. Use a spatula to break the meat into very fine crumbles—the smaller the better for that authentic ‘dirty’ look. Once browned, remove the meat and set aside, leaving about 2 tablespoons of fat in the pan.
- Add the diced onion, bell pepper, and celery (the ‘Holy Trinity’) to the pan. Sauté these over medium heat for about 8 minutes until they are soft and the onions are translucent. Add the minced garlic and cook for just 60 seconds until fragrant, being careful not to let it burn.
- Stir in the tomato paste and cook it for 2 minutes, stirring constantly. This ‘caramelizes’ the paste, deepening the flavor from bright red to a rich rust color. Pour in the beef broth to deglaze the pan, scraping up all the brown bits from the bottom.
- Add the cooked meat back into the skillet. Toss in the cooked spaghetti and a splash of the reserved pasta water. The starch in the water helps the sauce emulsify and cling to the noodles. Toss everything together over low heat for 2-3 minutes until the liquid has reduced and the pasta is perfectly coated.
How to prep baseball snacks?

Why we love this
There’s a unique, whimsical joy in baseball snacks that brings out the kid in everyone. We love this setup because it plays with the perfect balance of salty and sweet, featuring textures ranging from the airy crunch of popcorn to the hard snap of pretzels. When arranged on a food board, these snacks create a vibrant tapestry of colors and shapes that feel festive and communal. The aroma of buttery popcorn and roasted peanuts is synonymous with summer afternoons and stadium lights, making this the ultimate nostalgia-driven board for game day.
Ingredients
- 4 cups buttered popcorn
- 2 cups mini pretzels
- 1 cup roasted salted peanuts
- 1 cup chocolate candies (like M&Ms)
- 1 cup cracker jacks or caramel corn
- Beef jerky strips for a savory bite
How to make it
- Start by preparing the base of your snack board with the ‘volume’ items. Pop your popcorn fresh—either on the stove or in an air popper—and toss it with a light drizzle of melted butter and a fine dusting of sea salt. Let it cool slightly so it doesn’t make the other snacks soft.
- To elevate the flavor of the peanuts, toss them in a dry pan over medium heat for 3-4 minutes. Toasting them briefly releases their natural oils and makes them incredibly fragrant and much crunchier.
- Create ‘clusters’ on your board. Instead of mixing everything in one giant bowl, create distinct mounds of each snack. Start with the larger items like popcorn and pretzels to build structure, then fill in the gaps with smaller items like peanuts and chocolate candies.
- For a pro-tip on aesthetics, use small parchment paper liners or decorative cupcake wrappers to hold the messier or smaller items like caramel corn or jerky. This keeps the board organized and makes it easier for guests to grab a handful.
- Finalize the board by ensuring a good distribution of colors. Place the bright chocolate candies next to the neutral tones of the pretzels to make the colors pop. Serve immediately while the popcorn is at its peak crispness.
How to toss summer salads?

Why we love this
A summer salad should be a celebration of peak-season produce, bursting with juicy sweetness and cooling elements. We love this because it’s a masterclass in flavor contrast—think the icy crunch of cucumber against the creamy saltiness of feta and the burst of sun-ripened berries. The aroma of fresh mint and basil chiffonade provides a refreshing olfactory experience that makes the heat of summer feel manageable. It’s a visually stunning dish that brings a sophisticated, ‘clean-girl’ aesthetic to your food board, making it feel light and high-end.
Ingredients
- 1 medium seedless watermelon, cubed
- 2 English cucumbers, sliced into half-moons
- 1/2 cup fresh blueberries or strawberries
- 1/4 cup fresh mint leaves, torn
- 1/2 cup crumbled goat cheese or feta
- Zest and juice of 2 limes
How to make it
- The key to a non-soggy summer salad is moisture management. Cube your watermelon into uniform 1-inch pieces and place them in a colander over a bowl for 10 minutes. This allows excess juice to drain away so your salad doesn’t turn into a soup.
- Slice your English cucumbers. I prefer English cucumbers because the skin is thin and the seeds are minimal, providing a much cleaner crunch. If using standard cucumbers, peel them in stripes for a decorative look and scoop out the seeds.
- In a very large chilled mixing bowl, combine the watermelon, cucumbers, and berries. Chilling the bowl helps keep the ingredients crisp while you are tossing them.
- Whisk together the lime juice and zest in a separate small bowl. Drizzle this over the fruit and vegetables. Using large salad spoons or clean hands, gently fold the ingredients together. Avoid over-mixing, as watermelon is delicate and can break apart.
- Top with the torn mint leaves and crumbled cheese just seconds before serving. The mint provides a cooling finish, while the cheese adds a necessary creamy fat component that ties the sweetness of the fruit together.
How to grill healthy meals?

Why we love this
Grilling is the ultimate way to lock in flavor without the need for heavy sauces or fats. We love this because it imparts a distinct smoky char that enhances the natural sweetness of vegetables and the juiciness of lean proteins. The visual of perfect grill marks on a bright yellow squash or a succulent chicken breast is instantly appetizing and feels incredibly wholesome. There is something primal and satisfying about cooking over an open flame, and the resulting meal is packed with nutrients and bold, fire-kissed flavor that feels like a backyard vacation.
Ingredients
- 2 lbs lean protein (chicken breast, salmon, or tofu)
- 3 bell peppers, cut into thick strips
- 2 large zucchinis, sliced into planks
- 1 bunch asparagus, woody ends trimmed
- Marinade: Olive oil, balsamic vinegar, garlic, and dried oregano
How to make it
- Preparation is everything when it comes to healthy grilling. Marinate your protein for at least 30 minutes (up to 4 hours for chicken) in a mixture of olive oil, balsamic, and herbs. This doesn’t just add flavor; the acidity helps tenderize the fibers of the meat.
- Preheat your grill to medium-high heat (about 400°F). Use a grill brush to ensure the grates are perfectly clean, then lightly oil them using a paper towel dipped in vegetable oil held by tongs. This prevents sticking without adding excess calories.
- Start with the protein. Place it on the hottest part of the grill. For chicken, cook for about 6-7 minutes per side until the internal temperature reaches 165°F. For salmon, aim for 4-5 minutes per side until it flakes easily. Avoid moving the meat too much; let it sit to develop those iconic aesthetic grill marks.
- Move the protein to a cooler part of the grill to rest and add your vegetables to the direct heat. Zucchini and peppers cook quickly, usually taking only 3-4 minutes per side. Asparagus needs even less time; roll them across the grates for about 3 minutes until tender-crisp.
- Once everything is cooked, arrange it on a large wooden board. Squeeze fresh lemon juice over everything to brighten the flavors and add a final sprinkle of coarse sea salt. The steam rising from the charred veggies makes for a perfect viral photo op.
How to steam squishy dumplings?
Why we love this
Squishy dumplings are the heart and soul of an aesthetic food board, offering a delicate, pillowy texture that yields to a savory, umami-packed center. We love the sensory experience of pulling a warm, translucent dumpling apart and seeing the steam escape. The mouthfeel is a perfect balance between the tender, slightly chewy dough and the moist filling. When served on a board with a variety of dipping sauces, they provide an interactive element that guests absolutely adore. They are little pockets of joy that look like pearls when arranged correctly.
Ingredients
- 1 pack pre-made dumpling wrappers (or frozen gyoza)
- 1/2 lb ground pork or finely minced mushrooms
- 2 cups shredded cabbage
- 1 tbsp grated ginger and 2 cloves garlic
- 1 tbsp soy sauce and 1 tsp sesame oil
- Cabbage leaves or parchment paper for lining
How to make it
- If making from scratch, mix your filling (meat/veg, ginger, garlic, soy, and sesame) in a bowl until it forms a cohesive paste. Place a small teaspoon of filling in the center of a wrapper. Wet the edges with a finger dipped in water, fold in half, and pleat the edges tightly to seal.
- Prepare your steamer. A bamboo steamer is ideal for the aesthetic and flavor, but a metal insert works too. Line the bottom with either perforated parchment paper or large Napa cabbage leaves. This is a vital professional tip: it prevents the delicate ‘squishy’ dough from sticking and tearing when you try to pick them up.
- Bring about 2 inches of water to a simmer in a wok or wide pot. Place the steamer basket over the water, ensuring the bottom of the basket doesn’t actually touch the liquid.
- Arrange the dumplings in the basket, making sure they do not touch each other. If they touch, they will fuse together as the starch gelatinizes, ruining the aesthetic. Steam on medium heat for 8-10 minutes.
- You’ll know they are done when the wrappers become slightly translucent and feel firm but ‘squishy’ to the touch. Remove the steamer from the heat and let them sit for 1 minute before serving. Arrange them on your board with a small bowl of chili oil and soy sauce for dipping.
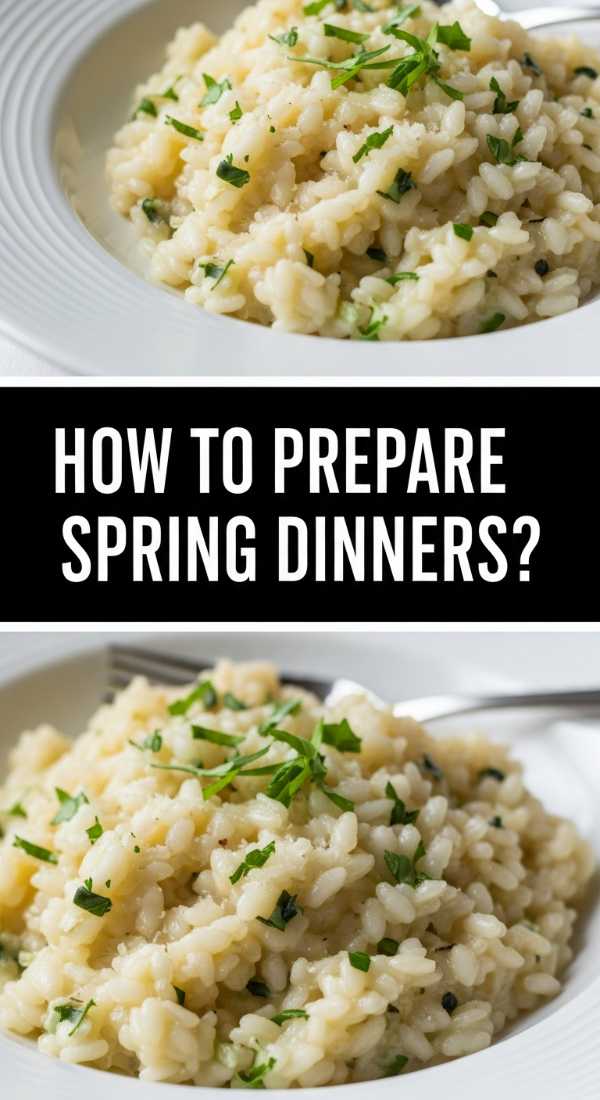
How to prepare spring dinners?
Why we love this
Spring dinners are all about the transition from heavy stews to vibrant, citrus-forward meals that celebrate new growth. We love this because it feels elegant yet effortless, often featuring tender proteins like lamb or salmon paired with the first harvest of asparagus and peas. The aroma of fresh dill and lemon butter melting over warm vegetables is quintessentially ‘spring.’ These dinners are naturally beautiful, with a color palette of soft greens, bright yellows, and pinks that make your food board look like a professional catering spread.
Ingredients
- 4 salmon fillets or lamb chops
- 1 bunch thin asparagus
- 1 cup fresh or frozen peas
- 2 tbsp butter
- 1 tbsp fresh dill, chopped
- Lemon slices for garnish
How to make it
- Start by prepping your ‘hero’ protein. Season your salmon or lamb generously with salt and pepper. In a heavy skillet, sear the protein in a touch of oil over medium-high heat. For salmon, start skin-side down for 4 minutes to get it crispy, then flip for 3 minutes. For lamb, sear for 3-4 minutes per side for medium-rare.
- In the same pan, add a knob of butter. Once it foams, toss in your asparagus. Sauté the asparagus in the pan juices for 5 minutes. The high heat will blister the skins slightly while keeping the inside tender and bright green.
- For the peas, I recommend a quick steam or a sauté in lemon butter for 2 minutes. You want them to stay plump and ‘pop’ in your mouth, not turn mushy or grey.
- Create a ‘brightening’ sauce by mixing the remaining melted butter with lemon juice and freshly chopped dill. This herb-butter infusion is what gives the dish its signature spring fragrance.
- To assemble the dinner board, lay the asparagus down as a bed, place the protein on top, and scatter the peas around. Drizzle the lemon-dill butter over everything and finish with fresh lemon slices. The contrast of the flaky pink salmon against the green vegetables is the height of spring aesthetic.
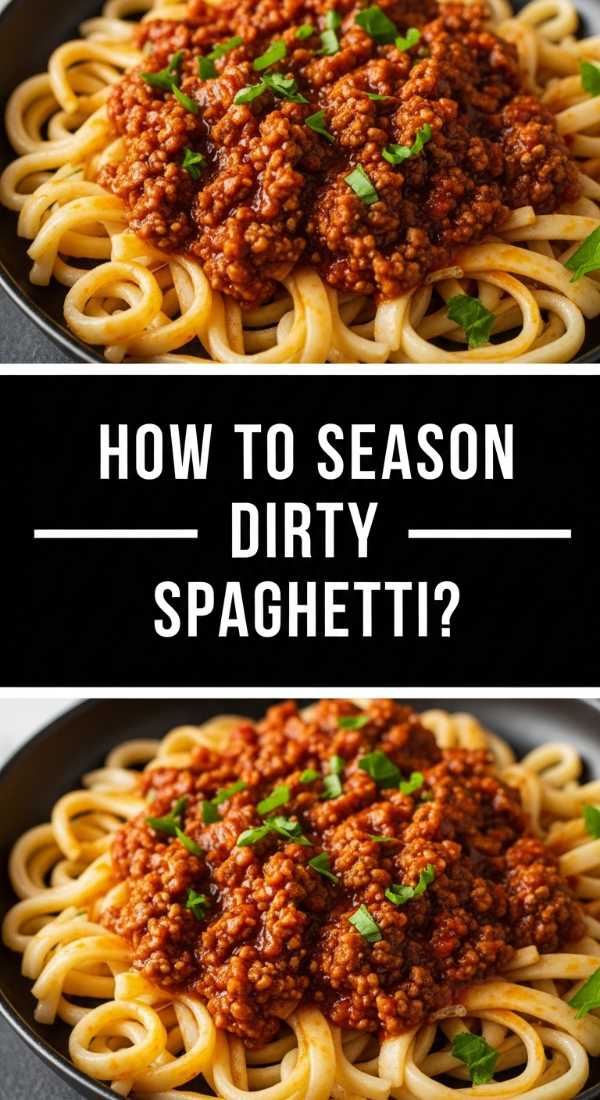
How to season dirty spaghetti?
Why we love this
The seasoning is the true ‘secret sauce’ of dirty spaghetti, turning a simple pasta dish into a complex, multi-layered flavor experience. We love it because the spices create a deep, smoky, and slightly spicy profile that lingers on the tongue. It’s all about the balance of earthy notes like cumin and thyme against the heat of cayenne and the sweetness of paprika. This specific seasoning blend gives the dish its characteristic ‘dirty’ color—a rich, dark hue that looks incredible against a white ceramic serving platter on your board.
Ingredients
- 2 tsp smoked paprika
- 1 tsp garlic powder
- 1 tsp onion powder
- 1/2 tsp cayenne pepper (adjust for heat)
- 1/2 tsp dried thyme
- 1/2 tsp ground cumin
- 1 tsp black pepper and 1.5 tsp kosher salt
How to make it
- The secret to great seasoning is to toast your dry spices. Before adding any liquids to your meat and vegetable mix, sprinkle this entire spice blend directly onto the browned meat and sautéed aromatics in the pan.
- Cook the spices with the dry ingredients for 60-90 seconds. This ‘blooms’ the spices in the residual fat, releasing their essential oils and intensifying their aroma and flavor significantly more than if you just stirred them into a liquid.
- Be careful with the heat during this stage. Spices, especially paprika, can burn and turn bitter if left over high heat for too long. Keep the mixture moving constantly.
- Once the spices are fragrant and the meat is well-coated in a dark, flavorful crust, proceed with adding your tomato paste and broth. This ensures the flavor is built from the bottom up and is deeply infused into the meat.
- Taste your sauce after it has simmered for a few minutes. Seasoning is a journey—if it needs more ‘zing,’ add a pinch more salt or a squeeze of lemon to cut through the richness of the spices.
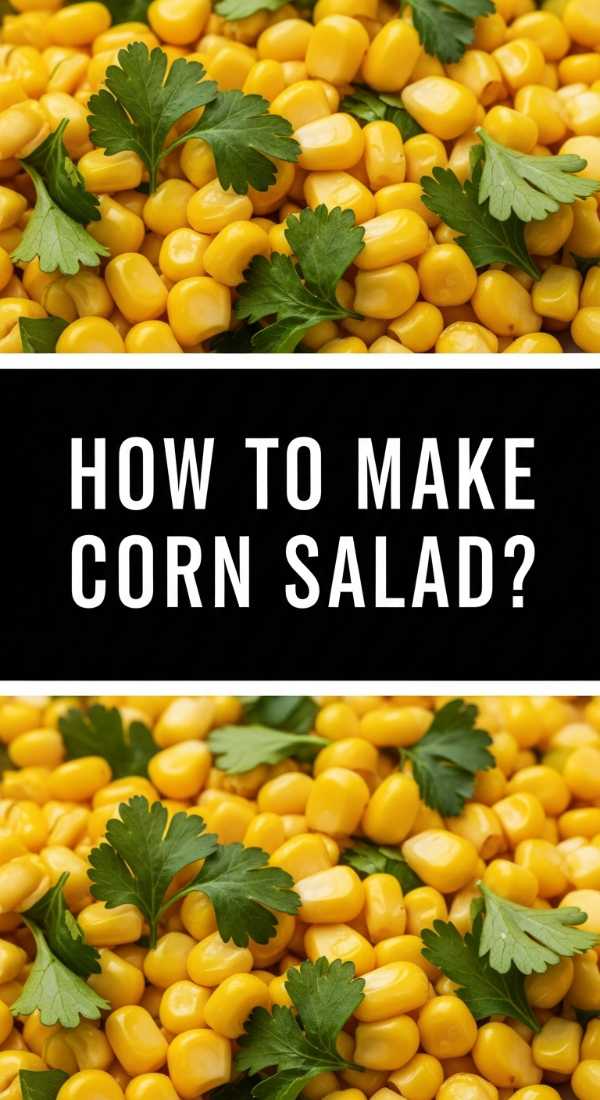
How to make corn salad?
[IMAGE_10]
Why we love this
Corn salad, specifically in the style of Mexican ‘Esquites,’ is a riot of flavors and textures. We love the combination of the sweet, charred corn kernels with the creamy, tangy dressing and the salty kick of cotija cheese. It’s a sensory explosion—crunchy, creamy, spicy, and sweet all at once. Visually, the bright yellow corn mixed with green cilantro and red chili powder creates a festive, viral look that adds a burst of energy to any food board. It’s the ultimate crowd-pleaser that people keep coming back to for ‘just one more spoonful.’
Ingredients
- 4 cups corn kernels (fresh from the cob is best)
- 2 tbsp mayonnaise or Mexican crema
- 1/4 cup crumbled cotija cheese
- 1/2 tsp chili powder or Tajin
- 1/4 cup fresh cilantro, chopped
- 1 lime, cut into wedges
How to make it
- For the best flavor, start by charring your corn. If using fresh ears, grill them whole until the kernels are blackened in spots. If using frozen or canned, toss them in a very hot cast-iron skillet with a teaspoon of oil. Don’t stir too often; let the corn sit for 2-3 minutes at a time to get that deep, smoky char.
- Once charred, transfer the corn to a large mixing bowl and let it cool slightly. Adding the creamy elements to piping hot corn will cause the mayo to break and become oily.
- Add the mayonnaise or crema, the chili powder, and half of the cotija cheese. Use a rubber spatula to fold everything together until every kernel is lightly coated in the creamy dressing.
- Taste the mixture. Corn varies in sweetness, so you may need an extra squeeze of lime juice or a pinch of salt to balance the flavors.
- Transfer to a small decorative bowl for your board. Garnish with the remaining cotija cheese, a heavy dusting of cilantro, and more chili powder for that professional, aesthetic finish. Serve with lime wedges on the side so guests can customize their acidity level.
Final Thoughts on the Perfect Food Board
Creating a viral food board is all about embracing the beauty of variety. By combining the rich, savory notes of dirty spaghetti with the refreshing crunch of a summer salad and the whimsical fun of baseball snacks, you create a spread that caters to every craving. Remember, the best boards are the ones that reflect your personality and the season. Don’t be afraid to get messy, pile things high, and let the colors bleed into one another. Happy hosting!