
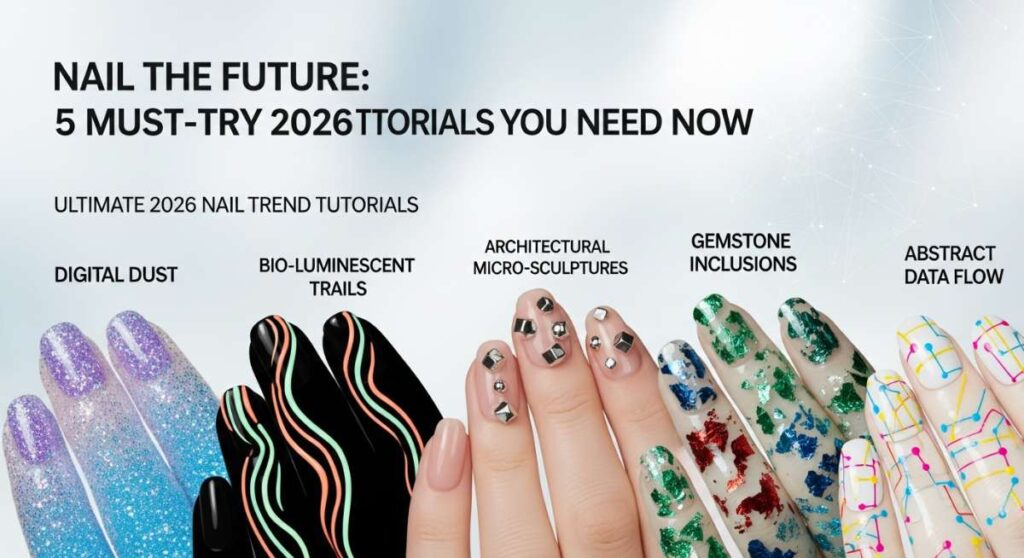
Nail the Future: 5 Must-Try 2026 Tutorials You Need Now
Hi my sweet loves! Pull up a chair and let’s share a quiet, beautiful moment together. I was sitting by my window this morning, watching the light dance across my vanity, and I realized how much our hands tell our stories. They hold our coffee, they wave hello to strangers, and they type out those dreams we’re finally making real. As we look toward 2026, I wanted to curate a little collection of magic for your fingertips—styles that feel like a soft hug and a bold statement all at once.
We aren’t just talking about polish here, my darlings; we are talking about an extension of your beautiful soul. These tutorials are designed to be your little weekend ritual, a way to slow down and pour some love back into yourself. Whether you’re a pro with a brush or just starting your DIY journey, I promise these looks will make you feel like the main character of your own soft-filtered life.
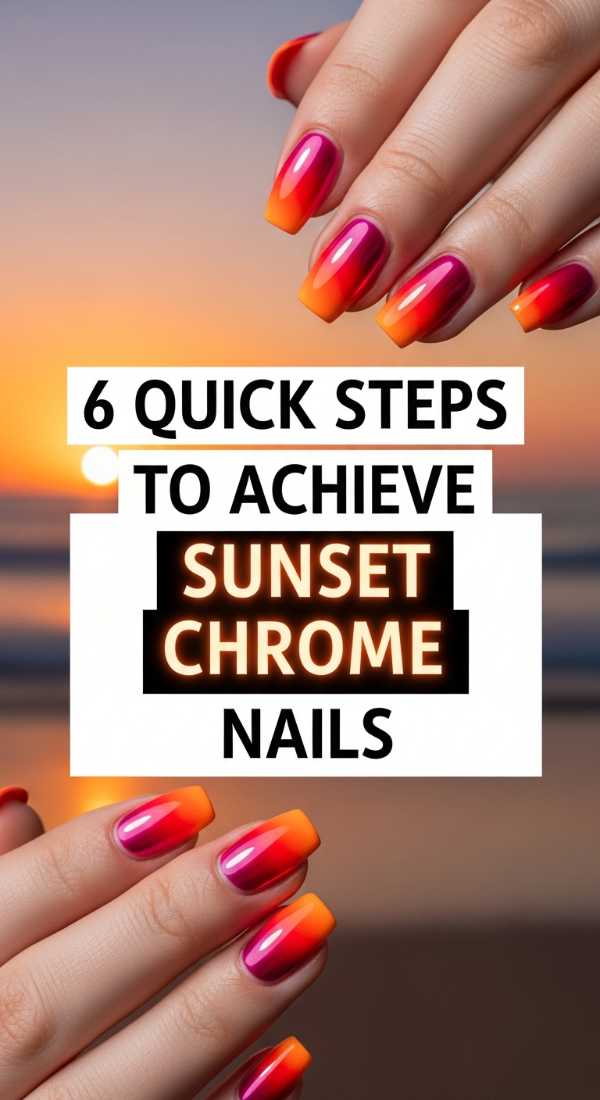
6 Quick Steps to Achieve Sunset Chrome Nails
Why to Love This Design:
There is something so deeply romantic about a sunset, isn’t there? This look captures that fleeting moment when the sky turns into a masterpiece of gold and pink. It’s ethereal, glowing, and has a futuristic shine that makes you feel like you’re carrying a piece of the horizon wherever you go. It’s perfect for those of us who want a little bit of magic in our everyday tasks.
Essential Elements:
- Iridescent chrome powder
- Peach and deep orange gel polish
- A soft makeup sponge
- Non-wipe top coat
How to Prepare:
- Start with a clean, buffed nail and apply a clear base coat.
- Apply a thin layer of soft peach polish and cure under your lamp.
- Dab a small amount of deep orange polish onto a sponge and lighty tap it onto the tips for a gradient effect.
- Apply a non-wipe top coat and cure for 30 seconds (it should still be slightly warm).
- Using a silicone tool or your finger, rub the chrome powder over the gradient until it mirrors the sky.
- Seal the magic with a final glossy top coat and cure fully.
Budget Range
- Holo Taco Chrome Powder – $12
- Beetles Gel Polish Sunset Set – $15
- SunUV LED Lamp – $25
4 Ways to Design Trendy Coral Peach Nails

Why to Love This Design:
Coral peach is the color of a soft morning glow and fresh fruit. It’s a shade that feels incredibly optimistic and warm, like a soft-knit sweater on a spring day. For 2026, we are leaning into this creamy, velvety texture that complements every skin tone with a flush of healthy, vibrant color.
Essential Elements:
- Creamy coral polish
- Soft white accent lacquer
- Fine liner brush
- Matte top coat (optional)
How to Prepare:
- Apply two thin coats of your favorite coral peach shade for a solid, opaque base.
- For a modern twist, use a liner brush to create a single vertical white line down the center of the ring finger.
- Try a ‘mismatched’ look by alternating the intensity of the peach on each finger.
- Finish with a high-shine top coat to make the color pop like fresh candy.
Budget Range
- Essie ‘Tart Deco’ – $10
- Zoya ‘Cora’ Peach – $12
- Sally Hansen Insta-Dri Top Coat – $7
7 Ways to Master Neon Sunset Aura Nails

Why to Love This Design:
Aura nails are all about the energy you radiate, my loves. This neon sunset version is for the dreamers who aren’t afraid to shine bright. It creates a soft, blurred circle of light in the center of your nail that looks like a glowing orb. It’s soulful, trendy, and absolutely mesmerizing to look at when you’re typing away at your desk.
Essential Elements:
- Neon pink and electric yellow polishes
- Blooming gel or a blending sponge
- White base color
- Nail art palette
How to Prepare:
- Apply a solid white base to make the neon colors truly scream.
- Apply a thin layer of ‘blooming gel’ but do not cure it yet.
- Drop a tiny bead of neon pink in the center of the nail and watch it spread.
- Add a tinier drop of yellow in the very center of the pink.
- Gently tap the edges with a sponge if you need a smoother transition.
- Cure once the ‘aura’ glow looks perfectly blurred.
- Finish with a thick, glass-like top coat.
Budget Range
- Modelones Blooming Gel – $8
- Makartt Neon Gel Set – $20
- Dual-ended Sponging Tool – $6
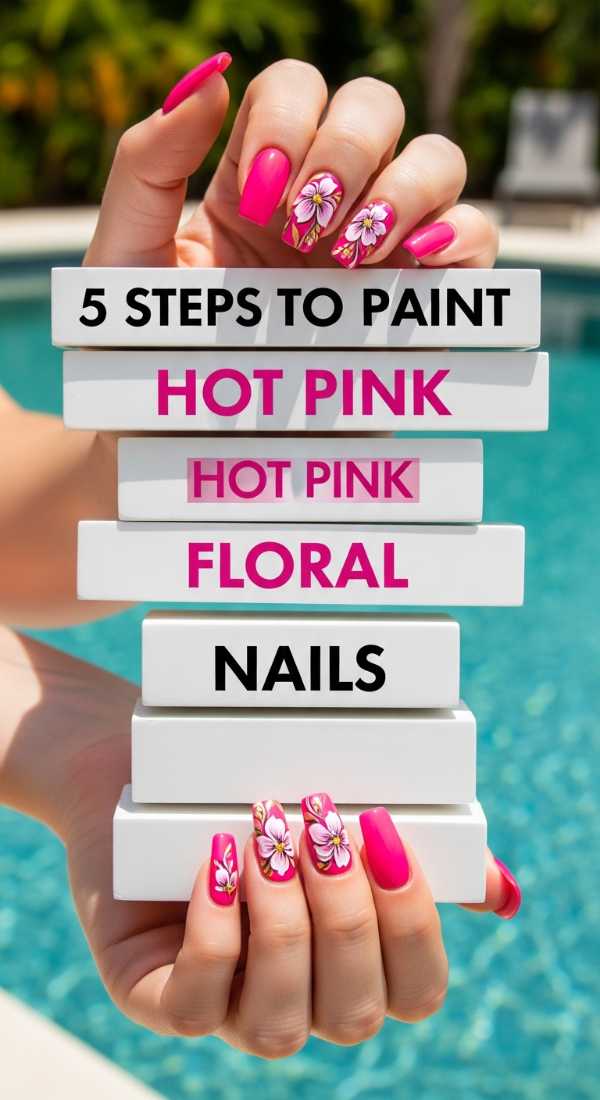
5 Steps to Paint Hot Pink Floral Nails
Why to Love This Design:
Florals are a timeless love letter to nature, but in 2026, we are making them loud! This hot pink version is feminine but fierce. It reminds me of a wild garden growing in the city. It’s a playful, tactile design that adds a pop of joy to your look and reminds you to stop and smell the roses (or at least look at them on your nails).
Essential Elements:
- Hot pink ‘Barbie’ shade
- Yellow and white detail paints
- Dotting tool
- Fine detail brush
How to Prepare:
- Paint all nails with two coats of hot pink and let them dry completely.
- Using your dotting tool, place five white dots in a circle to create the petals.
- Add a tiny sunny yellow dot in the center of each white flower.
- Use your fine brush to add tiny green leaves or simple white sparkles around the flowers.
- Seal your garden with a protective top coat to prevent chipping.
Budget Range
- OPI ‘Hi Barbie!’ Polish – $11
- Nail Art Dotting Tool Set – $5
- Apple Barrel Acrylic Paints (for art) – $2
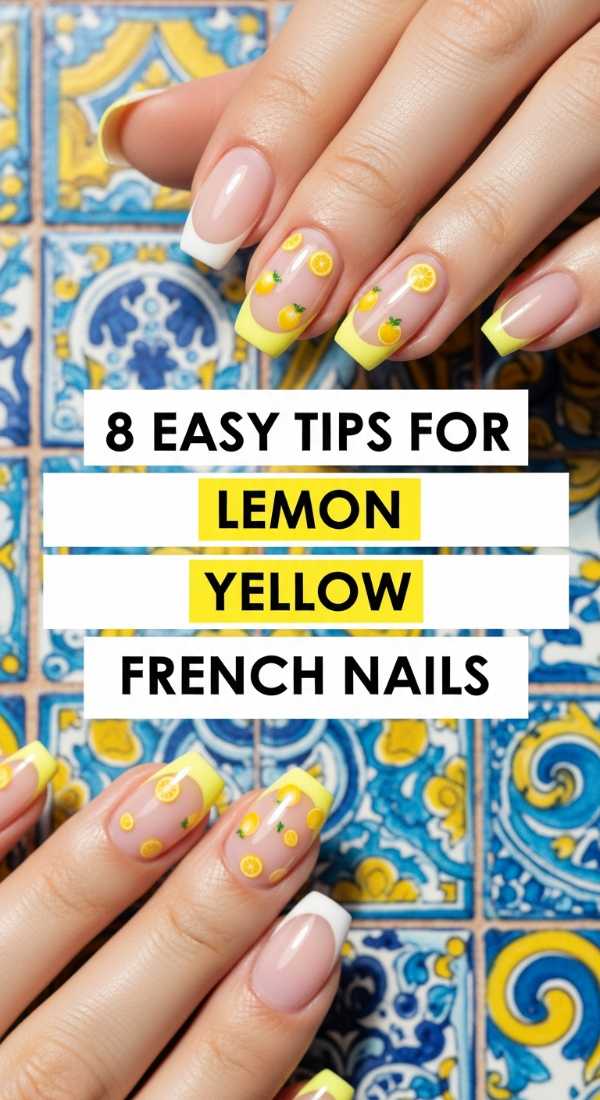
8 Easy Tips for Lemon Yellow French Nails
Why to Love This Design:
Classic French manicures are getting a zest of sunshine! Lemon yellow is the ultimate mood-booster. It’s clean, sophisticated, yet totally unexpected. This design is for the girlies who love a ‘quiet luxury’ vibe but want to keep things fresh and fun. It’s like a glass of cold lemonade for your aesthetic.
Essential Elements:
- Pale lemon yellow polish
- Sheer nude base coat
- French tip guides or a steady hand
- Clean-up brush with acetone
How to Prepare:
- Prep your nails by shaping them into a soft almond or square.
- Apply one coat of a sheer, milky nude to even out your nail bed.
- Place a tip guide just below the free edge of your nail.
- Swipe the lemon yellow polish across the tip in one smooth motion.
- Remove the guide carefully while the polish is still slightly tacky.
- Use a clean-up brush dipped in acetone to crisp up the ‘smile line’.
- Apply a second layer of yellow for maximum brightness.
- Finish with a high-gloss top coat and a drop of lemon-scented cuticle oil.
Budget Range
- Orly ‘Lemonade’ Polish – $15
- French Manicure Guide Stickers – $4
- Olive & June Clean Up Brush – $8
Embrace Your Inner Glow
I hope these tutorials spark a little light in your heart today, my loves. Remember, nail art isn’t about perfection; it’s about the joy of creating something beautiful for yourself. Take your time, put on your favorite playlist, and enjoy the process of becoming your own favorite artist. You deserve to feel polished and powerful, one finger at a time. I can’t wait to see which look you choose to rock first!