
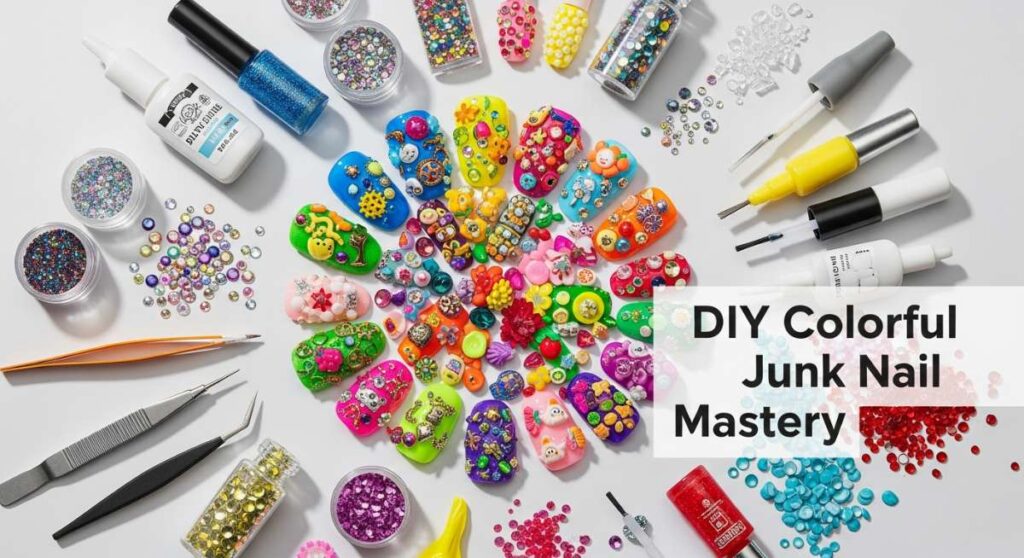
More is More: The Ultimate Guide to DIY Colorful Junk Nail Mastery
Hello, my beautiful loves! Welcome back to our cozy little corner of the internet where we believe that life is far too short for boring, plain nails. You know that feeling when you look down at your hands and see a tiny, sparkling explosion of joy? That is exactly what we are creating today. It’s like a warm, cloud-soft embrace for your fingertips, turning your hands into a living canvas of your most vibrant dreams.
Lately, I’ve been feeling like more is truly more. Why choose one color when you can have twenty? Why settle for smooth when you can have texture, charms, and gems that tell a story? Junk nails aren’t just a trend; they are a celebration of our messy, beautiful, colorful souls. So, grab a cup of tea, wrap yourself in your favorite blanket, and let’s dive into the magical world of junk nail mastery together.
Whether you’re a seasoned pro or just starting to play with polish, this guide is designed to hold your hand through every step. We’re going to explore textures, colors, and the kind of creative freedom that makes your heart sing. Let’s make some magic happen, sweetheart.
5 simple steps for vibrant multi colored nails
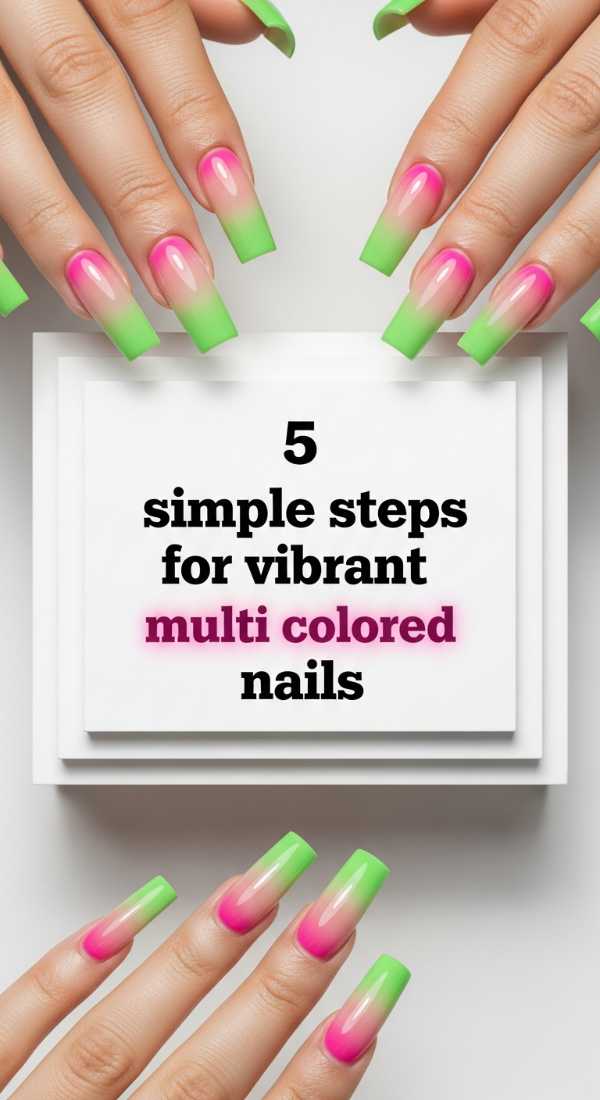
Why to love this recipe:
This approach is the perfect introduction to maximalism. It’s a gentle way to transition from single-tone manicures to a rainbow of possibilities without feeling overwhelmed. It’s like a soft sunrise for your hands!
Essential Ingredients:
- 5-10 different vibrant polish shades
- A high-quality base coat
- A glossy top coat
- Cleanup brush and acetone
- Nourishing cuticle oil
How to Prepare:
- Start with clean, buffed nails and apply your base coat to protect your natural nail.
- Select your palette—think of a bowl of summer berries or a wildflower meadow.
- Apply two thin coats of a different color to each nail, moving from thumb to pinky.
- Use a cleanup brush dipped in acetone to tidy up any edges for a crisp look.
- Seal the vibrancy with a thick layer of glossy top coat and finish with cuticle oil.
Budget Range
- Sally Hansen Insta-Dri ($5.00)
- Essie Glossy Shine Top Coat ($9.00)
- Moyra Cleanup Brush ($7.00)
6 pro tips to create colorful junk nails
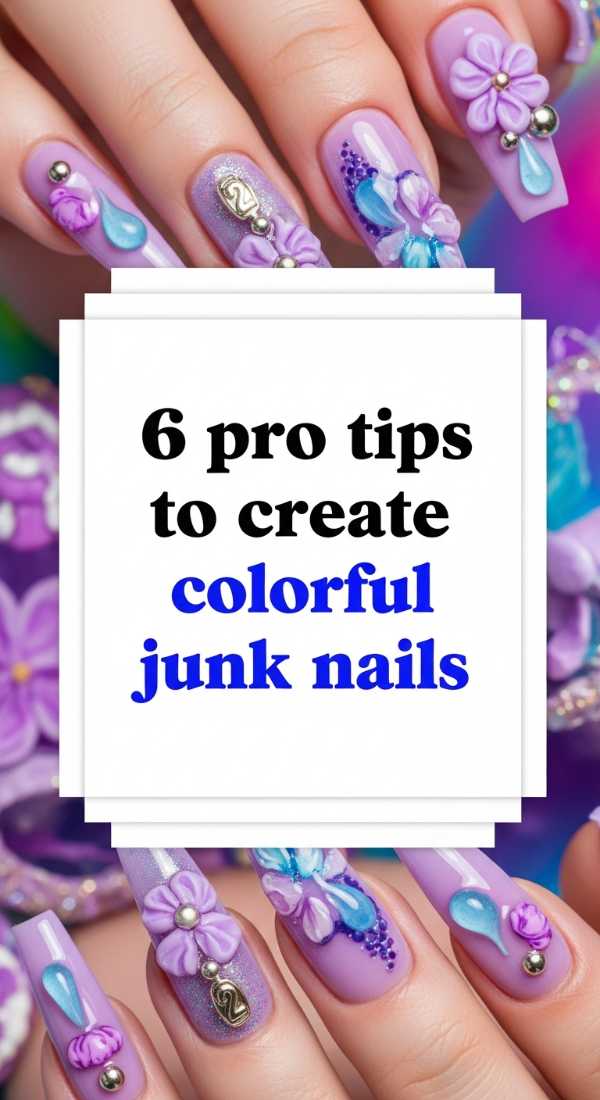
Why to love this recipe:
Junk nails are all about that intentional chaos. These pro tips will help you balance the ‘junk’ so it looks like wearable art rather than a happy accident. It’s all about the layers, darling!
Essential Ingredients:
- 3D nail charms (bows, hearts, bears)
- Nail glue or thick builder gel
- Tweezers
- Assorted rhinestones
- Small pearls
- Micro-beads
How to Prepare:
- Focus on focal points; place your largest charm (like a resin bear) first.
- Fill the ’empty’ spaces around big charms with smaller rhinestones and pearls.
- Vary the heights of your charms to create a 3D landscape on your nail.
- Use a strong builder gel instead of glue for charms that won’t budge.
- Layer decals underneath your 3D elements for added depth.
- Ensure the ‘junk’ follows the curve of your nail so it doesn’t snag on your favorite sweaters.
Budget Range
- Bulk 100pc Resin Charms from Amazon ($8.00)
- Makartt Rhinestone Glue ($10.00)
- Precision Tweezers Set ($6.00)
Learn to style 10 different color nails
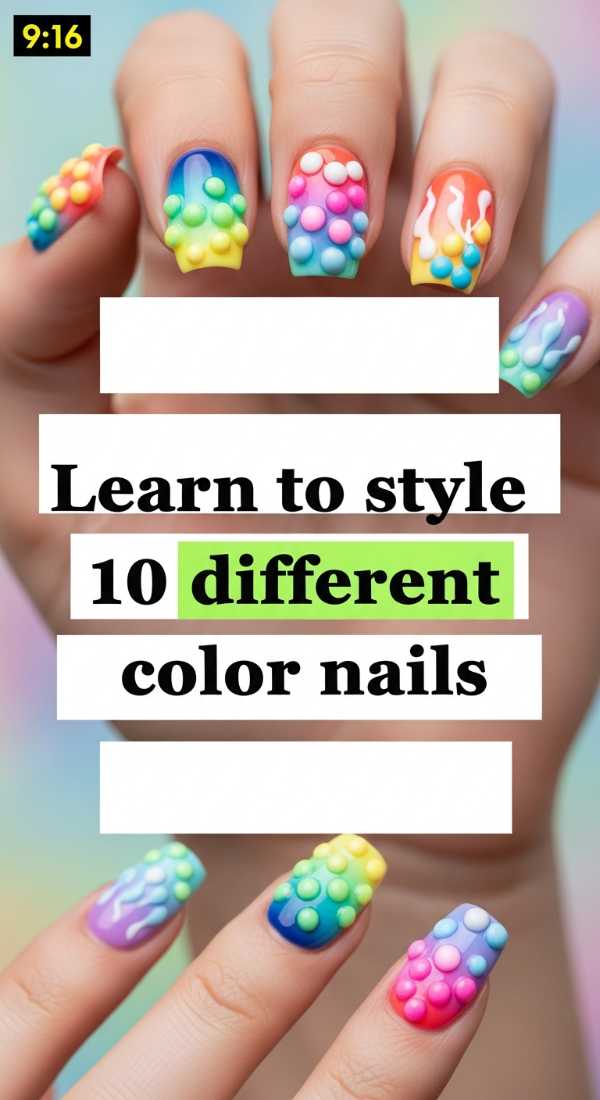
Why to love this recipe:
The ‘Skittle’ mani is a classic for a reason! Styling ten different colors—one for each finger—is the ultimate way to express a multifaceted personality. It’s like wearing a different mood on every finger.
Essential Ingredients:
- A curated 10-color polish set
- Matte or glossy top coat
- Nail file for uniform shape
How to Prepare:
- Line up your ten polishes to see how they flow together before painting.
- Try a gradient effect (lightest to darkest) across both hands.
- Or, try a complementary scheme where the left hand mirrors the right hand’s colors.
- Ensure your nail shapes are consistent to keep the multi-color look feeling cohesive.
Budget Range
- Holt Beauty Pastel Polish Set ($15.00)
- OPI Matte Top Coat ($11.00)
Find 8 ways for new colorful nail inspo
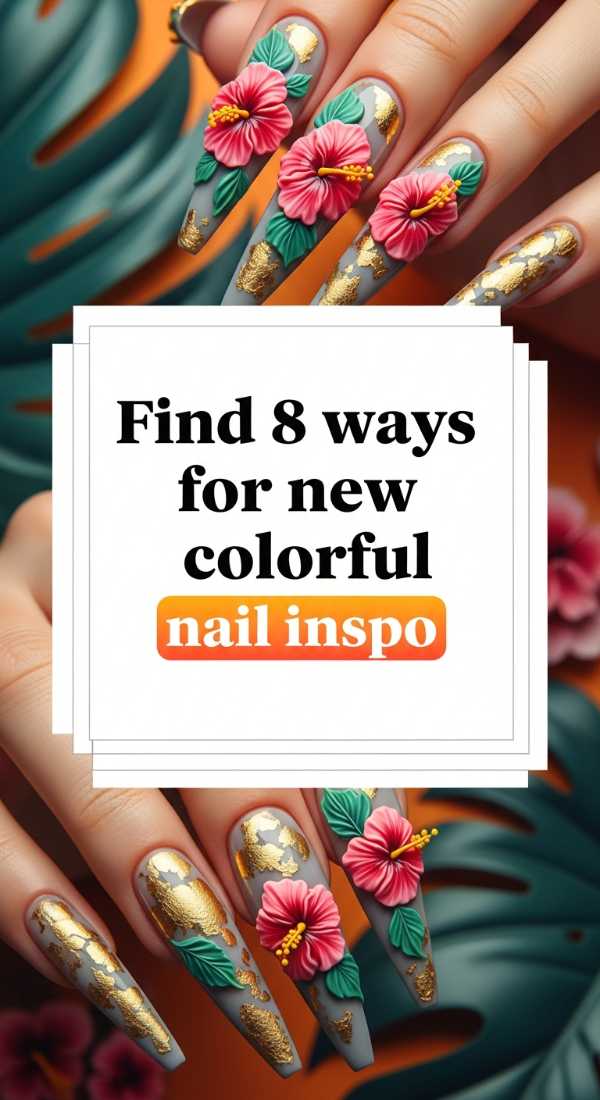
Why to love this recipe:
Sometimes our creativity needs a little nudge. These eight inspiration sources will keep your designs fresh and your soul inspired, drawing from the beauty of the world around us.
Essential Ingredients:
- Pinterest or Instagram
- Nature (flowers, sunsets)
- Vintage children’s stickers
- 90s candy packaging
How to Prepare:
- Look at vintage toy aesthetics for nostalgic color palettes.
- Take photos of botanical gardens to find natural color harmonies.
- Screenshot ‘kidcore’ fashion for bold, primary color ideas.
- Visit a craft store and look at scrapbooking paper patterns.
- Follow Japanese ‘Harajuku’ nail artists for extreme junk nail ideas.
- Look at stained glass windows for geometric color blocking.
- Check out 80s arcade carpet patterns for neon inspiration.
- Look at your favorite childhood cereal boxes for high-energy vibes.
Budget Range
- Pinterest App (Free)
- Nature Walk (Free)
- Vintage Sticker Sheets ($4.00)
4 quick methods for perfect two color nails
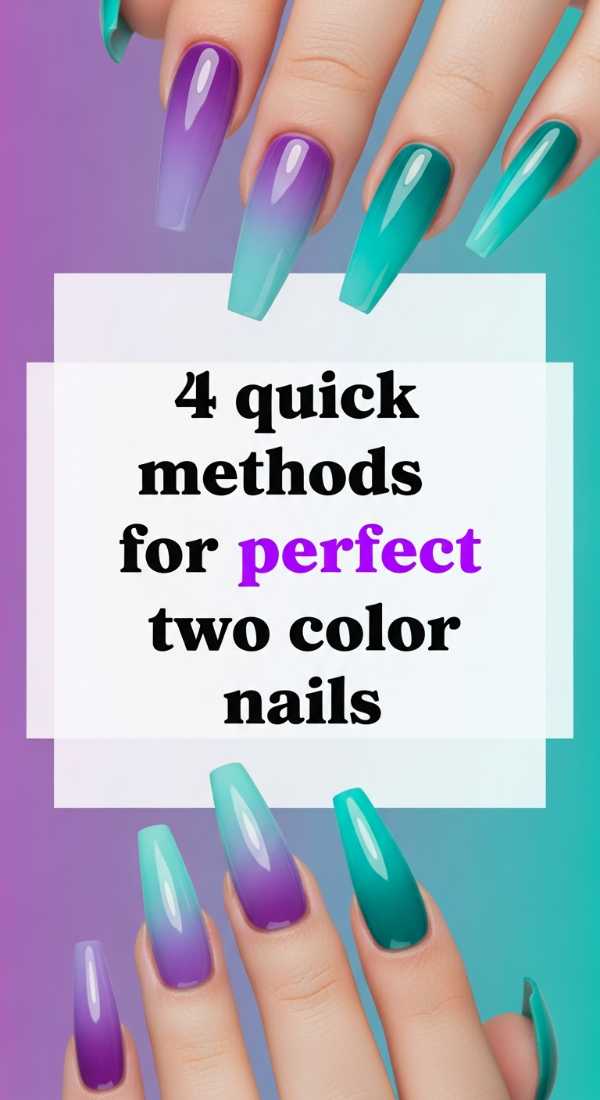
Why to love this recipe:
Sometimes simplicity is the sweetest thing. Two-color designs are quick, effective, and oh-so-chic. It’s like a perfect conversation between two beautiful friends.
Essential Ingredients:
- Two contrasting nail polishes
- Makeup sponge
- Striping tape
- Dotting tool
How to Prepare:
- The Ombré: Sponge the two colors where they meet for a soft blend.
- The Split: Use striping tape to paint half the nail one color and half another.
- The Polka Dot: Paint a solid base and use the second color for dainty dots.
- The French Twist: Use a bold color for the base and a neon for the tip.
Budget Range
- Wedge Makeup Sponges ($3.00)
- Nail Striping Tape Roll ($2.00)
7 secrets for long-lasting colourful acrylic nails
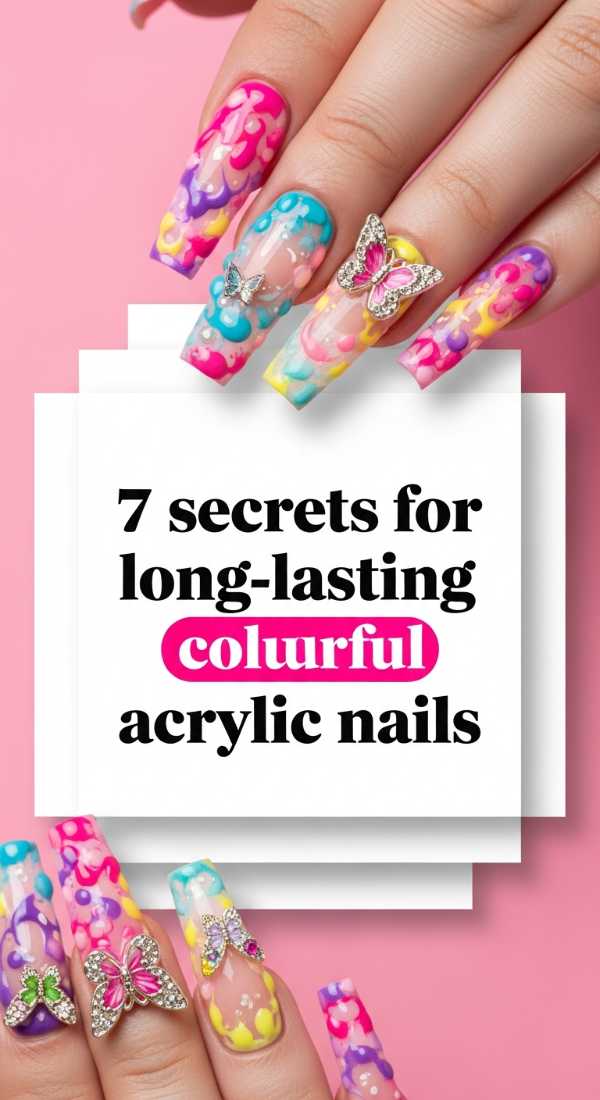
Why to love this recipe:
We want our art to last! These secrets ensure your colorful masterpieces stay vibrant and attached, even through all your daily adventures. You deserve a mani that works as hard as you do.
Essential Ingredients:
- Nail dehydrator
- Acid-free primer
- Quality acrylic powder and monomer
- E-file or hand file
How to Prepare:
- Never skip the dehydrator; it’s the secret to no lifting.
- Apply primer sparingly to ensure a chemical bond.
- Use a medium-wet bead for better control and less bubbles.
- Build a proper ‘apex’ to support the length of the nail.
- Seal the free edge with your top coat.
- Wear gloves when cleaning or doing dishes.
- Apply cuticle oil daily to keep the acrylic flexible and prevent cracking.
Budget Range
- Modelones Nail Prep Set ($12.00)
- Mia Secret Acrylic System ($20.00)
Apply 5 styles of DIY color street nails
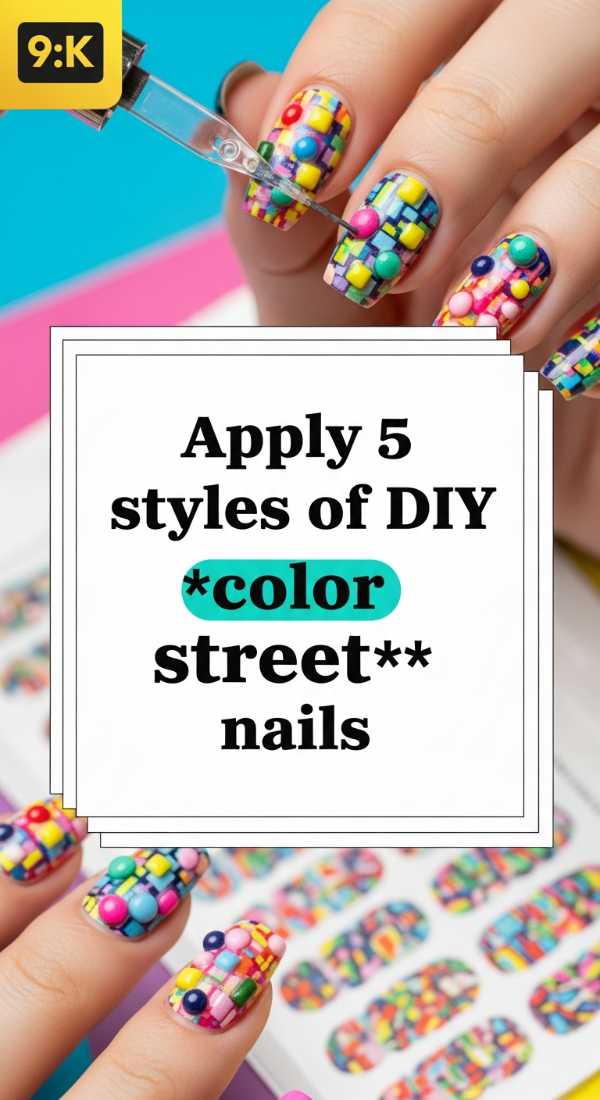
Why to love this recipe:
If you’re in a rush but still want that ‘wow’ factor, nail strips are a lifesaver. These styles elevate the classic strip into something uniquely ‘you’.
Essential Ingredients:
- Color Street or similar nail strips
- Scissors
- Small hole punch
How to Prepare:
- The Layered Look: Apply a glitter strip over a solid color strip.
- The Mixed Mani: Use strips from three different sets for a junk-lite feel.
- The Cutout: Use a hole punch to create shapes in a strip before applying it over a different color.
- The Half-Moon: Cut the strip into a curve to leave the base of your nail natural.
- The Patchwork: Use small scraps of different strips to create a mosaic.
Budget Range
- Color Street Strips ($11.00 – $14.00)
- Craft Hole Punch ($5.00)
Design 3 stunning sets of colorful stiletto nails
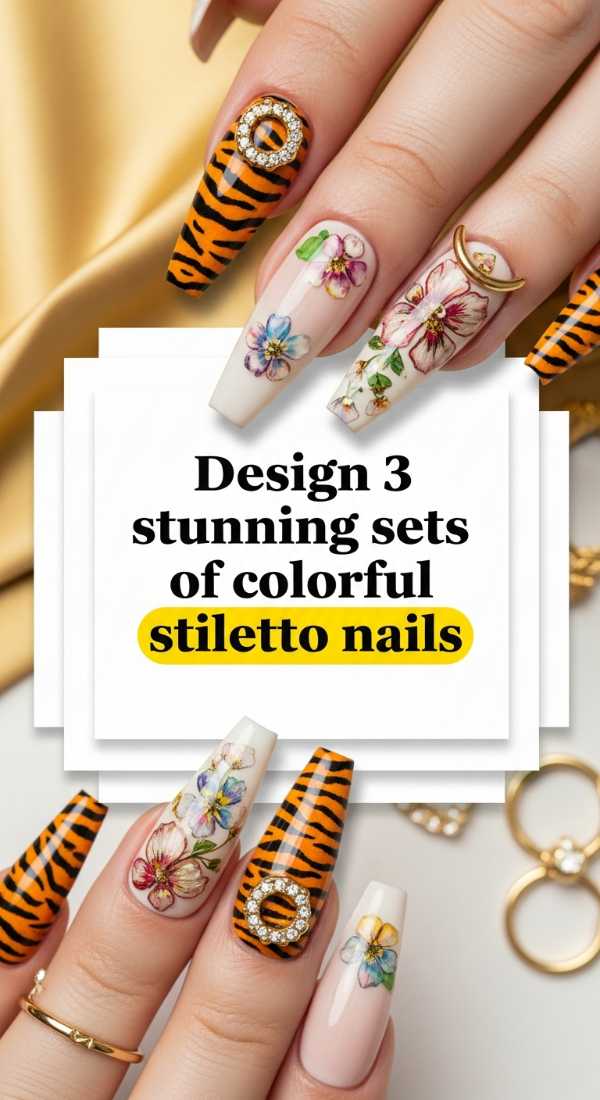
Why to love this recipe:
Stiletto nails are the ultimate ‘baddie’ canvas. The extra length gives us so much room to play with color and charms. It’s bold, it’s fierce, and it’s fabulous.
Essential Ingredients:
- Stiletto-shaped nail tips
- Gel polish in neon shades
- Oversized heart charms
How to Prepare:
- Set 1 (Kawaii Dream): Pastel gradients with clouds and 3D bows.
- Set 2 (Goth-Glam): Dark purple base with neon green ‘drip’ effects and spikes.
- Set 3 (Candy Shop): Bright pink base with 3D gummy bear charms and sprinkle glitters.
Budget Range
- Full Cover Stiletto Tips ($9.00)
- Beetles Neon Gel Set ($16.00)
Master 9 techniques for blending multicolor nails
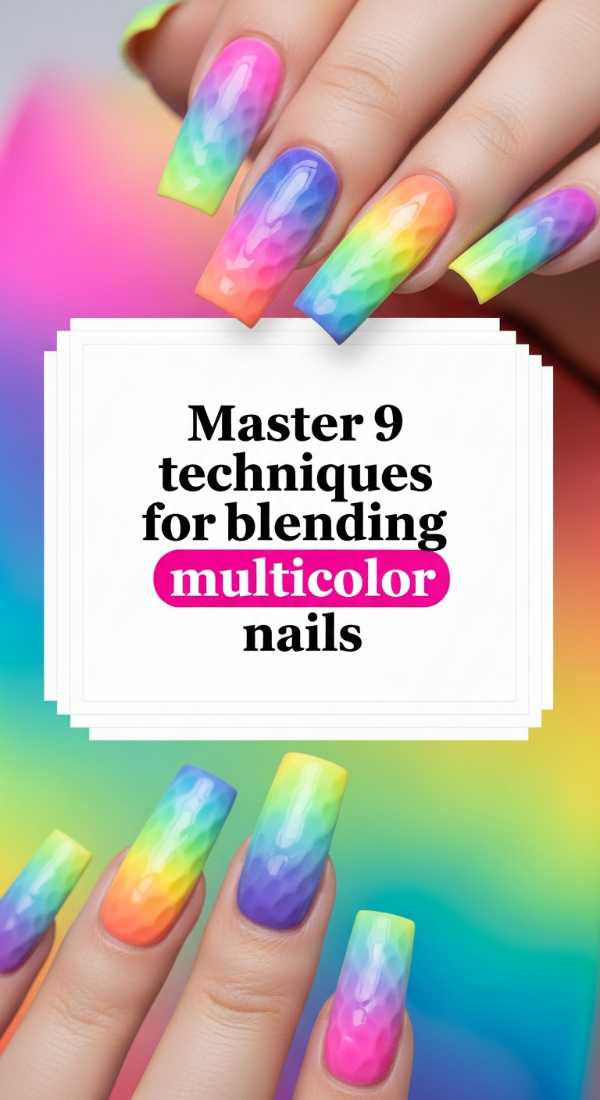
Why to love this recipe:
Blending is where the magic happens. These techniques allow colors to bleed into one another like a beautiful watercolor painting. It’s soft, artistic, and deeply soothing.
Essential Ingredients:
- Nail art brushes (fan, liner, detail)
- Acetone for thinning
- Mixing palette
How to Prepare:
- The Wet-on-Wet: Drop wet polish onto wet base and swirl.
- Dry Brushing: Swipe a nearly dry brush for a distressed texture.
- Sponging: Dab colors for a classic gradient.
- Water Marble: Drop polish in water and swirl before dipping.
- Fan Brush Streaks: Drag a fan brush for a grassy or hair-like texture.
- Needle Dragging: Use a needle to pull one color into another in sharp lines.
- Acetone Wash: Thin out polish with acetone for a sheer, watercolor effect.
- Stamping Blending: Apply multiple colors to a stamping plate and scrape once.
- Dabbing: Use a crumpled piece of plastic wrap to dab on secondary colors.
Budget Range
- Nail Art Brush Set ($8.00)
- Stainless Steel Mixing Palette ($6.00)
Make your nails colorful in 4 easy phases
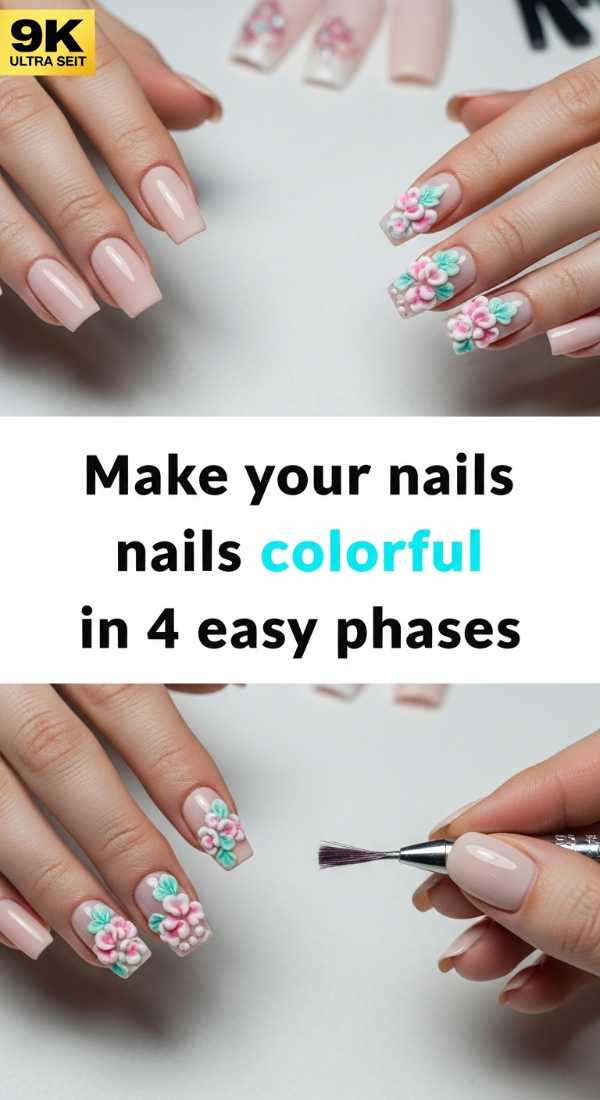
Why to love this recipe:
Breaking it down makes the ‘junk’ process feel manageable. These four phases take you from a blank canvas to a masterpiece without any stress.
Essential Ingredients:
- All your favorite polishes
- All your favorite charms
- Your lovely creative spirit
How to Prepare:
- Phase 1 (The Foundation): Prep, shape, and apply a solid or gradient base color.
- Phase 2 (The Spectrum): Add your secondary colors through dots, lines, or swirls.
- Phase 3 (The Trinket Toss): Apply your 3D charms, gems, and stickers.
- Phase 4 (The Glossy Shield): Seal everything in with a thick, high-shine top coat to protect the art.
Budget Range
- Everything in your kit! ($0.00)
- A new ‘treat yourself’ polish ($10.00)
Embrace Your Inner Artist
My loves, I hope this guide inspires you to reach for that extra bottle of glitter or that oversized bow charm. Your nails are a reflection of your beautiful, vibrant energy, and there is no wrong way to create. Remember, the ‘junk’ in junk nails isn’t rubbish—it’s the treasure of your imagination. Go forth and sparkle, and don’t forget to show me your beautiful creations! I love you all so much. Happy painting!