
Have you ever walked into a room and felt your shoulders immediately drop? There’s a specific kind of magic in a home that feels both impeccably curated and deeply soul-soothing. Lately, I’ve been obsessed with the concept of ‘Minimalist Opulence’—the art of making a grand statement through restraint. It’s not about filling every inch of your space with ‘stuff’; it’s about choosing singular, breathtaking elements that command the room’s energy and transform a simple wall into a living masterpiece.
We spend so much time looking at our walls, yet we often treat them as mere backgrounds. But in the world of high-end design, the wall is the soul of the home. It is the canvas upon which we paint our daily lives. Whether it’s the whisper-soft texture of hand-applied plaster or the vibrant, oxygen-rich hum of a living forest right in your hallway, these trends are about creating an atmosphere that feels as good as it looks. Let’s dive into how you can bring this high-end aesthetic into your own sanctuary.
How to Create a Living Green Wall for Natural Serenity
Why we love this
There is nothing quite like the intoxicating, earthy aroma of damp moss and fresh ferns to instantly transport you from the urban grind to a tranquil forest floor. This living tapestry brings a rhythmic, organic vibration to your space, filtering the air while providing a plush, velvet-like texture that you can’t help but want to reach out and touch. The deep emerald hues provide a cooling visual rest for the eyes, creating a sanctuary where you can breathe deeply and feel the gentle pulse of nature thriving right in your living room.
Essential Elements:
- Modular hydroponic wall planters
- A mix of Pothos, Philodendrons, and Bird’s Nest Ferns
- Integrated drip irrigation system
- Full-spectrum LED grow lights
- Moisture-resistant backing board
How to make it
- Begin by securing a waterproof membrane or PVC backing board to your chosen wall to prevent any moisture from seeping into the drywall; ensure it is anchored into the studs for maximum weight support.
- Install your modular planting trays or felt pocket system onto the backing board, maintaining even spacing to allow the foliage to eventually overlap and create a seamless ‘blanket’ effect.
- Carefully remove your selected plants from their nursery pots, gently loosening the root balls, and tuck them into the pockets using a high-quality, lightweight coco-coir or inorganic growing medium.
- Set up your automated drip irrigation lines, running the tubing discreetly along the top of the modules so gravity can pull the nutrient-rich water down through each layer of the wall.
- Calibrate your grow lights to a timer, providing 8-10 hours of consistent light, and prune any yellowing leaves weekly to maintain that lush, high-definition green aesthetic.
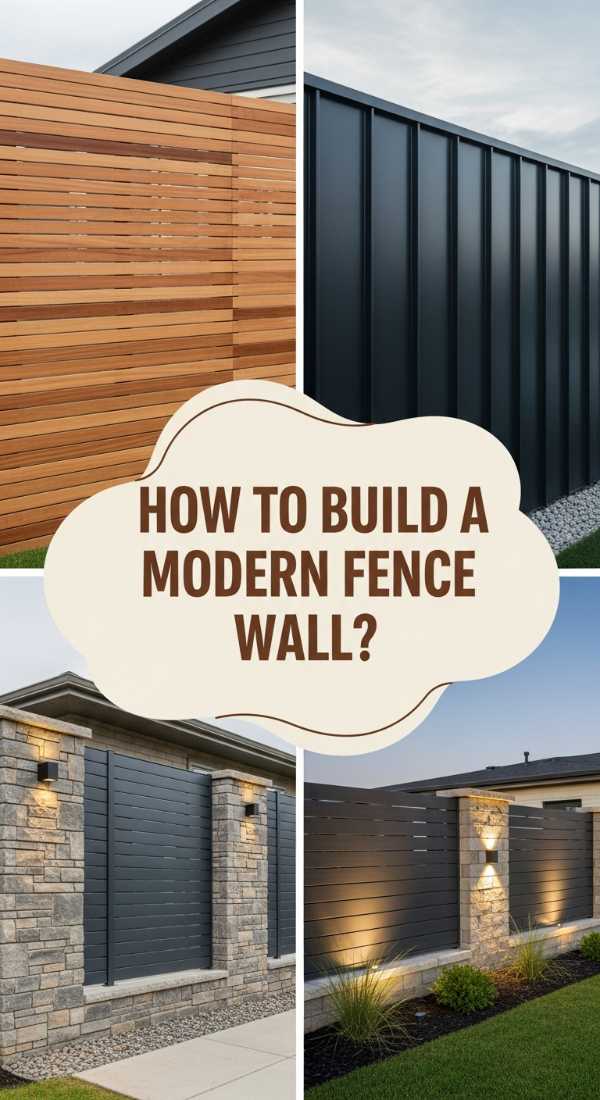
How to Build a Modern Fence Wall for Stylish Privacy
Why we love this
A modern fence wall is more than just a boundary; it is a statement of architectural intent that defines your outdoor sanctuary with crisp, clean lines and the warm, cedar-scented embrace of privacy. We love the way the golden-hour sun filters through horizontal slats, casting long, rhythmic shadows across your patio that feel like a private resort in the heart of the city. The texture of sandblasted wood against the coolness of black steel creates a tactile contrast that feels incredibly sophisticated and grounded.
Essential Elements:
- Horizontal Cedar or Ipe wood slats
- Black powder-coated steel posts
- Stainless steel hidden fasteners
- High-grade UV-resistant wood stain
- Concrete mix for post setting
How to make it
- Mark your perimeter precisely using string lines and batter boards, ensuring your corners are perfectly square before digging post holes to a depth of at least 24 inches for structural stability.
- Set your steel posts in the holes, using a level to ensure they are perfectly vertical, then pour your concrete mix and allow it to cure fully for at least 48 hours until it is rock-solid.
- Measure and cut your wood slats, then apply a rich, UV-resistant stain to all six sides of each board to prevent warping and maintain that high-end, deep timber glow over time.
- Starting from the bottom, attach the horizontal slats to the posts using hidden fasteners to maintain a clean, screw-free aesthetic, using half-inch spacers between each board for a modern, airy feel.
- Finish by capping the posts with sleek metal covers and applying a final coat of sealant to the wood to protect against the elements and ensure the grain pops with luxurious intensity.
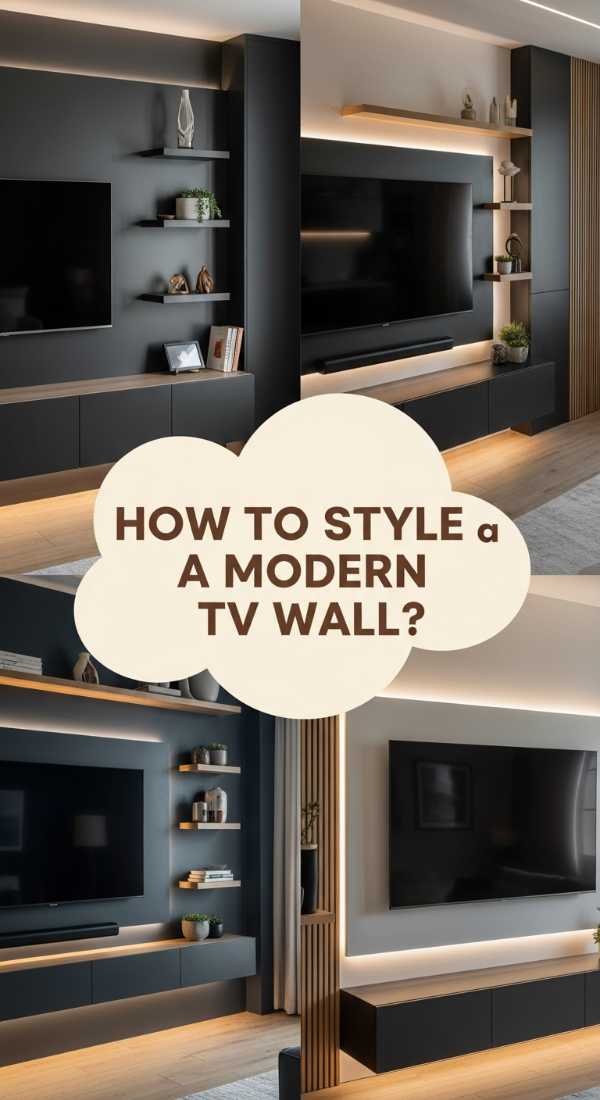
How to Style a Modern TV Wall for a Sleek Entertainment Hub
Why we love this
The modern TV wall is where technology meets high-art, turning the ‘black box’ into a curated focal point that feels intentional rather than accidental. We love the seamless integration of matte textures and recessed lighting that makes the screen appear as though it is floating in a void of pure luxury. The absence of visible wires and the presence of sculptural shelving creates a sense of calm, allowing you to immerse yourself in cinematic experiences without the visual clutter of traditional media centers.
Essential Elements:
- Ultra-thin flush wall mount
- Custom MDF or wood slat panels
- Recessed LED strip lighting (COB style)
- In-wall cable management kit
- Floating minimalist shelving
How to make it
- Map out the exact placement of your TV and floating shelves using painter’s tape on the wall, ensuring the center of the screen is at eye-level when seated for ergonomic comfort.
- Cut a hole in the drywall behind where the TV will sit and another near the floor outlet to install an in-wall cable management system, feeding all HDMI and power cords through the cavity.
- Install your architectural paneling—whether it’s vertical wood slats or large-format porcelain slabs—using high-strength construction adhesive and finishing nails for a secure, flush fit.
- Mount the ultra-thin bracket directly into the wall studs, then carefully hang the TV, ensuring it sits perfectly level and fits snugly against the paneling without any gaps.
- Adhere the LED strips to the back of the TV or within the recessed channels of your panels to create a soft, ambient glow that reduces eye strain and adds a layer of theatrical depth to the room.
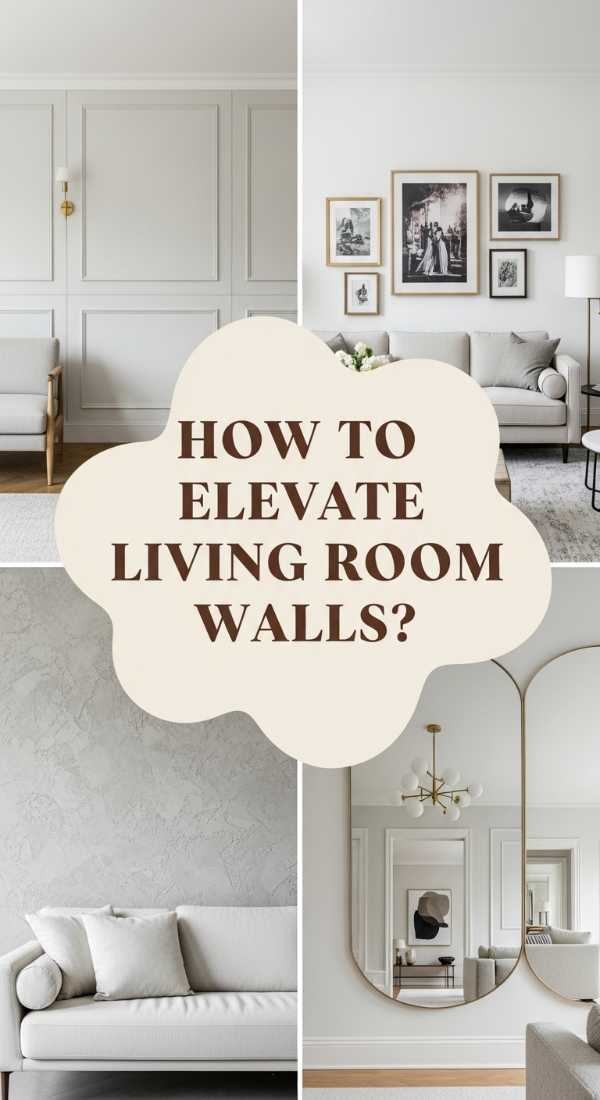
How to Elevate Living Room Wall Designs for a Sophisticated Home
Why we love this
Elevating a living room wall is about layers—the way a subtle silk-textured wallpaper catches the morning light, or how a hand-carved molding adds a shadow-play that changes throughout the day. We love the feeling of a room that whispers luxury through its tactile complexity, making the space feel finished, thoughtful, and deeply personal. It’s the difference between a house and a curated gallery; the walls become a conversation piece that evokes a sense of timelessness and quiet confidence.
Essential Elements:
- Picture frame molding (Wainscoting)
- Luxury metallic or grasscloth wallpaper
- Dimmable brass picture lights
- Oversized museum-grade canvas art
- Laser level for precision alignment
How to make it
- Determine the proportions of your wall and calculate the spacing for picture frame molding, aiming for the ‘golden ratio’ to ensure the boxes feel balanced and aesthetically pleasing to the eye.
- Cut your decorative molding at 45-degree angles using a miter saw, then attach them to the wall using a combination of wood glue and a pneumatic brad nailer for a seamless finish.
- Apply a high-quality primer to the molding and wall, then paint the entire surface in a sophisticated monochrome palette—matte for the walls and satin for the trim to create a subtle sheen contrast.
- If using wallpaper, apply the paste evenly to the back of the luxury paper and hang each strip with a smoothing tool to eliminate bubbles, ensuring the pattern matches perfectly at each seam.
- Install your brass picture lights above your primary art pieces and use a dimmer switch to adjust the mood, creating that warm, inviting ‘hotel lobby’ glow in your own home.
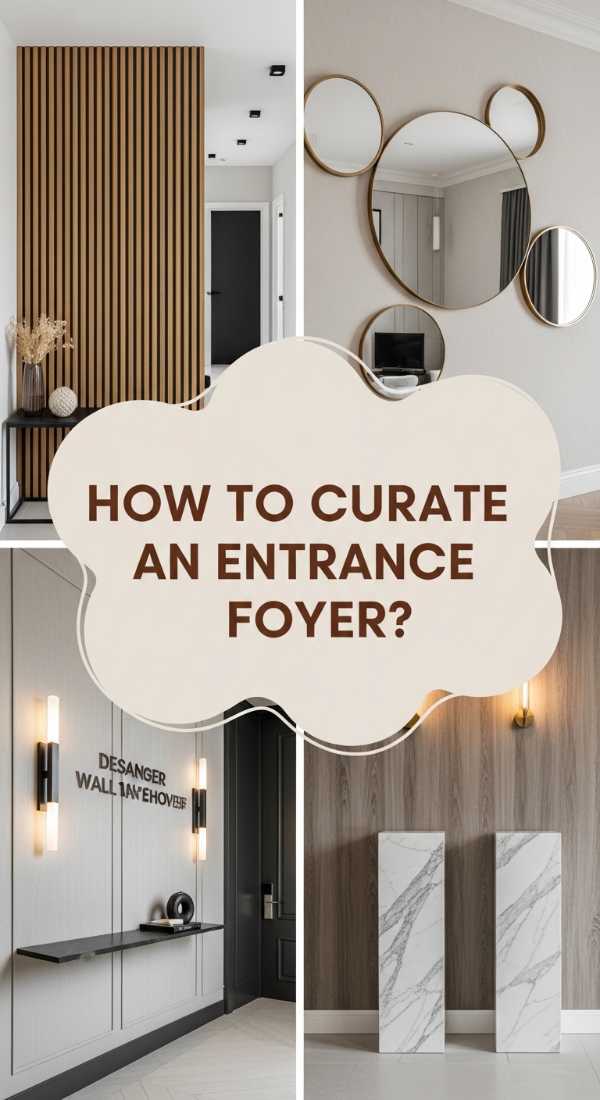
How to Curate an Entrance Foyer Wall Design for a Grand Welcome

Why we love this
The entrance foyer is your home’s first impression, and a well-designed wall here acts as a warm, sophisticated embrace for every guest who enters. We love the use of high-contrast materials—like a massive, gold-framed mirror reflecting a sculptural console table—that creates an immediate sense of scale and light. The scent of a luxury candle resting on a marble ledge combined with the visual impact of a textured wall finish creates a sensory experience that says, ‘You have arrived somewhere special.’
Essential Elements:
- Oversized floor or wall mirror
- Sleek marble or walnut console table
- Venetian plaster or textured lime wash
- Statement wall sconces
- Fresh botanical arrangement
How to make it
- Apply a base coat of lime wash or Venetian plaster using a trowel in wide, sweeping motions to create a mottled, stone-like texture that has an incredible depth of color.
- Center your oversized mirror on the main wall, ensuring it is mounted with heavy-duty anchors; the mirror should be large enough to bounce light throughout the entire entryway.
- Position a slim, high-end console table underneath the mirror, leaving enough space for a curated selection of objects like a heavy glass bowl for keys or a sculptural vase.
- Hardwire two statement sconces on either side of the mirror at roughly 60 inches from the floor to provide eye-level lighting that is flattering and atmospheric.
- Layer in your final touches: a large-scale botanical arrangement for a pop of life and a luxury room diffuser to ensure the foyer smells as incredible as it looks.
How to Design a TV Wall Luxury Feature for Premium Vibes

Why we love this
This is where minimalist design meets maximum impact, using premium materials like book-matched marble or dark, ribbed wood to frame your screen like a piece of high-end jewelry. We love the way these features hide the utilitarian nature of the TV, turning the media area into a sophisticated lounge that feels like a private penthouse suite. The interplay of cool stone and warm wood, highlighted by hidden accent lights, creates a luxurious ambiance that makes every movie night feel like a world premiere.
Essential Elements:
- Large-format porcelain or marble slabs
- Backlit ‘cove’ lighting channels
- Custom-built cabinetry with push-to-open doors
- Matte black hardware accents
- Sound-dampening felt panels
How to make it
- Frame out a shallow ‘bump-out’ wall using steel studs to create a recessed niche specifically for your TV, allowing it to sit completely flush with the surrounding stone or wood.
- Apply your large-format porcelain slabs to the face of the bump-out using a high-flex mortar, ensuring the veining flows naturally from one piece to the next for a cohesive look.
- Install recessed LED channels around the perimeter of the feature wall to create a ‘halo’ effect that provides soft bias lighting for better TV viewing and a dramatic architectural silhouette.
- Integrate custom lower cabinetry to house your media boxes and soundbars, using ‘push-to-open’ technology to eliminate the need for handles and keep the lines ultra-clean.
- Add sound-dampening acoustic panels behind the slat-wood sections to improve the room’s audio quality, ensuring the sound is as crisp and high-end as the visual design.
How to Install a Vertical Green Wall for Fresh Indoor Air
Why we love this
There is a literal ‘breath of fresh air’ that comes with an indoor vertical garden; it’s a living lung for your home that cleanses the air while providing a stunning, tactile centerpiece. We love the vibrant, multi-tonal greens that pop against a white minimalist interior, and the soft, rustling sound of leaves as you walk by. It’s a sensory delight that brings the serenity of a greenhouse into your daily life, making even the most modern space feel warm, inhabited, and vibrantly alive.
Essential Elements:
- Self-watering vertical garden kit
- Assorted indoor plants (Snake plants, Pothos, Spider plants)
- Integrated water reservoir and pump
- Horticultural charcoal for drainage
- Smart-home connected timer
How to make it
- Choose a wall that receives bright, indirect sunlight or install a dedicated overhead UV light bar to ensure your plants have the energy required for photosynthesis.
- Assemble the vertical garden frame according to the kit instructions, ensuring the reservoir at the bottom is level and the pump is easily accessible for monthly maintenance.
- Mix your potting soil with horticultural charcoal and perlite to ensure the roots don’t rot and the air remains fresh and free of any ‘damp’ odors.
- Plant your selection in a gradient—placing trailing plants like Pothos at the bottom to create a lush ‘skirt’ and more upright plants like Snake plants at the top for structure.
- Connect the pump to a smart-home timer to automate the watering cycle for 5-10 minutes every morning, and mist the leaves weekly to keep them glossy and dust-free.
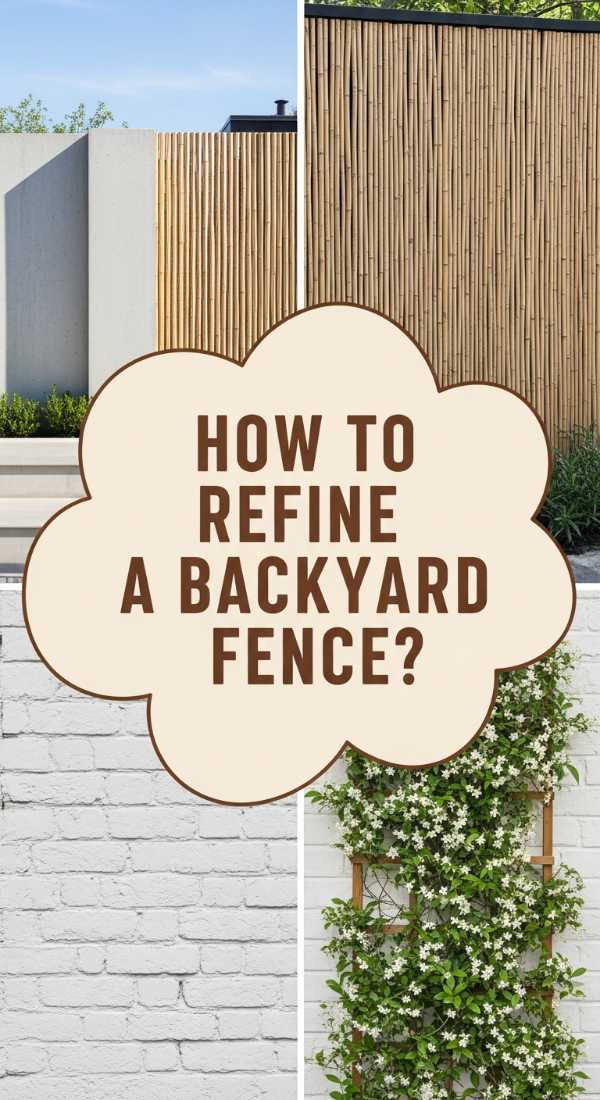
How to Refine a Backyard Fence Wall for Outdoor Elegance
Why we love this
An elegant backyard fence wall transforms a basic yard into an extension of your living room, providing a backdrop for summer dinner parties and quiet morning coffees. We love the mix of organic materials like dark-stained wood and industrial elements like laser-cut metal panels that cast intricate, lace-like shadows on the grass. It creates a sense of enclosure that feels cozy rather than cramped, providing a polished frame for your outdoor landscaping and a high-end, architectural feel to the garden.
Essential Elements:
- Composite or hardwood fence panels
- Laser-cut decorative metal inserts
- Low-voltage outdoor ‘wash’ lighting
- Concrete or stone footing
- Climbing vines (Clematis or Jasmine)
How to make it
- Set your structural posts in deep concrete footings, ensuring they are spaced perfectly to accommodate the width of your pre-made or custom-cut fence panels.
- Install your primary wood or composite panels horizontally to elongate the space, leaving a central section open for a decorative laser-cut metal panel insert.
- Mount the metal panel using stainless steel stand-offs to create a 1-inch gap from the fence, which allows you to tuck waterproof LED strips behind it for a backlit ‘glow’ at night.
- Install low-voltage spotlighting at the base of the fence, aiming the beams upward to ‘wash’ the texture of the wood in light and create a dramatic, high-end look after sunset.
- Plant fragrant climbing vines like Star Jasmine at the base, training them to weave through the fence to add a layer of natural beauty and a heavenly scent to your outdoor evenings.
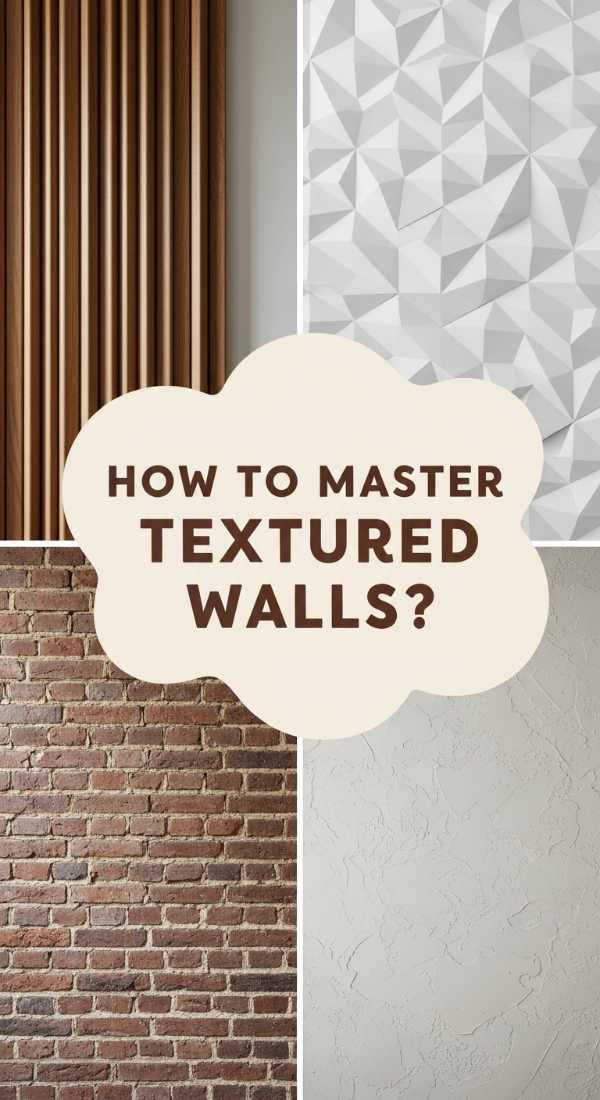
How to Master Textured Living Room Wall Designs for Artistic Depth
Why we love this
Texture is the secret language of luxury; it’s about the way a wall feels to the touch and how it interacts with the light. We love the raw, artistic depth of a hand-applied micro-cement or a layered plaster finish that makes a wall look like it was carved from a single piece of stone. It adds a ‘quiet luxury’ to the room—something that doesn’t scream for attention but rewards the viewer with its intricate peaks and valleys and its soft, suede-like appearance.
Essential Elements:
- Micro-cement or Roman Clay kit
- Stainless steel Japanese trowel
- Sandpaper (various grits)
- Protective sealer (matte finish)
- Color pigments
How to make it
- Clean the wall thoroughly and apply a specialized grip primer to ensure the textured material adheres perfectly without any peeling or cracking over time.
- Mix your clay or cement with your chosen pigment, then apply the first ‘scratch coat’ using a trowel in random, overlapping strokes to create a foundation of movement.
- Once the first layer is dry, apply a second, thinner ‘finish coat’ using a tighter trowel technique to compress the material and create those beautiful, smooth highlights.
- Gently sand any harsh ridges with 400-grit sandpaper to refine the texture, ensuring it feels like smooth stone or soft fabric under your fingertips.
- Apply a high-quality matte sealer to protect the wall from oils and dust, ensuring the finish remains breathable yet durable enough for a high-traffic living area.
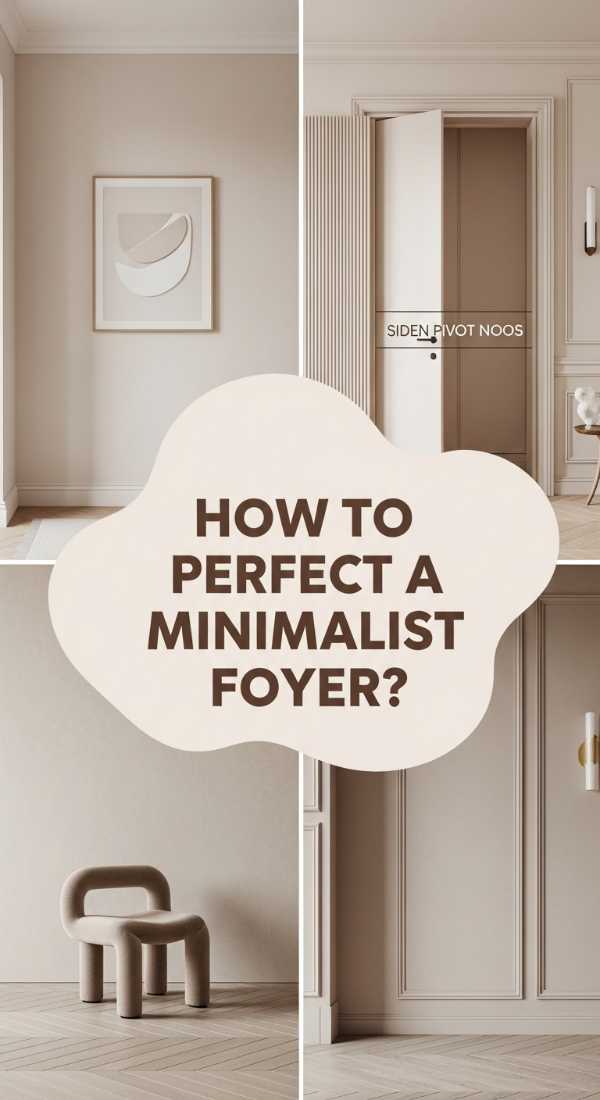
How to Perfect a Minimalist Entrance Foyer Wall Design for Timeless Appeal
[IMAGE_10]
Why we love this
In a world of noise, there is something deeply profound about a perfectly minimalist entrance wall that relies on singular, high-quality elements. We love the ‘less is more’ approach—a single, massive piece of abstract art or a perfectly placed architectural niche that feels like a breath of fresh air. It’s about the luxury of space; the feeling of walking into a home that is uncluttered, intentional, and focused on the beauty of simplicity and light.
Essential Elements:
- A single large-scale investment art piece
- Gallery-style directional lighting
- High-quality neutral paint (Warm white or soft greige)
- Minimalist floating bench
- Hidden ‘ghost’ door for coat storage
How to make it
- Paint the entire foyer in a high-quality, ‘gallery-white’ matte finish to provide a clean, expansive backdrop that reflects as much natural light as possible.
- Select one focal point—ideally a large canvas or a sculptural wall installation—and mount it at a height where the center point is exactly 57 inches from the floor.
- Install a single, high-CRI directional light in the ceiling, angled perfectly to illuminate the art without creating a glare, making the piece ‘pop’ against the white wall.
- Add a custom-built floating bench made of a single slab of white oak or marble, ensuring it has no visible brackets for a truly minimalist, gravity-defying look.
- Use ‘ghost’ or frameless doors for any storage areas to ensure the wall remains an uninterrupted plane of color, maintaining that high-end, museum-like serenity.
The Final Touch: Elevating Your Everyday
Luxury isn’t about the price tag; it’s about the feeling of peace and beauty your environment provides. By focusing on these wall design trends, you’re not just decorating a room; you’re curating an experience. Whether you choose the lush life of a green wall or the refined calm of minimalist plaster, remember that your home is your sanctuary. Let your walls speak to the life you want to lead—one of beauty, intention, and opulent serenity.