
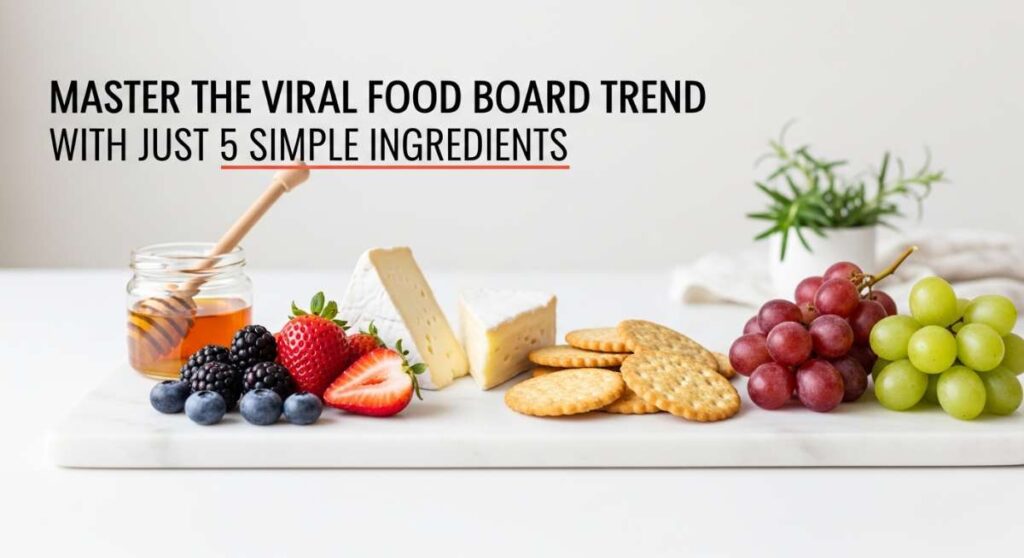
Master the Viral Food Board Trend with Just 5 Simple Ingredients
There is something undeniably magical about a perfectly curated food board. You’ve seen them all over your feed—those sprawling, colorful displays that look almost too beautiful to eat, yet somehow disappear within minutes of being set on the table. For a long time, I thought these were reserved for professional stylists or those with hours to spend in the kitchen, but I’ve discovered the secret: it’s all about the ‘hero’ dishes. When you have one or two high-impact, flavorful elements, the rest of the board practically builds itself.
Lately, my kitchen has become a laboratory for what I like to call the ‘Viral Simple Food Board.’ The goal is maximum aesthetic and flavor with minimum stress. Whether you are hosting a cozy girls’ night, a Sunday football gathering, or just want to make a Tuesday dinner feel like an event, these boards are the ultimate solution. They encourage grazing, conversation, and that communal feeling of sharing a really great meal without the formality of a sit-down dinner.
The best part? You don’t need a pantry full of exotic ingredients to pull this off. I’ve mastered 10 different staples that each use just five main ingredients, allowing you to mix and match based on your mood. From savory slow-cooked meats to sweet, gooey treats, these recipes are designed to be the stars of your next viral-worthy spread. Let’s dive into how you can create these showstoppers in your own kitchen!
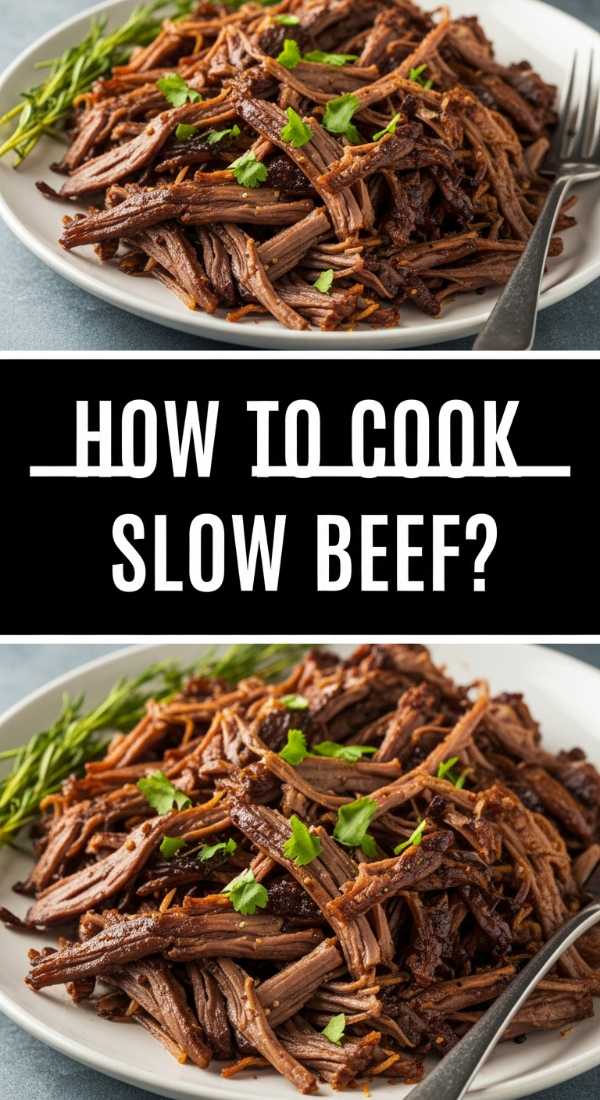
How to make slow cooker beef
Why we love this
There is nothing quite like the rich, savory aroma of beef that has been simmering for hours in its own juices, filling your home with an irresistible sense of comfort. This slow cooker beef is the ultimate ‘set it and forget it’ luxury; the texture becomes so incredibly tender that it practically melts on your tongue, while the deep, beefy flavors are concentrated into every succulent fiber. It provides a hearty, grounded element to any food board, offering a warm, melt-in-your-mouth experience that contrasts beautifully with crisp crackers or fresh bread.
Ingredients
- 3 lb Beef Chuck Roast
- 2 cups Beef Broth
- 4 cloves Garlic, smashed
- 1 large Yellow Onion, sliced
- 2 sprigs Fresh Rosemary
How to make it
- **Sear for Flavor:** Heat a large skillet over medium-high heat with a tablespoon of oil. Pat the beef roast dry with paper towels and season generously with salt and pepper. Sear the meat for 3-4 minutes per side until a deep brown, caramelized crust forms. This step is crucial for developing the complex flavors that a slow cooker alone cannot achieve.
- **Layer the Base:** Place the sliced onions and smashed garlic cloves at the bottom of your slow cooker. This creates a flavorful ‘rack’ for the meat to sit on and prevents it from sticking.
- **Assemble:** Place the seared roast on top of the onions. Pour the beef broth around the sides (not directly over the meat to keep the crust intact) and lay the rosemary sprigs on top.
- **Slow Cook:** Set your slow cooker to ‘Low’ and cook for 8 to 10 hours. Resisting the urge to open the lid is key; every time you peek, you lose heat and moisture. You’ll know it’s done when the meat shreds effortlessly with two forks.
- **Rest and Shred:** Remove the meat to a board, let it rest for 10 minutes, then shred into large, juicy chunks. Drizzle with a bit of the cooking liquid before serving on your board.
How to make crispy chicken

Why we love this
The satisfying crunch of perfectly fried chicken is a universal love language, and it adds a fantastic textural dimension to your grazing board. We love the contrast between the golden-brown, jagged exterior and the steaming, juicy meat hidden inside. Each bite offers a harmonic balance of salty seasoning and savory chicken, making it an addictive addition that pairs perfectly with both spicy dips and sweet honey drizzles. It brings that ‘pub-style’ indulgence right into your living room with a homemade touch.
Ingredients
- 1 lb Chicken Thighs, cut into bite-sized pieces
- 1 cup Panko Breadcrumbs
- 1/2 cup All-Purpose Flour
- 2 large Eggs, beaten
- 1 tsp Garlic Salt
How to make it
- **The Dredge Station:** Set up three shallow bowls. In the first, mix the flour and garlic salt. In the second, place the beaten eggs. In the third, put the panko breadcrumbs. This assembly line ensures an even, thick coating.
- **Coat Methodically:** Toss a few chicken pieces in the flour, shaking off the excess. Dip them into the egg wash until fully coated, then press them firmly into the panko. The pressure helps the crumbs stick for that signature ‘shaggy’ crispy look.
- **Oil Temperature:** Fill a heavy-bottomed skillet with about 1/2 inch of neutral oil (like canola or vegetable). Heat over medium-high until the oil reaches 350°F (175°C). If you don’t have a thermometer, a pinch of breadcrumbs should sizzle immediately upon contact.
- **Fry in Batches:** Carefully place the chicken in the oil, making sure not to crowd the pan. Crowd the pan and the oil temperature drops, resulting in greasy chicken. Fry for 3-4 minutes per side until the internal temperature reaches 165°F and the outside is a deep golden brown.
- **Drain and Salt:** Immediately move the chicken to a wire rack (not a paper towel, which can make them soggy) and hit them with one tiny extra pinch of salt while the oil is still wet on the surface.
How to make garlic shrimp

Why we love this
Garlic shrimp brings a touch of elegance and a bright, coastal vibe to your food board that feels light yet incredibly decadent. The aroma of minced garlic sizzling in butter is one of the most enticing scents in the culinary world, promising a dish that is punchy, savory, and sophisticated. The shrimp themselves turn a beautiful opaque pink with a slight snap to the texture, coated in a silky, herb-flecked sauce that begs to be soaked up by a slice of toasted baguette.
Ingredients
- 1 lb Large Shrimp, peeled and deveined
- 4 tbsp Unsalted Butter
- 5 cloves Garlic, minced
- 1/2 cup Fresh Parsley, chopped
- 1 Lemon, juiced
How to make it
- **Prep the Shrimp:** Pat your shrimp completely dry with paper towels. Any moisture on the outside will cause them to steam rather than sear, and we want that slight golden caramelization on the edges.
- **Infuse the Butter:** In a large skillet, melt the butter over medium heat. Once foaming, add the minced garlic. Cook for only 1 minute until fragrant—be careful not to let the garlic turn brown or bitter.
- **The High-Heat Sear:** Turn the heat up to medium-high. Add the shrimp in a single layer. Cook for about 2 minutes without moving them to get a nice sear, then flip.
- **The Finish:** Add the lemon juice and half of the parsley. Toss the shrimp for another 1-2 minutes until they are curled into a ‘C’ shape and are just opaque. Overcooking makes shrimp rubbery, so pull them off the heat the moment they lose their translucency.
- **Garnish:** Toss with the remaining fresh parsley and arrange them on the board with the pan juices drizzled over the top.
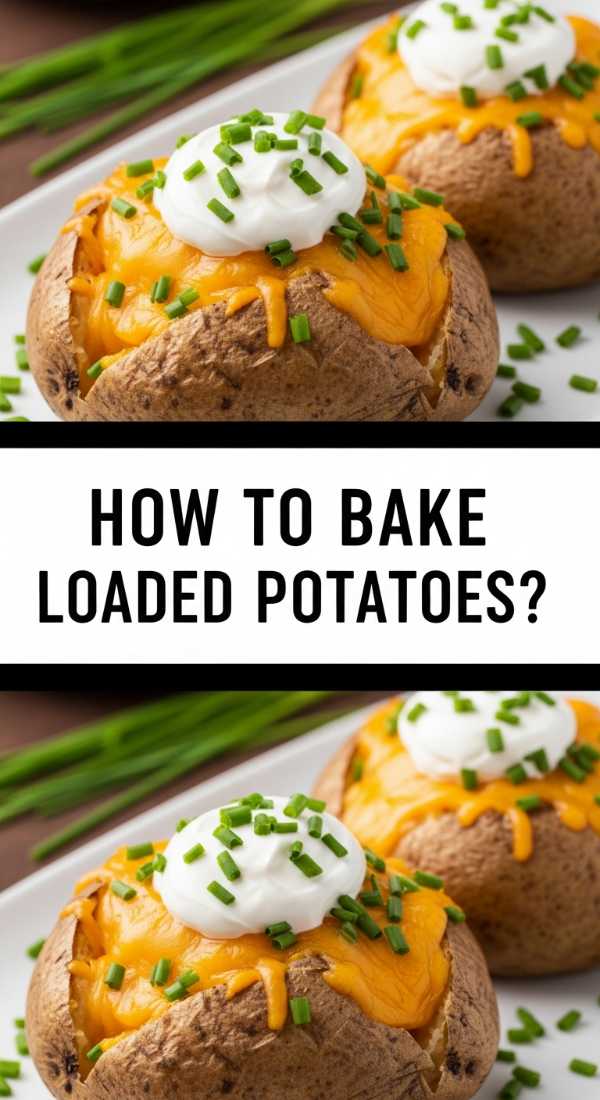
How to make loaded potatoes
Why we love this
Loaded potatoes are the ultimate crowd-pleaser, offering a comforting combination of starch, salt, and melted goodness that appeals to everyone. We love how the crispy, roasted skins provide a sturdy vessel for the velvety, fluffy potato interior that’s been enhanced with savory toppings. They add a rustic, substantial feel to your board, turning a collection of snacks into a truly filling meal. The visual of melted cheese cascading over a golden potato wedge is essentially the definition of ‘food porn’ for your guests.
Ingredients
- 4 large Russet Potatoes
- 1 cup Shredded Sharp Cheddar
- 1/2 cup Cooked Bacon bits
- 1/2 cup Sour Cream
- 2 Green Onions, sliced
How to make it
- **The Initial Bake:** Preheat your oven to 400°F (200°C). Rub the whole potatoes with oil and salt, pierce them with a fork, and bake for 50-60 minutes until tender.
- **The ‘Boat’ Prep:** Slice the potatoes in half lengthwise. Scoop out a bit of the center to create a well (save the insides for mashed potatoes tomorrow!). Cut these halves into smaller wedges or leave as skins.
- **Crisp the Skins:** Place the skins skin-side down on a baking sheet and bake for another 5-10 minutes to get the edges extra crispy and sturdy enough to be picked up by hand.
- **The Loading:** Fill the wells with a generous amount of cheddar cheese and the bacon bits. Switch your oven to ‘Broil’ and place the potatoes back in for 2-3 minutes until the cheese is bubbling and slightly browned.
- **The Topping:** Finish with a dollop of sour cream and a sprinkle of fresh green onions. Arrange them in a cluster on your board for easy grabbing.
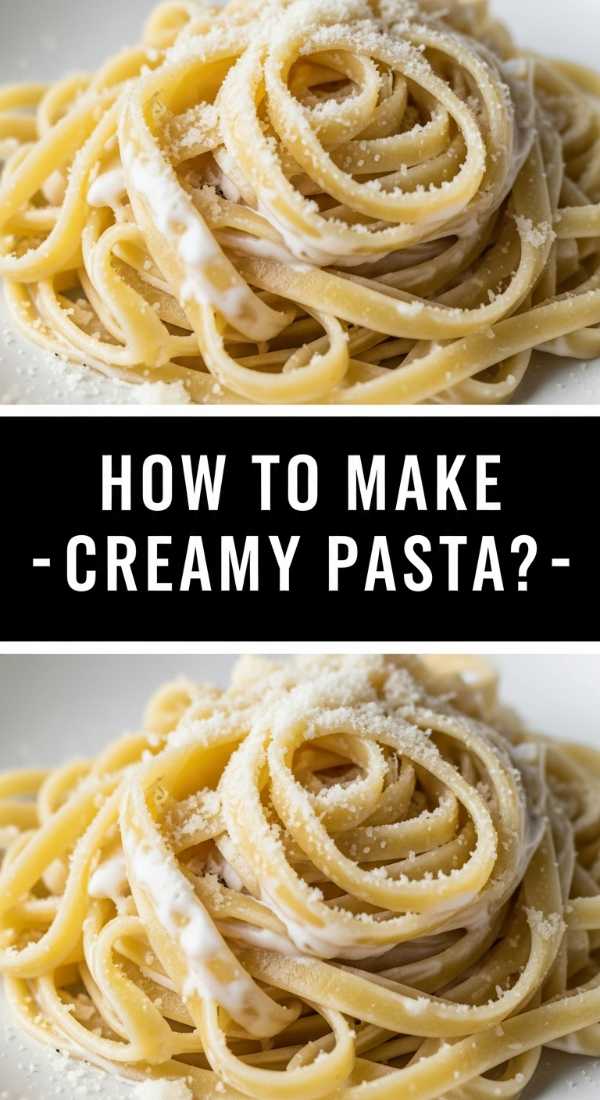
How to make creamy pasta
Why we love this
Putting pasta on a board might seem unconventional, but a ‘Pasta Board’ is the latest viral sub-trend for a reason: it’s pure, unadulterated comfort. This creamy pasta is silky, indulgent, and acts as a beautiful neutral base that pairs perfectly with roasted veggies or meats. The sauce clings to every curve of the noodle, creating a luxurious mouthfeel that is both rich and satisfying. It brings a sense of abundance and warmth to the table, making the whole spread feel like a feast from a rustic Italian kitchen.
Ingredients
- 1 lb Fettuccine or Penne pasta
- 1 cup Heavy Cream
- 1 cup Grated Parmesan Cheese
- 2 tbsp Butter
- 1 tsp Cracked Black Pepper
How to make it
- **Pasta Al Dente:** Boil a large pot of heavily salted water (it should taste like the sea). Cook your pasta for 1-2 minutes less than the package directions suggest. This ‘al dente’ texture ensures the pasta doesn’t get mushy when tossed with the hot sauce.
- **The Liquid Gold:** Before draining, reserve 1 cup of the starchy pasta water. This is the secret to a smooth, cohesive sauce. Drain the rest of the pasta.
- **The Emulsion:** In the same warm pot (off the heat), add the butter and heavy cream. Whisk together, then add the grated Parmesan and the black pepper.
- **The Toss:** Add the cooked pasta back into the pot. Slowly drizzle in small amounts of the reserved pasta water while tossing constantly. The starch in the water and the fat in the cheese will emulsify into a glossy, velvety sauce that coats the noodles perfectly.
- **Plating:** Swirl the pasta into a shallow bowl or directly onto a parchment-lined section of your board. Top with extra Parmesan for that viral ‘snow’ effect.
How to cook honey salmon
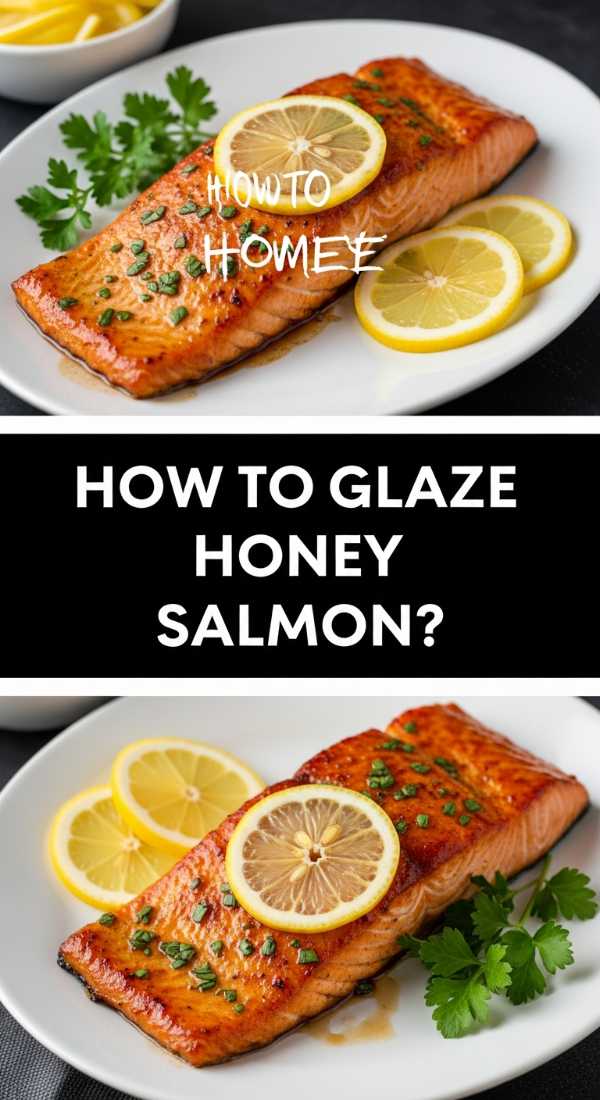
Why we love this
Honey salmon is the perfect blend of sweet and savory, offering a sophisticated protein option that looks absolutely stunning on a board. The honey caramelizes under the heat, creating a sticky, glistening glaze that seals in the moisture of the fish, while the salmon itself remains flaky and buttery. It’s a lighter, healthier option that doesn’t sacrifice flavor, providing a vibrant pop of pink and a sophisticated sweetness that balances out the saltier elements like cheese and nuts.
Ingredients
- 1 lb Salmon Fillet
- 3 tbsp Honey
- 2 tbsp Soy Sauce
- 1 tbsp Olive Oil
- 1/2 Lemon, sliced
How to make it
- **The Glaze:** In a small bowl, whisk together the honey and soy sauce until fully combined. This simple duo provides all the salt and sugar needed for a perfect glaze.
- **Sear the Skin:** Heat olive oil in a non-stick skillet over medium-high heat. Place the salmon skin-side down. Press down gently with a spatula for 30 seconds to ensure the skin makes full contact and becomes crispy. Cook for about 4-5 minutes.
- **The Flip and Glaze:** Carefully flip the salmon. Immediately pour the honey-soy mixture over the fish. It will begin to bubble and thicken almost instantly.
- **Basting:** Use a spoon to continuously pour the hot glaze over the salmon for the final 2-3 minutes of cooking. This ‘basting’ technique builds layers of flavor and creates that beautiful shine.
- **The Visual Cue:** The salmon is done when it flakes easily with a fork but is still slightly translucent in the very center. Remove from heat and serve with the lemon slices tucked around it for a fresh, acidic finish.
How to make cheesy tacos

Why we love this
Tacos are the ultimate interactive food, and making them extra ‘cheesy’ ensures they are the first thing your guests reach for. There is something deeply satisfying about the crunch of a toasted tortilla yielding to a flood of molten, gooey cheese and seasoned filling. They bring a fun, casual energy to your food board, encouraging people to dig in with their hands. The sight of slightly charred cheese edges and vibrant fillings makes these a visual centerpiece that promises a party in every bite.
Ingredients
- 12 Small Corn Tortillas
- 2 cups Shredded Mexican Blend Cheese
- 1 lb Ground Beef, seasoned
- 1 cup Pico de Gallo
- 1 Lime, cut into wedges
How to make it
- **Prepare the Meat:** Brown the ground beef in a skillet over medium heat, draining the excess fat. Season with your favorite taco spices (cumin, chili powder, salt) and a splash of water to keep it moist.
- **The Cheese Shield:** Heat a flat griddle or large skillet over medium heat. Place a tortilla down and immediately sprinkle a layer of cheese over the entire surface. This cheese acts as a ‘glue’ and a moisture barrier.
- **Assemble in Pan:** Once the cheese starts to melt, add a spoonful of beef to one half of the tortilla. Fold the tortilla over to create a half-moon shape.
- **The Crisp:** Press down with a spatula. Cook for 2 minutes per side until the tortilla is golden and crispy, and the cheese is oozing out the edges and getting slightly brown (the ‘frico’ effect).
- **Final Touch:** Open them slightly to tuck in a bit of fresh pico de gallo and serve immediately on the board with lime wedges nearby for guests to squeeze over the top.
How to bake cinnamon rolls
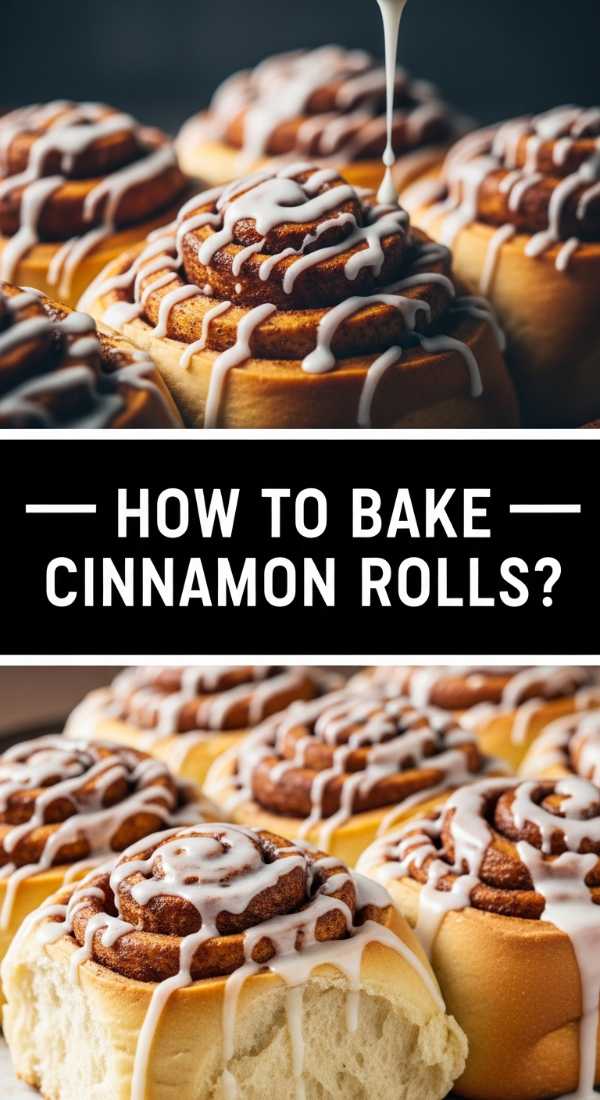
Why we love this
No food board is complete without a ‘sweet corner,’ and warm cinnamon rolls are the undisputed champions of dessert grazing. The aroma of cinnamon and yeast baking in the oven is practically a siren song for guests, promising a soft, pillowy dough swirled with a spicy-sweet filling. We love how the thick, sugary icing melts into the crevices of the warm rolls, creating a gooey, sticky experience that is pure indulgence. They provide a nostalgic, comforting finish to the meal that looks beautiful nestled among fresh berries.
Ingredients
- 1 tube Refrigerated Pizza Dough or Crescent Sheet
- 1/4 cup Butter, softened
- 1/2 cup Brown Sugar
- 2 tbsp Ground Cinnamon
- 1/2 cup Cream Cheese Frosting
How to make it
- **The Prep:** Preheat your oven to 375°F (190°C). Roll out your dough on a lightly floured surface into a large rectangle, about 1/4 inch thick.
- **The Filling:** Spread the softened butter evenly across the dough, leaving a tiny margin at the edges. In a small bowl, mix the brown sugar and cinnamon, then sprinkle it generously over the butter. Press it down slightly so it sticks.
- **The Roll:** Starting from the long edge, roll the dough tightly into a log. Use a piece of unflavored dental floss or a very sharp knife to slice the log into 1-inch thick rounds. Floss prevents squishing the delicate dough!
- **The Bake:** Place the rolls in a greased round baking dish, tucked close together so they rise ‘up’ rather than ‘out.’ Bake for 15-20 minutes until they are a light golden brown and have doubled in size.
- **The Glaze:** While they are still warm (but not hot), spread the cream cheese frosting over the top. The warmth will help the frosting seep into the layers without completely melting away.
How to cook roasted vegetables

Why we love this
Roasted vegetables are the unsung heroes of a viral food board, providing essential pops of color and earthy, caramelized flavors that balance out richer meats and cheeses. When roasted at high heat, vegetables like carrots, broccoli, or peppers develop charred, sweet edges and a tender interior that is far superior to steaming. They add a sophisticated, ‘farm-to-table’ aesthetic to your display, making the board look lush and abundant while offering a healthy, crunch-filled alternative for your guests to snack on.
Ingredients
- 1 lb Mixed Vegetables (Carrots, Brussels Sprouts, Bell Peppers)
- 3 tbsp Olive Oil
- 1 tsp Dried Thyme
- 1/2 tsp Sea Salt
- 1 tbsp Balsamic Glaze
How to make it
- **Uniform Cutting:** Cut all your vegetables into bite-sized pieces of similar size. This ensures they all cook at the same rate—no one wants a burnt carrot and a raw sprout!
- **The Toss:** In a large bowl, toss the vegetables with olive oil, thyme, and salt. Make sure every piece is glistening; the oil is what facilitates that beautiful browning.
- **The Sheet Pan Rule:** Spread the vegetables onto a large baking sheet in a *single layer*. If you crowd them, they will steam in their own moisture rather than roasting. Use two pans if necessary.
- **High Heat Roast:** Bake at 425°F (220°C) for 20-25 minutes. Halfway through, give the pan a good shake or use a spatula to flip the veggies so they brown evenly on all sides.
- **The Finishing Glaze:** Once they are out of the oven and still sizzling, drizzle with the balsamic glaze. The acidity cuts through the roasted sweetness and adds a professional-looking ‘shine’ to your board.
How to make hearty soup

Why we love this
Including a small crock or bowls of hearty soup on a food board is the ultimate ‘pro-tip’ for a cozy, viral-worthy spread. It provides a liquid element that is deeply warming and savory, perfect for dipping crusty bread or even those loaded potato skins. We love the way a thick, chunky soup offers a variety of textures—from tender vegetables to savory broth—creating a multi-sensory experience that feels complete. It turns a simple snack board into a soul-warming meal that invites guests to linger and savor every spoonful.
Ingredients
- 2 cans (15oz) Cannellini Beans, drained and rinsed
- 4 cups Vegetable Broth
- 2 cups Chopped Kale
- 1 large Onion, diced
- 2 cloves Garlic, minced
How to make it
- **The Sauté:** In a large pot, heat a splash of oil over medium heat. Add the diced onion and cook for 5 minutes until translucent. Add the garlic and cook for 1 more minute until the fragrance is released.
- **The Base:** Pour in the vegetable broth and the drained beans. Bring the mixture to a gentle boil, then reduce the heat to a simmer.
- **The Texture Trick:** To make the soup ‘hearty’ and creamy without adding dairy, take a potato masher or an immersion blender and crush about 1/4 of the beans directly in the pot. This thickens the broth beautifully.
- **Wilting the Greens:** Add the chopped kale during the last 5 minutes of simmering. It will wilt down into a vibrant green, adding texture and nutrients without becoming mushy.
- **Serving:** Season generously with salt and pepper. Ladle into small, aesthetic bowls or a mini pumpkin tureen and place directly on the board, surrounded by breadsticks or crackers for dipping.
Wrapping Up Your Viral Board
Creating a viral-worthy food board isn’t about being a master chef; it’s about choosing a few high-quality, simple components and presenting them with love. By focusing on these 5-ingredient recipes, you take the stress out of the preparation and leave more room for the fun part: styling and eating! Remember to fill in the gaps with fresh fruits, nuts, and herbs to give it that ‘overflowing’ look. Now, go ahead and capture that perfect overhead shot before your guests dive in!
Frequently Asked Questions
What are the best boards to use for these displays?
For a viral look, large wooden butcher blocks or marble slabs are the gold standard. However, you can also use a clean baking sheet lined with parchment paper for a more rustic, industrial vibe. The key is size—you want it to look full!
Can I prepare these components in advance?
Absolutely! The slow cooker beef and roasted vegetables can be made ahead of time. I recommend frying the chicken and shrimp right before serving to maintain that perfect texture, though the cinnamon rolls can be prepped and just popped in the oven when guests arrive.
How do I keep the hot items warm on the board?
The secret is using small ceramic bowls or cast-iron mini skillets that have been warmed in the oven. Placing the hot food (like the creamy pasta or hearty soup) in these vessels helps retain heat much longer than placing them directly on a cold board.