

There is something magical about a golden hour gathering where the table is overflowing with vibrant colors, and every guest reaches in for a bite of something delicious. I used to think that creating those viral food boards seen all over my social media feed required a professional catering budget and hours of stress, but I have learned the secret: it is all about the art of the assembly. By focusing on fresh, seasonal ingredients and simple, high-impact recipes, you can create a centerpiece that looks like a masterpiece without breaking the bank.
Today, I am sharing my ultimate guide to mastering the viral food board trend. We are going to dive into ten distinct themes that range from zesty pasta salads to the perfect grilled kabobs, ensuring your next cookout or picnic is the talk of the town. These are not just recipes; they are the building blocks for memories made over shared plates, laughter, and the simple joy of a meal prepared with love. Let’s get into how you can elevate your hosting game on a budget.
7 Best Chicken Caesar Wraps (Step-by-Step Guide)

Why we love this
The Chicken Caesar wrap is the ultimate handheld comfort food, offering a perfect textural contrast between the crisp, cold romaine lettuce and the warm, savory grilled chicken. Each bite delivers a punch of umami from the Parmesan cheese and the creamy, garlicky dressing that ties everything together into a cohesive, satisfying experience. It is the ideal food board addition because it is portable, mess-free, and brings a sense of familiar elegance to a casual outdoor lunch. The aroma of toasted tortillas and freshly cracked black pepper makes these wraps impossible to resist when displayed in a neat, diagonal-cut row.
Ingredients
- 4 Large flour tortillas (burrito size)
- 2 Cups grilled chicken breast, sliced into strips
- 3 Cups chopped Romaine lettuce
- 1/2 Cup shaved Parmesan cheese
- 1/2 Cup Caesar dressing (high-quality or homemade)
- 1/4 Cup garlic croutons, crushed slightly
- Freshly cracked black pepper and lemon wedges for serving
How to make it
- Begin by preparing your chicken; if using raw breasts, season them with salt, pepper, and garlic powder before grilling over medium-high heat for 6-7 minutes per side until the internal temperature reaches 165°F. Let the chicken rest for 5 minutes before slicing into thin strips to keep the juices locked in.
- Lightly warm your flour tortillas on a dry skillet over low heat for about 15 seconds per side; this makes them more pliable and prevents them from tearing during the folding process.
- In a large mixing bowl, toss the chopped romaine lettuce with the Caesar dressing until every leaf is lightly coated but not dripping. Add the shaved Parmesan and the lightly crushed croutons for an extra layer of crunch.
- Lay a tortilla flat and place a generous portion of the dressed salad in the center, leaving about two inches of space from the edges. Top the salad with 4-5 strips of the grilled chicken.
- Fold the sides of the tortilla inward toward the center, then pull the bottom edge up and over the filling, tucking it tightly as you roll forward. Ensure the roll is firm to maintain the structure.
- Heat a clean skillet over medium heat and place the wraps seam-side down for 30-45 seconds until golden brown and sealed. Slice diagonally and serve with a lemon wedge on the side.
10 Refreshing Easy Summer Desserts (Step-by-Step Guide)
Why we love this
Nothing captures the essence of summer quite like a dessert that cools you down while bursting with the sweetness of sun-ripened berries and citrus. We love these easy desserts because they emphasize lightness over heavy fats, featuring textures like whipped cream, flaky crusts, and frozen fruit purees that melt on the tongue. The visual appeal of a dessert board filled with mini fruit tarts and lemon bars is unparalleled, creating a vibrant focal point that smells of vanilla and fresh zest. It is the perfect way to end a meal without feeling weighed down, leaving everyone refreshed and satisfied.
Ingredients
- 1 Pint fresh strawberries, hulled and sliced
- 1 Package store-bought shortbread cookies (for the base)
- 2 Cups heavy whipping cream
- 1/2 Cup powdered sugar
- 1 Teaspoon pure vanilla extract
- Zest of 2 lemons
- Fresh mint leaves for garnish
How to make it
- Chill a large metal or glass mixing bowl and your whisk attachment in the freezer for 10 minutes before starting; this ensures the cream reaches maximum volume and stability.
- Pour the heavy cream into the chilled bowl and begin whisking on medium speed. Once the cream starts to thicken slightly, gradually sift in the powdered sugar and add the vanilla extract.
- Increase the speed to high and continue whisking until stiff peaks form; you’ll know it’s ready when the cream holds its shape firmly when the whisk is lifted. Do not over-beat, or it will turn into butter.
- Gently fold in half of the lemon zest using a rubber spatula to infuse the cream with a bright, citrusy aroma without deflating the air you’ve worked in.
- To assemble the individual dessert bites, place a shortbread cookie down as the base. Use a piping bag or a spoon to add a generous dollop of the whipped cream.
- Arrange 2-3 strawberry slices on top of the cream, sprinkle with the remaining lemon zest, and add a tiny mint leaf. Serve immediately or keep chilled until the moment of presentation.
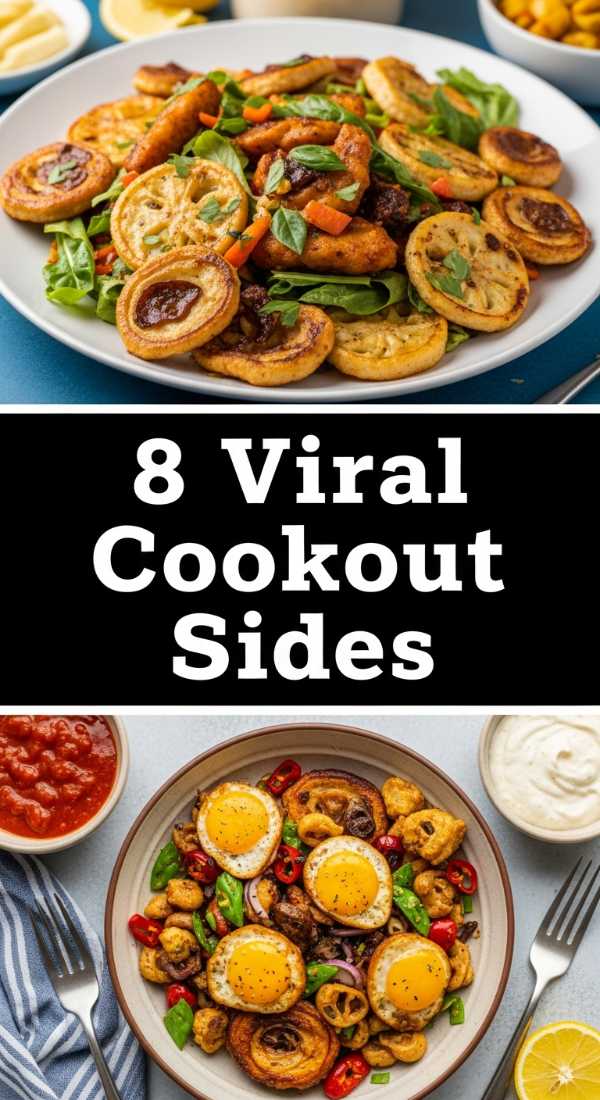
8 Viral Summer Cookout Sides (Step-by-Step Guide)

Why we love this
The sides are often the unsung heroes of a cookout, providing the necessary balance to smoky grilled meats with their acidity, crunch, and creaminess. We love these viral options because they take classic ingredients—like corn, potatoes, and cucumbers—and elevate them with bold seasonings and unexpected textures. Imagine the scent of charred corn mixed with lime and chili, or the cooling crunch of a vinegar-based slaw hitting your palate on a hot afternoon. These sides are designed to be shared, encouraging guests to scoop, dip, and sample a variety of flavors that make the meal feel complete.
Ingredients
- 4 Ears of fresh sweet corn, husks removed
- 1/4 Cup mayonnaise or Greek yogurt
- 1/2 Cup crumbled Cotija cheese
- 1 Tablespoon chili powder or smoked paprika
- 2 Tablespoons chopped cilantro
- 1 Lime, cut into wedges
How to make it
- Preheat your grill to medium-high heat (about 400°F). Place the cleaned corn cobs directly on the grates, turning them every 2-3 minutes to achieve an even char across all sides. The corn is ready when the kernels are tender and spotted with deep brown marks, usually about 10-12 minutes.
- Remove the corn from the grill and let it cool just enough to handle, but it should still be warm so the toppings adhere properly.
- Using a pastry brush or a spoon, coat each ear of corn with a thin, even layer of mayonnaise or Greek yogurt. This acts as the glue for your seasonings.
- Roll the coated corn in a shallow dish filled with the crumbled Cotija cheese, pressing slightly to make sure it sticks to the entire surface.
- Dust each ear with chili powder or smoked paprika for a hint of heat and a vibrant red color that pops against the white cheese.
- Garnish with a heavy sprinkle of freshly chopped cilantro and serve with lime wedges, instructing guests to squeeze the juice over the corn just before taking their first bite.
5 Best Refreshing Summer Cocktails (Step-by-Step Guide)

Why we love this
A well-crafted summer cocktail is more than just a drink; it is an experience that sets the tone for the entire gathering. We love these recipes for their ability to balance the bite of spirits with the sweetness of seasonal fruit and the effervescence of soda or tonic. The sound of ice clinking in a tall glass and the fragrance of bruised mint or basil instantly signal that it is time to relax and unwind. These cocktails are visually stunning, with garnishes that act like jewelry for your food board, making the entire spread feel more upscale and intentional without the high price tag of a professional bar.
Ingredients
- 2 Ounces silver tequila or gin
- 1 Ounce fresh lime juice
- 1/2 Ounce agave nectar or simple syrup
- 4-5 Fresh raspberries or blackberries
- Splash of sparkling water or club soda
- Fresh rosemary sprig for garnish
How to make it
- In a sturdy cocktail shaker, combine the fresh berries and the agave nectar. Use a muddler to firmly press down on the berries, releasing their juices and essential oils until they are fully macerated.
- Fill the shaker halfway with large ice cubes; using larger cubes prevents the drink from diluting too quickly while you are shaking.
- Add the spirit of your choice (tequila or gin) and the freshly squeezed lime juice. Secure the lid tightly and shake vigorously for at least 15 seconds; you want the outside of the shaker to feel frosty.
- Double strain the mixture through a fine-mesh sieve into a rocks glass filled with fresh ice. This removes the berry seeds and pulp, resulting in a smooth, vibrant liquid.
- Top the glass with a splash of sparkling water to add a light carbonation that lifts the fruit flavors and makes the cocktail more refreshing.
- Gently slap a sprig of rosemary between your palms to release its aroma before placing it in the glass as a garnish. The herbal scent will hit the nose with every sip, creating a complex flavor profile.
10 Perfect Picnic Food Ideas (Step-by-Step Guide)
Why we love this
Picnic food must be resilient, portable, and equally delicious at room temperature as it is cold, which is exactly why we love this selection. These ideas focus on sturdy ingredients that won’t wilt or become soggy, like crusty baguettes, hard cheeses, and marinated vegetables that actually improve in flavor as they sit. There is a romantic, nostalgic feeling to unpacking a basket filled with neatly wrapped sandwiches and jars of colorful salads. The textures range from the snap of a fresh apple to the creamy richness of a brie, providing a sensory journey that makes dining on a blanket feel like a five-star event.
Ingredients
- 1 Long French baguette
- 6 Ounces thinly sliced prosciutto or ham
- 4 Ounces Brie cheese, sliced
- 1 Jar of fig jam or honey
- 1 Cup arugula
- 2 Tablespoons balsamic glaze
How to make it
- Slice the French baguette lengthwise, but try not to cut all the way through; leaving a “hinge” on one side helps keep the fillings contained during transport.
- Spread a generous, even layer of fig jam or honey onto the bottom half of the bread. This provides a sweet base that perfectly offsets the saltiness of the cured meat.
- Layer the slices of Brie cheese over the jam. If the cheese is too soft to slice cleanly, put it in the freezer for 10 minutes beforehand to firm up.
- Fold the prosciutto or ham slices loosely and pile them on top of the cheese; folding the meat adds volume and a better mouthfeel than laying it flat.
- Top the meat with a handful of fresh arugula and a light drizzle of balsamic glaze. The arugula adds a peppery bite that cuts through the richness of the Brie.
- Close the sandwich and wrap it tightly in parchment paper, tying it with kitchen twine. This compression helps the flavors meld together. Slice into 4-inch sections just before serving at your picnic site.
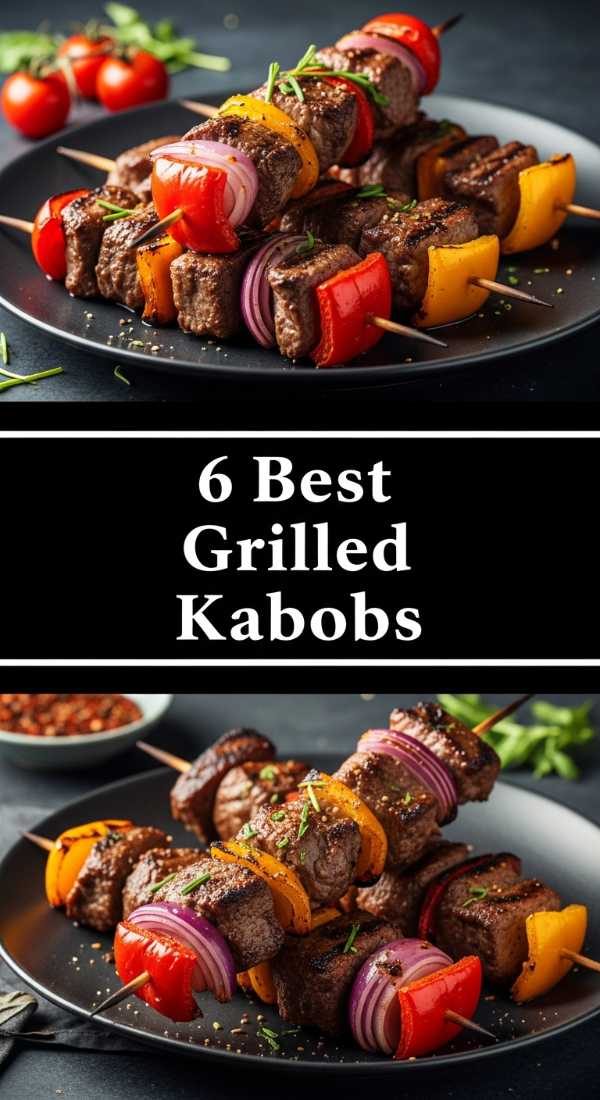
6 Best Grilled Kabobs (Step-by-Step Guide)

Why we love this
Kabobs are the ultimate crowd-pleaser because they offer a variety of flavors and textures on a single stick, making them fun to eat and beautiful to display. We love the charred edges of the bell peppers and onions as they caramelize next to succulent pieces of marinated protein. The aroma of wood smoke and searing meat is the quintessential scent of summer, drawing everyone toward the grill in anticipation. They are incredibly versatile, allowing you to mix and match colors and ingredients to create a rainbow effect on your food board that looks professional and vibrant.
Ingredients
- 1 Pound beef sirloin or chicken breast, cut into 1.5-inch cubes
- 1 Red bell pepper and 1 Green bell pepper, cut into chunks
- 1 Large red onion, cut into wedges
- 1 Cup whole cremini mushrooms
- 1/2 Cup olive oil mixed with 2 tablespoons soy sauce, 1 tablespoon honey, and 2 cloves minced garlic
How to make it
- If using wooden or bamboo skewers, soak them in water for at least 30 minutes prior to use. This prevents them from catching fire or splintering on the hot grill.
- Place your meat cubes in a bowl and pour the olive oil, soy sauce, honey, and garlic mixture over them. Let the meat marinate in the refrigerator for at least 1 hour, though 4 hours is better for deep flavor penetration.
- Thread the ingredients onto the skewers, alternating between meat and vegetables. Aim for a tight fit but don’t smash them together too hard; you want heat to circulate around each piece for even cooking.
- Preheat your grill to medium-high. Clean the grates thoroughly and lightly oil them to prevent sticking.
- Place the kabobs on the grill. Cook for 8-12 minutes, turning every few minutes. Look for the meat to develop a nice crust and for the vegetables to soften and char slightly at the edges.
- Remove from the grill and let the kabobs rest on a platter for 3 minutes. This allows the proteins to relax and the juices to redistribute, ensuring every bite is tender and flavorful.
7 Zesty Summer Pasta Salads (Step-by-Step Guide)

Why we love this
Pasta salad is the backbone of any great food board because it acts as a hearty filler that can carry a wide range of bold, zesty flavors. We love the way a spiral or bow-tie pasta catches bits of vinaigrette, feta cheese, and herbs in its crevices, ensuring every forkful is a burst of Mediterranean-inspired goodness. The cold, chewy texture of the pasta combined with the crunch of raw vegetables like cucumbers and peppers creates a refreshing contrast that stands up well to the summer heat. It’s a colorful, customizable dish that only tastes better as the ingredients sit and marinate together.
Ingredients
- 16 Ounces Fusilli or Rotini pasta, cooked and cooled
- 1 Cup cherry tomatoes, halved
- 1 Cucumber, diced
- 1/2 Cup Kalamata olives, sliced
- 1/2 Cup crumbled feta cheese
- 1/2 Cup Italian vinaigrette (olive oil, red wine vinegar, dried oregano, salt, pepper)
- Fresh parsley for garnish
How to make it
- Cook the pasta in a large pot of boiling salted water according to the package directions, but aim for ‘al dente’—it should have a slight bite. If you overcook it, the pasta will become mushy once it absorbs the dressing.
- Drain the pasta and immediately rinse it under cold running water. This stops the cooking process and removes excess starch, which prevents the noodles from sticking together.
- In a large mixing bowl, combine the cooled pasta with the cherry tomatoes, diced cucumber, and sliced olives. Toss gently with a large spoon to distribute the vegetables evenly.
- Whisk your Italian vinaigrette ingredients together in a small jar until emulsified, then pour over the pasta. Start with half the dressing and add more as needed; you want it coated, not swimming.
- Gently fold in the crumbled feta cheese. Doing this last ensures the cheese stays in visible chunks rather than dissolving into the dressing and making it cloudy.
- Cover and refrigerate for at least 30 minutes before serving. Just before placing on your food board, give it a final toss and top with freshly chopped parsley for a pop of green.
10 Healthy Easy Summer Meals (Step-by-Step Guide)

Why we love this
Healthy summer meals are all about celebrating the natural flavor of produce without over-complicating the cooking process. We love these recipes because they leave you feeling energized and light, focusing on lean proteins and a rainbow of vegetables that provide a wealth of nutrients. The experience of eating a crisp, vibrant salad or a piece of flaky white fish seasoned with citrus and herbs is inherently satisfying and matches the bright, airy mood of the season. These meals prove that eating well doesn’t have to be boring or expensive; it’s about using fresh ingredients when they are at their peak.
Ingredients
- 2 Large zucchini, spiralized into “zoodles”
- 1 Cup cherry tomatoes
- 2 Tablespoons pesto sauce (basil, pine nuts, parmesan, oil)
- 1 Tablespoon olive oil
- 1/2 Pound large shrimp, peeled and deveined
- Red pepper flakes and lemon juice to taste
How to make it
- Pat the shrimp dry with a paper towel and season lightly with salt and red pepper flakes. Heat olive oil in a large skillet over medium-high heat until it shimmers.
- Add the shrimp to the skillet in a single layer. Cook for about 2 minutes per side until they turn opaque and pink with a slight golden sear. Remove the shrimp from the pan and set aside.
- In the same skillet, add the cherry tomatoes. Sauté them for 3-4 minutes until the skins begin to blister and pop, releasing their natural juices to create a light sauce base.
- Add the spiralized zucchini to the pan. Toss them with the tomatoes for only 1-2 minutes; zucchini noodles release a lot of water and can become soggy quickly, so you want them just warmed through.
- Turn off the heat and stir in the pesto sauce, ensuring all the zoodles and tomatoes are coated in the herbaceous green mixture.
- Return the shrimp to the pan, toss once more to combine, and finish with a generous squeeze of fresh lemon juice to brighten all the flavors before serving.
5 Best Summer Crockpot Recipes (Step-by-Step Guide)

Why we love this
The Crockpot is a secret weapon for summer entertaining because it allows you to create deeply flavorful, tender dishes without heating up your entire kitchen. We love the convenience of “set it and forget it” cooking, which frees up your afternoon for poolside lounging or prep work for the rest of your food board. The results are often melt-in-your-mouth proteins, like pulled pork or shredded chicken, that carry a rich, slow-cooked aroma that fills the house. It’s the ultimate budget-friendly way to cook tougher cuts of meat until they reach a luxurious texture that feels incredibly decadent.
Ingredients
- 3 Pounds pork shoulder (Boston butt)
- 1 Bottle (18 oz) of your favorite BBQ sauce
- 1/2 Cup apple cider vinegar
- 1 Yellow onion, sliced thinly
- 1 Tablespoon smoked paprika
- Soft brioche buns for serving
How to make it
- Trim any excess thick layers of fat from the pork shoulder, but leave enough for flavor. Rub the meat thoroughly with the smoked paprika, salt, and black pepper, pressing the spices into the surface.
- Place the sliced onions at the bottom of the Crockpot to create a bed for the meat; this prevents the pork from sticking and adds flavor to the resulting juices.
- Place the seasoned pork on top of the onions. Pour the apple cider vinegar over the meat—this acidity helps break down the connective tissues during the long cook time.
- Cover and cook on LOW for 8 hours or HIGH for 4-5 hours. You’ll know it’s done when the meat is so tender that it falls apart when touched with a fork.
- Remove the meat from the pot and place it in a large bowl. Use two forks to shred it into bite-sized pieces, discarding any large pieces of fat or bone.
- Drain the excess liquid from the Crockpot (reserve a little for moisture) and return the shredded meat to the pot. Stir in the BBQ sauce and cook on warm for another 30 minutes to let the flavors fuse before serving on buns.
8 Viral Summer Grilling Recipes (Step-by-Step Guide)
[IMAGE_10]
Why we love this
Grilling is the heartbeat of summer dining, offering a smoky complexity that you simply cannot replicate indoors. We love these viral grilling recipes because they take advantage of high heat to create beautiful sear marks and caramelized surfaces that are as visually appealing as they are delicious. There is a primal joy in cooking over an open flame, and the social aspect of gathering around the grill makes the meal feel like an event. From charred pineapple to perfectly seared steaks, these recipes bring a rustic, bold energy to your food board that guests will find absolutely irresistible.
Ingredients
- 2 Thick-cut Ribeye or New York Strip steaks
- 2 Tablespoons softened butter mixed with minced garlic and parsley
- 1 Tablespoon coarse sea salt
- 1 Tablespoon cracked black pepper
- 1 Bunch of asparagus, trimmed and tossed in olive oil
How to make it
- Remove your steaks from the refrigerator at least 30-45 minutes before grilling. Bringing the meat to room temperature ensures it cooks evenly from the edges to the center.
- Generously season both sides of the steak with the coarse sea salt and cracked black pepper. The salt helps create a crusty “bark” when it hits the hot grates.
- Preheat your grill to high (450°F-500°F). Once hot, place the steaks on the grates. For a medium-rare steak, cook for 4-5 minutes without moving them to get those perfect grill marks.
- Flip the steaks using tongs (don’t use a fork, as piercing the meat lets juices escape) and cook for another 4-5 minutes on the other side.
- During the last 3 minutes of grilling, place the asparagus on the cooler side of the grill, turning occasionally until tender and slightly charred.
- Remove the steaks from the grill and immediately top with a dollop of the garlic-parsley butter. Let the meat rest for 10 full minutes on a cutting board before slicing; this is the most critical step for a juicy steak.
Conclusion
Creating a viral food board on a budget isn’t about perfection; it’s about the abundance of fresh ingredients and the joy of sharing a meal. By choosing one or two of these themes and focusing on beautiful presentation—using garnishes like fresh herbs, citrus wedges, and colorful sauces—you can turn simple recipes into an unforgettable experience. Remember to keep it relaxed, prep what you can in advance, and let the seasonal flavors speak for themselves. Happy hosting!
Frequently Asked Questions
Q: How do I keep the food fresh on a board during an outdoor party?
A: Use chilled marble slabs for cheeses and meats, and keep the board in a shaded area. For salads and dips, you can place the serving bowls inside larger bowls filled with ice to maintain a safe temperature.
Q: What are the best budget-friendly fillers for a large food board?
A: Focus on high-volume, low-cost items like seasonal fruits (grapes, melon), various crackers, crusty baguettes, and homemade dips like hummus or bean dip. These take up space beautifully while providing great variety.
Q: Can I prepare these recipes a day in advance?
A: Many components, like the pasta salad, the marinated meats for kabobs, and the Crockpot pulled pork, actually taste better when prepared ahead of time. However, assemble the wraps and add dressings to greens just before serving to avoid sogginess.