
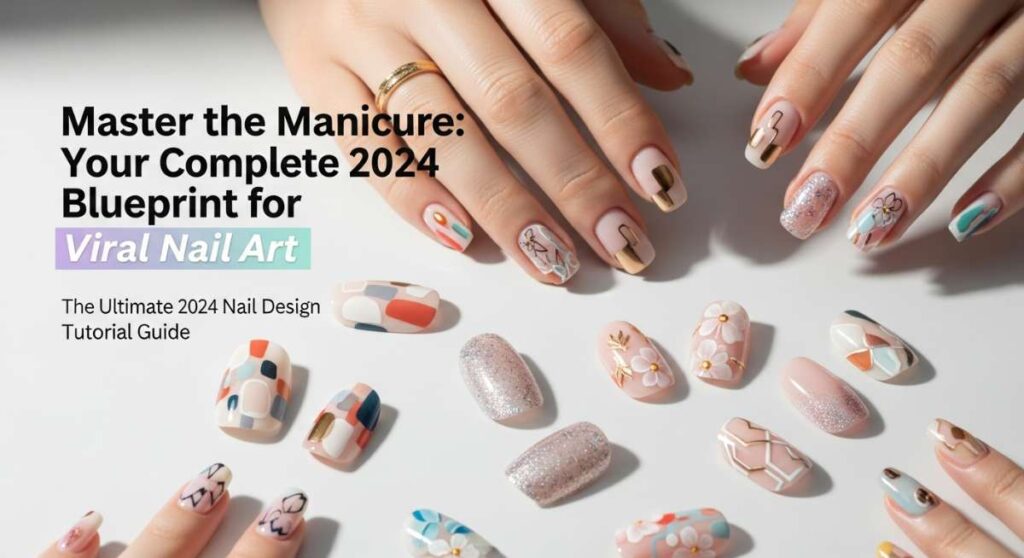
Master the Manicure: Your Complete 2024 Blueprint for Viral Nail Art
Hello, my loves! Grab a cup of chamomile tea, wrap yourself in your softest knit cardigan, and let’s have a heart-to-heart. There is something so profoundly healing about taking a moment for yourself, isn’t there? In the rush of our beautiful, chaotic lives, sitting down to paint your nails isn’t just about the color—it’s a quiet whisper of self-love, a tiny ritual that says, ‘I am worth this moment of beauty.’
This year, 2024 is all about embracing our softest selves. We are moving away from the harsh and the hurried, and stepping into a world of delicate bows, creamy lattes, and the gentle curves of an almond-shaped tip. I’ve spent weeks curating this blueprint just for you, so we can transform our fingertips into tiny canvases of joy together. Whether you’re a seasoned pro or picking up a brush for the first time, I’m right here with you, holding your hand through every stroke.
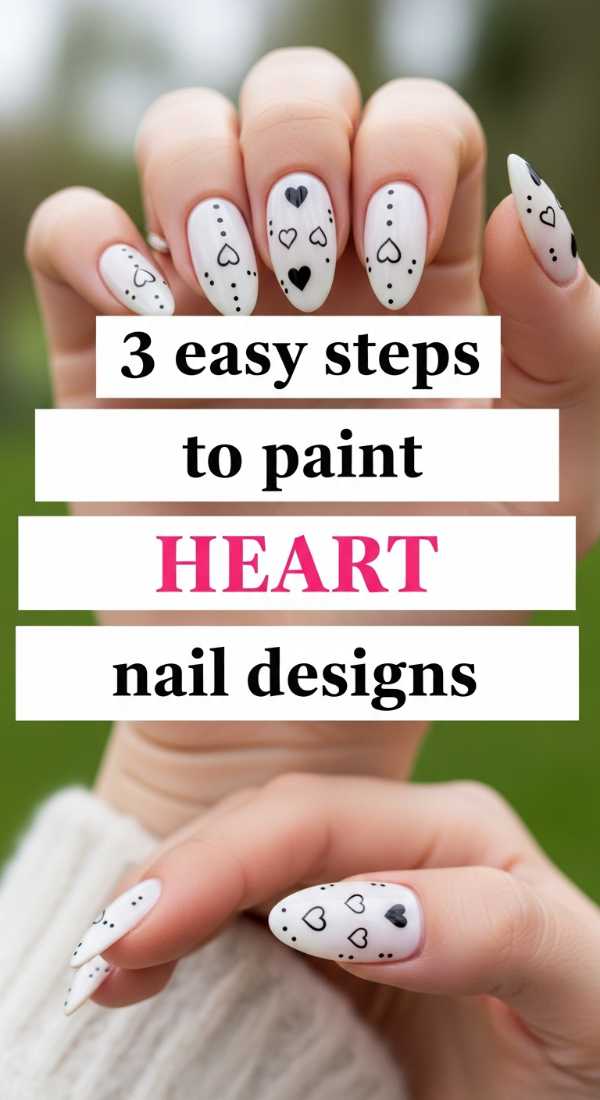
3 Easy Steps to Paint Heart Nail Designs
Why to love these Nails:
These tiny hearts are like a secret love letter to yourself. They are perfectly imperfect, representing the warmth we carry in our hearts every day. It’s a design that brings a smile to your face every time you look down at your keyboard or reach for your morning coffee.
Essential Items:
- Soft pink base polish
- Deep red or creamy white accent polish
- A wooden toothpick or a small dotting tool
- High-gloss top coat
How to Prepare:
- Apply two thin coats of your base color and let them dry completely until they feel like silk.
- Dip your toothpick into the accent color and place two small dots side-by-side where you want the heart to live.
- Drag the polish from each dot downward to a center point to create a perfect ‘V’ shape, then seal the magic with a top coat.
Budget Range
- Essie ‘Soothe Hole’ Pink ($10)
- OPI ‘Big Apple Red’ ($11)
- Sally Hansen Shiny Top Coat ($6)
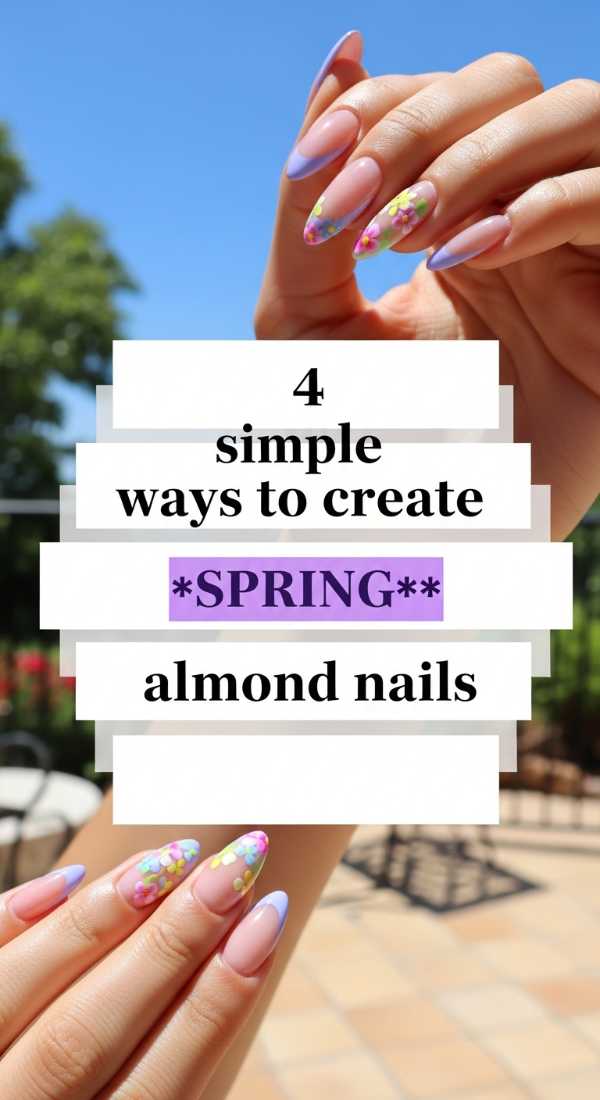
4 Simple Ways to Create Spring Almond Nails
Why to love these Nails:
The almond shape is the ultimate embrace for your fingers—it elongates, softens, and adds an instant touch of elegance. Spring is the season of rebirth, and these designs reflect that fresh, airy feeling of the first sunbeams hitting the garden.
Essential Items:
- Nail file (glass preferred)
- Pastel polish set
- Ultra-fine liner brush
- Iridescent shimmer topper
How to Prepare:
- File your nails into a soft taper, rounding the tips to mimic the shape of a delicate almond.
- Option 1: Paint each nail a different ‘skittles’ pastel shade for a playful, airy vibe.
- Option 2: Use a liner brush to create a thin, curved ‘micro-french’ tip in a sage green or buttery yellow.
- Option 3: Apply a sheer nude base and top with a single layer of iridescent shimmer for a ‘glazed’ look.
Budget Range
- Beetles Pastel Gel Polish Set ($15)
- Glass Nail File ($8)
- Modelones Liner Brush Set ($7)
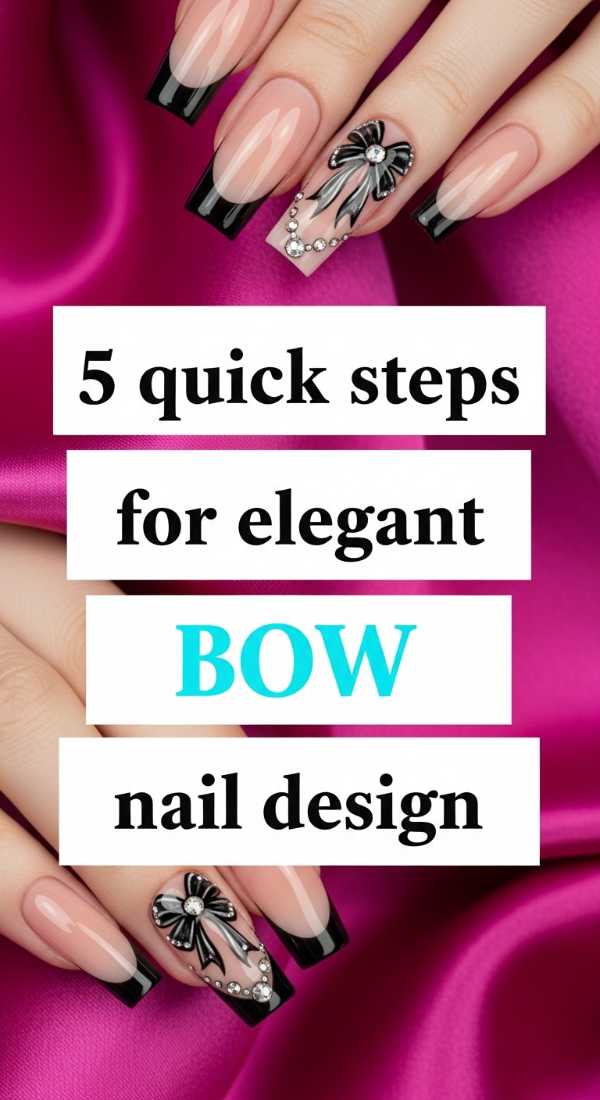
5 Quick Steps for Elegant Bow Nail Design
Why to love these Nails:
Loves, the ‘coquette’ aesthetic is here to stay, and nothing says ‘soft girl summer’ like a dainty bow. It’s feminine, it’s vintage-inspired, and it makes your hands look like a beautifully wrapped gift.
Essential Items:
- Sheer ‘milky’ base polish
- Black or white acrylic paint (easier to control than polish!)
- A very thin detailing brush
- Small rhinestones (optional)
- Matte or glossy top coat
How to Prepare:
- Start with a clean, milky base to let the bow design pop.
- Paint two tiny triangles meeting at the points in the center of your nail.
- Add two soft, flowing ‘ribbons’ or tails coming down from the center point.
- Place a tiny dot of polish (or a rhinestone!) in the center where the triangles meet.
- Finish with a matte top coat for a suede-like, high-end fabric feel.
Budget Range
- Zoya ‘Lucy’ Milky White ($12)
- Nail Art Detailing Brushes ($5)
- Small Nail Gems ($6)
6 Steps to Master Simple Plaid Nail Designs
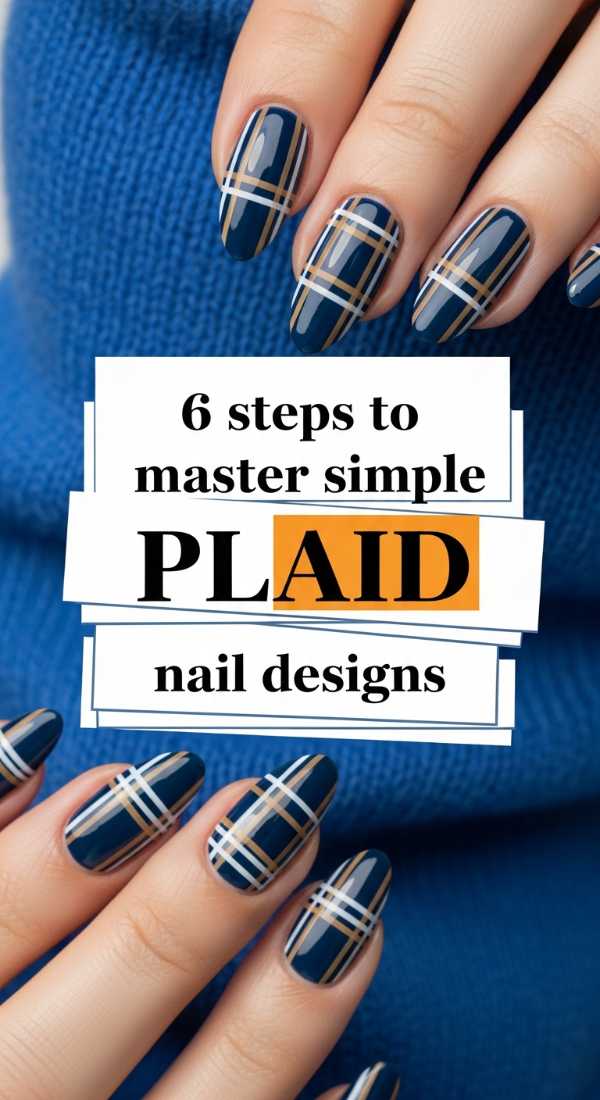
Why to love these Nails:
Plaid isn’t just for autumn, sweets! In soft blues and whites, it looks like a picnic blanket spread out under a cherry blossom tree. It’s structured yet cozy, providing a beautiful contrast to the soft lines of our spring wardrobe.
Essential Items:
- Solid base color (creme finish)
- Two contrasting striping colors
- Long-haired striping brush
- Acetone for clean-up
- Steady surface for your elbow
How to Prepare:
- Apply your base color and ensure it is dry to the touch.
- Draw one vertical line down the side of the nail using your longest brush.
- Draw two horizontal lines across the nail, spaced evenly apart.
- Use your second contrast color to draw thinner lines right next to the first ones.
- Clean up any edges with a brush dipped in acetone.
- Seal the grid with a generous layer of top coat to level the texture.
Budget Range
- Holt Taco ‘Not Milky White’ ($13)
- Striping Tape/Brush Kit ($9)
- OPI Matte Top Coat ($11)
7 Ways to Style Your Spring Almond Nails

Why to love these Nails:
Styling is where your personality truly shines through. It’s not just about the paint; it’s about how those nails complement your jewelry, your favorite knitwear, and the way you move through the world.
Essential Items:
- Stackable gold or silver rings
- Hydrating cuticle oil
- Floral temporary nail decals
- Pearl accents
How to Prepare:
- Pair your almond tips with thin, gold stacking rings to emphasize the length of your fingers.
- Mix textures: try three matte nails and two glossy nails in the same color family.
- Add a tiny pearl decal at the base of your ring finger for a ‘bridal’ softness.
- Apply cuticle oil daily to keep the skin around your almond shape looking soft and hydrated.
- Style with oversized sleeves—the almond shape peeking out is a classic viral aesthetic.
- Try a ‘negative space’ half-moon at the base for a modern twist.
- Coordinate your nail color with your favorite spring floral dress.
Budget Range
- Cuccio Revitalize Cuticle Oil ($10)
- Gold Stacking Ring Set ($12)
- Floral Nail Decals ($5)
3 Steps to Achieve Latte Art Nail Design
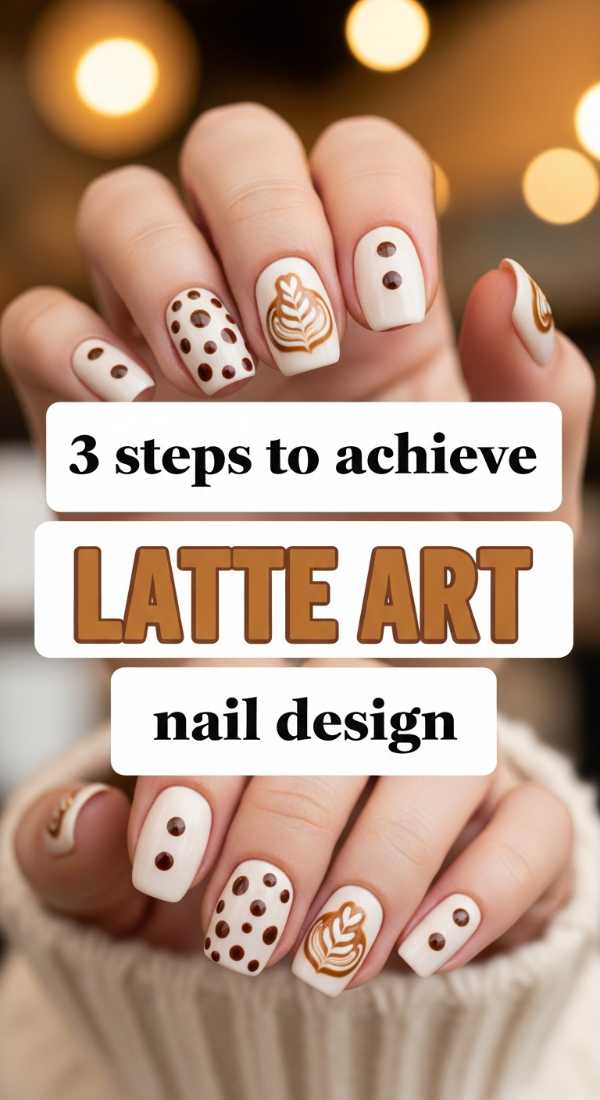
Why to love these Nails:
Imagine the swirl of cream into a warm espresso—that’s exactly what this design feels like. It’s grounded, earthy, and incredibly sophisticated. It’s the ‘quiet luxury’ of nail art that goes with every single outfit in your closet.
Essential Items:
- Coffee-brown polish
- Cream or tan polish
- A clear ‘blooming’ gel or a toothpick for swirling
How to Prepare:
- Apply a base of the creamy tan color.
- While the polish is still wet (or using blooming gel), drop three small beads of the darker brown onto the nail.
- Use a toothpick to gently swirl the colors together in a circular motion, creating that ‘barista’ foam effect, then let dry.
Budget Range
- Lights Lacquer ‘Coffee Shop’ Tones ($13)
- Born Pretty Blooming Gel ($8)
- Toothpicks ($2)
4 Easy Techniques for Simple Nail Designs
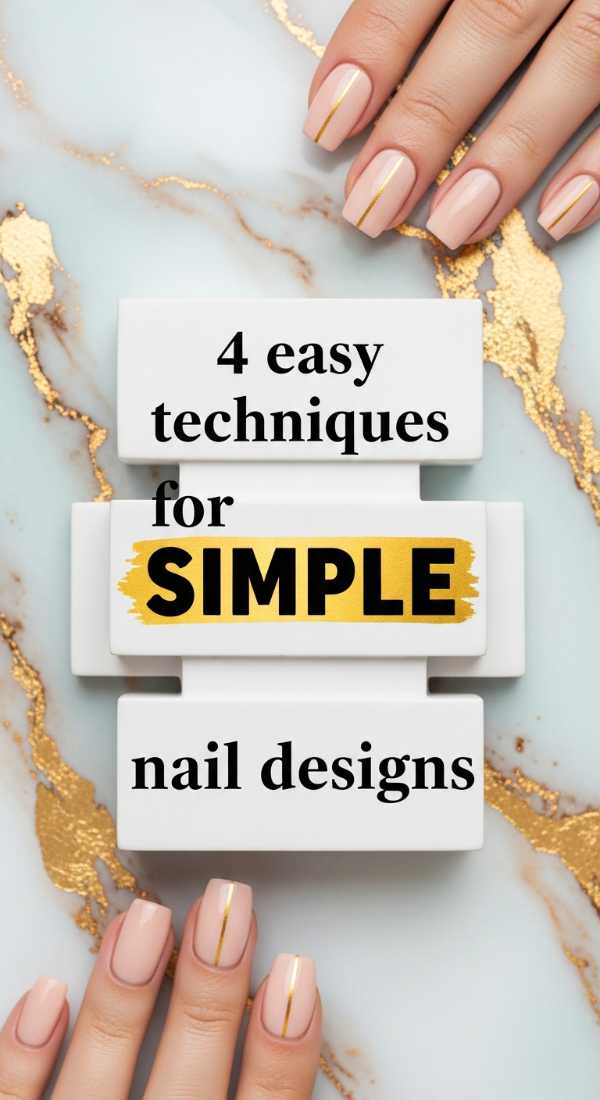
Why to love these Nails:
Sometimes, the most beautiful things are the simplest. These techniques are for those days when you want to feel put-together without the stress. They are the ‘no-makeup’ makeup look of the nail world.
Essential Items:
- Makeup sponge
- Dotting tool
- Washi tape or scotch tape
- Your favorite ‘holy grail’ nude polish
How to Prepare:
- The Sponge Gradient: Dab two colors onto a sponge and press onto the nail for a soft sunset effect.
- The Tape Method: Use scotch tape to create crisp, geometric lines for a modern look.
- The Single Dot: Place one single dot at the base of a naked nail for high-fashion minimalism.
- The Dry Brush: Wipe most of the polish off your brush and ‘swipe’ it across the nail for a rustic, painted-canvas texture.
Budget Range
- Wedge Makeup Sponges ($4)
- Olive & June ‘CHM’ Nude ($9)
- Scotch Tape ($3)
5 Steps for the Perfect Spring Nail Design
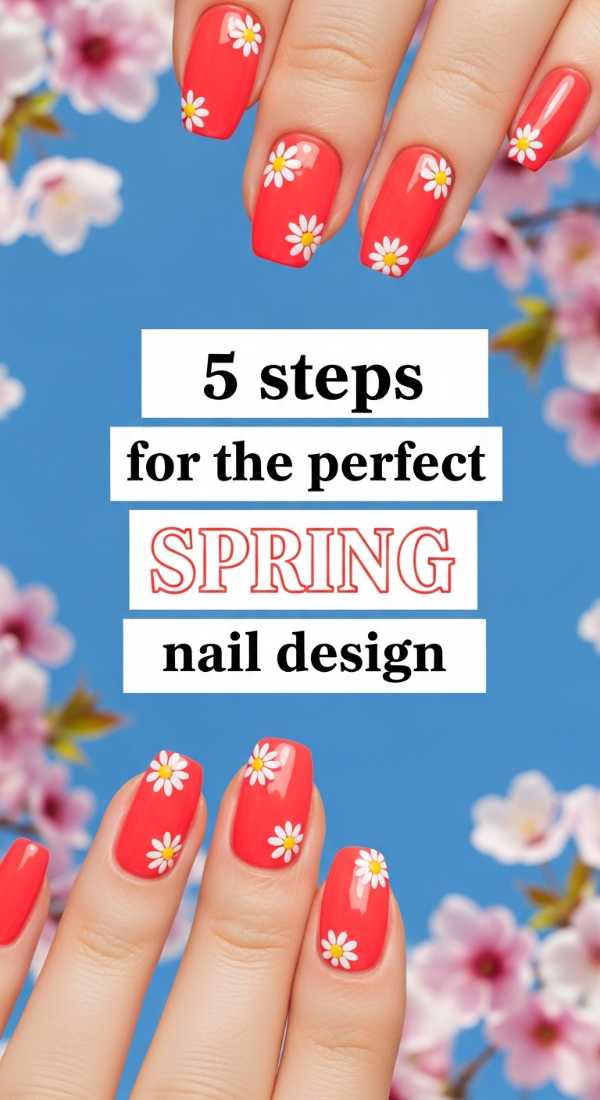
Why to love these Nails:
This is the ultimate ‘everything’ design—a little bit of floral, a little bit of pastel, and a whole lot of sunshine. It captures the essence of a spring meadow in full bloom right on your fingertips.
Essential Items:
- Lavender or Mint polish
- Yellow and white polish for daisies
- Small dotting tool
- Fine detail brush
How to Prepare:
- Apply two coats of lavender as your ‘sky’ background.
- Use a dotting tool to create five white dots in a circle for flower petals.
- Add a single yellow dot in the center of the white petals.
- Use your detail brush to add tiny green leaves if you’re feeling fancy!
- Apply a ‘plumping’ top coat to give it a professional salon finish.
Budget Range
- Essie ‘Mint Candy Apple’ ($10)
- SunUV LED Nail Lamp (if using gel) ($25)
- Revlon ColorStay Top Coat ($8)
6 Ways to Upgrade Your Almond Nail Design
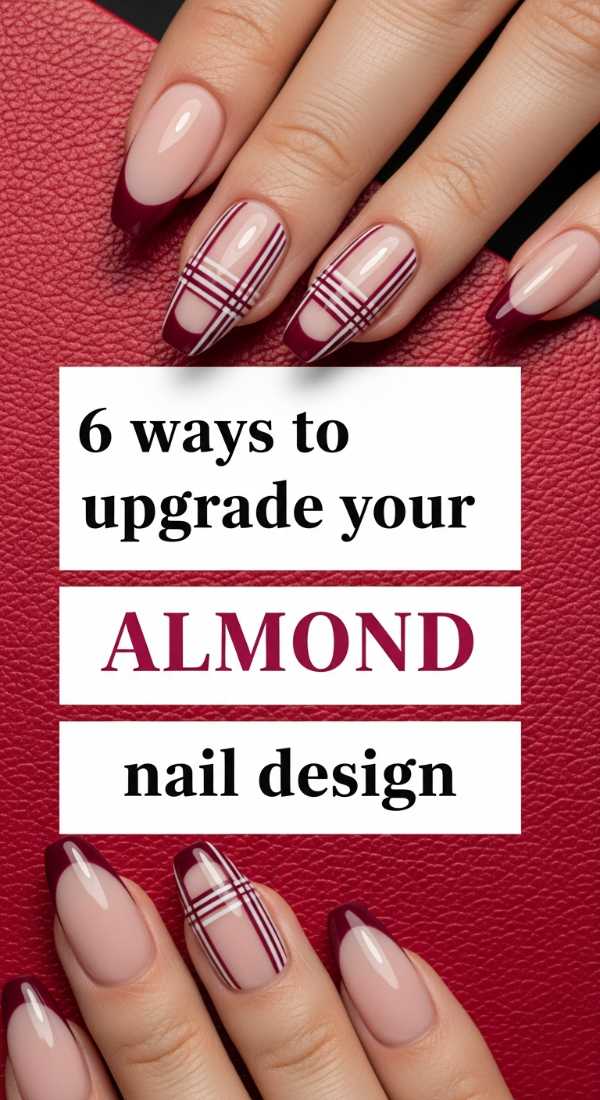
Why to love these Nails:
Ready to take it to the next level, loves? Upgrading your design is about adding layers of dimension. It’s the difference between a simple sketch and a masterpiece. These little tweaks make your DIY set look like it cost $100.
Essential Items:
- Chrome powder
- 3D ‘Gem’ gel
- Gold leaf flakes
- Velvet magnetic polish
How to Prepare:
- Rub chrome powder over a finished nail for a ‘pearl’ or ‘mirror’ effect.
- Use 3D gel to create raised ‘raindrops’ on the nail surface.
- Apply gold leaf flakes sparingly near the cuticle for a regal touch.
- Use a magnet with velvet polish to create depth that moves with the light.
- Try a ‘matte-glossy’ French where the base is matte and the tip is shiny.
- Add a tiny ‘hidden’ design on your thumb that only you can see.
Budget Range
- Artdone Chrome Powder ($9)
- Magnetic Nail Polish ($12)
- Gold Foil Flakes ($7)
4 Simple Steps for Dotted Nail Designs
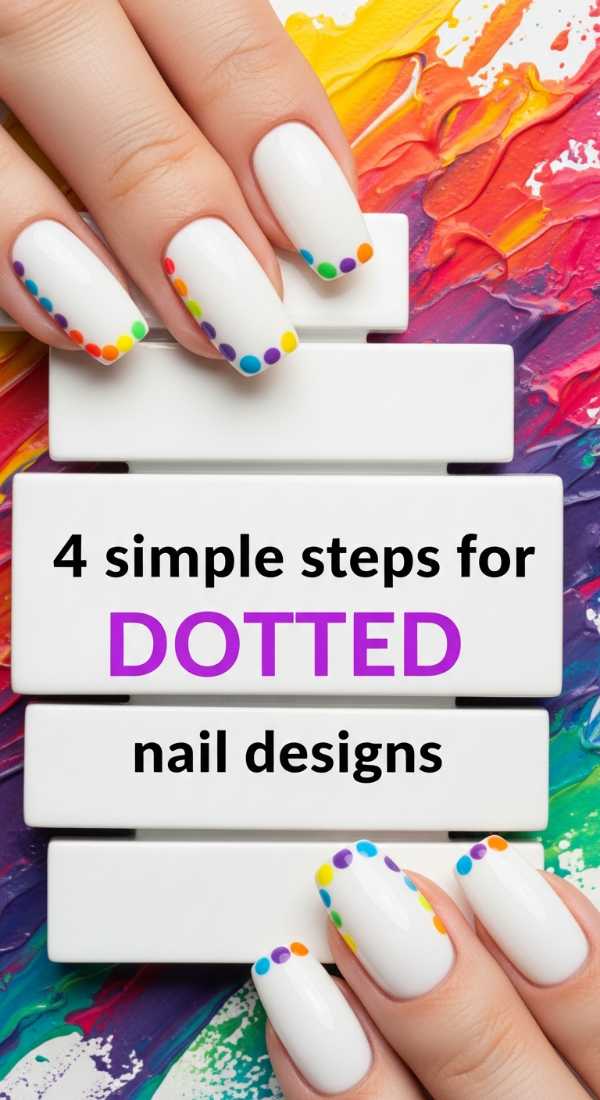
Why to love these Nails:
Dots are playful, retro, and impossible to mess up! They remind me of confetti and celebrations. If you’re feeling a bit nervous about your steady hand, dots are your best friend—they embrace the beauty of the circle.
Essential Items:
- A set of varying sized dotting tools
- At least three contrasting polish colors
- A paper plate (to use as a palette)
How to Prepare:
- Pour a small puddle of each color onto your paper plate.
- Dip the largest dotting tool into the first color and create a ‘random’ pattern of large circles.
- Switch to a smaller tool and fill in the gaps with the other colors.
- Vary the pressure to create different sizes, creating a ‘bubble’ effect across the nail.
Budget Range
- Dotting Tool 5-piece Set ($6)
- Sinful Colors Pro Set ($5 each)
- Paper Plates ($2)
A Soft Farewell & New Beginnings
As we wrap up our little nail session, I hope you feel inspired and, more importantly, relaxed. Your hands do so much for the world—they hold your loved ones, they create art, they work hard, and they deserve this moment of grace. Don’t worry if your lines aren’t perfectly straight or if your hearts are a little lopsided; that’s just proof that a human soul made them. Share your beautiful creations with me, and remember: you are the masterpiece, the nail art is just the frame. Until next time, stay soft, stay kind, and keep shining!