
Loud and Proud: Why Maximalist Nails Are This Season’s Biggest Statement
Hello, my beautiful loves. Pull up a chair, grab a warm cup of tea, and let’s have a little heart-to-heart about something that’s been making my soul dance lately. We’ve spent so long embracing the ‘clean girl’ aesthetic and the quiet neutrals, but darling, your spirit is far too vibrant to stay muted forever. There is a shift in the air, a soft yet powerful call to reclaim our space and our joy through the art of maximalism.
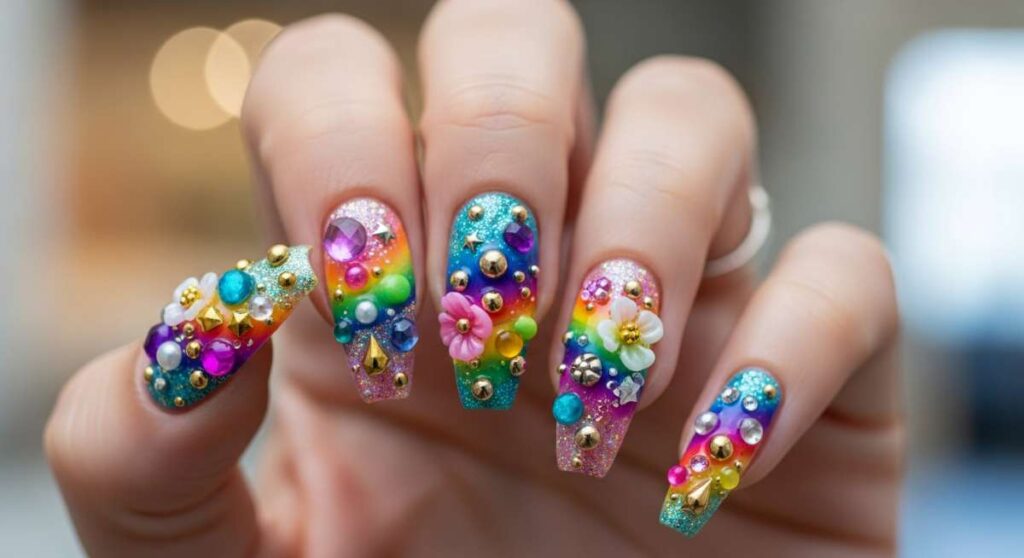
Maximalist nails are more than just a trend; they are a soft embrace of your truest, loudest self. It’s about looking down at your hands and seeing a tiny, glittering gallery of your favorite things. Whether it’s 3D textures that catch the light or a kaleidoscope of colors that tell the story of your week, these nails are a celebration of life in all its messy, beautiful fullness. They are a reminder that you don’t have to be ‘less’ to be ‘chic’—you can be everything, all at once.
So, let’s dive into this world of vibrant 3D art together. I’ve gathered my favorite ways to bring this sparkle into your life, from the intricate blooms of a spring garden to the eclectic joy of ‘junk’ nails. Let this be your permission slip to play, to experiment, and to wear your heart—and your art—on your fingertips.
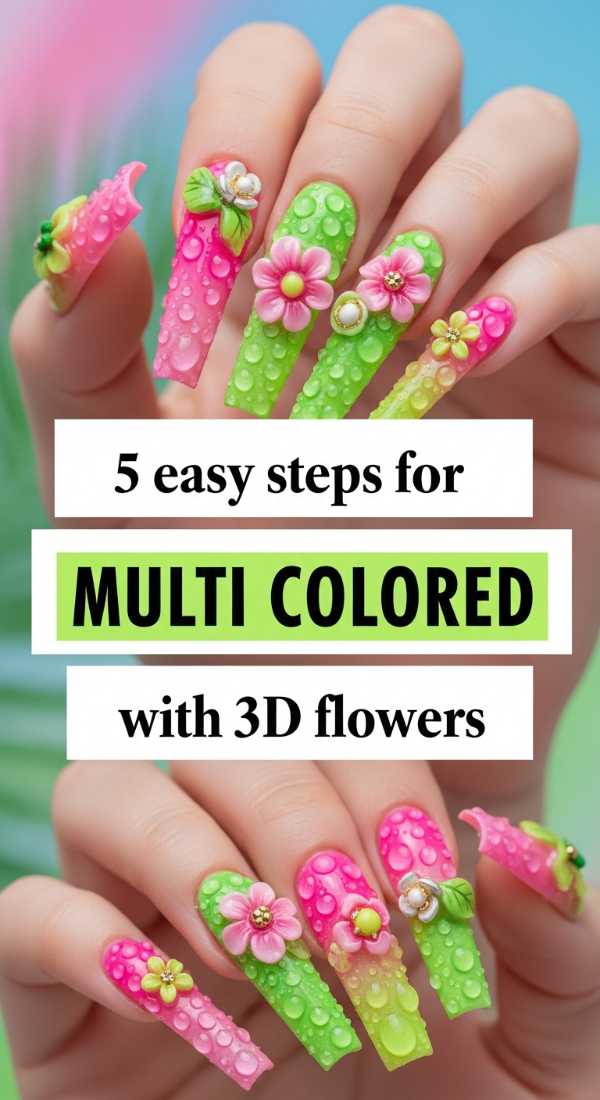
Dancing with Blooms: 5 Easy Steps for Multi-Colored 3D Flower Nails
Why to love this recipe:
There’s something so poetic about wearing a garden on your fingertips, isn’t there? These 3D flowers bring a touch of nature’s whimsy to your everyday life, making every gesture feel like a soft bloom. It’s a texture you’ll find yourself touching all day, a little sensory reminder of beauty.
Essential Ingredients:
- A palette of five different pastel gel polishes
- 3D flower charms or acrylic flower mold
- Nail glue or a thick builder gel
- Fine-tip brush for detailing
- Glossy top coat
How to Prepare:
- Apply a different pastel shade to each nail as your base coat and cure.
- Pick out your favorite 3D flower charms or create your own using a small bead of builder gel and a mold.
- Apply a tiny dot of nail glue or builder gel to the center of your nail.
- Press the 3D flower firmly into the glue and hold until set (or cure under UV).
- Finish by applying a glossy top coat around the flowers to seal the base color without losing the 3D texture.
Budget Range
- Beetles Pastel Gel Polish Set – $15.99
- Saviland 3D Flower Charms – $8.50
- Makartt Nail Glue – $6.99
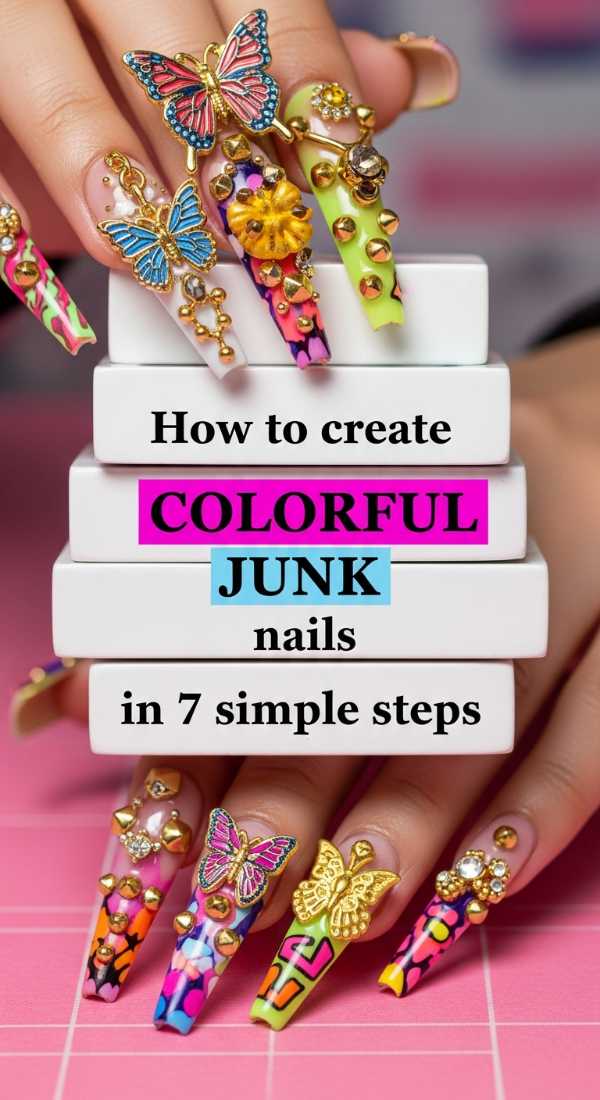
The Eclectic Soul: Creating Colorful Junk Nails in 7 Simple Steps
Why to love this recipe:
Junk nails are my absolute favorite way to tell a story without saying a word. This style is for the brave souls who find beauty in the chaotic, the eclectic, and the wonderfully oversized. It’s a collage of your personality that you get to carry with you everywhere.
Essential Ingredients:
- Assorted nail charms (bows, bears, stars)
- Rhinestones in various sizes
- Strong adhesive gel
- Tweezers
- Colorful base polish
- UV Lamp
- Matte and Glossy top coats for contrast
How to Prepare:
- Paint your base with a vibrant, solid color and cure.
- Lay out your charms on a flat surface to plan the layout of your ‘junk’ collage.
- Apply a generous layer of adhesive gel to the first nail.
- Starting with the largest charm, place it in the center using tweezers.
- Fill in the gaps with smaller rhinestones and tiny gold studs.
- Flash cure for 10 seconds to keep pieces from sliding, then repeat on all fingers.
- Give the entire hand a full 60-second cure to ensure every piece is locked in tight.
Budget Range
- Modelones 100pcs Mixed Charms – $12.99
- NYK1 Nail Bond Glue – $14.00
- AORAEM Rhinestone Kit – $9.95
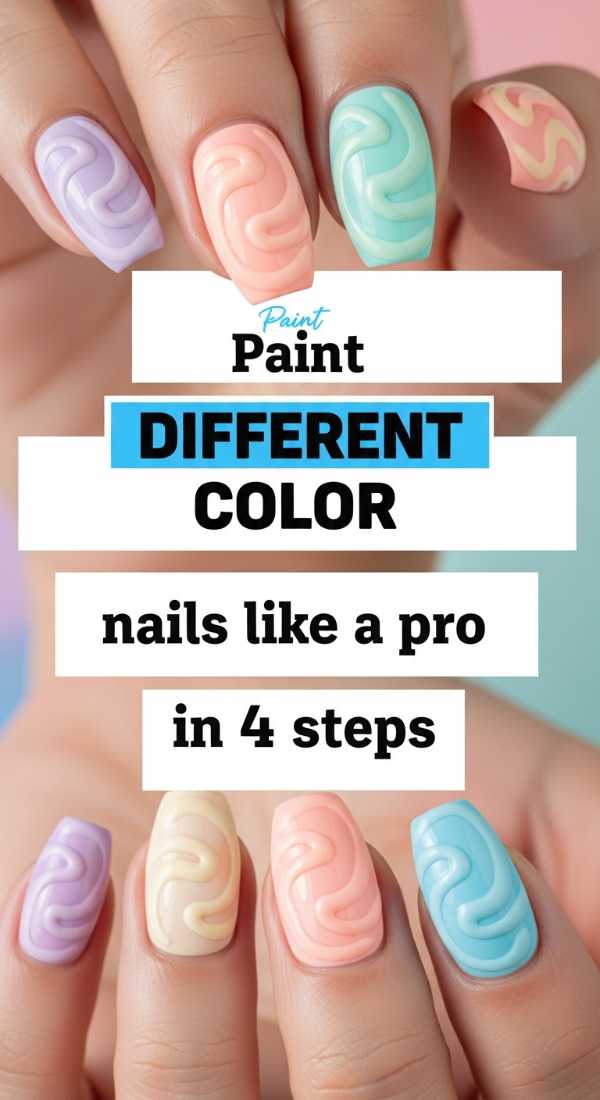
A Rainbow Palette: Painting Different Color Nails Like a Pro in 4 Steps
Why to love this recipe:
Sometimes we just can’t pick one mood, and loves, that is perfectly okay. This method celebrates the beautiful spectrum of your personality, giving each finger its own unique voice and color. It’s simple, effective, and pure joy.
Essential Ingredients:
- 5-10 coordinating bright polishes
- Nail primer
- High-quality top coat
- Cleanup brush and acetone
How to Prepare:
- Prep your nails with a primer to ensure your rainbow lasts as long as your energy does.
- Paint each nail a different, vibrant shade—don’t be afraid to mix warm and cool tones for a truly maximalist feel.
- Use a cleanup brush dipped in acetone to perfect the edges around your cuticles for that ‘pro’ look.
- Seal with a thick, high-shine top coat to make those colors truly sing.
Budget Range
- Zoya Professional Lacquer (Individual colors) – $12.00 each
- Sally Hansen Insta-Dri Top Coat – $5.49
- Pure Acetone Cleanup Kit – $7.50
Sharp and Stunning: Designing Colorful Stiletto Nails with 6 Pro Techniques
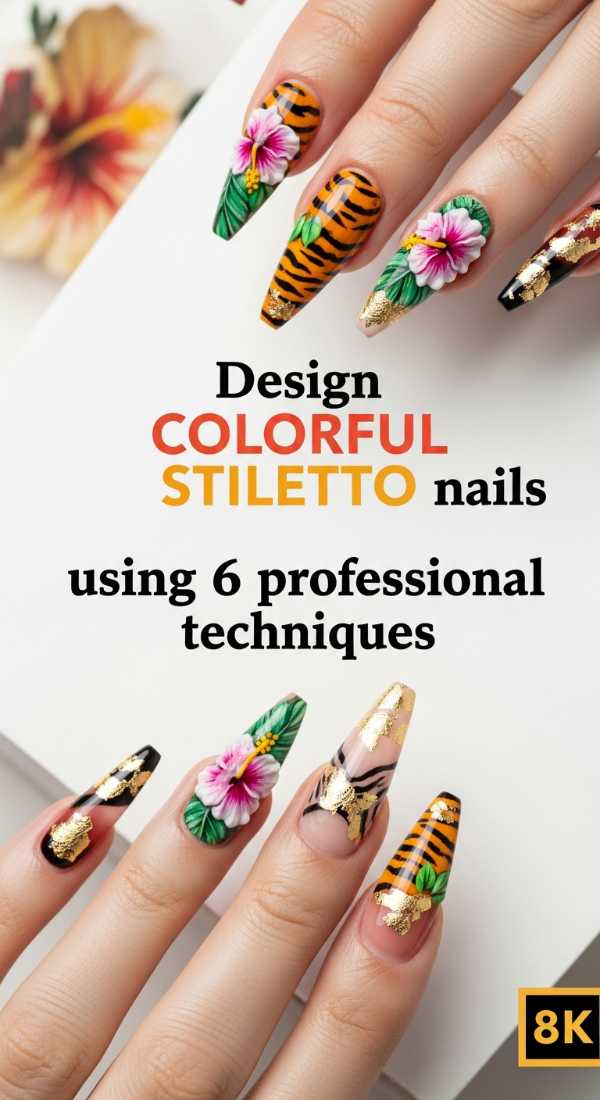
Why to love this recipe:
For those days when you need to feel a little extra sharp and powerful, stiletto nails are your best friend. They elongate the fingers and provide the perfect canvas for those high-fashion, vibrant pigments we adore. It’s elegance with an edge.
Essential Ingredients:
- Stiletto nail tips or forms
- Strong builder gel or polygel
- Neon pigments or gels
- A sharp nail file (100/180 grit)
- Detailing liner brushes
- Chrome powder
How to Prepare:
- Apply and shape your stiletto tips, ensuring the point is centered and symmetrical.
- Build the structure with clear gel to keep the look light and airy.
- Apply your neon base colors, using a liner brush to reach the very tip without flooding.
- Buff the surface and apply a chrome powder to one or two accent nails for a professional flair.
- Use a fine liner to add geometric ‘V’ shapes that accentuate the stiletto point.
- Seal everything with a hard gel top coat for maximum durability and shine.
Budget Range
- Modelones Polygel Kit – $29.99
- Arrtx Neon Gel Set – $18.50
- Born Pretty Chrome Powder – $7.99
Sun-Kissed Fades: Master Two Color Nails with This 3-Step Ombre Guide
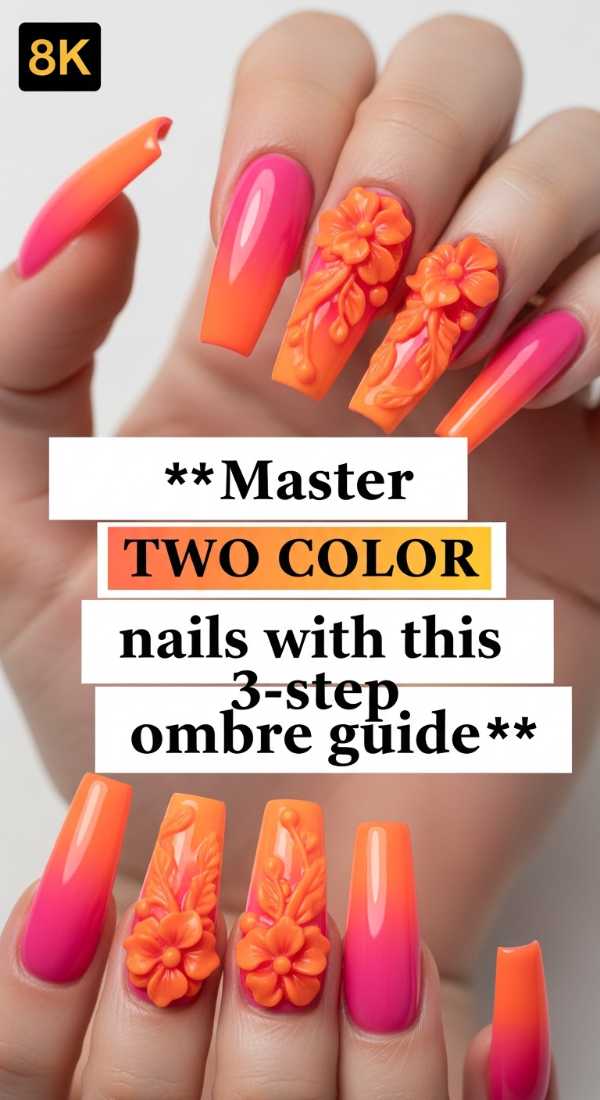
Why to love this recipe:
The way colors melt into each other reminds me of a summer sunset over a calm ocean. It’s a soft, romantic transition that adds depth to your look without feeling too overwhelming for your quiet moments. It’s the soft-girl version of maximalism.
Essential Ingredients:
- Two contrasting bright polishes
- Latex barrier or liquid peel-off tape
- Makeup sponges (wedge shape)
- No-wipe top coat
How to Prepare:
- Apply your lighter base color and let it dry completely (or cure if using gel).
- Apply the two colors side-by-side on a makeup sponge and gently dab onto the nail where they meet.
- Repeat the dabbing process until the blend is seamless, then peel off the barrier and seal with top coat.
Budget Range
- Essie Brights Collection – $9.00 each
- Pueen Liquid Latex Barrier – $8.99
- Bulk Makeup Wedges – $5.00
Your Home Sanctuary: 8 Secrets to Stunning Colourful Acrylic Nails
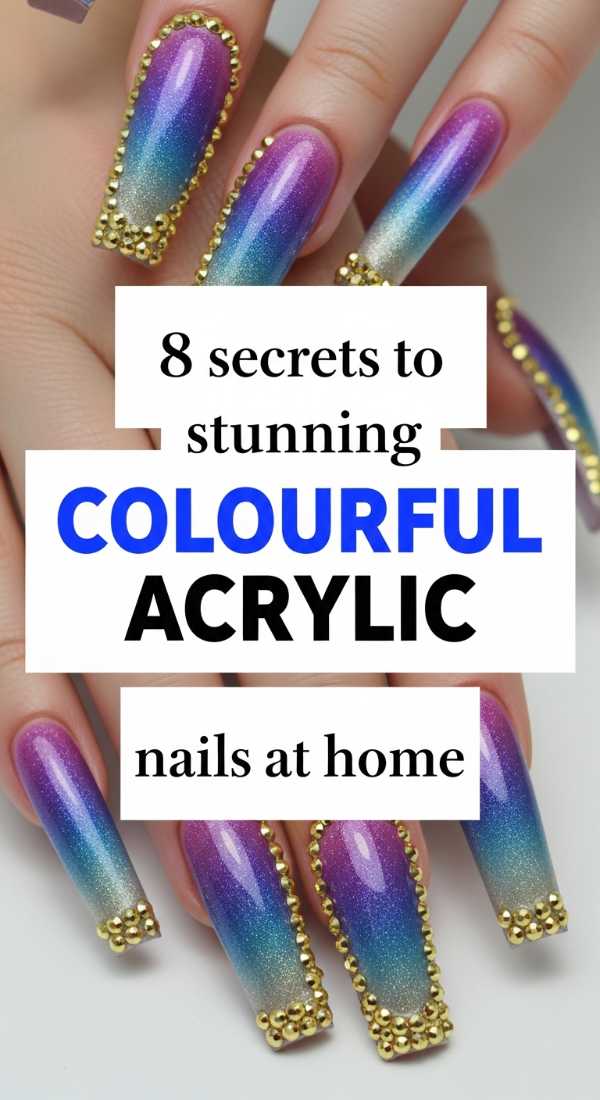
Why to love this recipe:
Creating that salon-perfect look from your own couch is a total soul-treat. These secrets are all about giving yourself that professional finish while enjoying the comfort of your favorite pajamas and a warm cup of tea. It’s DIY luxury at its finest.
Essential Ingredients:
- Acrylic liquid (monomer) and powder
- Vibrant colored acrylic powders
- Kolinsky acrylic brush (size 8 or 10)
- Dappen dish
- Primer and Dehydrator
- Electric nail drill (optional but helpful)
- Cuticle oil
- Patience and love
How to Prepare:
- Secret 1: Always dehydrate the nail bed first to prevent lifting.
- Secret 2: Use a high-quality monomer to ensure the color stays true and doesn’t yellow.
- Secret 3: Work in small beads to control the placement of your colorful powders.
- Secret 4: Keep your brush clean between colors to avoid muddying the vibrant hues.
- Secret 5: Use a ‘pinching’ tool while the acrylic is still slightly warm to create a sleek C-curve.
- Secret 6: File in one direction to prevent heat buildup and ensure a smooth surface.
- Secret 7: Buff with a high-grit buffer until the acrylic looks like glass before adding top coat.
- Secret 8: Finish with a generous amount of cuticle oil to nourish your skin after the process.
Budget Range
- Morphe Acrylic Starter Kit – $35.00
- Mia Secret Colored Acrylic Powder Set – $24.99
- MelodySusie Portable Nail Drill – $20.00
Effortless Magic: Apply Color Street Nails Perfectly with These 5 Tips

Why to love this recipe:
For my busy loves who still want that high-impact shine in a pinch, this is for you. It’s about finding that sweet balance between a hectic schedule and the self-care ritual of a beautiful manicure. It’s magic in a strip!
Essential Ingredients:
- Color Street nail strips in bright patterns
- Alcohol prep pads
- Glass nail file
- Rubber cuticle pusher
- Warm hands (literally!)
How to Prepare:
- Tip 1: Warm the strips between your palms for a minute to make them more pliable and adhesive.
- Tip 2: Thoroughly clean each nail with alcohol pads to remove any natural oils.
- Tip 3: Gently push back your cuticles so the strip sits directly on the nail, not the skin.
- Tip 4: Anchor the strip at the cuticle first, then smooth it down the center and out to the sides.
- Tip 5: Use a glass file in a downward motion to cleanly trim the excess for a perfect edge.
Budget Range
- Color Street Mixed Mani Sets – $13.00 – $15.00
- Mont Bleu Glass Nail File – $9.99
- OPI Cuticle Pusher – $6.50
Island Dreams: 4 Ways to Mix Multicolor Nails for a Tropical Look
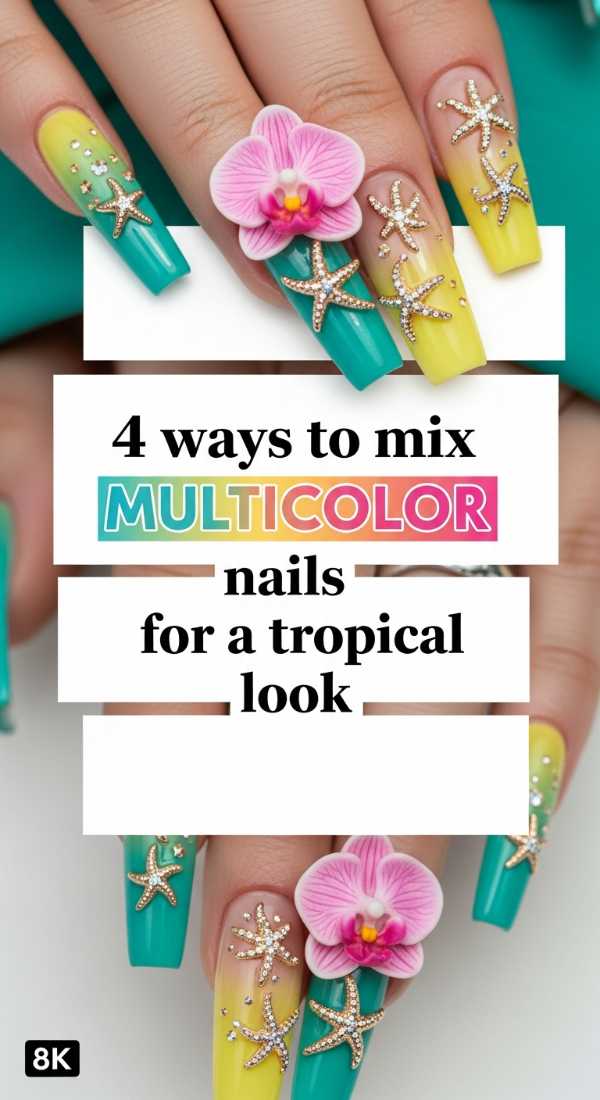
Why to love this recipe:
Close your eyes and feel the warm sand beneath your toes and the salty breeze in your hair. These tropical mixes are like a tiny vacation you can take with you everywhere, even on a rainy Tuesday. It’s pure sunshine bottled up.
Essential Ingredients:
- Turquoise, coral, and canary yellow polishes
- Fine gold leaf or flakes
- Small palm tree decals
- White gel for ‘sea foam’ effects
How to Prepare:
- Paint three nails in solid tropical colors (pink, orange, blue).
- On the fourth nail, create a ‘beach’ effect by layering yellow at the base and turquoise at the tip, blending with white foam.
- Apply gold leaf flakes sparingly to mimic the sun reflecting off the water.
- Seal with a high-gloss top coat to give that ‘wet’ vacation look.
Budget Range
- Holo Taco Tropical Bundle – $50.00
- Nail Art Gold Leaf Set – $6.99
- Tropical Decal Sheet – $4.50
Glowing Bright: Get Vibrant Color Nails by Following these 6 Easy Methods
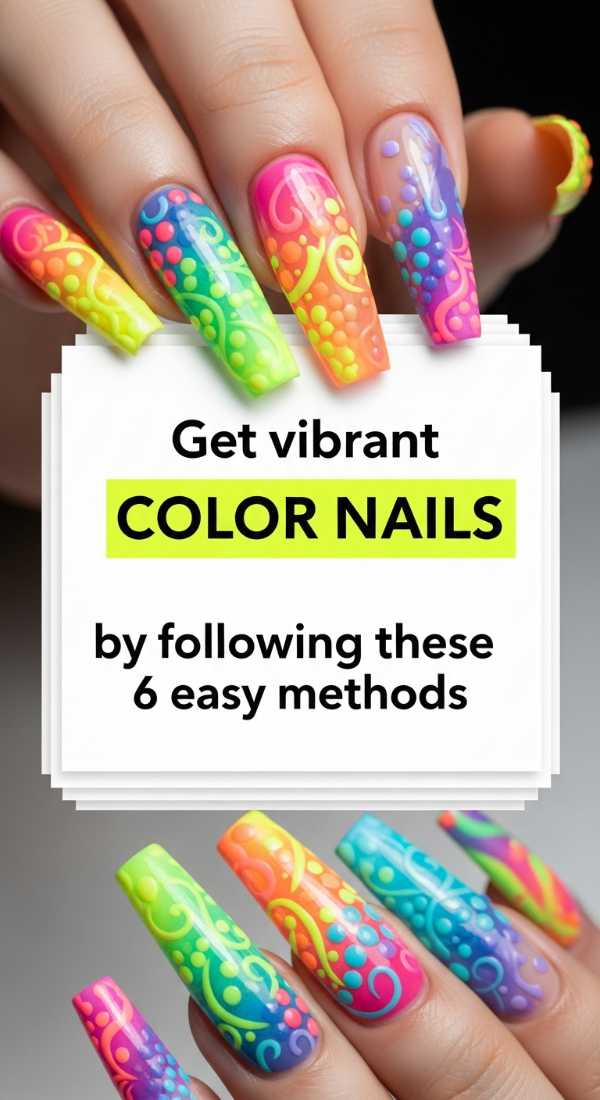
Why to love this recipe:
Let’s make sure those colors truly pop and sing as loud as your beautiful heart. These methods are designed to ensure your manicure stays as vibrant and energetic as your spirit, day after day. No more dull colors here, darlings!
Essential Ingredients:
- White base polish (the secret weapon!)
- High-pigment neon gels
- UV-protective top coat
- Matte base for better pigment grip
- Buffing block
- Alcohol wipes
How to Prepare:
- Always apply a thin coat of solid white polish before your color; it acts like a primer for neons.
- Apply your vibrant color in two thin layers rather than one thick one to prevent bubbles.
- Use a UV-protective top coat to stop your bright colors from fading in the sun.
- Buff the nail surface slightly before your base coat to help the pigment adhere better.
- Cleanse the nail with alcohol after curing to remove the inhibition layer and reveal the true shine.
- Layer a jelly polish over a solid neon for a deep, ‘glow from within’ dimension.
Budget Range
- OPI Alpine Snow (White Base) – $11.50
- Kiara Sky Neon Gel Collection – $15.00 each
- Seche Vite UV Fast Dry Top Coat – $9.95
Embrace Your Inner Glow
As we wrap up our little journey into the world of maximalist nails, I want you to remember one thing: there are no rules in self-expression. If it makes you smile when you type on your keyboard, or if it makes you feel a little more like ‘you’ when you’re holding your morning coffee, then it is perfect. Your nails are just another way to tell the world that you are here, you are vibrant, and you are not afraid to shine. Go forth and be loud, be proud, and most importantly, be you. I love you all so much!