

We’ve all been there—the frantic house cleaning, the three-page grocery list, and the overwhelming desire to just cancel the dinner party before it even starts. But lately, there is a new wave of hosting that is taking over my feed, and honestly, it has saved my social life. The ‘Lazy Girl’ food board trend is all about maximalist presentation with minimalist effort, turning simple, nostalgic dishes into a visual feast that encourages everyone to dig in and stay a while.
The secret is in the assembly. Instead of plated meals that keep you stuck in the kitchen while your friends are laughing in the living room, these boards allow you to prep everything ahead of time and present it as one giant, colorful masterpiece. It’s about the joy of sharing a meal without the performative stress of traditional entertaining. Whether it’s a cozy movie night or a sunny backyard hang, these boards are the ultimate way to feed a crowd while keeping your cool.
How to make cheesy Rotel dip?

Why we love this
There is something profoundly nostalgic and comforting about the scent of melting cheese and spiced meat wafting through the house. This dip is a texture lover’s dream, combining the velvety smoothness of processed cheese with the chunky, zesty bite of diced tomatoes and green chilies. It’s warm, gooey, and carries just enough heat to keep you coming back for ‘one last’ scoop with a salty, crunchy tortilla chip. It’s the ultimate centerpiece for any casual board because it stays delicious even as it cools slightly, creating a communal dipping experience that feels like a warm hug.
Ingredients
- 1 lb ground beef or breakfast sausage
- 1 block (32 oz) Velveeta cheese, cubed
- 2 cans (10 oz) Rotel Original Diced Tomatoes and Green Chilies
- 1/2 cup whole milk (optional, for thinning)
- 1 tsp garlic powder
- 1/2 tsp cumin
- Fresh cilantro for garnish
How to make it
- Begin by browning your ground beef or sausage in a large skillet over medium-high heat. Use a wooden spoon to break the meat into very small crumbles, ensuring even cooking. Cook until no pink remains and the meat has developed a slight golden-brown crust for extra flavor.
- Drain the excess grease thoroughly from the skillet. If using a slow cooker, transfer the meat now; otherwise, reduce the skillet heat to low.
- Add the cubed Velveeta to the meat. Cubing the cheese is essential as it ensures even melting without burning the bottom of the pan. Pour in both cans of Rotel, including the liquid, which provides the necessary acidity and spice.
- Stir continuously if using a skillet, or set your slow cooker to ‘Low.’ As the cheese begins to liquefy, add the garlic powder and cumin. If the dip feels too thick, whisk in the milk a tablespoon at a time until you reach a silky, pourable consistency.
- Once the dip is completely smooth and bubbly, transfer it to a serving bowl or keep it in the slow cooker on the ‘Warm’ setting. Top with fresh cilantro and serve immediately with sturdy corn chips.
How to make fresh summer salad?

Why we love this
This salad is like capturing a sun-drenched afternoon in a bowl. It’s a vibrant explosion of colors—ruby red strawberries, deep green spinach, and ivory crumbles of goat cheese—that looks stunning on a large wooden board. The aroma is purely herbal and sweet, with the scent of fresh basil and balsamic glaze cutting through the summer heat. Each bite offers a satisfying contrast between the crisp, cold greens and the creamy, tangy cheese, finished with the crunch of toasted pecans that provides a grounded, earthy undertone to the bright fruit.
Ingredients
- 5 oz fresh baby spinach or arugula
- 2 cups sliced strawberries
- 1/2 cup blueberries
- 1/4 cup red onion, thinly shaved
- 4 oz goat cheese or feta, crumbled
- 1/2 cup candied pecans
- Balsamic glaze for drizzling
How to make it
- Start by washing your greens in ice-cold water and drying them completely using a salad spinner. Damp greens will prevent the dressing from adhering and lead to a soggy salad, so this step is crucial for texture.
- Prepare your fruit by hulling the strawberries and slicing them into uniform 1/4-inch pieces. This ensures every forkful has a bit of sweetness. Soak the sliced red onions in cold water for 5 minutes to remove their harsh ‘bite,’ then pat dry.
- Spread the greens across a wide, shallow platter rather than a deep bowl. This ‘board style’ presentation ensures that the toppings don’t all sink to the bottom.
- Layer the strawberries, blueberries, and red onions evenly over the bed of greens. Use your fingers to crumble the goat cheese directly over the top to keep the pieces light and fluffy.
- Just before serving, sprinkle the candied pecans over the top. Drizzle the balsamic glaze in a zig-zag pattern across the entire board, ensuring a beautiful, professional finish that coats the ingredients without drowning them.
How to make chicken caesar wraps?

Why we love this
There is a reason the chicken caesar wrap has gone viral—it is the perfect handheld meal that feels indulgent yet light. The aroma of garlic-parmesan dressing and savory grilled chicken is instantly appetizing. Inside the soft, flour tortilla, you get the satisfying snap of chilled romaine lettuce paired with the tender, juicy warmth of the chicken. It’s a textural masterpiece where the creamy dressing acts as the glue, making every bite a harmonious blend of salty, savory, and fresh that is easy to eat while mingling.
Ingredients
- 1 lb cooked rotisserie chicken, shredded
- 2 heads romaine lettuce, chopped small
- 1/2 cup Caesar dressing (high quality)
- 1/2 cup shredded Parmesan cheese
- 1 cup crushed croutons
- 4 large flour tortillas
- Black pepper to taste
How to make it
- Prepare your ‘filling’ in a large mixing bowl first. Combine the shredded chicken, chopped romaine, Parmesan cheese, and crushed croutons. Adding the croutons directly into the mix provides a surprise crunch in every bite.
- Pour the Caesar dressing over the mixture and toss thoroughly until every leaf and piece of chicken is coated. Do not over-dress; the mixture should be moist but not dripping, or the tortillas will break.
- Warm the flour tortillas in the microwave for 15 seconds under a damp paper towel. This makes them pliable and prevents cracking during the rolling process.
- Place a generous mound of the filling in the center of a tortilla. Fold the sides inward first, then roll from the bottom up as tightly as possible, similar to a burrito.
- Place the wrap seam-side down on a cutting board. Use a sharp serrated knife to slice the wrap diagonally. This creates a beautiful presentation when stacked on your food board.
How to make strawberry pie?
Why we love this
A fresh strawberry pie is the ultimate ‘Lazy Girl’ dessert because it relies on the natural beauty of the fruit rather than complex baking techniques. The scent of macerated strawberries is intoxicatingly sweet and floral, filling the room with the essence of early summer. The texture is a delightful mix of a buttery, flaky crust and a glossy, jam-like glaze that holds the whole berries in place. It’s a bright, jewel-toned addition to any board that tastes like pure sunshine and nostalgia, especially when topped with a cloud of cold whipped cream.
Ingredients
- 1 pre-baked 9-inch pie crust
- 6 cups fresh strawberries, hulled
- 1 cup granulated sugar
- 3 tbsp cornstarch
- 1 cup water
- 1 small box (3 oz) strawberry gelatin powder
- Whipped cream for serving
How to make it
- Ensure your pre-baked pie crust is completely cool before starting. Any residual heat will cause the bottom to become soggy once the fruit is added.
- Select half of your strawberries (the prettiest ones) and arrange them pointed-end up inside the pie crust. This creates a professional, ‘bakery-style’ look.
- In a medium saucepan, crush the remaining strawberries with a fork. Add the sugar, cornstarch, and water. Cook over medium heat, stirring constantly, until the mixture reaches a boil and thickens into a translucent, ruby-red syrup.
- Remove the syrup from the heat and immediately stir in the strawberry gelatin powder until completely dissolved. This adds a boost of flavor and helps the pie set firmly.
- Carefully pour the warm glaze over the whole strawberries in the crust, using a spoon to ensure every berry is coated. Refrigerate for at least 4 hours, or until the filling is firm and chilled. Serve with a dollop of fresh whipped cream.
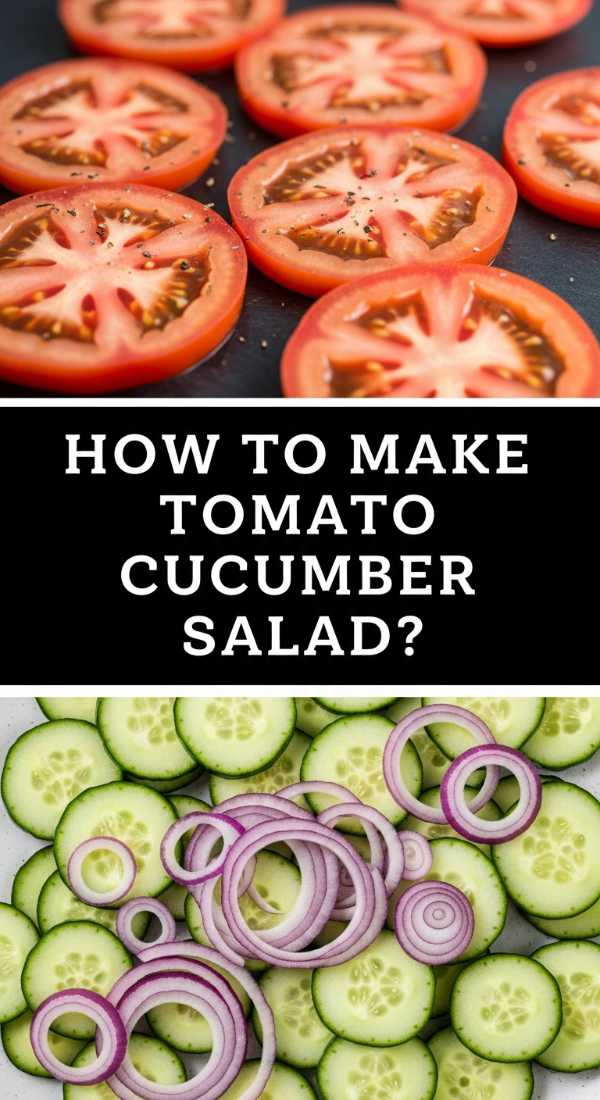
How to make tomato cucumber salad?

Why we love this
This salad is the definition of crisp and refreshing. The scent of vine-ripened tomatoes and freshly sliced cucumbers is clean and cooling, making it the perfect palate cleanser for a heavy food board. The texture is a play between the juicy, soft yielding of the tomatoes and the sharp, watery crunch of the cucumbers. Dressed in a light vinaigrette, it becomes a tangy, bright side dish that looks like a mosaic of garden colors, especially when accented with the purple hues of red onion and the deep green of fresh herbs.
Ingredients
- 3 large Persian cucumbers, sliced
- 1 pint cherry tomatoes, halved
- 1/4 red onion, thinly sliced
- 2 tbsp extra virgin olive oil
- 1 tbsp red wine vinegar
- 1 tsp dried oregano
- Salt and cracked black pepper to taste
How to make it
- Slice your cucumbers into 1/4-inch rounds. If using English or Persian cucumbers, there is no need to peel them; the skin adds a beautiful green border and extra fiber.
- Halve the cherry tomatoes. Using cherry tomatoes instead of large diced tomatoes prevents the salad from becoming too watery, as they hold their juices better.
- In a small glass jar, combine the olive oil, red wine vinegar, oregano, salt, and pepper. Shake vigorously until the oil and vinegar have emulsified into a cloudy dressing.
- Place the cucumbers, tomatoes, and red onions in a shallow bowl. Pour the dressing over the vegetables and toss gently with your hands or large spoons to avoid bruising the tomatoes.
- Let the salad sit for at least 15 minutes at room temperature before serving. This ‘marinating’ time allows the salt to draw out a little juice from the vegetables, creating a delicious natural broth at the bottom of the bowl.
How to make perfect banana bread?

Why we love this
There is nothing quite like the aroma of banana bread baking in the oven—it’s the scent of home, warmth, and caramelized sugar. This recipe yields a loaf with a deep golden-brown exterior and an incredibly moist, dense crumb that practically melts in your mouth. The sweetness is complex, rounded out by the brown sugar and the floral notes of overripe bananas. Sliced and placed on a board, it serves as a wonderful semi-sweet element that pairs beautifully with both coffee and savory cheeses alike.
Ingredients
- 3 very overripe bananas, mashed
- 1/3 cup melted salted butter
- 3/4 cup granulated sugar
- 1 large egg, beaten
- 1 tsp vanilla extract
- 1 tsp baking soda
- 1 1/2 cups all-purpose flour
- Pinch of salt
How to make it
- Preheat your oven to 350°F (175°C) and grease a 4×8 inch loaf pan thoroughly. Using a metal pan will result in a better crust than glass or silicone.
- In a large mixing bowl, mash the ripe bananas with a fork until they are almost liquid with just a few small chunks remaining. This provides the moisture and structure for the bread.
- Stir the melted butter into the mashed bananas. Add the sugar, beaten egg, and vanilla extract. Whisk together until the mixture is pale and well-combined.
- Sprinkle the baking soda and salt over the wet ingredients. Gradually fold in the flour using a spatula. Mix only until the flour streaks disappear; over-mixing will develop too much gluten and result in a tough, rubbery loaf.
- Pour the batter into the prepared pan and bake for 50 to 60 minutes. Test for doneness by inserting a toothpick into the center—it should come out clean or with just a few dry crumbs. Let it cool in the pan for 10 minutes before transferring to a wire rack.
How to make crunchy pound cake?

Why we love this
This isn’t your average grocery store pound cake; this version features a signature ‘crunchy’ top that is absolutely addictive. The aroma is pure butter and vanilla, evocative of a high-end French patisserie. The texture is the real star here—a dense, velvety interior surrounded by a thin, sugar-crisp crust that shatters slightly when you bite into it. It is the perfect base for berries or a drizzle of honey, making it a sophisticated yet simple addition to a dessert-themed food board.
Ingredients
- 1 cup salted butter, softened
- 1 1/2 cups granulated sugar
- 3 large eggs, room temperature
- 1 1/2 cups all-purpose flour
- 1/2 cup heavy cream
- 1 tsp vanilla extract
- Extra sugar for sprinkling
How to make it
- Preheat your oven to 325°F (165°C). The lower temperature is key to developing that thick, crunchy crust without burning the cake.
- Cream the softened butter and granulated sugar together for at least 5 minutes using a stand mixer. The mixture should look almost white and very fluffy; this aeration is what gives a dense cake its lift.
- Add the eggs one at a time, beating well after each addition. Incorporate the vanilla extract.
- Alternate adding the flour and the heavy cream, starting and ending with the flour. Mix on the lowest speed possible just until combined.
- Pour the batter into a greased loaf pan and smooth the top. Sprinkle an additional tablespoon of granulated sugar evenly over the surface. Bake for 60-70 minutes. The sugar on top will caramelize and create that sought-after crunch.
How to make watermelon salad?

Why we love this
Watermelon salad is the ultimate ‘cool’ dish for a summer board, offering a surprising and sophisticated flavor profile. The scent is an incredible mix of sweet melon and spicy, fresh mint. The texture is a revelation—the cold, watery crunch of the watermelon is punctuated by the creamy, salty chunks of feta cheese and the snap of red onion. It’s a dish that hits every taste bud: sweet, salty, sour, and herbal, making it an addictive favorite that disappears within minutes of being served.
Ingredients
- 6 cups seedless watermelon, cubed
- 1/2 cup feta cheese, crumbled
- 1/2 cup red onion, thinly sliced
- 1/4 cup fresh mint leaves, torn
- 2 tbsp lime juice
- 1 tbsp extra virgin olive oil
- Flaky sea salt
How to make it
- Cube the watermelon into uniform 1-inch squares. For the best texture, ensure the watermelon has been chilling in the refrigerator for at least 4 hours before cutting.
- Slice the red onion into paper-thin half-moons. To make them milder, soak them in the lime juice for 10 minutes before assembling the salad; this ‘quick pickles’ them slightly.
- Arrange the watermelon cubes on a large, flat platter. Scatter the red onions and crumbled feta over the top. Using a platter instead of a bowl prevents the watermelon at the bottom from getting crushed.
- Drizzle the olive oil and the remaining lime juice over the salad. This creates a light dressing that enhances the melon’s natural sweetness.
- Just before serving, tear the fresh mint leaves by hand and scatter them over the board. Finish with a generous sprinkle of flaky sea salt to make the flavors pop.
How to make refreshing sun tea?

Why we love this
Sun tea is more than just a drink; it’s a slow-living ritual that results in the smoothest iced tea you’ve ever tasted. Because it steeps slowly at a lower temperature than boiled water, it lacks the bitter tannins often found in traditional tea. The result is a clear, amber liquid with a gentle, toasted aroma that feels incredibly refreshing on a hot day. Served in a large glass dispenser on your food board, it looks beautiful and nostalgic, especially when filled with slices of citrus and sprigs of mint.
Ingredients
- 8 black tea bags (standard size)
- 1 gallon cold filtered water
- 1 lemon, sliced
- 1/2 cup honey or simple syrup (optional)
- Fresh mint for garnish
- Ice cubes
How to make it
- Find a large, clean one-gallon glass jar with a lid. Do not use plastic, as the sun can leach chemicals into the tea and the glass holds heat more consistently.
- Fill the jar with cold filtered water and place the tea bags inside, leaving the strings hanging outside the lid for easy removal.
- Place the jar in a spot that receives direct, punishing sunlight for 3 to 4 hours. Do not exceed 4 hours to prevent bacterial growth. You will see the water slowly transform into a rich, golden amber color.
- Bring the jar inside and remove the tea bags immediately. If you want to sweeten the tea, add your honey or syrup while the tea is still slightly warm from the sun so it dissolves easily.
- Refrigerate the tea until ice-cold. Serve in tall glasses over plenty of ice, garnished with fresh lemon slices and mint.
How to make sourdough discard recipes?
[IMAGE_10]
Why we love this
There is a unique satisfaction in turning what would be ‘waste’ into something incredibly delicious and tangy. Sourdough discard adds a complex, fermented depth of flavor to crackers or flatbreads that you simply can’t get with commercial yeast. The aroma is slightly sour and yeasty, becoming nutty and toasted as it bakes. The texture is usually characterized by a fantastic ‘shatter’ or a chewy, artisanal pull. These elements add a rustic, homemade feel to your food board that always sparks conversation among guests.
Ingredients
- 1 cup sourdough discard (unfed)
- 1/4 cup melted butter or olive oil
- 1 cup all-purpose flour
- 1/2 tsp sea salt
- 1 tbsp dried herbs (rosemary or za’atar)
- Additional salt for topping
How to make it
- In a medium bowl, combine the sourdough discard and melted butter. The fat is what will make the final product crisp rather than hard.
- Add the flour, salt, and herbs. Mix with a spatula until a shaggy dough forms. Use your hands to knead it briefly until it is smooth—about 1 to 2 minutes.
- Divide the dough in half. Place one half on a piece of parchment paper and roll it out as thin as possible (aim for 1/16th of an inch). The thinner you roll it, the crunchier the result will be.
- Brush the surface lightly with water or oil and sprinkle with extra sea salt. Use a pizza cutter to score the dough into squares or diamonds, but don’t worry about separating them yet.
- Bake at 350°F (175°C) for 15-20 minutes, or until the edges are golden brown and the center feels firm. Let them cool completely on the pan to finish crisping up, then snap them along the scored lines.
The Art of the Stress-Free Spread
The beauty of these recipes lies in their versatility. You don’t need a formal dining table or matching china to make your guests feel special. By focusing on high-impact, low-effort dishes like a vibrant watermelon salad or a tray of perfectly rolled chicken wraps, you’re creating an environment where the food is an invitation to relax. The ‘Lazy Girl’ approach isn’t about being lazy at all—it’s about being smart with your energy so you can actually enjoy the company you’ve invited over. So, grab your biggest wooden board, start prepping, and let the trend take over your next gathering!
Frequently Asked Questions
How do I keep my food board looking fresh for hours?
The trick is to use ‘buffer’ ingredients. Keep your dips in small bowls to prevent them from running into dry items, and always add your fresh herbs and dressings at the very last second. For fruit, a quick spritz of lemon juice can help prevent browning.
Can I make these recipes ahead of time?
Absolutely! Most of these recipes, like the Rotel dip, banana bread, and pound cake, actually taste better when made ahead. The salads should be prepped but only dressed right before serving to maintain that viral-worthy crunch.
What is the best board to use for hosting?
I always recommend a large, food-safe wooden butcher block or a marble slab. Wood adds a rustic, warm feel that is perfect for ‘Lazy Girl’ vibes, while marble keeps items like cheese and fruit cooler for longer periods.