
Inside Out: Mastering the Blend of High-End Home and Garden Living
There’s a specific kind of magic that happens when you open your back door and the distinction between ‘home’ and ‘garden’ simply melts away. I remember the first time I truly felt this harmony; it was a quiet Tuesday evening with a glass of crisp white wine in hand, watching the golden hour light dance across my freshly styled patio and into the open-plan living room. It wasn’t just about having a nice yard; it was about creating a sanctuary that felt like a continuous, curated experience of comfort and beauty.
Achieving that high-end lifestyle isn’t about spending a fortune—it’s about intentionality. It’s the way the scent of blooming jasmine drifts into your reading nook, or how a perfectly organized pantry makes your morning coffee ritual feel like a visit to a five-star hotel. Today, we’re diving into the projects that transform a house into a soulful, sophisticated home, blending the rugged beauty of the outdoors with the polished comfort of the indoors.
How to Create Lush Flower Beds for Beautiful Curb Appeal
Why we love this
There is nothing quite like the sensory explosion of a well-designed flower bed greeting you after a long day. The visual feast of deep purples, soft blushes, and vibrant greens creates a living tapestry that feels both expensive and deeply welcoming. As you walk by, the subtle, sweet aroma of gardenias or lavender lingers in the air, while the gentle hum of pollinators adds a layer of natural music to your front yard. It’s the ultimate way to signal that your home is a place of growth, care, and timeless elegance.
Essential Elements:
- High-quality organic compost and topsoil
- A mix of perennials (Hostas, Peonies) and annuals (Petunias, Zinnias)
- Natural cedar mulch for moisture retention and weed control
- Structured edging materials like cobblestone or metal edging
- Gardening gloves and a sharp spade
How to make it
- **Assess Your Sunlight:** Observe your front yard throughout the day. Full sun (6+ hours) requires different plants than partial shade. Visualizing the light path ensures your plants don’t just survive, but thrive.
- **Define Your Border:** Use a garden hose to lay out a fluid, organic shape for your bed. Avoid stiff straight lines; gentle curves feel more high-end and natural. Once satisfied, use a spade to cut a crisp edge along the hose line.
- **Prepare the Foundation:** Remove all grass and weeds from the interior of your shape. Turn the soil to a depth of 12 inches and mix in a 3-inch layer of organic compost to provide the nutrients necessary for lush growth.
- **The Layering Technique:** Place your tallest plants (like ornamental grasses or shrubs) in the back, mid-sized perennials in the middle, and low-growing annuals at the front. This ‘theatrical’ seating ensures every flower is visible.
- **Planting and Mulching:** Dig holes twice the width of the root balls. Tease the roots gently before placing them in the ground. Once planted, apply a 2-3 inch layer of mulch, keeping it away from the plant stems to prevent rot. Water deeply immediately after.
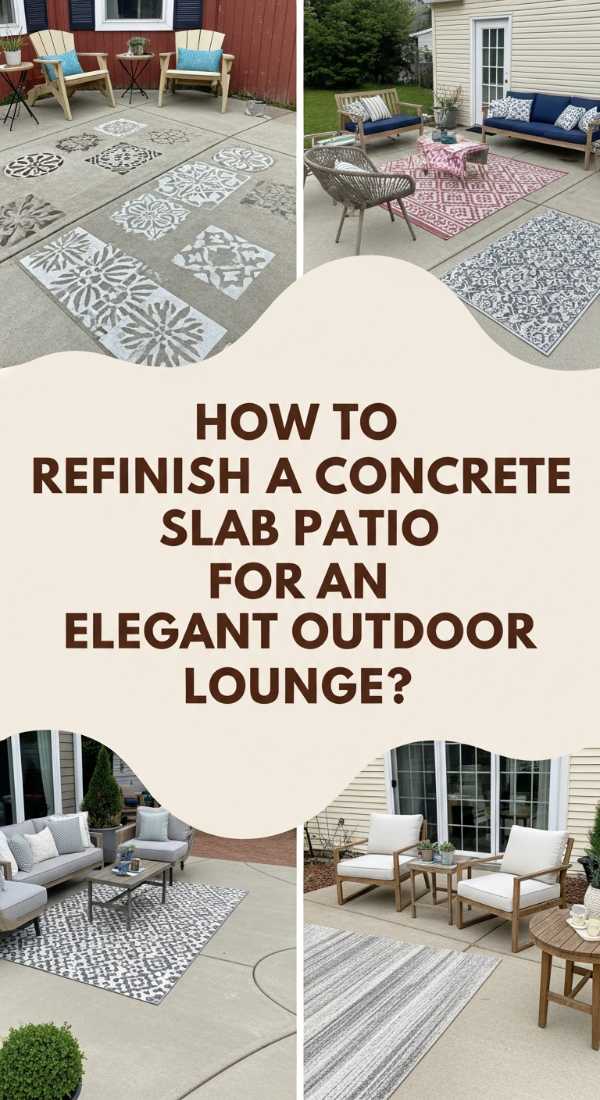
How to Refinish a Concrete Slab Patio for an Elegant Outdoor Lounge

Why we love this
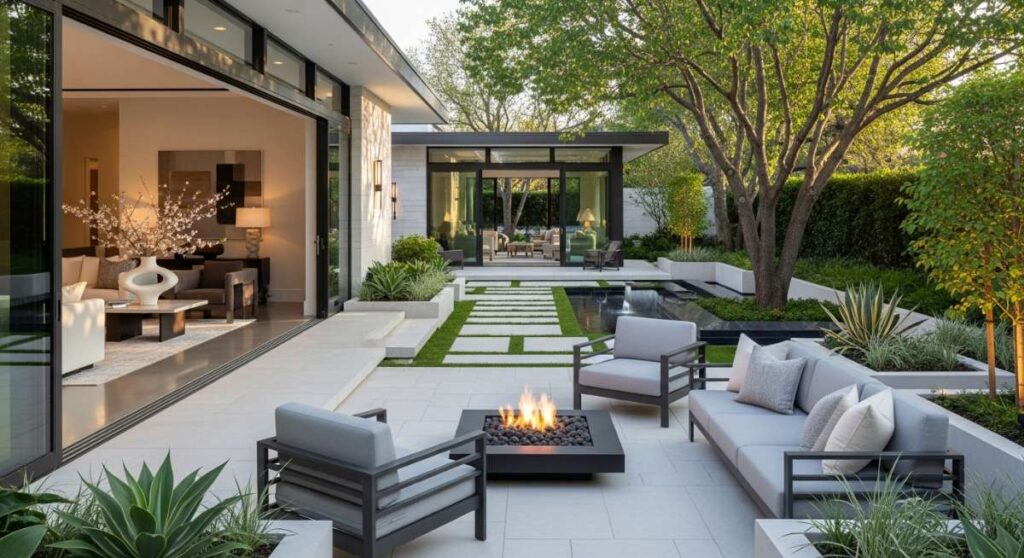
Converting a cold, grey concrete slab into a sophisticated lounge is like adding an extra room to your house without the construction permits. The transformation is tactile; instead of rough, stained concrete underfoot, you get a smooth, satin finish that feels cool and luxurious. When styled with plush outdoor sofas and a low-slung coffee table, this space becomes the heartbeat of your summer evenings, perfect for intimate conversations under the stars or a morning yoga session in the fresh air.
Essential Elements:
- Pressure washer and heavy-duty degreaser
- Concrete patch filler for cracks
- High-quality concrete stain or epoxy paint
- Sealant with a non-slip additive
- Long-handle paint rollers and brushes
How to make it
- **Deep Clean is Key:** Use a pressure washer to remove every ounce of dirt, moss, and loose debris. Apply a degreaser to any oil stains and scrub vigorously with a stiff brush. The finish will only be as good as the surface it adheres to.
- **Repair Imperfections:** Use a concrete filler to fill in any cracks or pits. Level the filler with a putty knife and allow it to cure completely according to the manufacturer’s instructions. Sand these areas smooth once dry.
- **Etching the Surface:** If the concrete is very smooth, apply a muriatic acid solution (following all safety protocols) to ‘open up’ the pores of the concrete. This ensures the stain or paint bonds permanently.
- **Applying the Color:** Start at the furthest corner and work your way back. Use a brush for the edges and a roller for the large surfaces. Apply thin, even coats to avoid pooling. Wait at least 4-6 hours between coats, or as specified on the label.
- **Sealing for Longevity:** Once the color is dry, apply two coats of clear concrete sealer. Mix in a non-slip additive to the final coat to ensure the patio isn’t a hazard when wet. Let it cure for 48 hours before moving furniture back.
How to Style a Noughties Teen Room for the Perfect Nostalgic Vibe
Why we love this
There is a delicious sense of playfulness in the ‘Noughties’ (2000s) aesthetic that modern minimalism often lacks. This style is a vibrant explosion of personality—think fuzzy textures, holographic accents, and a DIY spirit that feels incredibly cozy and lived-in. Stepping into a room styled this way feels like a warm hug from your younger self; it’s a space where you can kick off your shoes, listen to a vintage CD, and surround yourself with the playful, unapologetic energy of youth.
Essential Elements:
- Inflatable furniture or butterfly chairs
- Lava lamps and string fairy lights
- Poster collage kits and magazine cutouts
- Faux fur rugs and beaded curtains
- A dedicated ‘tech’ corner with a retro console or CD player
How to make it
- **Color Palette Selection:** Choose a base of ‘millennial pink’ or baby blue, then accent with bold pops of lime green or hot pink. The key is a balance between pastel sweetness and neon energy.
- **Texture Overload:** Layering is essential. Start with a shag or faux-fur rug on the floor. Add satin throw pillows to the bed and a beaded curtain in the doorway to create that signature 2000s movement and sound.
- **The Iconic Wall Collage:** Don’t use frames. Use washi tape or blue tack to create a floor-to-ceiling collage of posters, Polaroids, and handwritten notes. It should look curated but effortlessly messy.
- **Lighting for Mood:** Ditch the overhead light. Combine a lava lamp on the nightstand with multicolored fairy lights draped along the ceiling perimeter to create a soft, glowing atmosphere.
- **Nostalgic Details:** Incorporate small ‘Easter eggs’ like a clear landline phone, a disco ball, or a CD rack. These items serve as conversation starters and complete the time-capsule feeling.
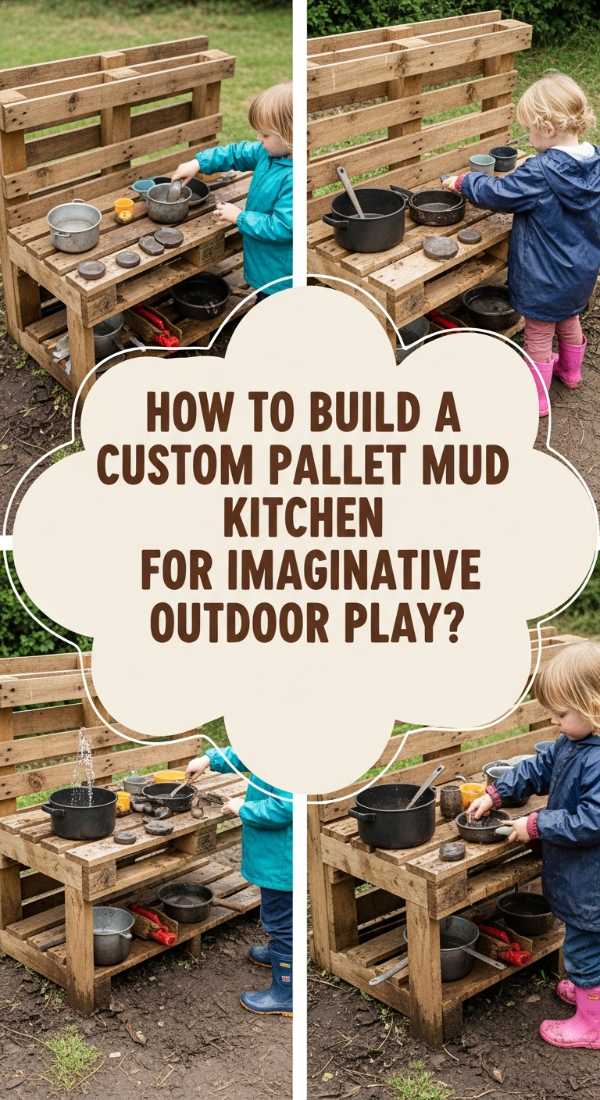
How to Build a Custom Pallet Mud Kitchen for Imaginative Outdoor Play
Why we love this
A mud kitchen is where the elegance of a home meets the wild, imaginative heart of childhood. We love it because it’s a tactile, messy, and wonderful escape that keeps children engaged with nature for hours. There’s something deeply satisfying about the sound of wooden spoons clacking against metal bowls and the earthy, rich scent of damp soil being ‘cooked’ into imaginary pies. It’s a beautiful, rustic addition to any garden that encourages ‘slow play’ and creates lasting family memories.
Essential Elements:
- Two heat-treated (HT) wooden pallets
- A stainless steel bowl (for the sink)
- Outdoor-rated wood screws and a drill
- Hand-me-down kitchen utensils and pots
- Outdoor wood stain or sealant
How to make it
- **Source Safe Wood:** Ensure your pallets are stamped with ‘HT’ (Heat Treated) and not ‘MB’ (Methyl Bromide). This ensures the wood is safe for children to touch and play with.
- **The Framework:** Use one pallet as the vertical backboard and the other for the horizontal workspace. You will need to disassemble part of the second pallet to create legs and support beams. Aim for a counter height of about 20-24 inches for toddlers.
- **The Sink Cutout:** Trace the circumference of your stainless steel bowl onto the top pallet surface. Use a jigsaw to cut the hole slightly smaller than the lip of the bowl so it sits flush but won’t fall through.
- **Sanding and Safety:** Sand every square inch of the wood with 80-grit then 120-grit sandpaper. Focus especially on the corners and edges to prevent splinters. Apply a child-safe outdoor stain to protect the wood from the elements.
- **Accessorize:** Screw small hooks into the backboard for hanging spoons and ladles. Use old stove knobs or paint circles on the wood to represent burners. Fill a nearby bucket with water and a tub with clean dirt to start the fun.
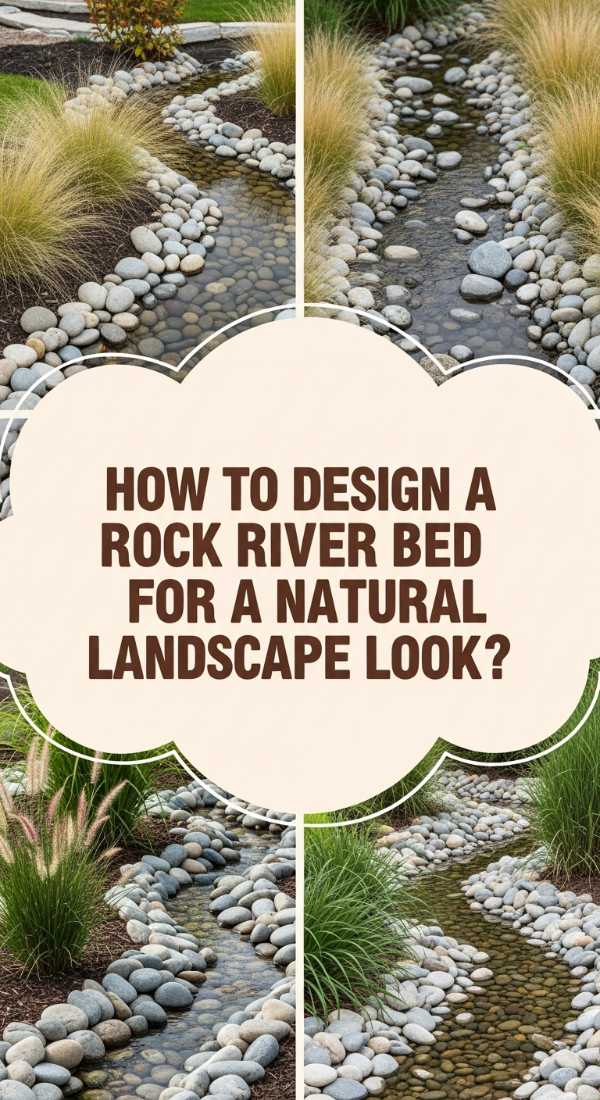
How to Design a Rock River Bed for a Natural Landscape Look

Why we love this
A rock river bed brings a sense of serene, flowing energy to a garden, even without the presence of actual water. It provides a visual anchor that mimics the rugged beauty of a mountain stream, offering a peaceful, Zen-like quality to your landscape. We love the way the different sizes of smooth river stones catch the light after a rainstorm, and the practical benefit of managing drainage in a way that looks like high-end art rather than a utility project.
Essential Elements:
- Landscape fabric (heavy-duty)
- River rocks (mixed sizes: 1-inch to 6-inch)
- Larger anchor boulders (1-2 feet wide)
- Landscape pins and a shovel
- Optional: Low-maintenance ornamental grasses (like Blue Fescue)
How to make it
- **Map the Flow:** Use a garden hose or spray paint to mark a winding, natural path. A ‘river’ should never be straight; it should meander around existing trees or features to look authentic.
- **Excavation:** Dig out the path to a depth of about 6-8 inches. Create a slight ‘V’ shape in the center to help channel water. Tamp the soil down firmly to create a solid base.
- **Lining the Bed:** Lay down heavy-duty landscape fabric to prevent weeds from growing through your stones. Secure the fabric with landscape pins every 2 feet. This step is crucial for keeping the river looking ‘clean’ over time.
- **Placement of Boulders:** Place your largest boulders first at ‘bends’ in the river or in small clusters. These act as the visual anchors. Bury them slightly so they look like they’ve been there for centuries rather than just sitting on top.
- **Filling with River Rock:** Fill the remaining space with a mix of medium and small river stones. Vary the sizes to mimic how a real river deposits silt and rocks. Tuck ornamental grasses along the edges to soften the transition to the rest of the garden.
How to Install a Planter Privacy Wall for a Peaceful Backyard Sanctuary
Why we love this
There is nothing quite as restorative as a ‘green’ wall that shields you from the outside world. This isn’t just a fence; it’s a living, breathing barrier that offers privacy while surrounding you with the refreshing scent of cedar and the lush texture of foliage. It creates an intimate ‘room’ outdoors where you can enjoy your morning coffee in your robe, feeling completely secluded and at peace within your own private sanctuary.
Essential Elements:
- Large rectangular cedar planters
- Tall, vertical plants (like Horsetail Reed or Bamboo)
- Trellis panels or horizontal cedar slats
- Potting soil with good drainage
- Wood screws and a power drill
How to make it
- **Plan the Alignment:** Measure the area where you want the most privacy. Place your planters side-by-side to ensure they form a continuous line without gaps. Ensure the ground is level so the wall doesn’t lean.
- **Build or Attach the Vertical Element:** If using pre-made trellis panels, screw them securely into the back of the cedar planters. For a modern look, build a frame using 2x4s and attach horizontal cedar slats spaced 1 inch apart.
- **Soil Preparation:** Fill the bottom third of the planters with lightweight filler (like empty plastic bottles or crushed cans) to reduce weight and cost, then fill the rest with premium potting soil mixed with slow-release fertilizer.
- **Strategic Planting:** Choose plants that grow tall and dense. Bamboo is excellent for height, while Star Jasmine can be trained up the trellis for a floral scent. Space them closely to ensure the ‘wall’ is opaque.
- **Finishing Touches:** Install small solar-powered uplights at the base of the plants. At night, this creates a dramatic, high-end glow that highlights the textures of the leaves and the wood.
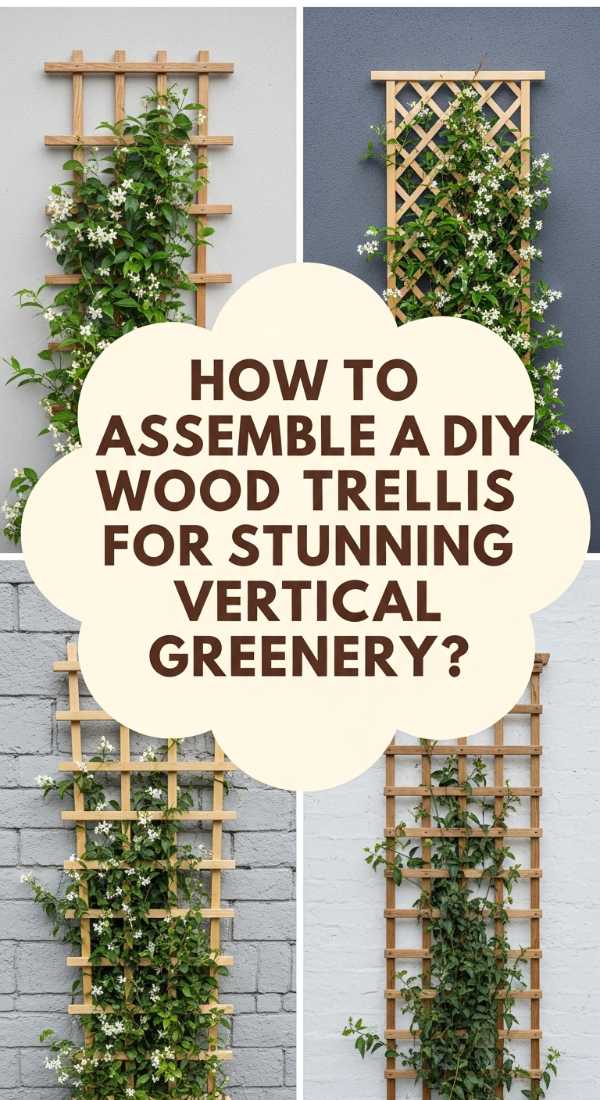
How to Assemble a DIY Wood Trellis for Stunning Vertical Greenery

Why we love this
A wood trellis is the secret weapon of the sophisticated gardener. It draws the eye upward, adding architectural height and a sense of grandeur to even the smallest spaces. We love the romantic, old-world feel of climbing roses or wisteria winding their way through the cedar slats. It’s a project that rewards you more each year as the plants mature, eventually turning a simple wooden structure into a lush, flowering masterpiece that smells as divine as it looks.
Essential Elements:
- Cedar or pressure-treated 2×2 wood strips
- Outdoor wood glue and galvanized finish nails
- Level and tape measure
- Wood stain or exterior paint
- Climbing plants (Clematis, Honeysuckle)
How to make it
- **Design the Grid:** Decide on your pattern—a classic square grid or a more modern diamond shape. Cut your vertical pieces to the desired height and your horizontal pieces to the desired width.
- **Assembly:** Lay the vertical pieces on a flat surface. Use a spacer block to ensure even gaps between each horizontal slat. Apply a drop of wood glue at each intersection and secure with a finish nail.
- **Square It Up:** Use a framing square to ensure the trellis isn’t lopsided. This is a small step that makes the difference between a DIY project and a professional-looking installation.
- **Finish and Protect:** Sand any rough edges and apply a high-quality exterior stain. Cedar is naturally rot-resistant, but a stain will preserve that beautiful ‘new wood’ color against UV rays.
- **Mounting and Planting:** Mount the trellis 2 inches away from the wall using spacers; this allows air circulation and gives the plants room to wrap around the slats. Plant your climbers at the base and gently tie the first few stems to the wood to get them started.
How to Organize a Realistic Pantry for a Calm Kitchen Routine

Why we love this
An organized pantry is the ultimate luxury for the modern home cook. The visual clarity of seeing your ingredients neatly displayed in glass jars instantly lowers your cortisol levels when you walk into the kitchen. We love the tactile experience of pouring grains from heavy glass canisters and the effortless flow of a kitchen where everything has its place. It’s not just about aesthetics; it’s about reclaiming time and mental energy for the joy of cooking.
Essential Elements:
- Clear glass or BPA-free plastic airtight containers
- Uniform labels (minimalist or handwritten)
- Tiered ‘stadium’ shelving for cans
- Woven baskets for bulky items
- Lazy Susans for oils and vinegars
How to make it
- **The Great Empty:** Take everything out of your pantry. Every. Single. Thing. Wipe down the shelves until they sparkle. This ‘clean slate’ allows you to visualize the space without the clutter.
- **Sort and Edit:** Group items by category (baking, grains, snacks, canned goods). Check expiration dates and toss anything that’s past its prime. Donate unopened items you know you won’t use.
- **Decanting Ritual:** Pour dry goods like flour, pasta, and nuts into your clear containers. This eliminates the ‘visual noise’ of mismatched packaging and keeps your food fresher for longer.
- **Zoning:** Place frequently used items at eye level. Put heavy items or appliances on the floor or bottom shelf. Use the highest shelves for things you only need occasionally, like holiday platters.
- **Labeling:** Apply your labels at the same height on every jar for a clean, uniform look. This makes it easy for everyone in the household to know exactly where things go, maintaining the system long-term.
How to Construct a Floating Deck for an Elevated Garden Experience
Why we love this
A floating deck is the height of backyard chic, offering a modern, low-profile platform that feels grounded yet airy. It provides a dedicated ‘island’ in your garden for lounging or dining, away from the main house. We love the rich, warm tones of the wood against the green of the lawn, and the way it makes the entire outdoor space feel more intentional and high-end. It’s the perfect spot for a summer dinner party, where the wood feels warm under bare feet and the world feels far away.
Essential Elements:
- Pressure-treated 2x6s for the frame
- Decking boards (Cedar or Composite)
- Concrete deck blocks
- Hidden deck fasteners or deck screws
- Level and circular saw
How to make it
- **Site Preparation:** Clear the area and lay down landscape fabric and gravel to prevent weeds and provide drainage. This ensures the wood doesn’t sit in moisture.
- **Layout and Blocks:** Position your concrete deck blocks in a grid, typically 4 feet apart. Use a long level to ensure every block is perfectly level with its neighbors. This is the most critical step for a stable deck.
- **The Frame:** Lay your 2×6 pressure-treated joists into the slots of the deck blocks. Fasten them together to create a rigid outer frame and then add internal joists every 16 inches on center for support.
- **Decking Boards:** Lay your top boards across the joists. Use spacers to maintain a consistent 1/8-inch gap for drainage. If using hidden fasteners, the result will be a clean, screw-free surface that looks incredibly sleek.
- **Sealing the Deal:** If using natural wood, wait a few weeks for the wood to ‘dry out’ before applying a high-quality UV-protective stain. This enhances the grain and protects your investment for years to come.
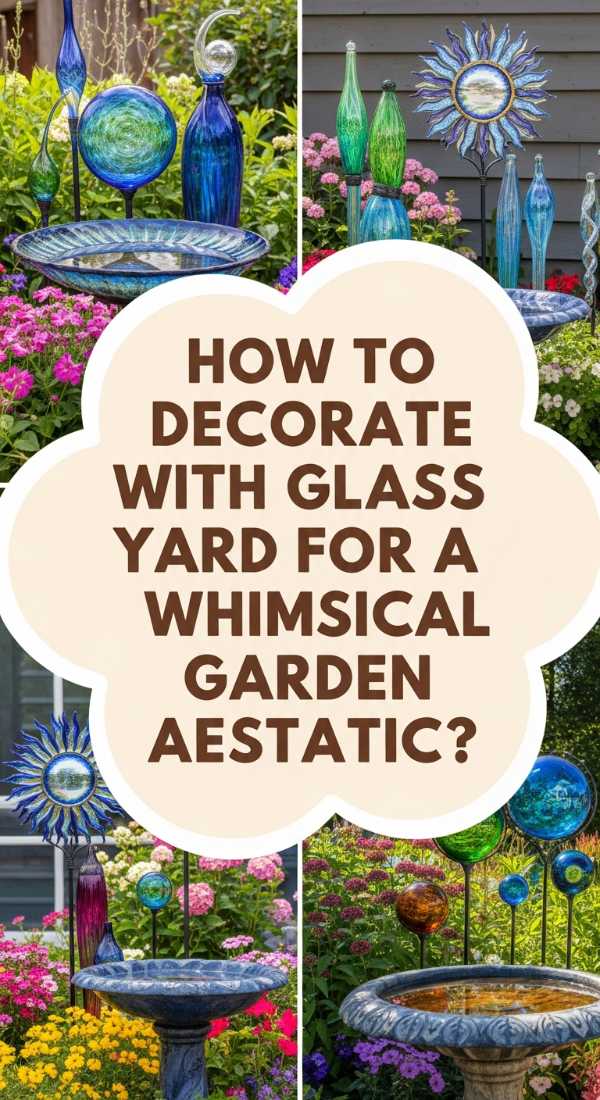
How to Decorate with Glass Yard Art for a Whimsical Garden Aesthetic
[IMAGE_10]
Why we love this
Glass yard art adds a touch of ethereal wonder to a garden that plants alone cannot provide. These pieces act as ‘light catchers,’ turning sunbeams into dancing colors across your lawn and foliage. We love the way a hand-blown glass orb or a delicate glass flower adds a pop of unexpected jewel tones—cobalt, emerald, and amber—that stay vibrant even in the depths of winter. It’s a whimsical, artistic touch that makes your garden feel like a curated outdoor gallery.
Essential Elements:
- Hand-blown glass garden stakes or globes
- Sturdy metal support rods
- Strategic placement near light sources
- Soft cloth for occasional cleaning
- A mix of heights and colors
How to make it
- **Choose Your Focal Points:** Walk through your garden and look for ‘quiet’ spots—areas with dense green foliage or shaded corners that need a bit of life. Glass art works best as a surprise element.
- **Height Variation:** Don’t place all your glass pieces at the same level. Use tall stakes for the back of borders and low-lying glass ‘stones’ or globes near the front of paths to create depth and movement.
- **Light Maximization:** Place glass art where it will catch the morning or evening sun. Backlighting glass makes the colors glow with an intensity that is truly magical.
- **Installation Security:** Ensure the metal stakes are pushed deep into the soil (at least 10-12 inches) so they don’t tip over in high winds. For heavier globes, consider a small amount of clear outdoor adhesive to secure them to their stands.
- **Maintenance:** Every few months, wipe the glass down with a mixture of water and vinegar to remove hard water spots and dust. Keeping the glass clear ensures maximum sparkle and light refraction.
Elevating Your Every Day
Mastering the blend of high-end home and garden living isn’t about perfection; it’s about creating spaces that reflect your soul and nourish your spirit. Whether you’re organizing your pantry to reclaim your morning or building a floating deck for sunset dinners, each project is a step toward a more intentional life. Your home is your canvas—don’t be afraid to paint it with the colors of your personality and the textures of the natural world.