

How to Master the Viral Simple Food Board Trend
There is something inherently magical about a gathering where the food is as beautiful as the conversation. We have all seen those viral simple food boards taking over our feeds—the ones overflowing with vibrant colors, textures, and aromas that make you want to reach through the screen. For me, these boards represent more than just a trend; they are a celebration of slow summer afternoons and the effortless joy of sharing a meal with the people you love most. It’s about taking the stress out of hosting and replacing it with a curated, tactile experience that invites everyone to dig in.
Building the perfect board is an art form that anyone can master. It’s not about expensive ingredients or professional plating skills; it’s about the intention behind the arrangement. Whether you are prepping for a quiet patio dinner or a bustling backyard bash, these ideas will help you create a centerpiece that is both stunning and delicious. Let’s dive into the ultimate guide for creating summer boards that will have your guests reaching for their phones to snap a photo before the first bite.
7 Easy Summer Meal Prep Ideas (Step-by-Step Guide)

Why we love this
Summer meal prep is all about preserving the freshness of the season while reclaiming your time. Imagine opening your fridge to find crisp, colorful containers filled with roasted Mediterranean vegetables, fluffy quinoa, and zesty lemon-tahini dressing. The aroma of roasted bell peppers and caramelized red onions fills the air, promising a week of lunches that feel like a vacation on a plate. It’s the perfect way to ensure you’re eating well even when the heat makes you want to avoid the stove entirely.
Ingredients
- 2 cups tri-color quinoa
- 4 cups vegetable broth
- 3 bell peppers (red, yellow, orange), sliced
- 2 large zucchini, sliced into half-moons
- 1 red onion, wedged
- 1 bunch asparagus, trimmed
- Olive oil, salt, and cracked black pepper
- 1 lemon, juiced
- 1/2 cup tahini
How to make it
- Begin by rinsing your quinoa under cold running water for at least 30 seconds to remove any bitterness; this step is crucial for a smooth, nutty flavor.
- In a medium saucepan, combine the quinoa and vegetable broth. Bring to a rapid boil over high heat, then immediately reduce to a low simmer and cover. Let it cook for 15 minutes or until the liquid is fully absorbed and the quinoa appears translucent with a little “tail” visible.
- While the quinoa cooks, preheat your oven to 425°F (218°C). A high temperature is essential for achieving those sweet, charred edges on the vegetables without turning them into mush.
- Toss the sliced peppers, zucchini, onion, and asparagus in a large bowl with three tablespoons of high-quality olive oil, a teaspoon of sea salt, and a generous crack of black pepper.
- Spread the vegetables in a single layer across two large rimmed baking sheets. Ensure they are not crowded; if the pan is too full, the vegetables will steam instead of roast, losing that desirable texture.
- Roast for 20-25 minutes, flipping halfway through. Look for the bell peppers to blister slightly and the onion edges to turn a deep golden brown.
- For the dressing, whisk the tahini and lemon juice in a small bowl until thick, then slowly add warm water one tablespoon at a time until it reaches a drizzling consistency.
- Portion the quinoa and roasted vegetables into airtight containers, drizzle with the dressing just before serving, and enjoy cold or at room temperature.
What is the Best Rotel Dip Recipe?

Why we love this
There is nothing quite like the nostalgic, gooey comfort of a classic Rotel dip. The way the melted cheese wraps around the spicy, diced tomatoes and savory sausage creates a dip that is impossible to stop eating. As the steam rises from the bowl, you get hits of cumin and green chilies that immediately signal a party has started. It’s the ultimate crowd-pleaser that balances creamy richness with a gentle heat, making it the star of any snack board.
Ingredients
- 1 lb ground breakfast sausage or spicy chorizo
- 1 block (32 oz) Velveeta cheese, cubed
- 2 cans (10 oz each) Rotel Original Diced Tomatoes and Green Chilies
- 1/4 cup fresh cilantro, chopped
- Bag of sturdy tortilla chips
How to make it
- Place a large, heavy-bottomed skillet over medium-high heat. Once hot, add the ground sausage. Use a wooden spoon to break the meat into very small, uniform crumbles. This ensures you get a bit of savory protein in every single bite.
- Cook the sausage until it is deeply browned and no pink remains, which usually takes about 8 to 10 minutes. Use a slotted spoon to transfer the meat to a plate lined with paper towels to drain the excess grease; this prevents the dip from becoming oily.
- In a slow cooker or a heavy pot over low heat, add the cubed Velveeta cheese. Cubing the cheese into 1-inch pieces is vital for even melting and preventing scorched spots.
- Pour both cans of Rotel—juice and all—directly over the cheese. The acidity and liquid from the tomatoes help emulsify the cheese into a silky sauce.
- Stir in the cooked sausage crumbles. Maintain low heat and stir every 5-7 minutes. If using a slow cooker, set it to “Low” for about 1-2 hours.
- Watch for a glossy, smooth consistency. Once fully melted and combined, turn the heat to the “Warm” setting to prevent the dip from setting.
- Garnish with fresh cilantro right before serving to add a pop of color and a fresh herbal finish.
5 Tips for Perfect Hummingbird Nectar
Why we love this
While not a dish for us, creating perfect hummingbird nectar is a ritual that brings the beauty of nature right to your window. There is a quiet peace in watching these tiny, iridescent jewels dart and hover over a feeder. The nectar itself is a simple syrup that mimics the flowers they love, providing vital energy. When done right, your garden becomes a sanctuary of movement and color, adding a living element to your outdoor lifestyle.
Ingredients
- 1 cup refined white granulated sugar
- 4 cups filtered water
How to make it
- Combine the water and white granulated sugar in a clean saucepan. It is imperative to use only plain white sugar; never use honey, brown sugar, or artificial sweeteners, as these can be fatal to hummingbirds.
- Place the pan over medium heat and stir constantly. You don’t need to bring the mixture to a rolling boil, but heating it to a gentle simmer (around 180°F or 82°C) ensures the sugar crystals are completely dissolved and any impurities in the water are neutralized.
- Once the liquid is crystal clear, remove it from the heat immediately. Over-boiling can change the sugar-to-water ratio by evaporating too much liquid.
- Allow the nectar to cool completely to room temperature. This is a critical safety step; filling a feeder with hot liquid can warp the plastic or harm the birds’ delicate tongues.
- While the nectar cools, clean your hummingbird feeder thoroughly with hot water and a brush. Do not use dish soap, as the residue can be harmful.
- Fill the feeder and store any leftover nectar in a clean, sealed jar in the refrigerator for up to two week.
- Change the nectar every 2-3 days, or daily in extreme heat, to prevent mold and fermentation, which you can identify if the liquid looks cloudy.
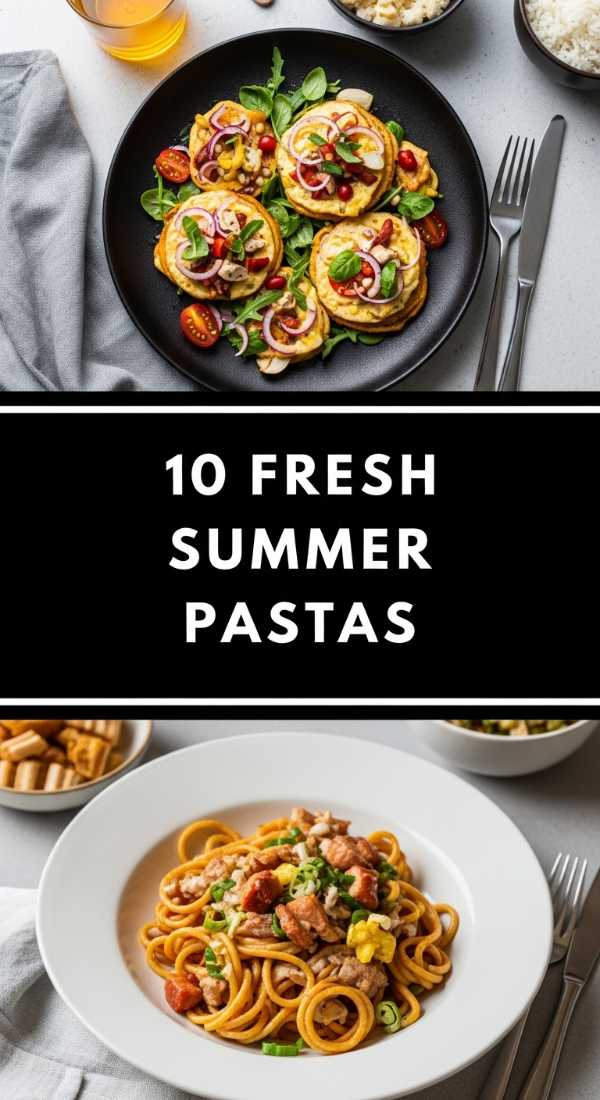
10 Refreshing Summer Pasta Recipes to Try
Why we love this
Summer pasta is the antithesis of heavy winter sauces; it is light, bright, and often served at a cooling room temperature. We love the way a simple olive oil base can highlight the snap of fresh peas, the sweetness of cherry tomatoes, and the punch of torn basil. Each bite feels like a garden harvest, with the silkiness of the pasta acting as a canvas for the season’s best produce. It’s the kind of meal that leaves you feeling satisfied but energized for a sunset walk.
Ingredients
- 1 lb Farfalle or Fusilli pasta
- 1 pint cherry tomatoes, halved
- 8 oz fresh mozzarella pearls
- 1/2 cup basil pesto (homemade or high-quality store-bought)
- 2 tbsp toasted pine nuts
- Fresh basil leaves for garnish
- 1 tbsp balsamic glaze
How to make it
- Bring a large pot of heavily salted water to a boil. Use at least 1 tablespoon of salt per gallon of water; this is your only chance to season the pasta itself.
- Add the pasta and cook according to the package directions for “al dente.” For summer pasta salads, you want a slight bite to the noodle so it doesn’t fall apart when tossed with the dressing.
- Before draining, reserve half a cup of the starchy pasta water. Drain the pasta and immediately rinse it under cold water to stop the cooking process and remove excess starch that makes noodles stick together.
- In a large mixing bowl, combine the cooled pasta with the pesto. If the sauce feels too thick, add a splash of the reserved pasta water to loosen it and help it coat every crevice of the Farfalle.
- Gently fold in the halved cherry tomatoes and the mozzarella pearls. Using pearls ensures every forkful has a bit of creamy cheese.
- Toast the pine nuts in a small dry skillet over low heat for 2-3 minutes until they are fragrant and pale golden. Watch them closely, as they burn in seconds.
- Scatter the toasted nuts and fresh basil over the top. Just before serving, drizzle the balsamic glaze in a zigzag pattern for a sweet, acidic finish that cuts through the rich pesto.
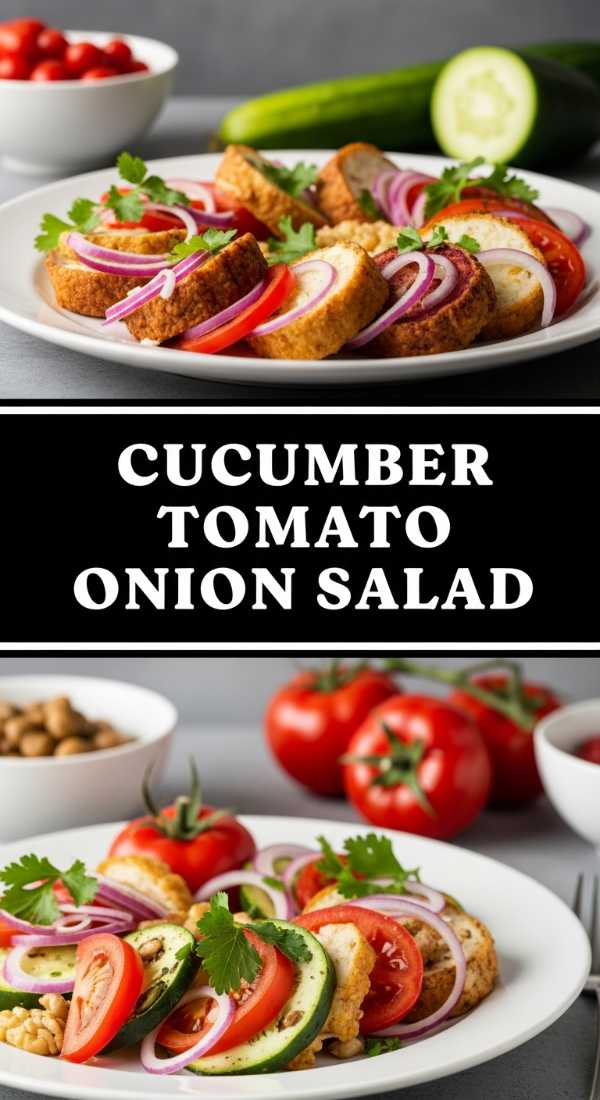
Is This the Best Cucumber Tomato Onion Salad?

Why we love this
This salad is the undisputed king of summer sides. It is the definition of refreshing, with the crunch of chilled cucumbers meeting the juicy explosion of sun-ripened tomatoes. The red onion adds a sharp, crisp bite that is mellowed by a simple vinegar soak. It’s the aroma of fresh dill and the sparkle of sea salt that truly brings it home. It cleanses the palate and pairs perfectly with anything off the grill, making it a staple for any simple food board.
Ingredients
- 2 large English cucumbers, sliced into rounds
- 4 large Roma tomatoes, chopped
- 1/2 red onion, thinly sliced
- 1/4 cup Apple Cider Vinegar
- 2 tbsp extra virgin olive oil
- 1 tbsp fresh dill, chopped
- 1 tsp sugar
- Salt and pepper to taste
How to make it
- Start by slicing your red onion into paper-thin half-moons. Place them in a small bowl with the apple cider vinegar and sugar. Let them macerate for 10 minutes; this “quick pickle” technique removes the harsh raw bite of the onion and turns them a beautiful vibrant pink.
- Wash and slice the English cucumbers. Using English cucumbers is preferred because their skin is thin and the seeds are minimal, providing a superior crunch without the watery center of standard cucumbers.
- Core and chop the tomatoes into chunks that are roughly the same size as the cucumber slices. This ensures a balanced ratio in every spoonful.
- In a large glass bowl, combine the cucumbers and tomatoes. Pour the onions and their vinegar soaking liquid over the vegetables.
- Add the extra virgin olive oil and the fresh dill. Fresh dill is non-negotiable here; dried dill cannot match the bright, feathery aroma that defines this dish.
- Toss everything gently with a large spoon. Season generously with flakey sea salt and cracked black pepper.
- Let the salad sit in the refrigerator for at least 30 minutes before serving. This resting period allows the salt to draw out the juices from the tomatoes, creating a delicious natural “dressing” at the bottom of the bowl.
12 Easy No-Bake Summer Desserts

Why we love this
When the temperature climbs, the last thing you want to do is turn on the oven. No-bake desserts are the ultimate summer hack, relying on the freezer and fridge to create decadent treats like strawberry icebox cakes or lemon cream pies. We love the airy, whipped textures and the way these desserts feel like a cool breeze at the end of a meal. They are often better made a day ahead, making them the perfect stress-free addition to a busy hosting schedule.
Ingredients
- 2 lbs fresh strawberries, sliced
- 2 sleeves of graham crackers
- 16 oz whipped topping or sweetened whipped cream
- 1 tsp vanilla extract
- 1/4 cup dark chocolate shavings
How to make it
- Prepare your strawberries by washing, hulling, and slicing them into thin, even layers. Pat them dry with a paper towel to prevent excess moisture from making the cake soggy.
- In a medium bowl, fold the vanilla extract into the whipped topping to give it a more homemade, floral flavor profile.
- In a 9×13 inch baking dish, spread a very thin layer of whipped topping on the bottom to act as “glue” for your first layer of graham crackers.
- Lay the graham crackers down in a single layer, breaking them as needed to fit the corners of the dish.
- Spread a thick, even layer of whipped topping over the crackers using an offset spatula. Ensure you reach all the way to the edges.
- Arrange a single layer of sliced strawberries over the cream. Repeat these layers—crackers, cream, fruit—until you reach the top of the dish, usually three to four layers deep.
- Finish with a final layer of whipped topping and a decorative arrangement of strawberries. Sprinkle the dark chocolate shavings over the top for a bit of bitter-sweet contrast.
- Cover with plastic wrap and refrigerate for at least 4 hours, though overnight is best. This time is vital because the graham crackers absorb moisture from the cream, transforming into a soft, cake-like texture that you can slice easily.
8 Healthy Summer Dinner Recipes You’ll Love

Why we love this
Healthy summer dinners should never feel like a sacrifice; they should feel like an indulgence in the season’s bounty. We’re talking about flaky grilled salmon, vibrant citrus glazes, and beds of leafy greens that crunch with every bite. The aroma of char on a piece of lean protein combined with the zing of fresh lime or lemon is intoxicating. These meals are designed to fuel your summer adventures without weighing you down, keeping things light, colorful, and incredibly nutrient-dense.
Ingredients
- 4 Salmon fillets (6 oz each)
- 2 tbsp honey
- 1 tbsp soy sauce
- 1 lime, zested and juiced
- 1 tsp grated ginger
- 1 bunch thin asparagus, woody ends removed
- Olive oil
How to make it
- In a small jar, whisk together the honey, soy sauce, lime juice, lime zest, and grated ginger. This marinade provides a perfect balance of sweet, salty, and acidic notes.
- Place the salmon fillets in a shallow dish and pour half of the marinade over them. Let them sit at room temperature for 15-20 minutes. Do not marinate longer, as the acid in the lime will begin to “cook” the fish and alter the texture.
- Preheat your grill to medium-high heat (about 400°F). Clean the grates thoroughly and wipe them with an oil-soaked paper towel to prevent the delicate fish skin from sticking.
- Toss the asparagus with a drizzle of olive oil and a pinch of salt.
- Place the salmon skin-side down on the grill. Close the lid and cook for 6-8 minutes. Do not try to move the fish until the skin has naturally released from the grates.
- Flip the fillets gently using a fish spatula. At the same time, place the asparagus on the grill.
- Cook for another 3-4 minutes. The salmon is done when it reaches an internal temperature of 145°F (63°C) and the asparagus has bright green stalks with slightly charred tips.
- Brush the remaining marinade over the salmon during the last minute of cooking to create a glossy, flavorful lacquer.
Top 10 Crowd-Pleasing Cookout Sides

Why we love this
A cookout is only as good as its sides, and there’s something so comforting about the classics done right. We love the golden glow of grilled corn on the cob slathered in lime butter and the creamy, tangy zip of a well-made slaw. These dishes bring the “simple” to the food board, offering familiar flavors that ground the meal. The smoky smell of charred corn mixing with the scent of fresh herbs creates an atmosphere of pure summer nostalgia that brings everyone back for seconds.
Ingredients
- 6 ears of fresh sweet corn, husks removed
- 1/2 cup salted butter, softened
- 1 lime, zented
- 1/2 tsp smoked paprika
- 1/4 cup Cotija cheese, crumbled
How to make it
- In a small bowl, combine the softened butter, lime zest, and smoked paprika. Mash with a fork until the zest and spice are evenly distributed. This flavored butter is the secret to elevating simple corn.
- Preheat your grill to high. You want direct heat to achieve the signature charred kernels.
- Place the corn directly onto the clean grill grates. Grill for 10-12 minutes, turning every 2-3 minutes.
- Look for the kernels to turn a deep, golden yellow with patches of dark brown char. The corn should be tender when pierced with a knife but still have a firm “pop.”
- Remove the corn from the grill and immediately use a pastry brush to coat each ear generously with the lime-paprika butter. The heat from the corn will melt the butter, allowing it to seep into every crevice.
- Sprinkle the crumbled Cotija cheese over the warm buttered corn. The cheese will soften slightly but maintain its salty, crumbly texture.
- Serve immediately while the butter is still glistening and the aroma of smoked paprika is at its peak.
6 Refreshing Summer Soup Recipes

Why we love this
Chilled summer soups are the hidden gems of the season. A classic Gazpacho, served ice-cold in a glass bowl, is a revelation of garden flavors—cucumber, bell pepper, and tomato blended into a smooth, refreshing elixir. The texture is velvety yet light, and the scent of garlic and sherry vinegar provides a sophisticated edge. It is a cooling, hydrating way to start a meal or act as a vibrant dip for crusty bread on your food board.
Ingredients
- 2 lbs very ripe tomatoes, cored and chopped
- 1 green bell pepper, seeded and chopped
- 1 cucumber, peeled and chopped
- 1 small red onion, chopped
- 2 cloves garlic, minced
- 2 tsp sherry vinegar
- 1/2 cup extra virgin olive oil
- Salt to taste
How to make it
- Place the chopped tomatoes, bell pepper, cucumber, onion, and garlic into a high-speed blender. It is important to use the ripest tomatoes possible; they provide the sweetness and liquid base for the soup.
- Blend on high until the mixture is completely liquefied and smooth. If you prefer a more rustic texture, you can pulse it until chunky, but a traditional Gazpacho is silky.
- With the blender running on low, slowly stream in the extra virgin olive oil. This emulsifies the soup, turning it from a bright red to an opaque, creamy orange-pink and adding a rich mouthfeel.
- Stir in the sherry vinegar and salt. Sherry vinegar is preferred over other vinegars for its complex, nutty undertone that balances the acidity of the tomatoes.
- Pour the soup through a fine-mesh sieve into a large bowl. Use the back of a spoon to press the solids through, discarding the skin and seeds. This ensures a professional, elegant finish.
- Refrigerate the soup for at least 4 hours, or ideally overnight. Temperature is key here—Gazpacho must be served bone-chillingly cold to be truly refreshing.
- Garnish with a drizzle of olive oil and a few finely diced pieces of the leftover vegetables before serving.
9 Best Kabobs on the Grill Today
[IMAGE_10]
Why we love this
Kabobs are the ultimate interactive food, and we love the way they look lined up on a board. There’s something so satisfying about the charred edges of a juicy piece of chicken nestled against a sweet piece of pineapple or a smoky red onion. The aroma of marinades caramelizing over open flames is the quintessential scent of summer. They are easy to grab, easy to eat, and allow you to customize every skewer to your guest’s preferences.
Ingredients
- 1.5 lbs boneless skinless chicken thighs, cut into 1-inch chunks
- 1 red bell pepper, cut into squares
- 1 green bell pepper, cut into squares
- 1 red onion, cut into chunks
- 1 cup pineapple chunks
- 1/2 cup teriyaki sauce
- 2 tbsp honey
- 1 tsp sesame oil
- Wooden or metal skewers
How to make it
- If using wooden skewers, soak them in water for at least 30 minutes. This prevents them from catching fire on the grill.
- In a bowl, whisk together the teriyaki sauce, honey, and sesame oil. Place the chicken chunks in a zip-top bag with half of the sauce. Marinate for at least 1 hour in the refrigerator.
- Prep your vegetables and pineapple. Ensure all pieces are cut to a similar size (about 1 inch) so they cook evenly alongside the chicken.
- Thread the skewers, alternating between chicken, pepper, onion, and pineapple. Don’t pack the pieces too tightly; leaving a tiny bit of space between them allows the heat to circulate and cook the chicken thoroughly.
- Preheat the grill to medium-high. Clean and oil the grates.
- Place the kabobs on the grill. Cook for 12-15 minutes, turning every 3-4 minutes to ensure all sides of the chicken are browned and the vegetables are tender with charred edges.
- Use a meat thermometer to check the chicken; it should reach an internal temperature of 165°F (74°C).
- During the last two minutes of grilling, brush the reserved teriyaki mixture over the kabobs. The sugar in the honey and sauce will bubble and create a sticky, savory glaze.
- Remove from heat and let rest for 5 minutes before serving to allow the juices in the chicken to redistribute.
Conclusion
Mastering the viral simple food board trend isn’t about perfection; it’s about the joy of assembly and the pleasure of eating. By focusing on fresh, seasonal ingredients and simple techniques like roasting, marinating, and chilling, you can create a spread that feels both elevated and effortless. Whether you’re serving a chilled gazpacho or a platter of glazed kabobs, remember that the best boards are the ones shared with good company and a relaxed spirit. Happy hosting!