
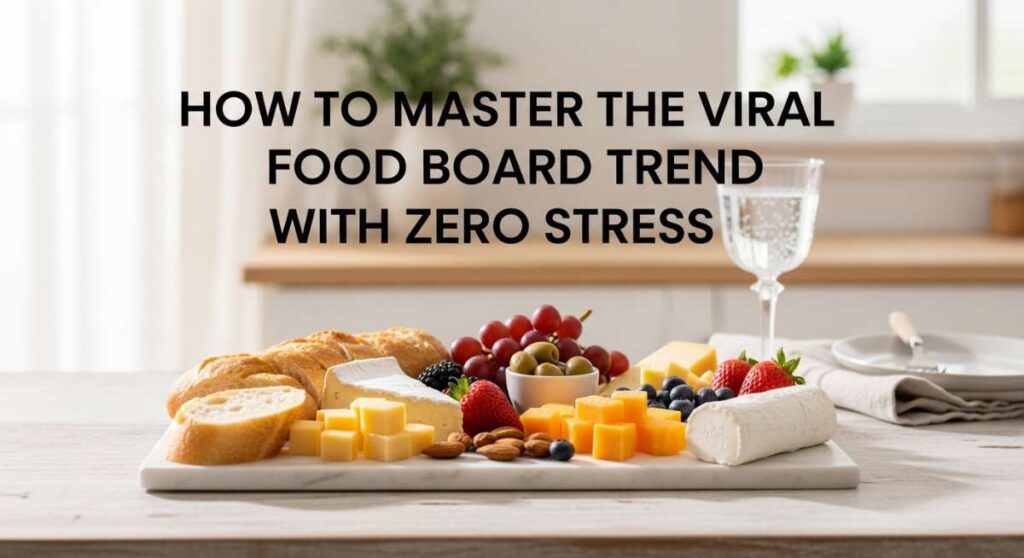
How to Master the Viral Food Board Trend with Zero Stress
We’ve all been there: scrolling through social media, staring at those breathtakingly beautiful food boards that look like they belong in a fine art museum. You want to host that perfect afternoon gathering or surprise your partner with a romantic spread, but the thought of sourcing forty different types of artisanal cheese and spending three hours arranging grapes feels, well, a little overwhelming. I’m here to tell you that the magic of the ‘Viral Simple Food Board’ isn’t about perfection—it’s about the joy of sharing simple, delicious things in a way that makes everyone feel special.
In this guide, I’m stripping away the stress and bringing you back to the heart of the trend. We are going to explore how to turn everyday ingredients into stunning, ‘gram-worthy’ boards that taste even better than they look. Whether you’re heading to the park, the beach, or just your own backyard, these tips will help you master the art of the board without losing your mind in the process. Let’s dive into the delicious world of effortless entertaining!
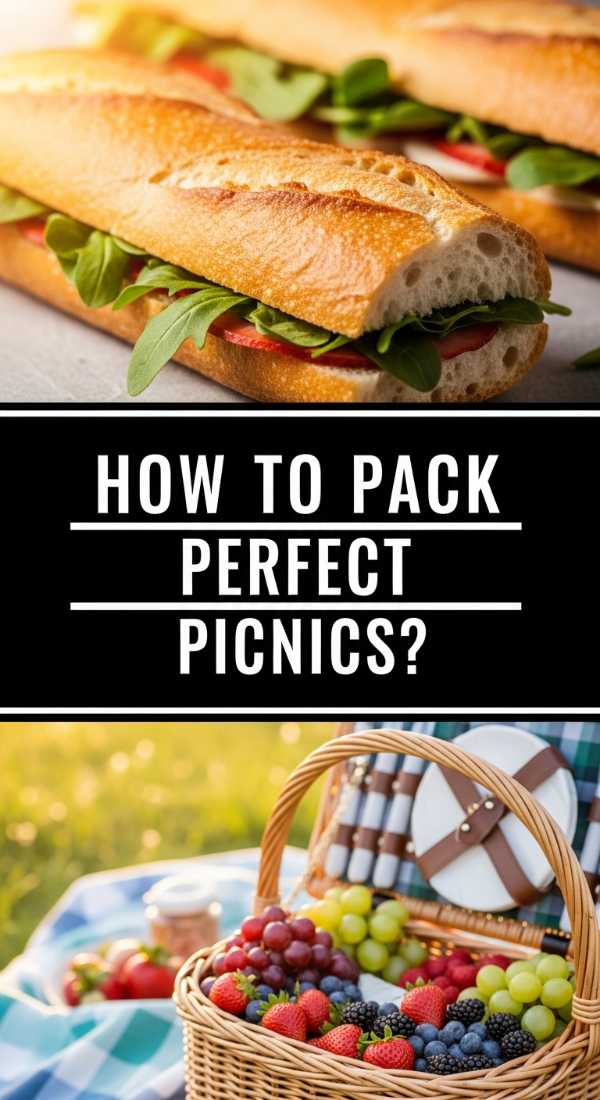
How to pack perfect picnics?
Why we love this
A perfectly packed picnic board is like a gift you give to your future self. There is a specific kind of sensory bliss that comes from opening a cooler to find vibrant, crisp colors and perfectly chilled textures rather than a soggy sandwich. We love the way a well-curated picnic board balances the salty tang of cured meats with the juicy explosion of seasonal berries and the crunch of a sourdough baguette. It transforms a simple patch of grass into a luxury dining room, filling the air with the scent of fresh herbs and the promise of a leisurely, sun-soaked afternoon where time seems to slow down just for you.
Ingredients
- Hard cheeses (Manchego or Aged Cheddar)
- Cured meats (Prosciutto or Salami)
- Fresh grapes and strawberries
- Artisan crackers
- A small jar of honey or fig jam
- Fresh rosemary sprigs for garnish
How to make it
- Select a sturdy, flat-bottomed container or a portable wooden board with a lid to ensure stability during transport.
- Start by placing your ‘anchors’—the small jars of honey or jam—to create focal points on the board.
- Slice your hard cheeses into uniform triangles or cubes; hard cheeses hold up better in outdoor temperatures than soft, creamy varieties.
- Fold your meats into ‘ribbons’ or fans to add height and visual interest, placing them snugly against the cheese slices to keep them from shifting.
- Fill the remaining gaps with clusters of grapes and whole strawberries, ensuring the fruit is bone-dry before packing to prevent the crackers from getting soft.
- Tuck rosemary sprigs into the corners for a professional, aromatic touch that smells heavenly when the lid is finally opened.
How to style aesthetic snacks?

Why we love this
Styling aesthetic snacks is all about the visual rhythm of the board, turning a simple snack into a feast for the eyes before it even hits the palate. We love the way the light catches the glistening surface of a honeycomb or the deep, velvet purple of a mission fig sliced in half. It’s about the tactile satisfaction of a perfectly placed ‘S-curve’ of crackers and the way contrasting colors make the ingredients pop. When a board is styled with intention, it feels like a celebration of the ingredients themselves, inviting guests to slow down and appreciate the textures—from the flaky crust of a cracker to the creamy, matte finish of a goat cheese log.
Ingredients
- Goat cheese log with edible flowers
- Fresh figs or pomegranate seeds
- Marcona almonds
- Multi-colored heirloom carrots
- Thinly sliced radishes
- Dip (Hummus or Beetroot dip)
How to make it
- Place your main dip in a shallow, wide bowl in the center-left of the board to break the symmetry and create a dynamic starting point.
- Create an ‘S-curve’ using your crackers or sliced radishes, snaking them from one corner of the board to the other to guide the viewer’s eye.
- Position the goat cheese log opposite the dip; if using edible flowers, press them gently into the cheese using the back of a spoon for a seamless look.
- Group your ingredients by color (color-blocking) or sprinkle small items like almonds and pomegranate seeds in the ‘valleys’ between larger items to create layers.
- Use a mandoline to slice carrots and radishes into paper-thin rounds; soak them in ice water for 10 minutes to make them curl and look extra fresh before placing.
- Finish with a light drizzle of olive oil over the dip and a pinch of flaky sea salt over the vegetables to give them a professional, appetizing glisten.
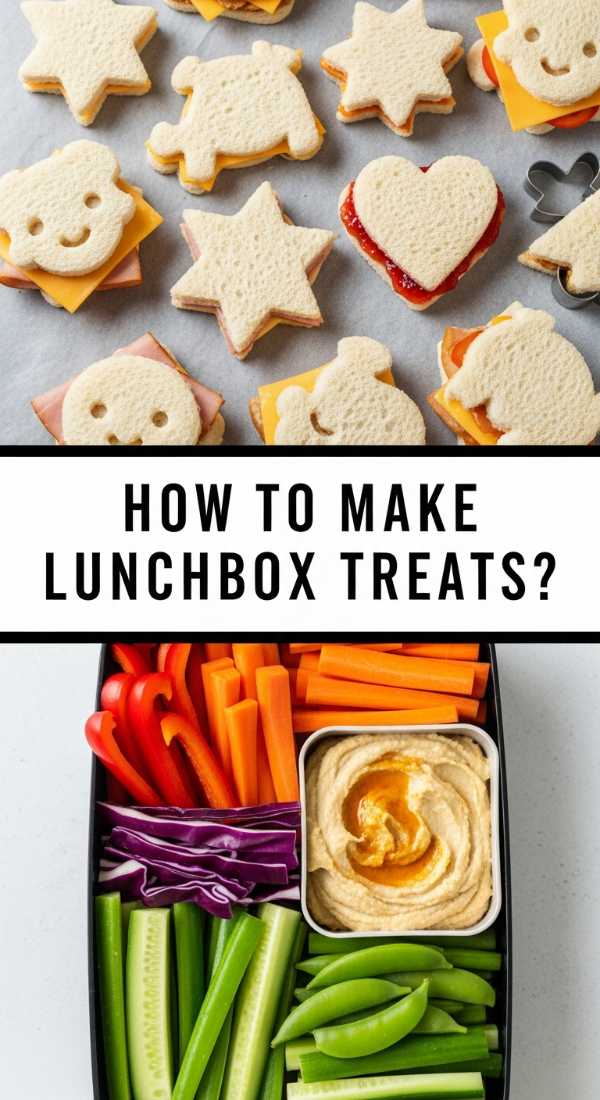
How to make lunchbox treats?
Why we love this
Lunchbox treats aren’t just for kids; they are a midday ritual that brings a spark of joy to a busy workday. There is something deeply comforting about opening a container to find a miniature, organized world of flavors—a tiny piece of dark chocolate nestled next to a handful of salty pretzels or a tart dried apricot. We love the way these small bites provide a multi-sensory break: the snap of a crisp apple, the chewy sweetness of a date, and the smooth richness of a nut butter. It turns a mundane lunch break into a curated experience that fuels the body while delighting the senses with variety and balance.
Ingredients
- Mini pretzels or rice cakes
- Nut butter or sunflower butter
- Apple slices (tossed in lemon juice)
- Dark chocolate squares
- Dried apricots or mango
- Greek yogurt for dipping
How to make it
- Choose a multi-compartment lunchbox or use silicone cupcake liners to create individual ‘zones’ for different flavors and textures.
- Prepare your fruit by slicing apples thinly and tossing them in a mixture of water and lemon juice to prevent browning; pat them dry before packing.
- Place a generous dollop of nut butter in a small, leak-proof container; if it’s too thick, stir in a teaspoon of coconut oil to make it more ‘dippable.’
- Arrange the pretzels in a neat stack to maximize space and ensure they stay crunchy away from any moist ingredients.
- Nestle the dark chocolate and dried fruit in the smallest compartment; the contrast between the bitter cocoa and the sweet, chewy fruit is the perfect palate cleanser.
- If using yogurt, ensure it is thick (Greek style is best) and keep the container chilled with an ice pack to maintain that refreshing, creamy consistency.
How to prepare romantic picnics?

Why we love this
A romantic picnic board is an exercise in decadence and intimacy, focusing on ingredients that feel like a shared secret. We love the lingering aroma of a truffle-infused cheese and the way a perfectly ripe strawberry looks when dipped into a pool of dark chocolate. It’s about the sensory experience of sharing—the soft tear of a fresh baguette, the clink of glasses, and the lingering sweetness of a dessert-heavy board under the glow of a setting sun. This board isn’t just food; it’s a catalyst for conversation and connection, designed to be lingered over while the world fades into the background.
Ingredients
- Truffle cheese or Brie
- Fresh strawberries and raspberries
- Dark chocolate truffles or bark
- Prosciutto-wrapped melon
- Sparkling cider or wine
- Small baguette or brioche rolls
How to make it
- Warm the Brie in a low oven (300°F/150°C) for about 10 minutes until it feels soft to the touch but hasn’t lost its shape; wrap it in foil to keep it warm during the walk.
- Wrap thin slices of prosciutto around wedges of cantaloupe or honeydew; the saltiness of the meat enhances the floral sweetness of the fruit perfectly.
- Slice the baguette at a sharp angle to create long, elegant ‘boats’ for the cheese and meat, and keep them in a cloth bag to maintain a crisp crust.
- Arrange the berries in small, overflowing piles to suggest abundance; if you’re feeling fancy, dip half of the strawberries in melted chocolate and let them set before packing.
- Place the chocolate truffles in a small decorative box or directly on the board as the ‘grand finale’ to the meal.
- Ensure your beverages are chilled to the point of frost on the bottle; use a thermal sleeve to keep them at that crisp, refreshing temperature until you’re ready to pour.
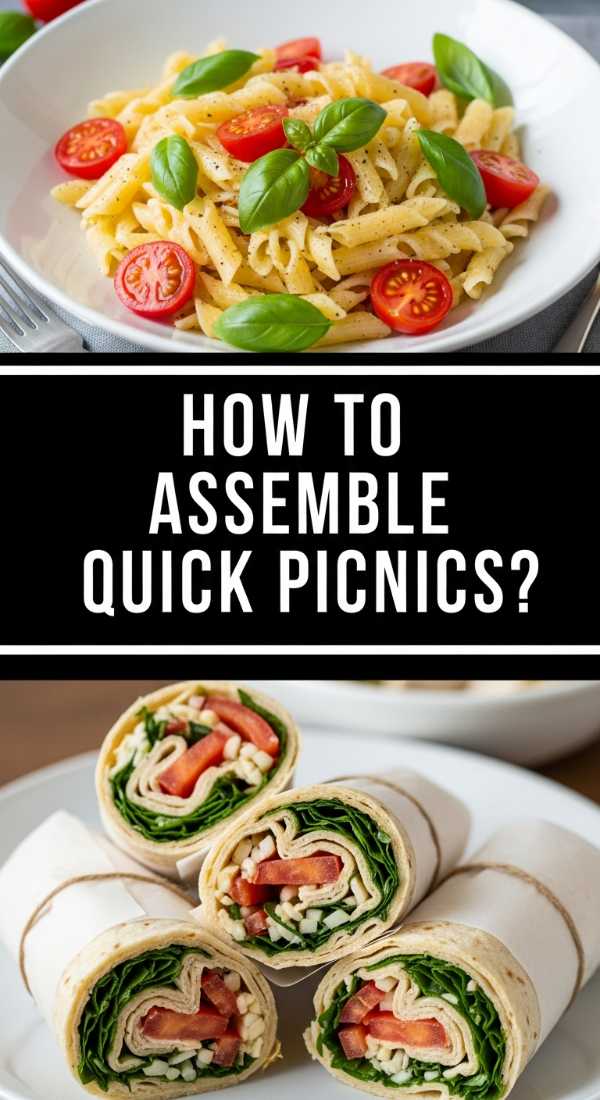
How to assemble quick picnics?
Why we love this
The beauty of a quick picnic board lies in its spontaneity—it’s the ‘yes’ to a last-minute invite or a sudden burst of sunshine. We love the rustic, unpretentious charm of store-bought staples rearranged into something beautiful; it proves that you don’t need hours of prep to create a memorable meal. There is a specific satisfaction in the crunch of a high-quality potato chip paired with a zesty store-bought dip, or the simple pleasure of a sharp cheddar slice. It’s fast, it’s fresh, and it’s focused on the immediate joy of eating outdoors without the lingering shadow of a messy kitchen left behind.
Ingredients
- Pre-sliced deli meats (Turkey or Roast Beef)
- Block of sharp cheddar
- Store-bought hummus or spinach dip
- Kettle-cooked potato chips
- Cherry tomatoes
- Cucumber spears
How to make it
- Skip the fancy board and use the lid of your cooler or a simple baking sheet as your base for maximum efficiency.
- Empty the store-bought dip into a real bowl if you have one; it immediately elevates the look from ‘grocery run’ to ‘curated board.’
- Roll the deli meats into tight cylinders; this makes them easy to grab and prevents them from looking messy on the tray.
- Cube the block of cheddar into bite-sized pieces using a sharp knife; irregular ‘craggy’ edges give it a more artisanal, rustic feel.
- Arrange the kettle chips in a large pile on one side of the board—their height and texture add a great visual element for very little effort.
- Scatter the cherry tomatoes and cucumber spears around the dip; their bright colors and watery crunch provide a necessary balance to the salty chips and meat.
How to craft easy bites?

Why we love this
Easy bites are the ultimate ‘party fuel,’ designed to be grabbed with one hand while the other holds a drink or a conversation. We love the cleverness of a single-bite assembly—the way a salty olive sits perfectly atop a cube of feta, or a folded piece of salami acts as a vessel for a dollop of cream cheese. It’s about the concentrated burst of flavor in every mouthful and the effortless way these snacks disappear. There’s no need for plates or forks; just the tactile joy of picking up a small, perfectly balanced morsel and experiencing a harmony of textures, from creamy to crunchy, in one go.
Ingredients
- Salami or pepperoni slices
- Feta cheese cubes or Mozzarella pearls
- Pitted green olives
- Toothpicks or small skewers
- Pesto or balsamic glaze
- Small crackers
How to make it
- Create ‘skewers’ by threading a mozzarella pearl, an olive, and a folded piece of salami onto a toothpick; this keeps everything organized and easy to eat.
- For a cracker bite, place a small dollop of pesto on the cracker first to act as ‘glue’ for the cheese or meat topping.
- Drizzle a very thin stream of balsamic glaze over your finished skewers; for the best result, use a squeeze bottle to create professional-looking lines.
- Keep your bites small—no larger than 1.5 inches—to ensure they can actually be eaten in one comfortable bite.
- Arrange the bites in neat rows or concentric circles on your board to give it a structured, high-end catering look.
- Chill the assembled bites for 20 minutes before serving; this helps the flavors meld and ensures the cheese stays firm and easy to handle.
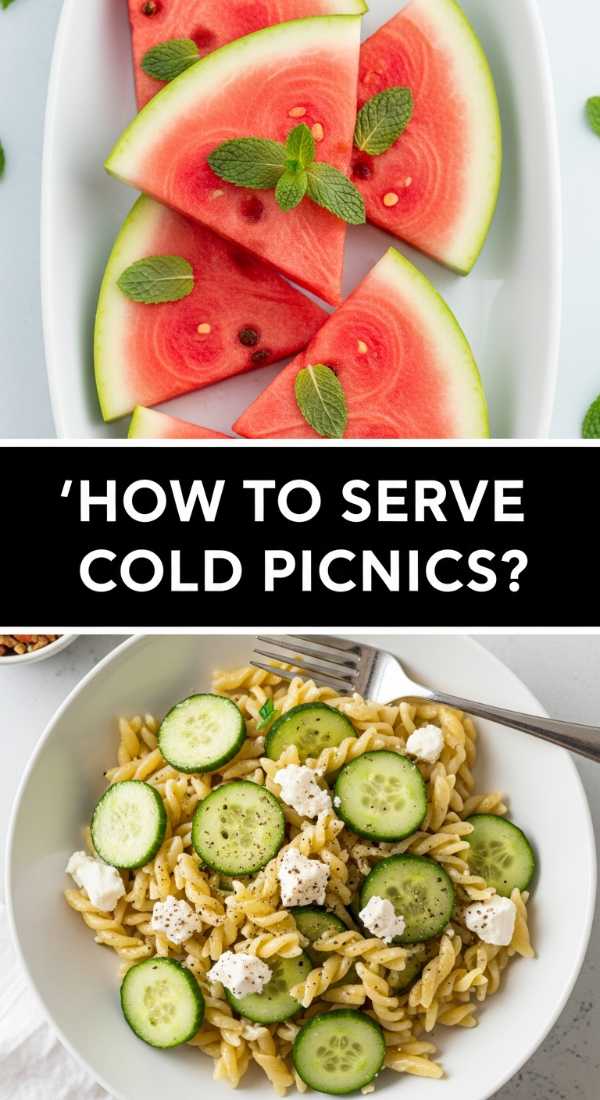
How to serve cold picnics?
Why we love this
When the temperature rises, a cold picnic board is a sanctuary of refreshment. We love the icy crispness of a cold snap pea, the cooling sensation of a chilled yogurt dip with mint, and the way cold grapes feel like tiny bursts of sorbet. It’s a sensory experience built on temperature contrasts—the freezing cold containers against the warmth of the summer air. There is something deeply revitalizing about eating food that has been kept at the perfect, refreshing chill, making every bite feel light, hydrating, and perfectly suited for a day spent under the sun.
Ingredients
- Chilled shrimp cocktail
- Snap peas and blanched asparagus
- Watermelon wedges
- Tzatziki or cold yogurt dip
- Feta cheese crumbles
- Fresh mint leaves
How to make it
- Blanch your green vegetables (asparagus and snap peas) in boiling water for 60 seconds, then immediately plunge them into an ice bath to lock in that vibrant green color and snap.
- Keep the shrimp on a bed of crushed ice within a larger bowl on the board to ensure they stay at a safe, delicious temperature.
- Slice the watermelon into thick triangles and keep them in the coldest part of your cooler until the very last second.
- To prevent the board from getting ‘sweaty,’ use a stone or marble board that has been chilled in the freezer for an hour before assembly.
- Top the tzatziki with a sprinkle of feta and torn mint leaves right before serving to add a fresh, aromatic punch that enhances the cooling effect.
- Use insulated containers for everything and pack the ‘wet’ ingredients (like watermelon) separately from anything that could get soggy, assembling the final board on-site.
How to prep healthy bowls?

Why we love this
Healthy bowl boards are a deconstructed dream, allowing everyone to customize their own nutritional masterpiece. We love the rainbow of colors—from the deep orange of roasted sweet potatoes to the vibrant green of massaged kale and the earthy brown of quinoa. It’s a feast that feels as good as it looks, offering a variety of textures: the fluffiness of grains, the creaminess of avocado, and the satisfying crunch of toasted seeds. There’s a wonderful sense of abundance and wellness in these boards, making healthy eating feel like a luxurious, communal celebration rather than a restrictive chore.
Ingredients
- Cooked quinoa or farro
- Roasted sweet potato cubes
- Massaged kale or spinach
- Sliced avocado (with lime juice)
- Chickpeas (roasted or canned)
- Lemon-tahini dressing
How to make it
- Start by prepping your base grain; cook the quinoa in vegetable broth instead of water to infuse it with savory flavor from the inside out.
- Roast the sweet potato cubes at 400°F (200°C) with olive oil and salt until the edges are caramelized and slightly crispy—this provides a necessary sweetness to the board.
- Massage your kale with a teaspoon of olive oil and a pinch of salt for 2 minutes until it turns dark green and becomes tender to the bite.
- Arrange the ingredients in separate ‘piles’ on a large wooden board or in a shallow bowl, leaving space for the avocado in the center.
- Drizzle the avocado with lime juice immediately after slicing to keep it bright green and prevent oxidation; place it on the board last.
- Serve the lemon-tahini dressing in a separate carafe so guests can control the amount, and finish the board with a heavy sprinkle of toasted sesame seeds or hemp hearts.
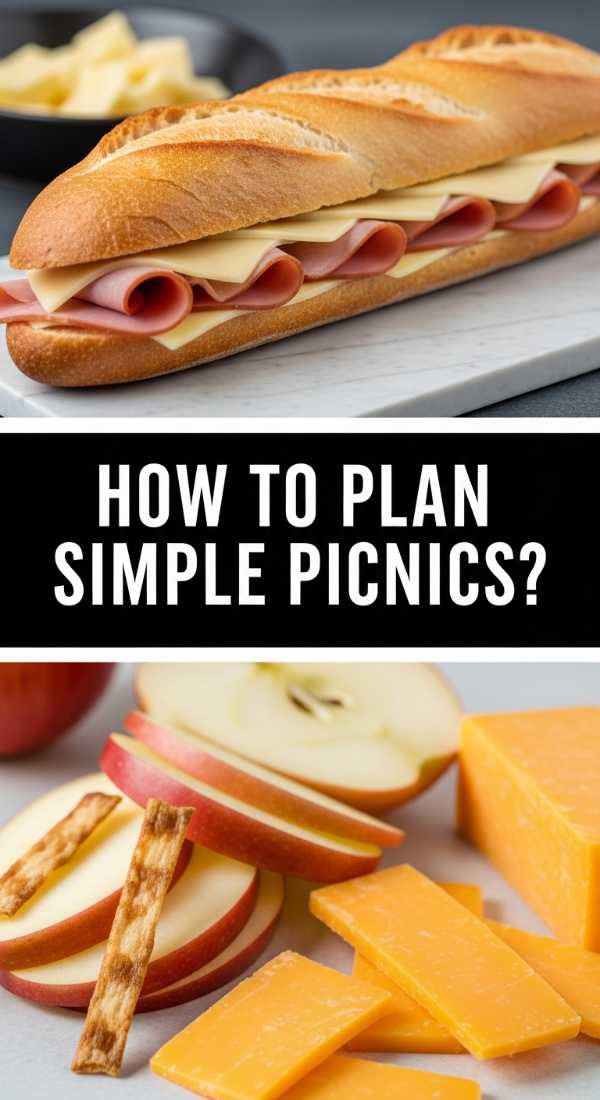
How to plan simple picnics?
Why we love this
Sometimes the most profound joy is found in simplicity, and a simple picnic board is proof of that. We love the ‘three-item rule’ where each component—a single great cheese, a perfect loaf of bread, and a seasonal fruit—is allowed to shine. It’s an approachable way to dine that focuses on quality over quantity, stripping away the noise of complicated recipes. The aroma of a fresh baguette and the sight of a single, beautiful wedge of brie are enough to create a sense of occasion. It’s easy to plan, easy to carry, and leaves more room for the things that matter: the view, the fresh air, and the company.
Ingredients
- One high-quality Brie or Camembert
- A fresh sourdough baguette
- One seasonal fruit (like peaches or pears)
- Salted butter
- A small handful of walnuts
- Sparkling water with lemon
How to make it
- Invest in one ‘star’ ingredient, like an artisanal cheese from a local shop; let it sit at room temperature for 30 minutes before packing to develop its full flavor profile.
- Keep the baguette whole and wrap it in brown paper; tearing the bread by hand at the picnic site adds to the rustic, simple experience.
- Slice the fruit into thick, juicy wedges; if using pears or peaches, ensure they are ripe enough that the juice slightly runs when cut.
- Pack a small container of high-quality salted butter; it might seem redundant with cheese, but the combination of bread, butter, and fruit is a classic European picnic staple.
- Scatter the walnuts across the board for a bit of earthy crunch that complements the creamy cheese and sweet fruit.
- Focus on the layout: place the cheese in the center, the fruit on one side, and the bread on the other, keeping the presentation clean and uncluttered.
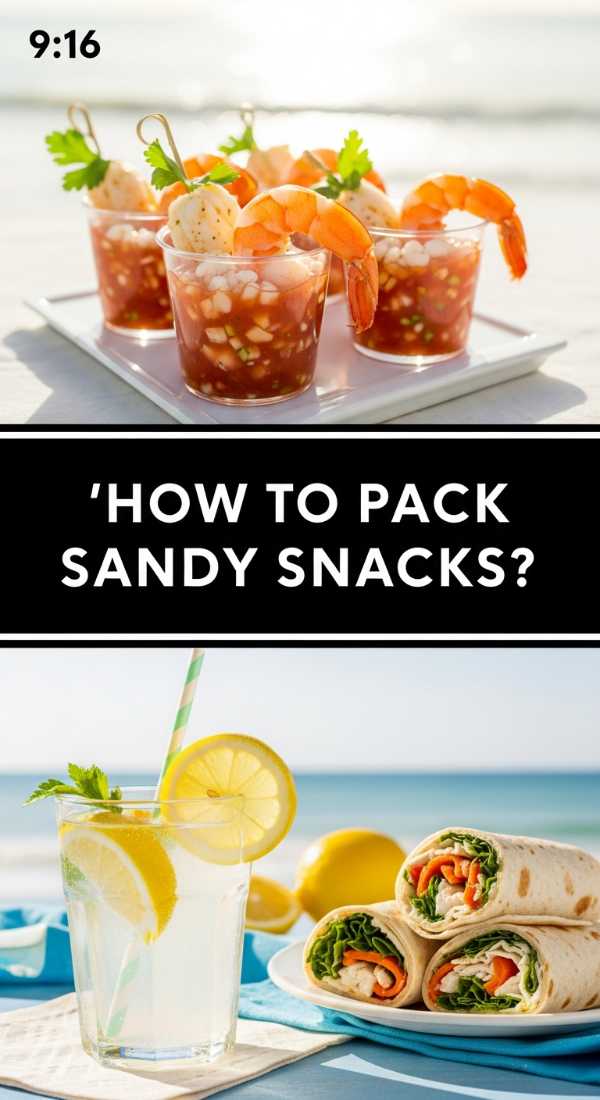
How to pack sandy snacks?
Why we love this
Beach snacking is an art form that requires strategy to keep the grit out and the flavor in. We love the clever use of individual portions and ‘covered’ boards that protect the food from the elements while still looking incredibly appetizing. There is a specific beach-day joy in biting into a clean, sand-free snack while listening to the waves—the salty air making the flavors of the food seem even more intense. It’s about the peace of mind that comes from smart packaging, allowing you to enjoy your sunset spread without the unwanted crunch of the shore.
Ingredients
- Individual mason jars or lidded containers
- Veggie sticks (Celery, Carrots, Peppers)
- Hard-boiled eggs
- Pre-cut cheese cubes
- Dry roasted nuts
- Grapes or cherries (on the stem)
How to make it
- The ‘Board in a Jar’ method is king: place your dip (like hummus) at the bottom of a mason jar, then stand veggie sticks upright inside it. This keeps the dip covered and the veggies clean.
- Use lidded bento boxes for cheese and meats; only open the lid when you are ready to eat a specific section to minimize exposure to wind-blown sand.
- Hard-boil your eggs for exactly 9 minutes for a ‘jammy’ but set yolk; keep the shells on until you are ready to eat for maximum protection.
- Choose ‘stemmed’ fruits like grapes or cherries; you can hold the stem and eat the fruit without your sandy fingers ever touching the part you’re consuming.
- Avoid anything sticky or ‘open-faced’ like honey or loose crackers on a flat board; stick to items that are self-contained or easy to peel.
- Keep everything in a sand-proof, insulated bag and use a small brush to clean your hands (or a wet wipe) before reaching for a snack.
Conclusion
Mastering the viral food board trend doesn’t require a culinary degree or a massive budget—it just requires a little bit of heart and a focus on the ingredients you love. From the sandy shores of the beach to the quiet corner of a park, these boards are more than just a meal; they are an invitation to slow down, enjoy the textures and flavors of the season, and connect with the people around you. So, the next time you feel the urge to create something beautiful, remember to keep it simple, keep it fresh, and most importantly, keep it stress-free. Happy grazing!
FAQ Section
Q: How do I keep my food board from getting soggy?
A: The key is moisture control. Always pat your fruits and vegetables dry with a paper towel after washing. If you are packing a board for travel, keep ‘wet’ items like pickles, olives, or juicy fruits in separate small containers or jars and add them to the board right before serving.
Q: What is the best type of board to use?
A: For home use, a large wooden or marble board is classic and beautiful. For picnics, look for a lightweight bamboo board with a lid, or even a sturdy baking sheet. Marble is excellent for hot days as it stays cooler than wood.
Q: How long can a food board sit out?
A: Generally, perishable items like soft cheese and cured meats should not sit out for more than two hours. If you are outdoors in the heat, aim for one hour. Use ice packs underneath your board or stone boards chilled in the freezer to extend the time.