
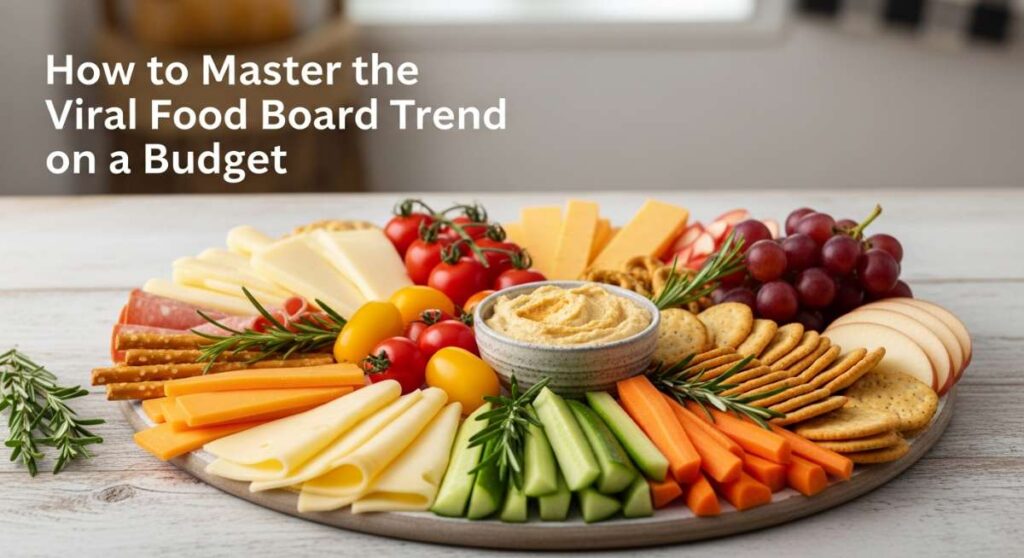
I remember the first time I saw a viral ‘grazing board’ on my feed; it looked like a literal work of art, but my bank account let out a tiny whimper. We’ve all been there—scrolling through endless carousels of imported cheeses and exotic fruits, wondering if we can ever achieve that aesthetic without spending a week’s rent. The secret, my friends, isn’t about how much you spend, but how you present the comfort foods we already know and love. A ‘Viral Simple Food Board’ is about taking cozy, budget-friendly classics and serving them in a way that invites everyone to dig in together.
Sharing a meal shouldn’t be about perfection; it should be about that warm, fuzzy feeling you get when a big pot or a crowded board hits the center of the table. Whether it’s a rainy Tuesday or a Saturday night with friends, these recipes are designed to be the stars of your next gathering. By focusing on textures, colors, and the soulful aromas of home cooking, we can master the trend while keeping things grounded and accessible. Let’s dive into the heart of the home and create something beautiful.
How to make minestrone soup?

Why we love this
There is something incredibly soul-soothing about a bowl of minestrone that has been simmering on the stove, filling the kitchen with the scent of dried oregano and rich tomato broth. It’s a tapestry of textures, from the slight bite of ditalini pasta to the creamy softness of cannellini beans and the earthy crunch of seasonal greens. When served on a board with crusty bread and a small bowl of fresh pesto, it transforms from a simple soup into a rustic feast that feels both healthy and indulgent. The vibrant red hue of the broth against the green of the zucchini makes it a visual masterpiece for any table.
Ingredients
- 2 tablespoons olive oil
- 1 large onion, diced
- 2 carrots, sliced
- 2 stalks celery, chopped
- 3 cloves garlic, minced
- 1 zucchini, diced
- 1 can (15oz) diced tomatoes
- 1 can (15oz) cannellini beans, rinsed
- 6 cups vegetable or chicken broth
- 1 teaspoon dried oregano
- 1/2 cup small pasta (ditalini or shells)
- 2 cups fresh spinach
- Salt and pepper to taste
- Grated parmesan for serving
How to make it
- Begin by heating your olive oil in a large heavy-bottomed pot over medium heat. Add the onion, carrots, and celery, sautéing for about 8 to 10 minutes. You are looking for the onions to become translucent and the carrots to just begin softening—this base is crucial for building deep flavor.
- Stir in the minced garlic and zucchini, cooking for another 2 minutes until the garlic is fragrant but not browned. Professional tip: don’t rush the garlic, as burnt garlic can turn the entire broth bitter.
- Add the diced tomatoes (with their juices), the beans, broth, and oregano. Increase the heat to bring the mixture to a gentle boil, then immediately reduce the heat to low and let it simmer uncovered for 20 minutes. This allows the vegetables to meld with the tomato base.
- Add the small pasta to the pot. Cook for about 8-10 minutes, or until the pasta is al dente. Keep an eye on the liquid level; pasta absorbs broth, so add a splash more water or stock if it looks too thick.
- Finally, stir in the fresh spinach and cook just until wilted (about 1 minute). Season generously with salt and pepper. Serve in wide bowls with a heavy dusting of parmesan cheese and a side of toasted sourdough bread.
How to cook chicken curry?
Why we love this
A good chicken curry is like a warm hug for your senses, offering a complex dance of heat, sweetness, and creaminess that lingers beautifully on the palate. The aroma of blooming spices—turmeric, cumin, and coriander—creates an inviting atmosphere that pulls everyone toward the kitchen long before the meal is served. When plated on a large board surrounded by fluffy basmati rice, charred naan, and bright mango chutney, it becomes a vibrant centerpiece that encourages sharing. The tender, golden-hued chicken pieces soaking in a velvety sauce create a texture that is absolutely irresistible.
Ingredients
- 1.5 lbs chicken thighs, cut into bite-sized pieces
- 2 tablespoons vegetable oil
- 1 large onion, finely chopped
- 3 cloves garlic, minced
- 1 tablespoon fresh ginger, grated
- 2 tablespoons curry powder
- 1 can (14oz) coconut milk
- 1 can (15oz) crushed tomatoes
- 1 tablespoon honey or sugar
- Fresh cilantro for garnish
- Salt to taste
How to make it
- Heat the oil in a large skillet or wok over medium-high heat. Add the chicken pieces in a single layer, seasoning with a pinch of salt. Sear the chicken until golden brown on all sides (about 5-7 minutes), then remove the chicken from the pan and set aside. It doesn’t need to be cooked through yet.
- In the same pan, add the chopped onion. Sauté for 5 minutes until softened, then add the garlic and ginger. Cook for 1 minute until highly aromatic.
- Lower the heat to medium and add the curry powder. Stir constantly for 30-60 seconds to ‘bloom’ the spices in the oil; this releases the essential oils and creates a much deeper flavor profile.
- Pour in the crushed tomatoes and coconut milk, stirring to combine and scraping up any brown bits from the bottom of the pan. Stir in the honey or sugar to balance the acidity of the tomatoes.
- Return the chicken and any accumulated juices to the pan. Simmer gently on low heat for 15-20 minutes. The sauce should thicken slightly and the chicken should be tender and fully cooked. Garnish with a handful of fresh cilantro and serve with hot rice.
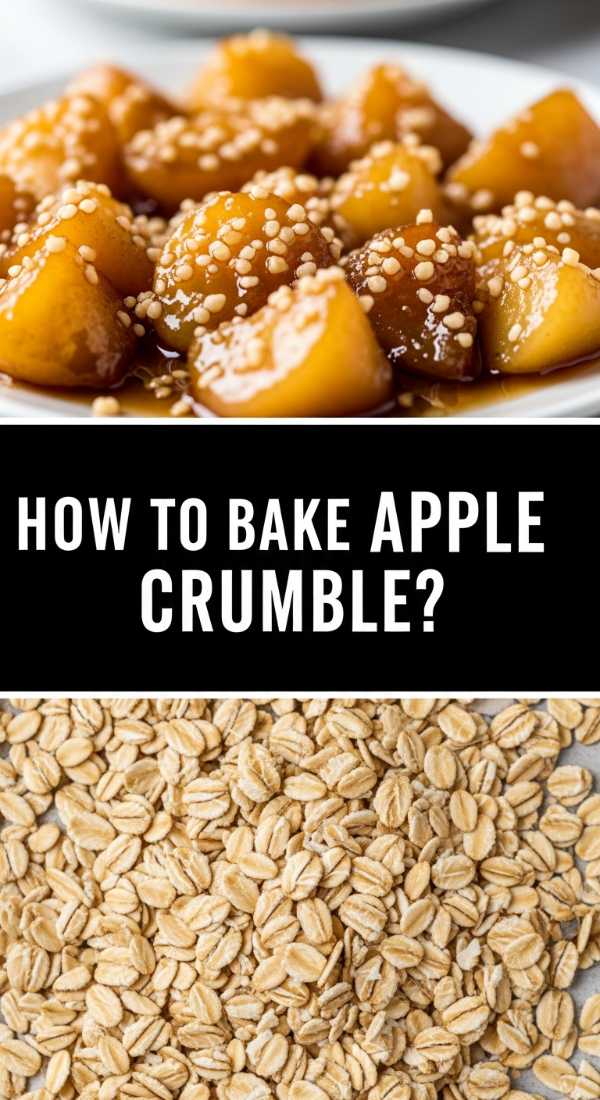
How to bake apple crumble?

Why we love this
Apple crumble is the ultimate comfort dessert, celebrated for the contrast between the bubbling, tart fruit and the buttery, crunchy topping that shatters perfectly under a spoon. As it bakes, the smell of cinnamon and caramelized sugar wafts through the house, creating a sense of nostalgic warmth that is impossible to resist. Serving this on a dessert board alongside a pitcher of cold cream or a bowl of melting vanilla bean ice cream makes for a stunning, interactive end to a meal. The gooey, softened apples provide a sweet, jam-like base that perfectly complements the nutty, toasted oats of the crumble.
Ingredients
- 6 large Granny Smith apples, peeled and sliced
- 1/2 cup granulated sugar
- 1 tablespoon cinnamon
- 1 cup all-purpose flour
- 1 cup rolled oats
- 1 cup brown sugar, packed
- 1/2 cup cold unsalted butter, cubed
- A pinch of salt
How to make it
- Preheat your oven to 375°F (190°C). In a large mixing bowl, toss the sliced apples with the granulated sugar and cinnamon until every slice is evenly coated. Transfer the apples into a greased baking dish, spreading them out into an even layer.
- In a separate bowl, combine the flour, rolled oats, brown sugar, and salt. Add the cold, cubed butter to the mixture.
- Using your fingertips or a pastry cutter, work the butter into the dry ingredients until the mixture resembles coarse crumbs with some pea-sized chunks of butter remaining. This texture is key to getting a crunchy topping rather than a sandy one.
- Sprinkle the crumble mixture evenly over the top of the apples, ensuring you cover all the fruit to trap the steam and soften the apples.
- Bake for 40-45 minutes. You are looking for two visual cues: the fruit juices should be bubbling up around the edges, and the topping should be a deep, golden brown. Let it cool for at least 10 minutes before serving so the juices can thicken.
How to make sticky date pudding?

Why we love this
Sticky date pudding is a masterclass in rich, decadent flavors, featuring a dark, moist sponge that acts as a sponge for the luscious toffee sauce poured over it. The deep, molasses-like sweetness of the dates gives the cake a unique weight and texture that feels incredibly luxurious, yet it’s surprisingly simple to make. When presented on a board with extra sauce in a decorative boat and a few sprigs of mint, it looks like a high-end bistro dessert. Each bite is a perfect balance of the warm, dense cake and the silky, buttery caramel sauce that pools around every slice.
Ingredients
- 1.5 cups chopped dried dates
- 1 teaspoon baking soda
- 1 cup boiling water
- 1/2 cup unsalted butter, softened
- 3/4 cup brown sugar
- 2 eggs
- 1.5 cups self-rising flour
- For sauce: 1 cup brown sugar, 1 cup heavy cream, 1/2 cup butter
How to make it
- Place the chopped dates and baking soda in a heatproof bowl. Pour the boiling water over them and let them sit for 10-15 minutes until softened. Mash them slightly with a fork to create a chunky paste.
- Preheat your oven to 350°F (175°C). In a large bowl, cream the softened butter and brown sugar together until light and fluffy. Add the eggs one at a time, beating well after each addition.
- Gently fold in the flour and the date mixture (including the liquid) until just combined. Be careful not to over-mix, as this can make the pudding tough. Pour the batter into a greased square baking tin.
- Bake for 30-35 minutes, or until a skewer inserted into the center comes out clean. While the cake bakes, make the sauce by combining the brown sugar, cream, and butter in a small saucepan over medium heat. Stir until the sugar dissolves and the sauce thickens slightly (about 5 minutes).
- While the pudding is still warm, poke holes across the surface with a skewer and pour half the warm toffee sauce over the top. Let it soak in for 5 minutes. Serve individual squares with the remaining sauce drizzled generously over the top.
How to flip fluffy pancakes?

Why we love this
Nothing says ‘weekend morning’ quite like a towering stack of fluffy pancakes, golden on the outside and cloud-like on the inside. The gentle sizzle of batter hitting a buttered griddle is a sound that brings everyone to the table in anticipation of that first syrupy bite. A pancake board is perhaps the most viral of all, featuring the stacks in the center surrounded by fresh berries, chocolate chips, whipped butter, and maple syrup for a DIY breakfast experience. The texture should be light and airy, with a delicate crumb that melts in your mouth and absorbs the toppings perfectly.
Ingredients
- 1.5 cups all-purpose flour
- 3.5 teaspoons baking powder
- 1 tablespoon white sugar
- 1/2 teaspoon salt
- 1.25 cups milk
- 1 egg
- 3 tablespoons butter, melted
- 1 teaspoon vanilla extract
How to make it
- In a large bowl, whisk together the flour, baking powder, sugar, and salt. In a separate jug, whisk the milk, egg, melted butter, and vanilla extract.
- Make a well in the center of the dry ingredients and pour in the wet ingredients. Whisk together until *just* combined; it is absolutely vital to leave some lumps in the batter. Over-mixing is the number one reason for flat, tough pancakes.
- Heat a non-stick skillet or griddle over medium-low heat. Lightly grease with a tiny bit of butter or oil. Scoop about 1/4 cup of batter onto the griddle for each pancake.
- Wait for the ‘bubble cue.’ You should see bubbles forming on the surface of the batter and the edges will begin to look set and matte. This usually takes about 2-3 minutes. If the bottom is browning too fast before bubbles appear, turn your heat down.
- Carefully slide a thin spatula under the pancake and flip in one smooth motion. Cook for another 1-2 minutes until golden brown on the second side. Serve immediately or keep warm in a low oven until the whole stack is ready.
How to bake fudgy brownies?

Why we love this
A truly great fudgy brownie is a sensory experience, characterized by a thin, crackly, paper-like top and a center that is so dense it’s almost like truffle. The intense chocolate aroma fills the room, signaling a treat that is both sophisticated and deeply comforting. On a dessert board, brownies look stunning when cut into small squares and piled high, interspersed with fresh raspberries or a bowl of salted caramel for dipping. That first bite, where the crisp top gives way to the rich, gooey interior, is the hallmark of a perfectly executed bake that will have everyone asking for the recipe.
Ingredients
- 1/2 cup unsalted butter, melted
- 1 cup granulated sugar
- 2 large eggs
- 1 teaspoon vanilla extract
- 1/3 cup unsweetened cocoa powder
- 1/2 cup all-purpose flour
- 1/4 teaspoon salt
- 1/4 teaspoon baking powder
- 1/2 cup chocolate chips
How to make it
- Preheat your oven to 350°F (175°C) and line an 8×8 inch baking pan with parchment paper, leaving an overhang on the sides for easy removal.
- In a medium bowl, beat the melted butter and sugar together vigorously for about 2 minutes. Adding the eggs and vanilla and beating again until the mixture is pale and smooth. This step is what creates that coveted ‘crackly’ top.
- Sift in the cocoa powder, flour, salt, and baking powder. Using a rubber spatula, fold the dry ingredients into the wet mixture until only a few streaks of flour remain. Do not over-mix, or the brownies will become cakey rather than fudgy.
- Fold in the chocolate chips. Spread the batter evenly into the prepared pan, smoothing the top with your spatula.
- Bake for 20-25 minutes. The key is to not overbake; a toothpick inserted into the center should come out with a few moist crumbs attached, not clean. Let them cool completely in the pan before slicing to allow the fudge structure to set.
How to make chicken stirfry?

Why we love this
Chicken stirfry is the king of quick, vibrant meals, offering a beautiful contrast between tender seared chicken and vegetables that retain their bright colors and snap-crisp texture. The high-heat cooking method creates a ‘wok hei’ or ‘breath of the wok’—a subtle smoky charred flavor that elevates simple ingredients. Served on a board with heaps of steamed jasmine rice and little bowls of toasted sesame seeds and sliced scallions, it’s a healthy, interactive feast. The glossy sauce should coat every piece perfectly, providing a savory, ginger-and-garlic punch that makes every bite exciting.
Ingredients
- 1 lb chicken breast, thinly sliced
- 2 tablespoons soy sauce
- 1 tablespoon cornstarch
- 2 tablespoons vegetable oil
- 2 cups broccoli florets
- 1 red bell pepper, sliced
- 1 carrot, julienned
- 2 cloves garlic, minced
- 1 tablespoon fresh ginger, minced
- For sauce: 1/4 cup soy sauce, 1 tablespoon honey, 1 teaspoon sesame oil
How to make it
- In a bowl, toss the sliced chicken with 2 tablespoons of soy sauce and the cornstarch. Let it marinate for 10 minutes; the cornstarch ‘velvets’ the chicken, keeping it tender during high-heat cooking.
- Whisk the sauce ingredients (soy sauce, honey, sesame oil) in a small bowl and set aside. Ensure all your vegetables are chopped and ready to go, as stir-frying happens very quickly.
- Heat a wok or large skillet over high heat until it’s nearly smoking. Add 1 tablespoon of oil and sear the chicken in batches to avoid crowding the pan. Cook until golden and just cooked through (3-4 minutes), then remove and set aside.
- Add the remaining tablespoon of oil to the pan. Toss in the broccoli, peppers, and carrots. Stir-fry constantly for 3-4 minutes until they are bright and crisp-tender. Add the garlic and ginger in the last 30 seconds to prevent burning.
- Return the chicken to the pan and pour over the sauce. Toss everything together for 1 minute until the sauce thickens and glazes the chicken and vegetables. Serve immediately over rice.
How to roast pumpkin soup?
Why we love this
Roasted pumpkin soup is the embodiment of autumn, with a deep, caramelized sweetness that can only be achieved by roasting the squash until it’s tender and charred at the edges. The texture is incredibly silky and velvety, coating the spoon with a vibrant orange glow that looks stunning in a rustic tureen or individual bowls on a serving board. Paired with toasted pumpkin seeds, a swirl of heavy cream, and warm bread, it’s a meal that feels deeply nourishing and elegant. The roasting process intensifies the pumpkin’s natural sugars, creating a much more complex flavor than simple boiling ever could.
Ingredients
- 1 medium sugar pumpkin (or butternut squash), halved and seeded
- 1 onion, quartered
- 3 cloves garlic, unpeeled
- 2 tablespoons olive oil
- 3 cups vegetable broth
- 1/2 cup heavy cream (optional)
- 1/2 teaspoon nutmeg
- Salt and pepper to taste
How to make it
- Preheat your oven to 400°F (200°C). Place the pumpkin halves, quartered onion, and garlic cloves on a large baking sheet. Drizzle everything with olive oil and rub it in. Roast the pumpkin cut-side down.
- Bake for 45-50 minutes, or until the pumpkin skin is darkened and the flesh is very soft when pierced with a fork. The onion should be slightly charred, and the garlic soft inside its skin.
- Once cool enough to handle, scoop the pumpkin flesh out of the skin and place it into a blender or a large pot. Squeeze the roasted garlic out of its skin and add it along with the roasted onion.
- Add the vegetable broth and nutmeg. Blend until completely smooth. If using a pot, use an immersion blender for the same silky result.
- Pour the soup into a pot (if blended) and bring to a gentle simmer. Stir in the heavy cream for extra richness, and season generously with salt and pepper. Serve hot with a drizzle of olive oil on top.
How to bake carrot cake?
Why we love this
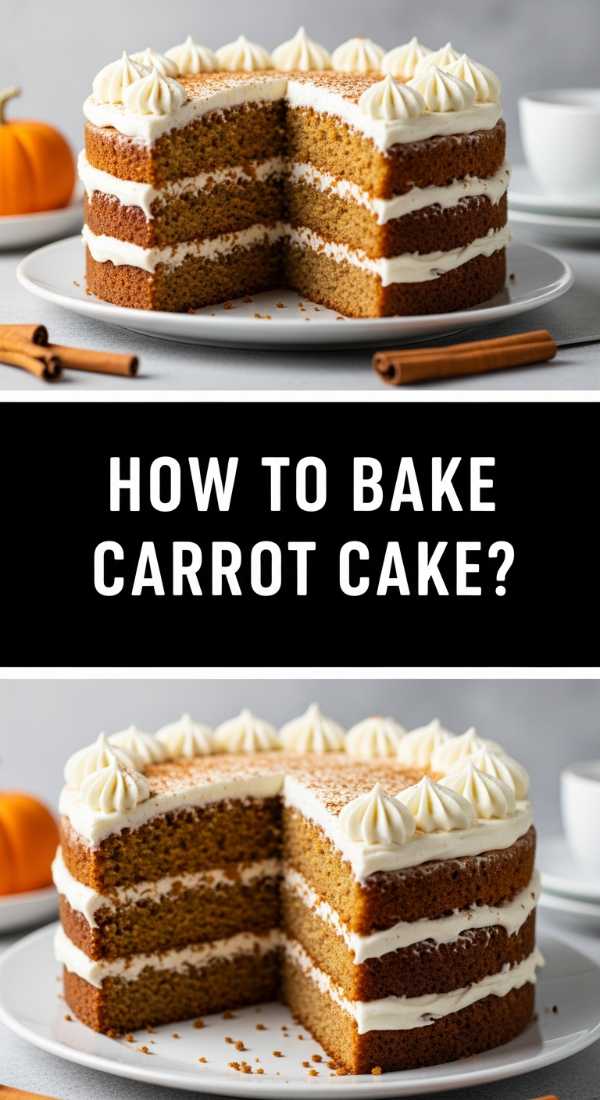
A classic carrot cake is a celebration of texture and spice, featuring a moist, dense crumb packed with shredded carrots and warm notes of cinnamon and nutmeg. The slight tang of a thick cream cheese frosting provides the perfect counterpoint to the sweet, spiced cake, creating a flavor profile that is both rustic and refined. When served on a board, the cake can be left whole or pre-sliced into generous wedges, decorated with crushed walnuts or even edible flowers for a viral-worthy look. It’s a cake that actually tastes better the next day, as the flavors develop and the moisture settles into a perfect harmony.
Ingredients
- 2 cups all-purpose flour
- 2 cups granulated sugar
- 1 teaspoon baking soda
- 1.5 teaspoons ground cinnamon
- 1/2 teaspoon salt
- 1.5 cups vegetable oil
- 4 large eggs
- 3 cups finely grated raw carrots
- 1/2 cup crushed walnuts (optional)
- For frosting: 8oz cream cheese, 1/2 cup butter, 3 cups powdered sugar, 1 tsp vanilla
How to make it
- Preheat your oven to 350°F (175°C) and grease and flour two 9-inch round cake pans. In a large bowl, whisk together the flour, sugar, baking soda, cinnamon, and salt.
- In another bowl, whisk the oil and eggs together until well combined. Gradually add the wet ingredients to the dry, stirring until just smooth.
- Fold in the grated carrots and walnuts using a spatula. Ensure the carrots are evenly distributed so you don’t get ‘clumps’ in the finished bake.
- Divide the batter evenly between the two pans. Bake for 30-35 minutes, or until a toothpick comes out clean. Let the cakes cool in the pans for 10 minutes before turning them out onto wire racks to cool *completely*.
- To make the frosting, beat the cream cheese and butter together until smooth. Gradually add powdered sugar and vanilla, beating until fluffy. Frost the top of one cake layer, place the second layer on top, and frost the top and sides.
How to braise beef casserole?
[IMAGE_10]
Why we love this
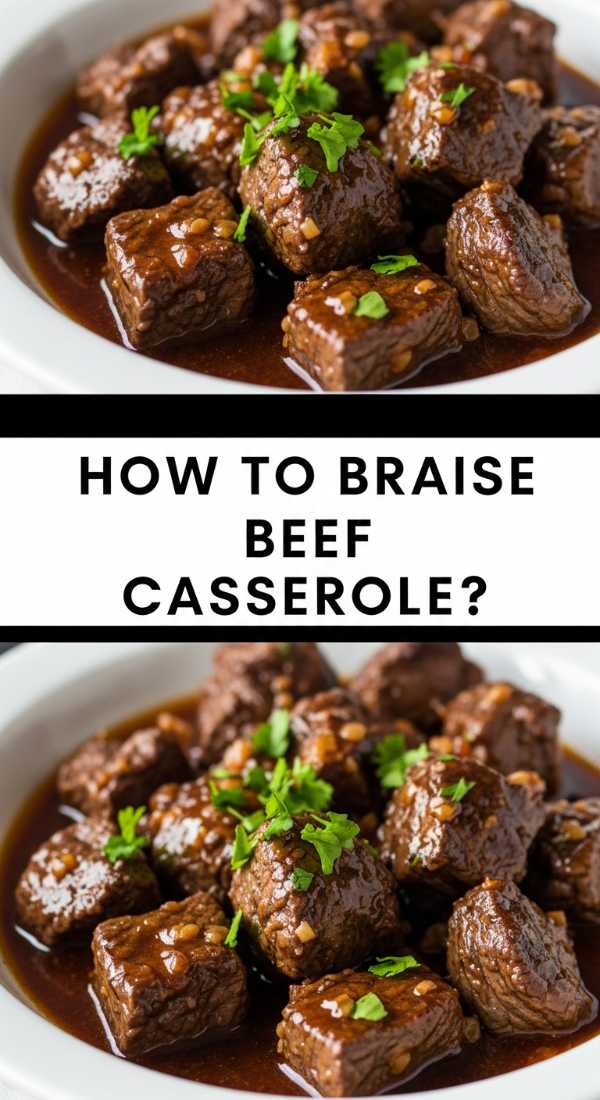
A beef casserole is the ultimate slow-cooked masterpiece, where tough cuts of meat are transformed into meltingly tender morsels bathed in a rich, glossy gravy. The deep, savory scent of red wine, thyme, and seared beef creates an atmosphere of pure comfort that makes any house feel like a home. When served ‘board-style,’ place the heavy cast iron pot right in the middle, surrounded by piles of buttery mashed potatoes or thick slices of buttered baguette for dipping. The carrots and onions become incredibly sweet after hours of braising, offering a soft texture that contrasts perfectly with the robust, savory beef.
Ingredients
- 2 lbs beef chuck, cut into large cubes
- 2 tablespoons flour (for dredging)
- 2 tablespoons vegetable oil
- 1 large onion, sliced
- 3 carrots, cut into thick rounds
- 2 cups beef stock
- 1 cup dry red wine (or extra stock)
- 2 tablespoons tomato paste
- 2 sprigs fresh thyme
- 2 bay leaves
- Salt and pepper
How to make it
- Preheat your oven to 325°F (160°C). Season the beef cubes generously with salt and pepper, then toss them in the flour until lightly coated. This flour will help thicken the gravy later.
- In a large Dutch oven or oven-safe heavy pot, heat the oil over medium-high heat. Sear the beef in batches until a dark brown crust forms on all sides. Do not crowd the pan; searing is about flavor, and overcrowding leads to steaming. Remove beef and set aside.
- Add the onion and carrots to the same pot, cooking for 5 minutes. Stir in the tomato paste and cook for 1 minute to ‘cook out’ the raw tomato flavor.
- Pour in the red wine to deglaze the pan, scraping up all the brown bits (the fond) from the bottom. This is where the magic flavor lives! Add the beef stock, thyme, and bay leaves.
- Return the beef and any juices to the pot. Cover with a tight-fitting lid and place in the oven for 2.5 to 3 hours. The beef is done when it pulls apart easily with a fork. Remove the bay leaves and thyme sprigs before serving.
Conclusion
Mastering the viral food board trend doesn’t require a culinary degree or a massive budget. It’s all about the intention—taking humble, well-loved recipes and presenting them with a bit of flair and a lot of heart. By focusing on shared experiences and comfort food classics, you create a table that isn’t just beautiful for a photo, but beautiful for the soul. So, grab your biggest platter, pick a recipe from this list, and invite your favorite people over for a meal they won’t forget.