

There is something inherently magical about gathering friends around a sprawling food board. It’s more than just a meal; it’s a shared experience, a canvas of textures and colors that invites everyone to linger a little longer and share stories over a glass of chilled wine. I remember the first time I set out a truly elaborate board—the room filled with the scent of fresh herbs and the sound of laughter, and I realized that this trend isn’t just about the aesthetic; it’s about the connection it fosters.
Mastering the simple food board trend is about embracing the seasonal bounty and letting the ingredients speak for themselves. Whether it’s the crunch of a perfectly charred ear of corn or the creamy decadence of a homemade dip, every element should feel intentional and vibrant. This guide is your roadmap to creating a board that is as delicious as it is Instagram-worthy, focusing on those sunny, warm-weather flavors we all crave.
7 Best Cookout Side Dishes (Easy Recipes)

Why we love this
There is nothing quite like the smoky, sweet aroma of charred street corn wafting through a backyard cookout. The kernels pop with a juicy sweetness that is perfectly balanced by a dusting of salty cotija cheese and a squeeze of zesty lime. As you take a bite, the creamy crema coats your palate, followed by the subtle heat of chili powder, creating a sensory explosion that feels like the very essence of a summer afternoon spent under the sun.
Ingredients
- 6 ears of fresh sweet corn, husks removed
- 1/4 cup Mexican crema or sour cream
- 1/4 cup mayonnaise
- 1/2 cup crumbled cotija cheese
- 1 teaspoon chili powder
- Fresh cilantro, chopped
- 2 limes, cut into wedges
How to make it
- Preheat your grill to medium-high heat (about 400°F). Ensure the grates are clean and lightly oiled to prevent sticking.
- Place the shucked corn directly onto the grill grates. Close the lid and grill for about 10-12 minutes, turning every 2-3 minutes. Look for even char marks and a deep golden color across all kernels.
- In a small bowl, whisk together the crema and mayonnaise until smooth. This creates the perfect adhesive for your toppings.
- Once the corn is tender and charred, remove from the grill and immediately brush each ear generously with the crema-mayo mixture while the corn is still hot.
- Generously sprinkle the cotija cheese over the corn, rotating the ears to ensure full coverage. The cheese should slightly soften against the warm corn.
- Finish with a light dusting of chili powder and a sprinkle of fresh cilantro. Serve immediately with lime wedges for an extra burst of acidity.
5 Easy Summer Dips Recipes (Quick & Fresh)
Why we love this
Imagine a dip so airy and light it feels like a savory cloud, bursting with the tang of feta and the floral sweetness of local honey. This whipped feta dip is the ultimate summer appetizer, offering a cooling contrast to the heat of the day. The texture is velvety and rich, yet it leaves a refreshing aftertaste of lemon zest and fresh thyme that lingers beautifully, making it impossible to stop at just one dip of a warm pita chip.
Ingredients
- 8 oz high-quality Greek feta cheese, crumbled
- 1/2 cup Greek yogurt (full fat)
- 1 clove garlic, minced
- Zest of one lemon
- 2 tablespoons extra virgin olive oil
- 1 tablespoon honey
- Fresh thyme leaves for garnish
How to make it
- Place the crumbled feta and Greek yogurt into a food processor or high-speed blender. Pulse a few times to break down the cheese.
- Add the minced garlic and lemon zest to the mixture. Process on high for 1-2 minutes until the texture transforms from grainy to incredibly smooth and aerated.
- While the processor is running, slowly drizzle in the olive oil. This emulsifies the dip, giving it a luxurious, glossy finish.
- Taste the mixture; feta is naturally salty, so you likely won’t need extra salt, but a crack of black pepper can add depth.
- Transfer the dip to a shallow bowl. Use the back of a spoon to create swirls on the surface.
- Drizzle the honey over the top and garnish with fresh thyme. Serve chilled with sliced cucumbers, radishes, or toasted pita points.
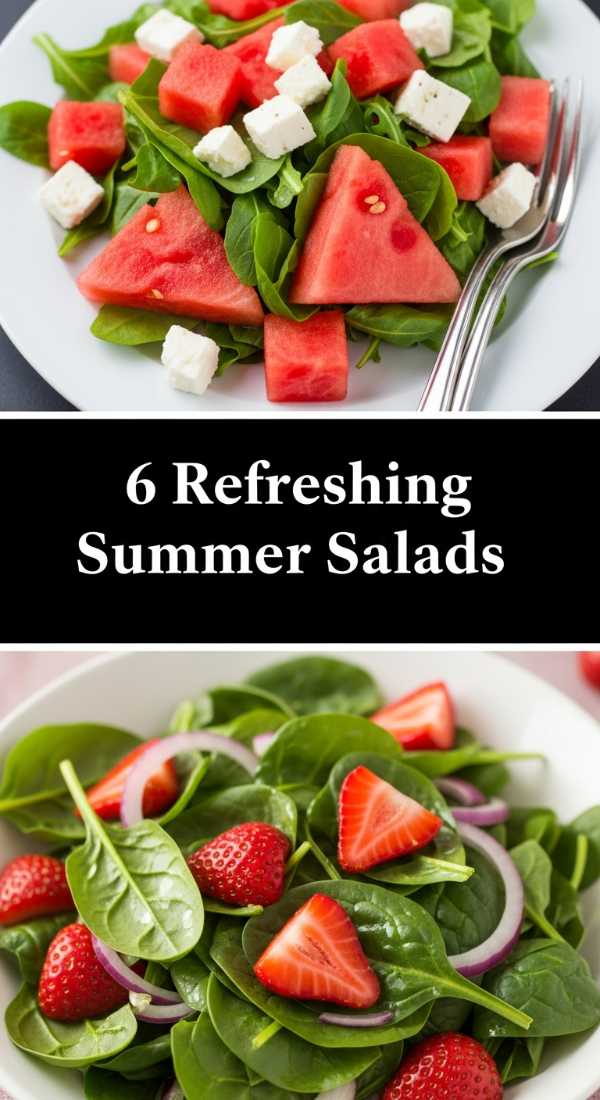
6 Refreshing Summer Salads You’ll Love

Why we love this
The combination of cold, crisp watermelon and salty feta cheese is a revelation that defines summer dining. Each bite offers a satisfying crunch followed by a rush of hydrating juice, while the mint provides a cooling aromatic finish that clears the palate. It’s a vibrant, colorful salad that looks like jewels on a plate, smelling of fresh earth and sweet fruit, perfect for those humid evenings when you want something substantial yet incredibly light.
Ingredients
- 4 cups seedless watermelon, cubed
- 1/2 cup cucumber, sliced into half-moons
- 1/3 cup feta cheese, crumbled
- 1/4 cup red onion, very thinly sliced
- 1/2 cup fresh mint leaves, torn
- 2 tablespoons lime juice
- 1 tablespoon olive oil
How to make it
- Start by cubing your watermelon into uniform 1-inch squares. For the best texture, ensure the watermelon has been thoroughly chilled in the refrigerator for at least 4 hours before slicing.
- Place the sliced red onions in a small bowl of ice water for 10 minutes. This trick removes the harsh “bite” of the onion, leaving them crisp and sweet.
- In a large, wide bowl (to prevent crushing the fruit), gently toss the watermelon and cucumbers together.
- Drain the onions and pat them dry, then add them to the bowl along with the torn mint leaves.
- Whisk the lime juice and olive oil together in a small ramekin. Drizzle this simple dressing over the salad and toss very gently with your hands or a large spoon.
- Just before serving, sprinkle the crumbled feta over the top. Adding it last ensures the cheese stays white and doesn’t absorb the pink watermelon juice.
8 Best Picnic Side Dishes (Crowd Pleasers)

Why we love this
A classic dill potato salad is the backbone of any successful picnic, offering a comforting, creamy texture that pairs perfectly with grilled meats. The aroma of fresh dill and vinegar provides a sharp, herbaceous kick that cuts through the richness of the mayo-based dressing. Every spoonful is a mix of tender, buttery potatoes and the crunch of celery, creating a nostalgic flavor profile that feels like a warm hug in bowl form.
Ingredients
- 2 lbs Yukon Gold potatoes, peeled and cubed
- 1/2 cup mayonnaise
- 1 tablespoon Dijon mustard
- 1 tablespoon apple cider vinegar
- 1/2 cup celery, finely diced
- 1/4 cup red onion, finely minced
- 1/4 cup fresh dill, chopped
- Salt and pepper to taste
How to make it
- Place the cubed potatoes in a large pot and cover with cold salted water. Bringing the water to a boil *with* the potatoes ensures even cooking from the center out.
- Boil for 10-15 minutes until the potatoes are fork-tender but not falling apart. They should hold their shape when pierced.
- Drain the potatoes and immediately splash them with the apple cider vinegar while they are still steaming. This allows the potatoes to absorb the acidity deeply into the starch.
- In a separate bowl, whisk together the mayonnaise, Dijon mustard, salt, and pepper.
- Let the potatoes cool to room temperature before adding the dressing; adding mayo to hot potatoes will cause it to melt and become oily.
- Fold in the celery, red onion, and fresh dill. Refrigerate for at least 2 hours before serving to allow the flavors to marry and the texture to set.
7 Quick Spring Dinner Recipes (Under 30 Mins)

Why we love this
Sheet pan lemon chicken with asparagus is the epitome of effortless spring elegance. The chicken thighs develop a crispy, golden skin that crackles when bitten, releasing juices infused with garlic and bright citrus. The asparagus tips become slightly charred and nutty, creating a harmony of flavors that feels sophisticated yet takes almost no effort to clean up. It’s a meal that smells like a sunny garden and tastes like pure rejuvenation.
Ingredients
- 1.5 lbs chicken thighs, bone-in and skin-on
- 1 bunch thin asparagus, trimmed
- 2 lemons, one sliced and one juiced
- 3 cloves garlic, smashed
- 3 tablespoons olive oil
- 1 teaspoon dried oregano
- Salt and flaky sea salt
How to make it
- Preheat your oven to 425°F (220°C). A high temperature is crucial for rendering the chicken fat and getting that sought-after crispy skin.
- Pat the chicken thighs completely dry with paper towels. Any moisture on the skin will steam rather than crisp.
- In a bowl, toss the chicken with 2 tablespoons of olive oil, the lemon juice, minced garlic, oregano, and salt.
- Place the chicken on a large rimmed baking sheet, skin side up. Arrange the lemon slices around the chicken. Roast for 15 minutes.
- While the chicken is roasting, toss the asparagus with the remaining tablespoon of olive oil and a pinch of salt.
- Remove the pan from the oven, nestle the asparagus around the chicken, and roast for another 10-12 minutes until the chicken reaches an internal temperature of 165°F and the asparagus is tender-crisp.
The Best Rotel Dip Recipe (Party Favorite)
Why we love this
This is the ultimate “crowd-pleaser” dip that disappears within minutes of being set on the table. The combination of melted, velvety cheese and the spicy, chunky tomatoes from the Rotel creates a texture that is thick, gooey, and perfect for scooping. It has a nostalgic, savory aroma that reminds you of game days and family reunions, offering a mild heat that keeps you coming back for just one more bite with a salty tortilla chip.
Ingredients
- 1 lb Velveeta cheese, cut into cubes
- 1 can (10 oz) Ro-Tel Diced Tomatoes and Green Chilies, undrained
- 1/2 lb ground sausage or beef (optional)
- 1/2 teaspoon cumin
- Fresh cilantro for garnish
How to make it
- If using meat, brown the sausage or beef in a skillet over medium heat until fully cooked. Drain the excess fat thoroughly to prevent the dip from becoming greasy.
- In a medium saucepan or a slow cooker, combine the cubed Velveeta and the entire can of Ro-Tel (including the juice). The juice is essential for the right consistency.
- Set the heat to low. Slow and steady is the key here; high heat can cause the cheese to scorch or separate.
- Stir frequently with a wooden spoon or silicone spatula as the cheese begins to melt.
- Once the cheese is completely smooth and liquid, stir in the cooked meat and the cumin.
- Keep the dip on the ‘warm’ setting of a slow cooker for serving. If it becomes too thick, stir in a splash of milk to loosen it back to a dippable consistency.
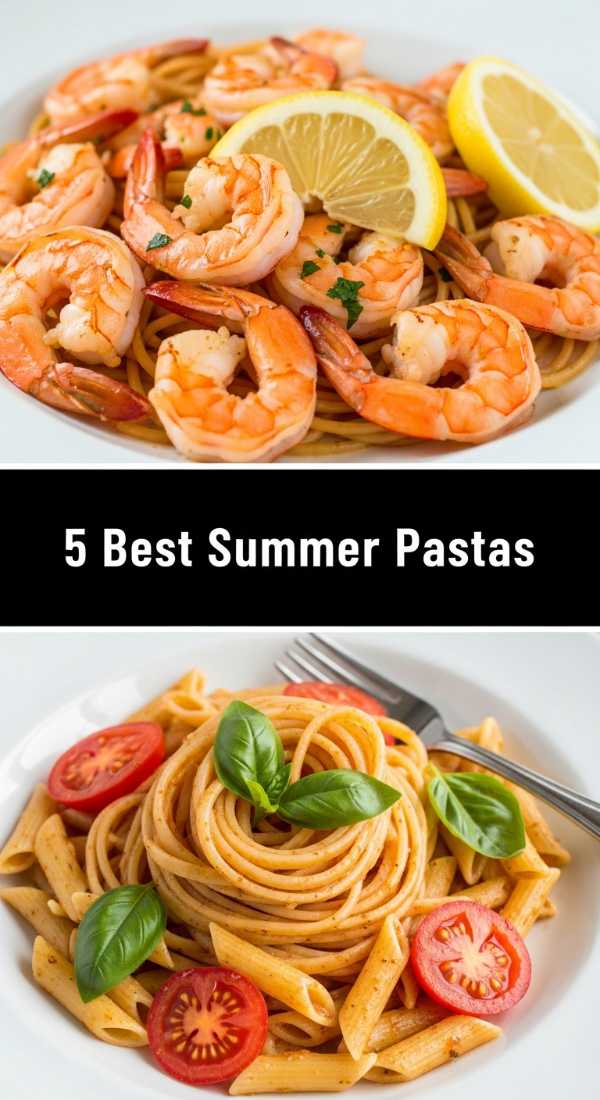
5 Delicious Summer Pasta Dishes (Light & Easy)

Why we love this
Summer pasta should never feel heavy, and this heirloom tomato and basil linguine is the perfect example of seasonal simplicity. The sauce isn’t cooked in the traditional sense; rather, the heat of the pasta gently wilts the basil and softens the tomatoes until they burst, creating a fresh, liquid gold sauce. The aroma is intoxicating—a mixture of peppery basil and fruity olive oil that makes your kitchen feel like a trattoria on the Italian coast.
Ingredients
- 12 oz linguine or spaghetti
- 2 cups heirloom cherry tomatoes, halved
- 3 cloves garlic, thinly shaved
- 1/2 cup extra virgin olive oil
- 1 large bunch fresh basil, torn
- 1/2 cup freshly grated Parmesan cheese
- Red pepper flakes (optional)
How to make it
- In a large bowl, combine the halved tomatoes, shaved garlic, olive oil, and half of the torn basil. Let this sit at room temperature for at least 30 minutes to macerate and create a natural sauce.
- Bring a large pot of heavily salted water to a boil. Cook the linguine until it is exactly al dente—it should still have a firm bite.
- Before draining, reserve 1/2 cup of the starchy pasta water. This is your secret weapon for the perfect sauce.
- Drain the pasta and immediately toss it into the bowl with the tomato mixture while it is piping hot.
- Add the Parmesan cheese and a splash of the reserved pasta water. Toss vigorously with tongs; the heat from the pasta and water will melt the cheese and oil into a creamy emulsion.
- Top with the remaining fresh basil and a pinch of red pepper flakes. Serve immediately at room temperature or warm.
4 Iced Summer Coffee Drinks (Barista Quality)

Why we love this
There is a specific joy in the sound of ice clinking against glass on a sweltering July morning. This brown sugar shaken espresso is a tactile and sensory delight, featuring a thick, frothy foam on top that tastes like toasted caramel. The deep, roasted notes of the espresso are mellowed by the sweetness of the sugar and the creaminess of the milk, creating a balanced, refreshing drink that looks as beautiful as a sunset with its marbleized swirls.
Ingredients
- 2 shots of hot espresso (or 1/2 cup very strong coffee)
- 1 tablespoon brown sugar
- 1/4 teaspoon ground cinnamon
- 1/2 cup oat milk or whole milk
- Plenty of ice
How to make it
- Brew your espresso directly into a heat-safe glass or a small jar. Immediately stir in the brown sugar and cinnamon while the coffee is hot so the sugar dissolves completely.
- Fill a cocktail shaker or a large mason jar halfway with ice cubes. Pour the sweetened espresso over the ice.
- Secure the lid tightly and shake vigorously for at least 20-30 seconds. You are looking for the coffee to double in volume and create a thick, tan foam.
- Fill a serving glass with fresh ice. Strain the frothy espresso into the glass, making sure to scrape out all that precious foam.
- Slowly pour the milk of your choice over the top. Watch as the milk cascades through the foam and mixes with the dark coffee for a beautiful visual effect.
- Give it a gentle stir and enjoy immediately while the foam is stiff and the drink is ice-cold.
10 Sweetest Summer Desserts (No-Bake Options)

Why we love this
No-bake lemon icebox cake is the ultimate solution for a summer dessert that doesn’t involve turning on the oven. It is incredibly refreshing, with a tart lemon curd that cuts through the sweetness of the whipped cream and softened graham crackers. The texture is reminiscent of a light, airy mousse, and as it sets, it becomes a sliceable masterpiece that feels cold and crisp against the tongue, smelling faintly of sunshine and vanilla.
Ingredients
- 2 cups heavy whipping cream
- 1/2 cup powdered sugar
- 1 cup lemon curd (store-bought or homemade)
- 1 box graham crackers
- Zest of 2 lemons
- Fresh berries for topping
How to make it
- In a large chilled bowl, whip the heavy cream and powdered sugar together until stiff peaks form. Be careful not to over-whip into butter; you want it light and spreadable.
- Gently fold in 1/2 cup of the lemon curd to create a lemon-infused whipped cream. Do this slowly to keep the air in the cream.
- Spread a very thin layer of the cream on the bottom of an 8×8 inch baking dish to act as an anchor for the crackers.
- Place a single layer of graham crackers over the cream. Spread a layer of the lemon cream over the crackers, then drizzle a few teaspoons of the remaining lemon curd on top.
- Repeat the layers (crackers, cream, curd) until you reach the top of the dish, ending with a smooth layer of cream.
- Cover and refrigerate for at least 8 hours, or ideally overnight. This time is crucial as the crackers absorb moisture and turn into a cake-like texture. Top with lemon zest and berries before serving.
9 Most Delicious Summer Dinners (Comida Rica)
[IMAGE_10]
Why we love this
Grilled citrus garlic shrimp skewers are the stars of any summer dinner table. The shrimp are plump and succulent, having absorbed a marinade of bright lime, savory garlic, and a hint of cilantro. When they hit the grill, they develop a beautiful charred edge that adds a hint of bitterness to balance the sweet meat of the shellfish. Served over a bed of fluffy rice or tucked into warm tortillas, they provide a light yet satisfying meal that smells like an island vacation.
Ingredients
- 1 lb large shrimp, peeled and deveined
- 3 tablespoons olive oil
- 3 cloves garlic, minced
- Juice and zest of 1 lime
- 1 teaspoon smoked paprika
- 2 tablespoons fresh cilantro, chopped
- Wooden or metal skewers
How to make it
- If using wooden skewers, soak them in water for at least 30 minutes to prevent them from burning on the grill.
- In a medium bowl, whisk together the olive oil, garlic, lime juice, lime zest, smoked paprika, and cilantro.
- Add the shrimp to the marinade and toss to coat. Let them marinate in the refrigerator for only 15-20 minutes. Marinating longer can cause the acid in the lime to “cook” the shrimp and make them rubbery.
- Thread the shrimp onto the skewers, piercing them through the tail and the head end so they stay secure and don’t spin.
- Preheat the grill to high heat. Place the skewers on the grill and cook for 2-3 minutes per side.
- The shrimp are done when they turn opaque and form a nice “C” shape. Avoid overcooking until they form a tight “O,” as this indicates they will be tough. Serve immediately with extra lime wedges.
Conclusion
Mastering the simple food board trend is all about celebrating the season and the people you share it with. From the zesty snap of grilled shrimp to the cooling sweetness of a watermelon salad, these recipes are designed to bring vibrant flavors to your table with minimal stress. So, grab your favorite board, gather your ingredients, and start creating your own summer masterpiece. Happy hosting!