

How to Make a Viral-Worthy Snack Board in Under 10 Minutes
There is something inherently magical about the moment you set a beautiful, overflowing board in the center of a table. It’s more than just food; it’s an invitation to linger, to laugh, and to share stories while picking at artisanal cheeses, sun-ripened fruits, and perfectly crisp crackers. I remember one humid Tuesday when the house felt like a sauna and my energy was at zero—I threw together a ‘fridge raid’ board that ended up being the highlight of our week. It reminded me that we don’t need a three-course meal to feel pampered; we just need a little bit of color and a lot of heart.
The secret to the viral ‘simple food board’ isn’t about expensive ingredients; it’s about the art of the assembly. It’s the way a sprig of fresh rosemary smells against a wedge of sharp cheddar, or the satisfying crunch of a sea-salt almond paired with a sweet dried apricot. Whether you’re hosting a backyard bash or just treating yourself after a long day of work, mastering the art of the 10-minute board is the ultimate lifestyle hack. Let’s dive into some of my favorite ways to elevate your summer dining with these effortless, board-friendly inspirations!
10 Easy Summer Meals for Busy Weeknights

Why we love this
Nothing says summer like a Zucchini Ribbon Pesto Pasta that feels light yet incredibly satisfying. The aroma of freshly slapped basil leaves mingling with toasted pine nuts fills the kitchen with an earthy, verdant scent that instantly lifts the mood. As you twirl the tender, al dente strands of pasta, you get the satisfying snap of fresh zucchini ribbons and the silky, buttery texture of high-quality olive oil coating every bite. It’s a dish that tastes like a golden sunset in a bowl, perfect for those nights when you want to eat well without spending hours over a hot stove.
Ingredients
- 12 oz Linguine or Spaghetti
- 2 medium Zucchini, ribboned with a peeler
- 1 cup Fresh Basil leaves
- 1/3 cup Pine nuts, toasted
- 1/2 cup Parmigiano-Reggiano, grated
- 2 cloves Garlic
- 1/2 cup Extra virgin olive oil
- Lemon zest and juice from one lemon
- Salt and cracked black pepper to taste
How to make it
- Fill a large pot with water and add a generous tablespoon of salt; bring it to a rolling boil over high heat. The water should taste like the sea to properly season the pasta from the inside out.
- While the water heats, place the basil, toasted pine nuts, garlic, and parmesan in a food processor. Pulse until coarsely chopped, then slowly drizzle in the olive oil while the motor is running until the sauce is creamy and emulsified.
- Once the water is boiling, add the pasta and cook according to package instructions, but start testing for ‘al dente’ (firm to the bite) about 2 minutes before the timer ends.
- During the last 60 seconds of pasta cooking, drop the zucchini ribbons into the boiling water with the pasta. This softens the zucchini just enough without making it mushy or watery.
- Before draining, reserve 1 cup of the starchy pasta water. Drain the pasta and zucchini, then return them to the warm pot.
- Pour the pesto over the pasta and toss gently with tongs. Add small splashes of the reserved pasta water to create a glossy, silken sauce that clings to every strand. Finish with a squeeze of lemon juice for brightness.
5 Best Chicken Caesar Wraps Recipes for Lunch

Why we love this
The Classic Grilled Chicken Caesar Wrap is the ultimate handheld lunch that never goes out of style. There’s a wonderful contrast between the warm, charred chicken breast and the ice-cold, crisp romaine lettuce that provides a refreshing crunch in every mouthful. The creamy, garlicky Caesar dressing acts as the perfect glue, offering a savory tang that balances the salty punch of the parmesan shavings. Wrapping it all in a soft, pillowy flour tortilla creates a comforting, portable feast that smells of grilled charcoal and fresh citrus.
Ingredients
- 2 Large Flour tortillas
- 2 Grilled chicken breasts, sliced
- 2 cups Romaine lettuce, chopped
- 1/4 cup Caesar dressing
- 1/4 cup Shaved Parmesan cheese
- 1/2 cup Garlic croutons, crushed slightly
- 1 tsp Black pepper
How to make it
- Preheat a grill pan or outdoor grill to medium-high heat. Season the chicken breasts with salt, pepper, and a touch of olive oil.
- Place chicken on the grill and cook for 6-7 minutes per side. Look for clear juices and an internal temperature of 165°F (74°C). Let the chicken rest for 5 minutes before slicing to ensure the juices redistribute through the meat.
- In a large mixing bowl, toss the chopped romaine, parmesan, and crushed croutons with the Caesar dressing until every leaf is evenly coated and glistening.
- Lay the flour tortillas flat on a clean surface. If they are stiff, microwave them for 10 seconds to make them pliable.
- Arrange the sliced chicken in the center of the tortilla and top with a generous heap of the dressed salad.
- Fold in the sides of the tortilla, then roll tightly from the bottom up. For a professional touch, sear the seam of the wrap on a hot pan for 30 seconds to lock it closed and add a satisfying crunch.
7 Refreshing Summer Desserts to Cool You Down

Why we love this
A Watermelon and Feta Skewer with balsamic glaze is the quintessential cooling dessert for a hot afternoon. The vibrant red of the melon looks stunning against the stark white feta, creating a visual pop that is as refreshing as it is beautiful. When you take a bite, the explosion of sweet, icy juice from the watermelon is immediately met with the creamy, salty tang of the cheese, while the mint garnish provides a cooling aroma that lingers on the palate. It’s a sophisticated, low-sugar treat that feels like a breeze on a 90-degree day.
Ingredients
- 1/2 small Seedless Watermelon, cubed
- 8 oz Feta cheese, cut into 1-inch cubes
- 1 bunch Fresh Mint leaves
- 1/4 cup Balsamic glaze
- Wooden skewers
How to make it
- Prepare your watermelon by cutting off the rind and slicing the flesh into uniform 1-inch cubes. Keep the watermelon in the refrigerator until the very moment of assembly to ensure it is ice-cold.
- Cut the feta cheese into cubes of the same size. Tip: Use a sharp, non-serrated knife dipped in warm water to get clean edges on the feta without it crumbling.
- To assemble, thread a mint leaf onto the skewer, followed by a watermelon cube, and then a feta cube. Repeat once more for a full skewer.
- Arrange the skewers on a chilled platter. This helps maintain the temperature while serving outdoors.
- Just before serving, drizzle the balsamic glaze in a zig-zag motion across the skewers. Look for a glaze that is thick and syrupy so it stays put rather than running off.
12 Crowd-Pleasing Picnic Sides for Your Next Outing

Why we love this
The Honey-Mustard German Potato Salad is a game-changer for picnics because it skips the mayo for a zesty, herb-forward vinaigrette. The scent of sautéed shallots and crispy bacon bits creates an irresistible savory aroma that draws everyone to the basket. You get the soft, waxy texture of Red Bliss potatoes paired with the sharp, acidic bite of apple cider vinegar and the sweet undertone of honey. It’s a robust, rustic side dish that holds up beautifully in the sun, getting even better as the flavors meld together over the afternoon.
Ingredients
- 2 lbs Red Bliss potatoes, halved
- 6 slices Bacon, chopped
- 1 small Shallot, minced
- 1/4 cup Apple cider vinegar
- 2 tbsp Dijon mustard
- 1 tbsp Honey
- 1/4 cup Fresh parsley, chopped
How to make it
- Place halved potatoes in a large pot of cold salted water. Bring to a boil, then reduce heat to a simmer. Cook for 10-12 minutes until fork-tender but not falling apart. Drain and let steam-dry for 2 minutes.
- In a cold skillet, add the chopped bacon. Turn the heat to medium and fry until the fat has rendered and the bacon is mahogany brown and very crispy. Remove bacon with a slotted spoon.
- Keep 2 tablespoons of the bacon fat in the pan. Add the minced shallots and cook for 2-3 minutes until translucent and fragrant.
- Whisk in the apple cider vinegar, Dijon mustard, and honey directly into the warm pan with the shallots. This creates an emulsified warm dressing that the potatoes will soak up instantly.
- While the potatoes are still warm, toss them with the dressing, crispy bacon, and fresh parsley. Serving them warm or at room temperature allows the starches to absorb the vinegary tang.
6 Cold Summer Soup Recipes You Will Love

Why we love this
Chilled Cucumber and Avocado Soup is like a spa day in a bowl, offering a creamy, velvety texture without any heavy dairy. The pale green hue is incredibly soothing to look at, and the scent of fresh dill and lemon zest is immediately invigorating. As the cool liquid hits your tongue, you notice the richness of the avocado balanced by the hydrating, crisp essence of the cucumber. It’s a sophisticated starter that feels light on the stomach and provides a much-needed burst of hydration during the peak of summer heat.
Ingredients
- 2 large English Cucumbers, peeled and seeded
- 2 ripe Avocados
- 1 cup Plain Greek yogurt (optional, for extra creaminess)
- 1/4 cup Fresh dill
- 2 Green onions, white and light green parts
- Juice of 2 limes
- 1/2 cup Cold vegetable broth
How to make it
- Roughly chop the cucumbers and green onions. Ensure you remove the seeds from the cucumbers to prevent the soup from becoming too watery or bitter.
- Place the cucumbers, avocado flesh, green onions, dill, lime juice, and yogurt into a high-speed blender.
- Start blending on low speed, gradually increasing to high. Pour in the cold vegetable broth slowly until you reach your desired consistency—it should be thick enough to coat the back of a spoon but thin enough to sip.
- Taste for seasoning; avocado can absorb a lot of salt, so don’t be afraid to add a pinch more to make the flavors pop.
- Pour the soup into a glass container and chill in the refrigerator for at least 2 hours. Serving it in chilled bowls will maintain that ‘ice-cold’ sensation.
- Garnish with a drizzle of olive oil and a few sprigs of dill before serving.
8 Effortless Summer Crockpot Recipes for Easy Dinners

Why we love this
Slow-Cooker Pulled Pork Carnitas are a revelation because they give you that crispy, carnitas-style finish without you standing over a frying pan. The aroma of cumin, oregano, and citrus simmering all day long creates a warm, welcoming atmosphere in the home that builds anticipation for dinner. The meat becomes so tender it practically melts at the touch of a fork, yet a quick stint under the broiler gives it those iconic charred, crunchy edges. It’s the perfect protein for a ‘taco board’ where everyone can build their own masterpiece.
Ingredients
- 4 lb Pork Shoulder (Boston Butt)
- 1 tbsp Cumin
- 1 tbsp Dried Oregano
- 1 Orange, halved
- 1 Onion, quartered
- 4 cloves Garlic, smashed
- 1/2 cup Chicken broth
How to make it
- Rub the pork shoulder thoroughly with a mixture of salt, pepper, cumin, and oregano, pressing the spices into the meat to form a flavorful crust.
- Place the onion, garlic, and chicken broth in the bottom of the slow cooker. Squeeze the orange juice over the pork and drop the husks into the pot for extra aromatic oils.
- Set the crockpot to ‘Low’ and cook for 8-10 hours. You know it’s done when the meat pulls apart with zero resistance.
- Carefully remove the pork and shred it using two forks, discarding any large pieces of fat.
- For the viral ‘crispy’ finish, spread the shredded meat on a baking sheet and drizzle with some of the cooking juices.
- Broil on high for 4-5 minutes until the tips of the meat turn dark brown and crispy. Watch it closely; it can go from golden to burnt in seconds!
9 Vibrant Summer Cocktails for Your Next Party

Why we love this
The Sparkling Hibiscus Limeade is a show-stopping cocktail that brings a deep, ruby-red elegance to any snack board display. The floral notes of the hibiscus are delicate and sophisticated, paired perfectly with the sharp, zesty punch of fresh lime juice. When topped with sparkling water, the bubbles carry the aroma of citrus and flowers right to your nose, making every sip feel like a celebration. It’s a visually stunning drink that is just as delicious as a mocktail as it is when spiked with a splash of premium silver tequila.
Ingredients
- 1/2 cup Dried hibiscus flowers
- 1 cup Sugar (for simple syrup)
- 1 cup Fresh lime juice
- 1 liter Sparkling water
- Fresh mint and lime wheels for garnish
- Ice
How to make it
- Make the hibiscus syrup: Boil 1 cup of water with the sugar and dried hibiscus flowers. Once boiling, remove from heat and let steep for 15 minutes. Strain and chill the syrup.
- In a large pitcher, combine the chilled hibiscus syrup and the fresh lime juice. Stir well to integrate the flavors.
- Fill highball glasses to the brim with ice—the more ice, the slower it melts, keeping your drink from becoming diluted.
- Pour the hibiscus-lime base into the glasses until they are half full.
- Top with sparkling water, pouring slowly to maintain the carbonation. Use a long spoon to give it one gentle stir from the bottom.
- Garnish with a lime wheel and a sprig of mint. Pro tip: Slap the mint against your hand before garnishing to release the essential oils for a better aroma.
11 Healthy Summer Salad Recipes for BBQ Season

Why we love this
A Grilled Peach and Burrata Salad is the epitome of summer luxury, blending the smoky sweetness of fruit with the creamy, decadent center of Italian cheese. The scent of caramelized peaches on the grill is intoxicating, smelling like a summer bonfire and a fruit orchard combined. The burrata provides a rich, milky texture that creates a beautiful mess when broken open, coating the peppery arugula leaves in a natural dressing. It’s a dish that feels incredibly gourmet but relies entirely on the quality of the seasonal ingredients.
Ingredients
- 3 Ripe Peaches, halved and pitted
- 2 balls of Burrata cheese
- 4 cups Baby Arugula
- 1/2 cup Toasted Walnuts
- Balsamic glaze
- Flaky sea salt
How to make it
- Preheat your grill to medium heat and lightly brush the cut side of the peaches with a neutral oil like grapeseed to prevent sticking.
- Place peaches cut-side down on the grill for 3-4 minutes. Do not move them! You want those distinct, dark char marks that signify caramelization.
- Once the peaches release easily from the grill, remove them and let them cool slightly so they don’t wilt the greens immediately.
- Arrange a bed of baby arugula on a large platter. Place the warm grilled peaches on top.
- Carefully place the burrata balls in the center of the salad. Use a knife to gently tear the outer skin of the cheese so the creamy ‘stracciatella’ center starts to ooze out.
- Sprinkle with toasted walnuts and flaky sea salt. Finish with a generous drizzle of balsamic glaze and serve immediately while the peaches are still warm.
15 Amazing Cookout Side Dishes Everyone Will Crave
Why we love this
Mexican Street Corn (Elote) Off-The-Cob is the ultimate crowd-pleaser that brings a smoky, spicy, and creamy explosion to your palate. The aroma of roasted corn kernels mixed with chili powder and fresh cilantro is a staple of summer festivals. Each spoonful offers a satisfying pop from the corn, followed by the salty crumble of cotija cheese and the tang of lime-infused crema. It is messy, bold, and incredibly vibrant, making it the perfect companion to grilled meats or a standalone star on a vibrant snack board.
Ingredients
- 4 cups Roasted corn kernels (fresh is best)
- 1/4 cup Mayonnaise
- 1/4 cup Mexican Crema or Sour Cream
- 1/2 cup Cotija cheese, crumbled
- 1 tsp Chili powder or Ancho chili
- 1/4 cup Cilantro, chopped
- Lime wedges
How to make it
- If using fresh corn, grill the cobs over high heat until charred on all sides (about 8-10 minutes). Cut the kernels off the cob into a large bowl.
- While the corn is still warm, add the mayonnaise and crema. The heat from the corn will help thin the dressing so it coats every kernel evenly without being clumpy.
- Fold in half of the cotija cheese and the cilantro. Save the rest for the topping to provide visual contrast.
- Add the chili powder. Tip: Start with a little and add more; the heat of chili powder can vary greatly between brands.
- Squeeze in the juice of one lime wedge and stir thoroughly.
- Transfer to a serving bowl, top with the remaining cheese and a sprinkle of cilantro. Serve with extra lime wedges on the side for guests who want an extra zing.
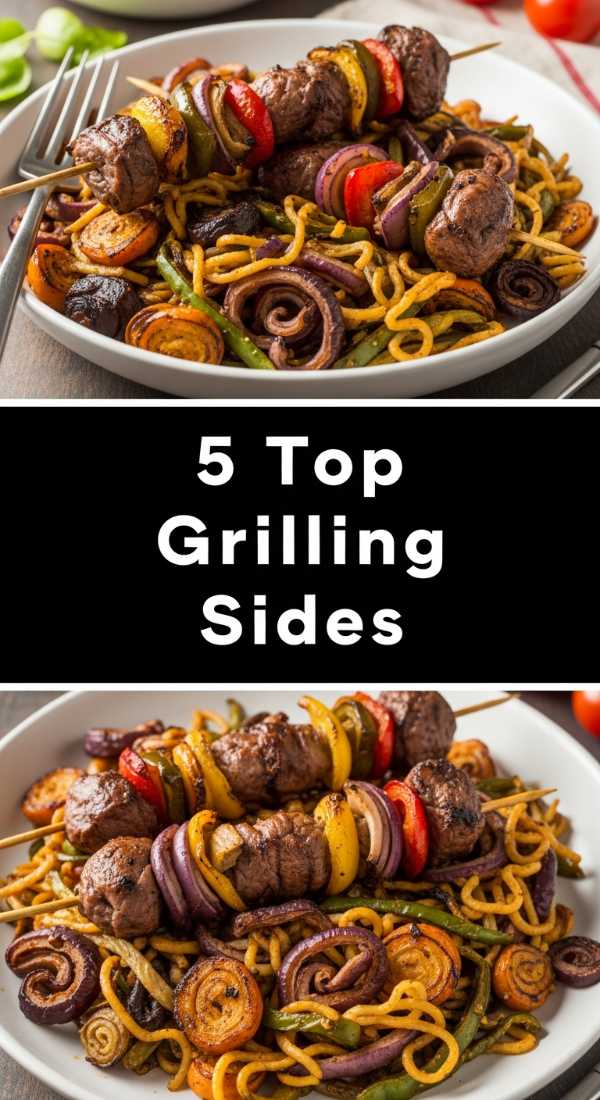
5 Easy Grilling Sides for Your Next Backyard BBQ
[IMAGE_10]
Why we love this
Charred Asparagus with Lemon and Parmesan is the simplest way to add a touch of elegance to your outdoor grill. The smell of the asparagus tips getting slightly crispy and smoky over the flames is one of the true scents of early summer. The texture is the star here—tender-crisp stalks that snap when bitten, contrasted with the salty, melted parmesan that creates a lacy crust on the vegetable. It’s a bright, clean side dish that cuts through the richness of grilled steaks or burgers perfectly.
Ingredients
- 1 lb Asparagus, woody ends trimmed
- 2 tbsp Extra virgin olive oil
- 1/2 cup Shaved Parmesan
- 1 Lemon, halved
- 1/2 tsp Red pepper flakes
- Kosher salt
How to make it
- Prepare the asparagus by snapping off the tough, woody ends. A pro tip: hold the stalk at both ends and bend it; it will naturally break at the point where the stalk becomes tender.
- Toss the asparagus in a bowl with olive oil, salt, and red pepper flakes until every spear is glistening.
- Place the asparagus spears across the grill grates (perpendicular to the bars so they don’t fall through!) over medium-high heat.
- Grill for 4-5 minutes, turning occasionally with tongs. You are looking for a vibrant green color with spots of dark char.
- In the last minute of cooking, place the lemon halves cut-side down on the grill to caramelize the sugars and make the juice extra sweet.
- Remove the asparagus to a platter, squeeze the charred lemon over them, and immediately top with parmesan shavings so the cheese softens and slightly melts from the residual heat.
Conclusion
Creating a viral-worthy snack board is all about embracing the seasons and keeping things simple. By mixing textures, colors, and a few well-executed ‘mini-recipes,’ you turn a simple meal into an experience. I hope these ideas inspire you to gather your favorite people, clear the table, and start building your own edible masterpiece. Remember, there are no rules—if it looks good and tastes better, you’ve nailed it!