
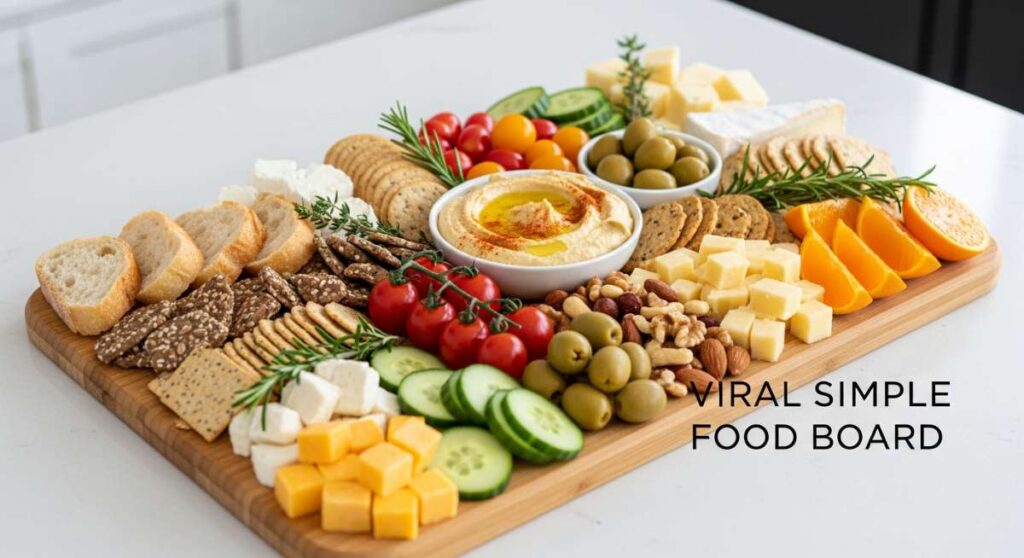
We have all been there—the frantic ten minutes before guests arrive when the kitchen feels like a disaster zone and the menu feels incomplete. But there is a certain kind of magic that happens when you stop worrying about perfection and start focusing on the joy of gathering. Today, I am sharing my secret for creating that ‘wow’ factor without the stress: the ultimate viral food board. It’s more than just a platter; it’s a canvas for your favorite memories and flavors, designed to be shared, photographed, and devoured.
Building a food board is an emotional experience for me. It reminds me of long summer afternoons and the pride of celebrating big milestones with the people I love most. Whether you are hosting a graduation bash or just a simple Sunday brunch, these elements bring texture, color, and soul to your table. Let’s dive into the components that will make your board the talk of the neighborhood.
How to bake graduation cakes?

Why we love this
There is nothing quite like the scent of a fresh vanilla bean cake wafting through the house to signal a major life transition. This cake is the centerpiece of any celebratory board, offering a moist, tender crumb that melts on the tongue while the velvety buttercream provides a rich, decadent finish. Imagine the sight of gold leaf shimmering under the dining room lights and the soft, pillowy texture of a sponge that has been baked to golden perfection. It is a triumphant bite that tastes like hard work and bright futures.
Ingredients
- 2 1/2 cups all-purpose flour
- 1 1/2 cups granulated sugar
- 1 tbsp baking powder
- 1/2 tsp salt
- 3/4 cup unsalted butter, softened
- 1 cup whole milk
- 2 tsp vanilla extract
- 3 large eggs
How to make it
- Preheat your oven to 350°F (175°C) and grease two 6-inch round cake pans thoroughly with butter and a dusting of flour to ensure a clean release.
- In a large mixing bowl, sift together the flour, baking powder, and salt to aerate the dry ingredients, which creates a lighter cake structure.
- In a separate stand mixer, cream the softened butter and sugar on medium-high speed for about 3-5 minutes until the mixture is pale, fluffy, and doubled in volume.
- Add the eggs one at a time, beating well after each addition to properly emulsify the fats and liquids; stir in the vanilla extract at the end.
- Lower the mixer speed and alternate adding the dry ingredients and the milk, starting and ending with the flour mixture, mixing only until just combined to avoid overworking the gluten.
- Divide the batter evenly between the prepared pans and bake for 30-35 minutes, or until a toothpick inserted into the center comes out clean with just a few moist crumbs.
- Cool in the pans for 10 minutes before transferring to a wire rack to cool completely before frosting with your choice of graduation-themed colors.
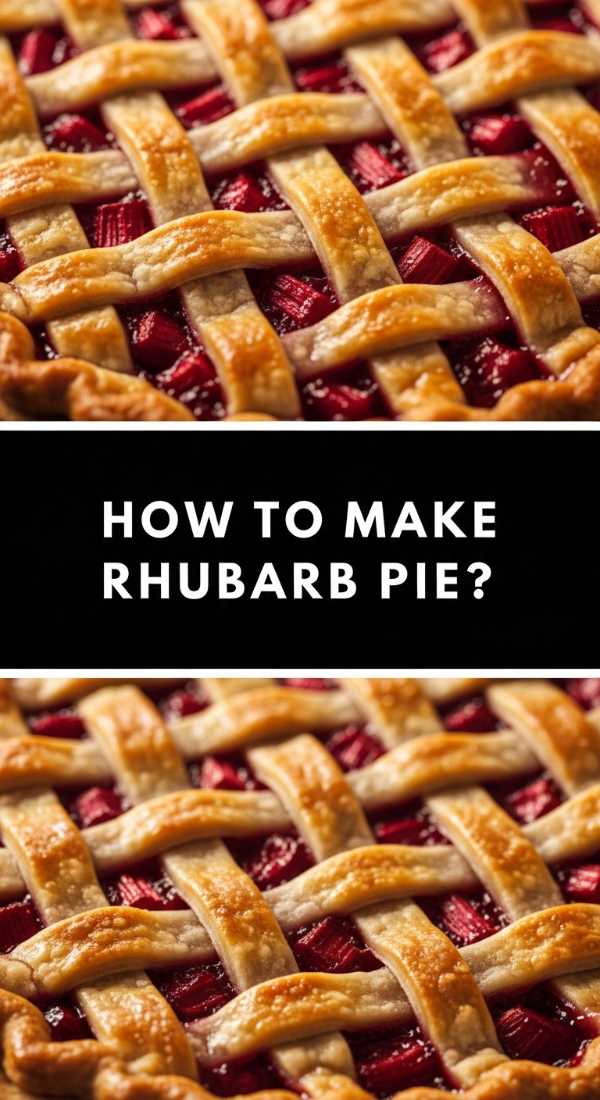
How to make rhubarb pie?
Why we love this
Rhubarb pie is the ultimate study in contrasts, where the aggressive tartness of the stalks meets the mellow sweetness of a buttery, flaky crust. As it bakes, the rhubarb softens into a jam-like consistency, releasing a vibrant, crimson juice that creates a beautiful stained-glass effect through the lattice top. The aroma is nostalgic—a mix of earthy garden scents and caramelized sugar that fills the kitchen with warmth. Each bite offers a crisp snap of pastry followed by a bright, zingy explosion of flavor that defines early summer.
Ingredients
- 4 cups fresh rhubarb, chopped into 1/2-inch pieces
- 1 1/4 cups granulated sugar
- 1/4 cup cornstarch
- 1/2 tsp ground cinnamon
- Double pie crust (homemade or store-bought)
- 1 tbsp cold butter, cubed
- 1 egg (for egg wash)
How to make it
- Roll out your bottom pie crust on a lightly floured surface and fit it into a 9-inch pie plate, leaving an inch of overhang; chill in the fridge while you prep the filling.
- In a large bowl, toss the chopped rhubarb with sugar, cornstarch, and cinnamon, ensuring every piece is coated; let it sit for 10 minutes to allow the juices to begin macerating.
- Pour the rhubarb mixture into the chilled crust, spreading it evenly, and dot the top with the small cubes of cold butter to add richness to the sauce.
- Roll out the second crust and cut into strips to create a lattice pattern, weaving them over the top of the fruit and crimping the edges to seal.
- Brush the lattice with a simple egg wash (one egg beaten with a splash of water) and sprinkle with a bit of extra sugar for a professional, sparkling crunch.
- Bake at 425°F for the first 15 minutes, then reduce the heat to 375°F and bake for another 40-45 minutes until the filling is bubbling thick and the crust is deep golden brown.
- Let the pie cool for at least 3 hours before slicing; this is critical for the filling to set so it doesn’t run when served on your board.
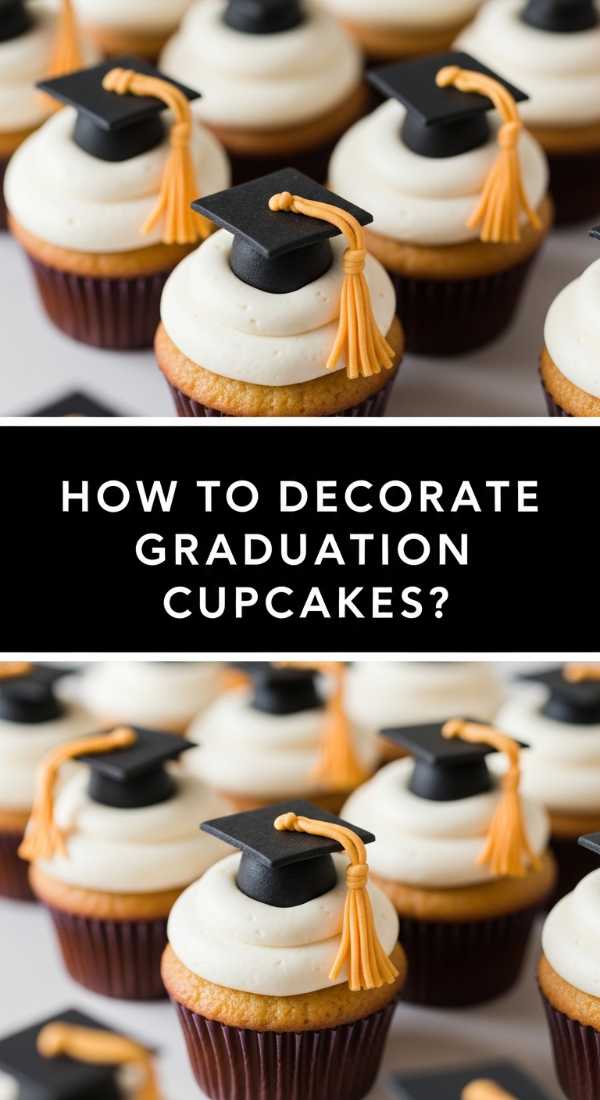
How to decorate graduation cupcakes?
Why we love this
Cupcakes are the playful, handheld cousins of the celebration cake, making them perfect for a grab-and-go board. When decorated with tiny mortarboards and tassels, they become edible works of art that spark immediate conversation and joy. The creamy swirl of frosting provides a luscious mouthfeel that contrasts beautifully with the soft cake base. They add height and variety to your food board, acting as little pedestals of sweetness that celebrate the graduate’s personality and achievements.
Ingredients
- 12 pre-baked cupcakes
- 2 cups stiff vanilla buttercream
- Ghirardelli chocolate squares
- Mini peanut butter cups
- Sour belt candy or fruit leather (for tassels)
- M&Ms or small round candies
- Food coloring
How to make it
- Fit a piping bag with a large open star tip and fill with buttercream; pipe tall, stable swirls onto each cooled cupcake, starting from the outside and spiraling inward.
- To create the graduation caps, unwrap the mini peanut butter cups and place them upside down on top of the frosting swirl to act as the base.
- Apply a small dot of frosting to the bottom of a chocolate square and press it firmly onto the peanut butter cup to create the mortarboard top.
- Slice thin strips of sour belt candy or fruit leather to create the tassel; use a tiny dab of frosting to attach it from the center of the chocolate square hanging over the side.
- Place a single M&M or round candy in the center of the square to cover the end of the tassel, giving it a finished, polished look.
- If desired, use a small round piping tip to write the graduation year or the student’s initials on the chocolate square using contrasting colored icing.
- Chill the cupcakes for 15 minutes before placing them on the board to ensure the decorations are set and won’t shift during transport.
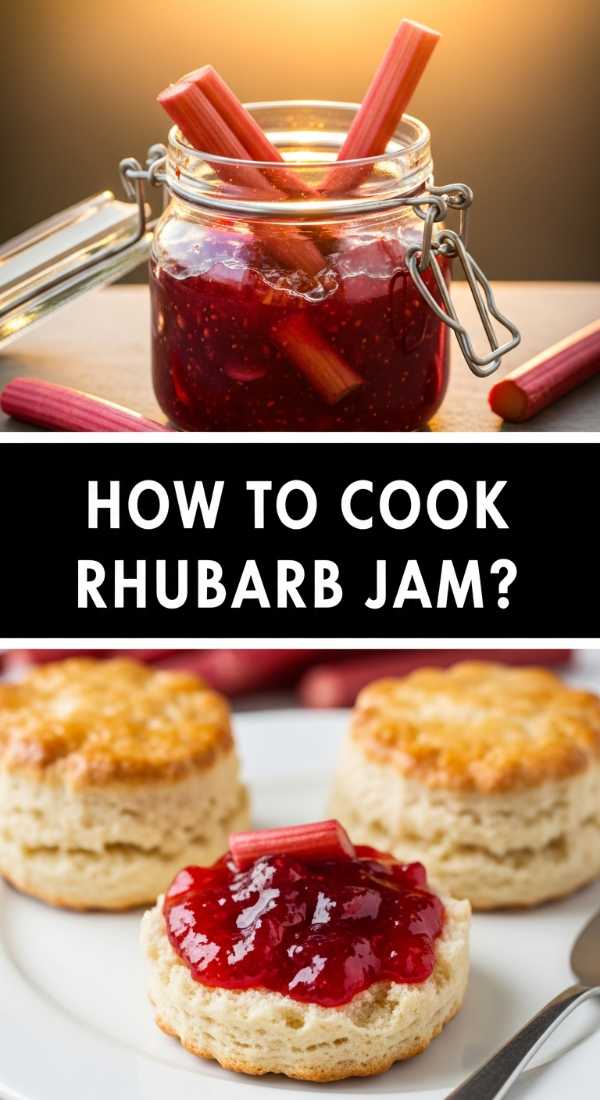
How to cook rhubarb jam?
Why we love this
Rhubarb jam is like capturing sunshine in a jar, offering a concentrated burst of tangy fruit flavor that brightens up any cheese or charcuterie board. The texture is thick and spreadable, with soft bits of fruit that provide a delightful resistance against the silkiness of the preserve. Its striking ruby-pink hue adds a pop of natural color to your board, while the sharp acidity cuts through the richness of brie or goat cheese. It’s a sophisticated condiment that feels artisanal and deeply rooted in seasonal cooking.
Ingredients
- 1 lb rhubarb, sliced thin
- 1 1/2 cups granulated sugar
- 1 tbsp lemon juice
- 1 tsp lemon zest
- 1/2 tsp vanilla bean paste (optional)
How to make it
- In a heavy-bottomed saucepan, combine the sliced rhubarb, sugar, and lemon juice; stir well and let it sit for about 30 minutes until the rhubarb releases its moisture.
- Place the pan over medium heat and bring the mixture to a gentle boil, stirring frequently with a wooden spoon to prevent the sugar from scorching.
- Once boiling, reduce the heat slightly and simmer for 15-20 minutes, skimming off any foam that rises to the surface with a metal spoon to keep the jam clear.
- Use a potato masher to break up any large chunks of rhubarb if you prefer a smoother consistency, or leave it chunky for a more rustic feel.
- Test the set point by placing a small spoonful of jam on a chilled plate; let it sit for a minute, then push it with your finger—if it wrinkles, it is ready.
- Stir in the lemon zest and vanilla bean paste during the last minute of cooking to preserve their bright, fresh aromatic oils.
- Pour the hot jam into sterilized glass jars, leaving a half-inch of headspace, and let it cool completely before sealing and refrigerating.
How to brew fun coffee?

Why we love this
Coffee shouldn’t just be a morning routine; it should be an experience that delights the senses and complements the sweetness of a food board. Fun coffee involves layers of velvety foam, ribbons of colorful syrups, and a rich, bold espresso base that provides a necessary bitter counterpoint to sugary treats. The ritual of pouring cold foam over a dark brew creates a beautiful marbled effect that is visually stunning. It’s a warm, comforting hug in a mug that encourages guests to linger over the board and enjoy another bite.
Ingredients
- 2 shots of espresso or 1 cup strong cold brew
- 1/2 cup milk (whole or oat works best)
- 1 tbsp lavender or vanilla syrup
- Ice cubes
- Dried edible flower petals or cinnamon dust
How to make it
- Brew your espresso or prep your cold brew and sweeten it with half of your chosen syrup while the liquid is still warm to ensure it dissolves completely.
- Fill a tall glass with large, clear ice cubes to keep the drink cold without diluting it too quickly as you sip.
- Pour the sweetened coffee over the ice, leaving about two inches of space at the top for the foam layer.
- In a separate small jar or milk frother, combine the cold milk with the remaining syrup; froth for about 30-45 seconds until thick, stiff peaks form.
- Slowly pour the cold foam over the back of a spoon onto the coffee to create distinct, beautiful layers that won’t immediately mix.
- Garnish the top of the foam with a sprinkle of dried lavender or a dusting of cinnamon to provide an immediate aromatic hit when the glass is lifted.
- Serve immediately with a long straw, allowing the drinker to stir the layers together as they enjoy the board’s treats.
How to decorate graduation cookies?
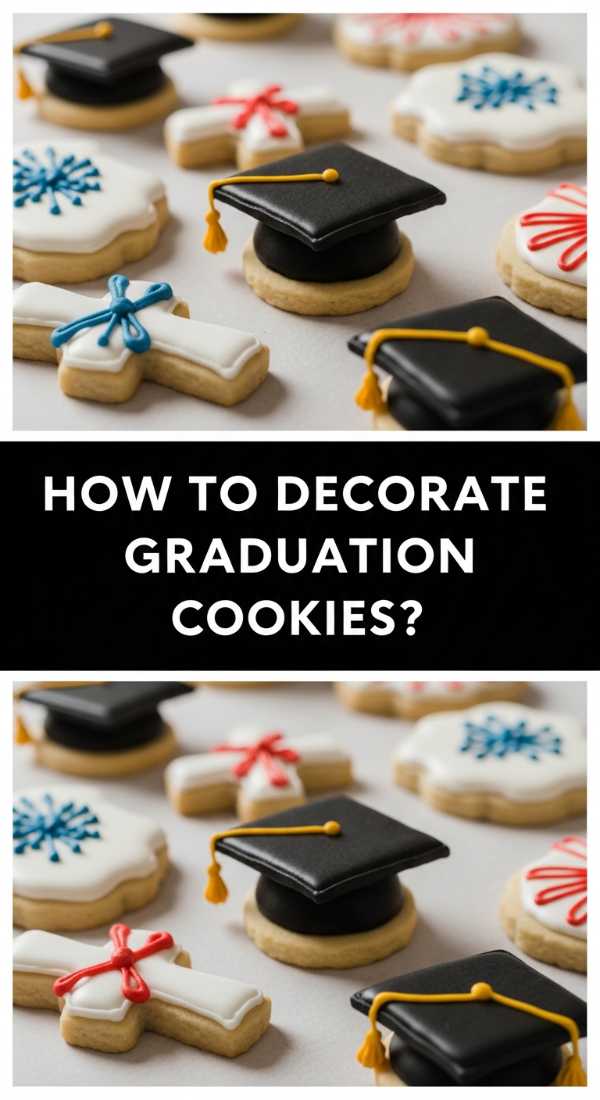
Why we love this
Decorated sugar cookies are the ultimate personalized addition to a viral food board, acting as edible mementos of the big day. The snap of a perfectly baked cookie followed by the sweet, smooth crunch of royal icing is incredibly satisfying. These cookies offer a smooth canvas for intricate designs like diplomas, gowns, or even the graduate’s name. They add a graphic, clean look to the board, and their portability makes them the first thing guests reach for. It’s a labor of love that looks as good as it tastes.
Ingredients
- Batch of chilled sugar cookie dough
- Royal icing (stiff and flood consistency)
- Gel food coloring
- Piping bags and small round tips
- Edible gold luster dust
How to make it
- Roll out your chilled dough to a consistent 1/4-inch thickness and cut into shapes like diplomas or graduation caps; bake and cool completely on a wire rack.
- Outline the edge of the cookie using the stiff-consistency royal icing to create a dam that will hold the thinner icing in place.
- Fill the center of the outlined area with flood-consistency icing, using a toothpick or scribe tool to pop any air bubbles and push the icing into the corners.
- Allow the base layer of icing to dry for at least 4-6 hours (or overnight) until it is completely hard to the touch before adding details.
- Use the stiff icing to pipe ‘ribbons’ on diplomas or tassels on the caps, giving the cookies a three-dimensional, textured appearance.
- Mix a tiny drop of vodka or lemon extract with gold luster dust to create a paint; use a fine-tip brush to paint gold accents onto the dried icing for a touch of luxury.
- Store the cookies in a single layer until the decorations are fully set before stacking them or arranging them artistically on your board.
How to bake rhubarb crumble?

Why we love this
Rhubarb crumble is the definition of comfort food, offering a rustic, unpretentious charm that feels right at home on a family-style board. The bottom layer is a bubbling, tart rhubarb compote that provides a soft, jammy base for the crowning glory: a thick, buttery oat topping. The contrast between the soft fruit and the crunchy, cinnamon-spiced crumble is a textural dream. Served warm, it releases a scent of toasted grains and summer fruit that is simply irresistible, especially when a dollop of cream starts to melt into the crevices.
Ingredients
- 5 cups rhubarb, cut into 1-inch pieces
- 3/4 cup sugar
- 1 cup rolled oats
- 1 cup all-purpose flour
- 1/2 cup brown sugar
- 1/2 cup cold unsalted butter, cubed
- 1 tsp ground ginger
How to make it
- Preheat your oven to 375°F (190°C) and lightly butter a 9×9 inch baking dish to prevent the fruit from sticking.
- Toss the rhubarb pieces with the 3/4 cup of granulated sugar and the ground ginger directly in the baking dish until evenly coated.
- In a separate bowl, combine the oats, flour, and brown sugar; mix well to ensure the brown sugar is broken up and distributed.
- Add the cold, cubed butter to the dry mixture and use your fingertips or a pastry cutter to rub it in until the mixture looks like coarse breadcrumbs with some pea-sized lumps.
- Spread the crumble topping evenly over the rhubarb, pressing down slightly so the topping adheres to the fruit but remains craggy on top.
- Bake for 35-40 minutes; the fruit should be bubbling at the edges and the topping should be a deep, toasted golden brown.
- Let the crumble rest for 10-15 minutes before serving to allow the fruit juices to thicken slightly, making it easier to portion out onto individual plates.
How to prep toddler lunch?
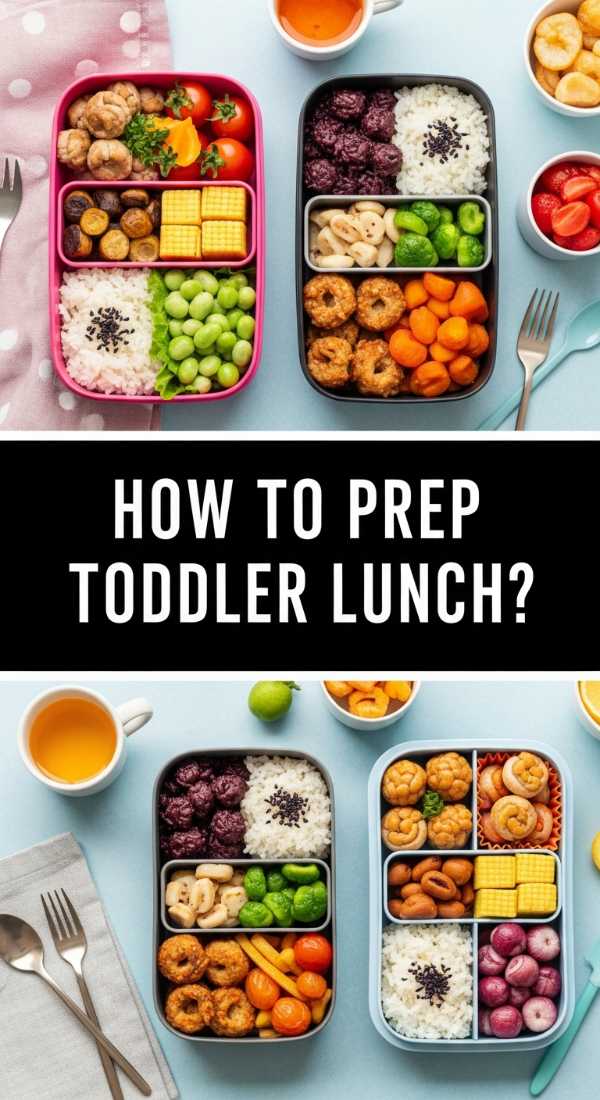
Why we love this
A toddler-focused section on your board is a lifesaver for busy parents and a delight for little ones who eat with their eyes. This is all about bright colors, bite-sized shapes, and a variety of textures that encourage exploration. Think of crunchy cucumber rounds, soft cheese cubes, and sweet berry clusters all arranged in a way that feels like a treasure map. The joy of a toddler lunch board is its versatility—it’s a stress-free way to ensure the youngest guests are well-fed while adding a playful, whimsical energy to your overall presentation.
Ingredients
- Whole grain bread and mild deli turkey
- Cheddar cheese slices
- Cucumber and bell pepper strips
- Grapes (halved) or blueberries
- Hummus or yogurt for dipping
- Fun-shaped cookie cutters
How to make it
- Use small crust cutters or sandwich presses to turn standard turkey and cheese sandwiches into stars, hearts, or dinosaurs, which makes them instantly more appealing to picky eaters.
- Slice cucumbers and peppers into thin, manageable matchsticks that are easy for small hands to grip and dip.
- Always slice grapes lengthwise and blueberries in half to ensure they are safe for toddlers to consume without being a choking hazard.
- Place a small, colorful silicone muffin liner in the center of the toddler section and fill it with a creamy dip like hummus or Greek yogurt.
- Arrange the items in a ‘rainbow’ pattern to make the board visually stimulating; toddlers are often more willing to try new vegetables when they are part of a colorful display.
- Add a few ‘fun’ elements like goldfish crackers or yogurt-covered raisins in small clusters to keep the little ones engaged with the meal.
- Keep the items separate rather than mixed to respect the toddler preference for ‘clean’ flavors, allowing them to choose their own culinary adventure.
How to make mulberry recipes?
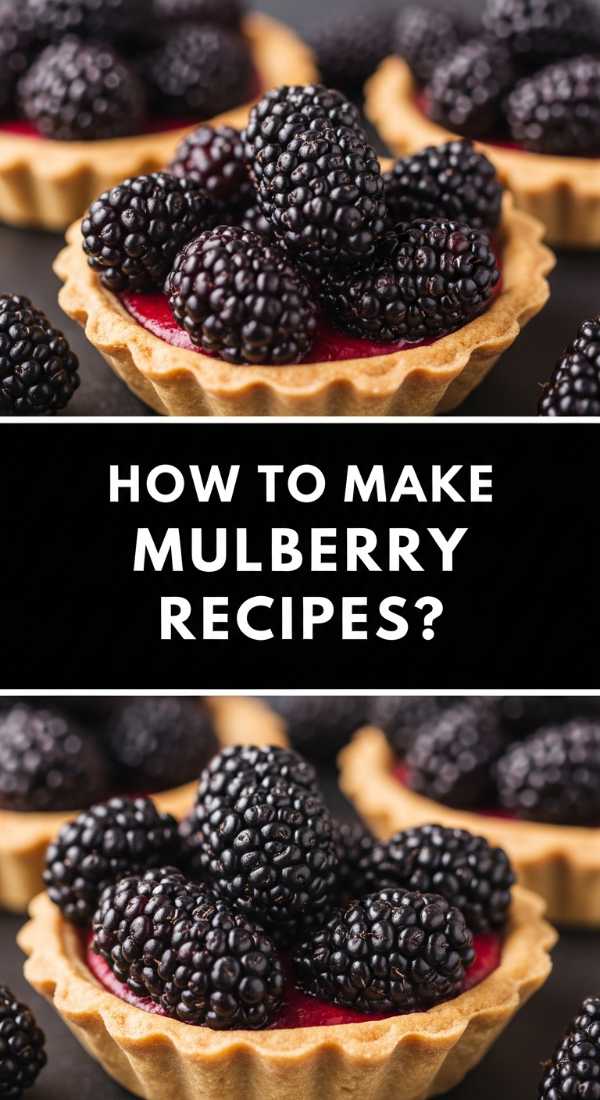
Why we love this
Mulberries are the hidden gems of the foraging world, offering an earthy, honey-like sweetness that is far more complex than a standard blackberry. Incorporating mulberries into a recipe, like a simple compote or syrup, adds a sense of wild, seasonal luxury to your food board. The deep purple juice is incredibly vibrant, providing a stunning natural dye for frostings or yogurts. Tasting a mulberry recipe feels like a secret shared with nature—a fleeting, delicious moment that celebrates the bounty of the backyard.
Ingredients
- 2 cups fresh mulberries (stems removed)
- 2 tbsp honey or maple syrup
- 1 tsp lemon zest
- A pinch of sea salt
- Optional: 1 tsp balsamic glaze
How to make it
- Carefully wash the mulberries and use a small pair of scissors or your fingernails to snip off the green stems, which can be slightly woody.
- Place the berries in a small saucepan over low heat and add the honey and lemon zest; the low heat is crucial to prevent the delicate sugars from burning.
- Gently crush about a quarter of the berries with a fork to release their deep purple juices, which will form the base of your sauce.
- Simmer the mixture for 8-10 minutes, stirring occasionally, until the liquid has reduced and thickened into a syrupy consistency that coats the back of a spoon.
- If using, stir in a drop of balsamic glaze at the end; the acidity heightens the earthy notes of the mulberry and adds a sophisticated depth.
- Remove from heat and stir in a tiny pinch of sea salt to balance the sweetness and make the berry flavor truly pop.
- Cool the compote to room temperature and serve it in a glass bowl on your board, perfect for drizzling over cheeses, cakes, or crusty bread.
How to host summer dinners?

Why we love this
Hosting a summer dinner is about embracing the ‘golden hour’—that magical time when the light turns soft and everything feels relaxed. The best summer dinners are centered around large, communal food boards that allow guests to graze at their own pace while the sun sets. There is a breezy, effortless elegance to serving fresh, vibrant ingredients outdoors under a canopy of trees or string lights. It’s an atmosphere defined by cold glasses of wine, the hum of crickets, and the lingering scent of charcoal and jasmine. It turns a simple meal into a restorative escape.
Ingredients
- A large wooden board or marble slab
- Variety of grilled proteins (shrimp, chicken skewers)
- Fresh seasonal fruits (peaches, berries)
- Assorted crackers and crusty baguette
- Fresh herbs (basil, mint) for garnish
- Ambient lighting (candles or fairy lights)
How to make it
- Plan a menu that requires minimal ‘active’ cooking once guests arrive; prep your food board components in advance so you can spend your time socializing rather than in the kitchen.
- Set the scene by layering textures on your table—use a linen runner, mismatched vintage plates, and plenty of unscented candles to create a warm, inviting glow.
- Arrange your food board with a focus on ‘abundance’; fill every gap with nuts, dried fruits, or fresh herbs so the board looks lush and overflowing.
- Keep the proteins light and zesty; grill shrimp with lemon and garlic or chicken with a chimichurri sauce, then place them directly on the board among the vegetables.
- Incorporate ‘cooling’ elements like sliced peaches or chilled cucumber salad to balance the warmth of the summer evening.
- Provide plenty of cloth napkins and small plates to encourage guests to help themselves, making the dining experience feel casual and interactive.
- End the evening by clearing the main board and replacing it with a ‘dessert board’ featuring the rhubarb crumble or graduation cookies you prepared earlier.
The Secret to a Board That Goes Viral
At the end of the day, the secret to a viral food board isn’t just about the expensive ingredients or the perfect lighting. It’s about the heart you put into it. When you combine a tart rhubarb pie with the whimsy of graduation cupcakes and the earthiness of mulberries, you aren’t just serving food—you are telling a story. You are creating a space where people feel seen, celebrated, and fed. So, grab your biggest board, follow these steps, and watch as your table becomes the heart of the home.