
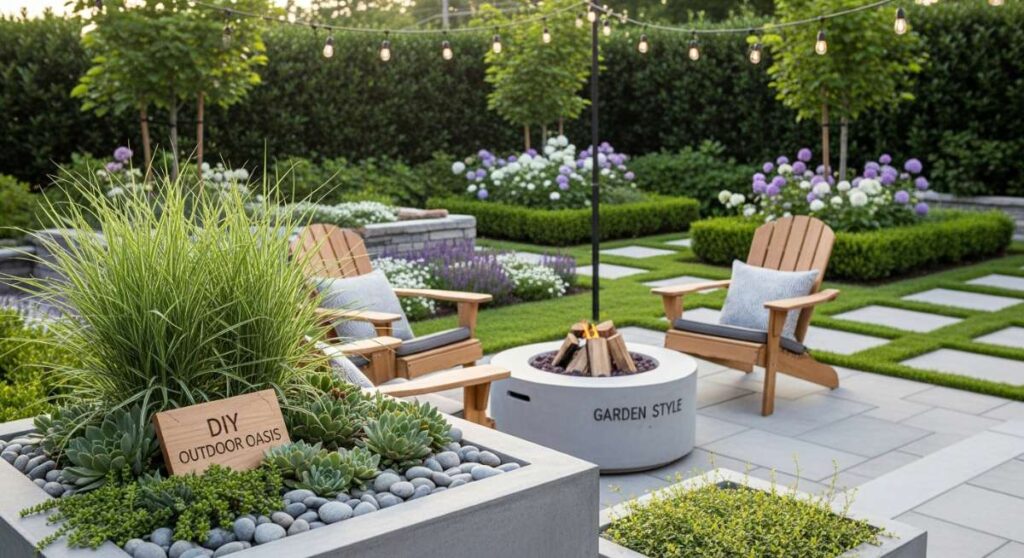
I used to look out my back window and see nothing but a patch of neglected grass and a few rusted chairs. It felt like a chore just to step outside, let alone host a summer BBQ. But I realized that our outdoor spaces are just as much a part of our home as our living rooms. They are the places where we breathe deep, watch the sunset, and let the chaos of the day melt away into the evening air.
Creating an outdoor haven doesn’t require a professional landscaper or a massive bank account; it just takes a bit of vision and some dirt under your fingernails. There is something so incredibly soul-filling about building your own sanctuary from scratch. Whether you have a sprawling backyard or a tiny balcony, these DIY garden style secrets will help you craft a space that feels like a permanent vacation right at home.
How to Craft a Backyard Bird Oasis Using Budget Finds
Why we love this
There is nothing quite like the gentle melody of birdsong to make a garden feel alive and serene. Imagine sitting on your porch with a morning coffee, watching colorful wings flutter through the mist while the scent of damp earth and blooming jasmine fills the air. It’s a tactile experience—the cool splash of water from a birdbath and the rhythmic chirping create a sensory retreat that grounds you in nature. By using budget-friendly finds, you create a rustic, lived-in charm that feels intentional and welcoming to our feathered friends.
Essential Elements:
- A shallow basin or thrifted ceramic bowl
- Sturdy stones or river rocks
- Wildbird seed mix
- Suet cages or recycled mesh bags
- A shepherd’s hook or low-hanging tree branch
How to make it
- Select a location that is visible from your window but quiet enough for birds to feel safe, ideally near a natural cover like a shrub.
- Thoroughly clean your thrifted basin with a mild vinegar solution to ensure no bacteria remains.
- Place a layer of heavy river rocks at the bottom of the basin; these provide a safe footing for smaller birds so they don’t slip in deep water.
- Fill the basin with no more than two inches of fresh water, ensuring the tops of some rocks remain dry for perching.
- Install your feeding station nearby by hanging suet or seed dispensers at varying heights to attract different species.
- Refresh the water daily and clean the feeders weekly to keep your oasis vibrant and healthy for the local wildlife.
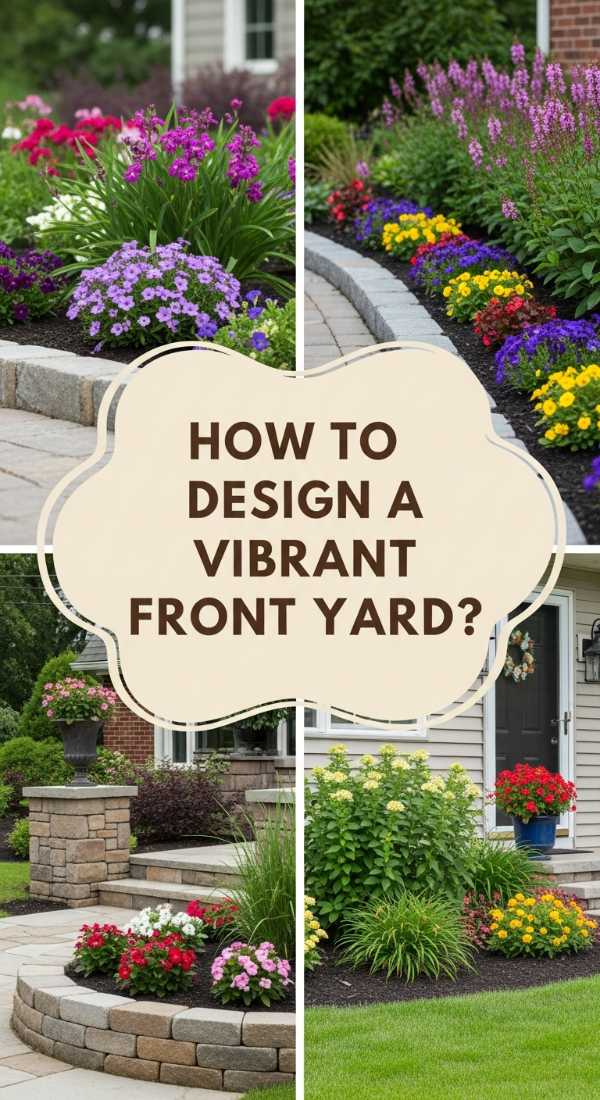
How to Design a Vibrant Front Yard with Flourishing Flower Beds
Why we love this
A flourishing flower bed is like a warm embrace for your home’s exterior, offering a burst of color that instantly lifts your mood. The visual feast of deep purples, sunny yellows, and fiery oranges creates a dynamic landscape that changes with the light of the day. You’ll find yourself pausing to touch the velvet petals and breathing in the heady, sweet perfume of lilies and roses. It’s about more than curb appeal; it’s about creating a living tapestry that celebrates the changing seasons and greets you every time you pull into the driveway.
Essential Elements:
- High-quality organic compost
- A mix of perennials and annuals
- Natural cedar mulch
- Stone or brick edging
- Hand trowel and garden rake
How to make it
- Map out your bed’s shape using a garden hose to visualize the curves before you dig; curved lines often look more organic and professional.
- Remove the grass and weeds from the designated area, ensuring you get the roots to prevent regrowth.
- Turn the soil to a depth of about 12 inches and mix in a generous amount of compost to provide a nutrient-rich foundation.
- Arrange your plants while they are still in their pots to ensure proper spacing and height—place taller plants in the back and shorter ones in the front.
- Dig holes twice as wide as the root ball, gently tease the roots, and plant them at the same depth they were in the nursery container.
- Apply a 2-3 inch layer of mulch around the plants, keeping it an inch away from the stems to retain moisture and suppress weeds.
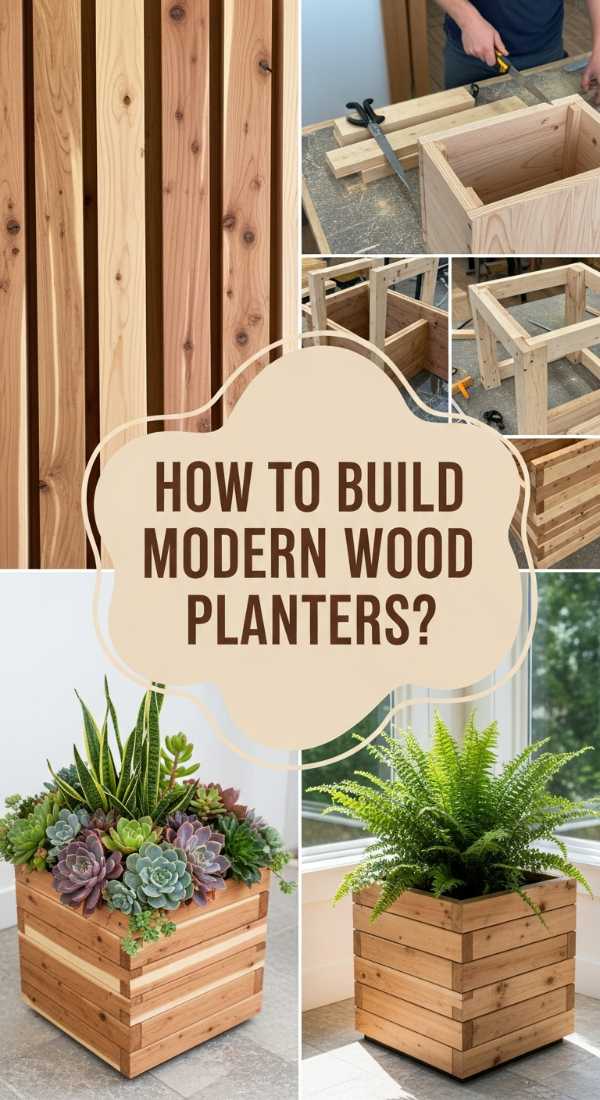
How to Build Modern Wood Planters for an Elevated Garden Look
Why we love this
The clean lines of modern wood planters offer a sophisticated contrast to the wild, organic shapes of garden greenery. There’s a satisfying weight to a handmade cedar box, smelling of fresh-cut timber and rich stain, sitting prominently on a patio. The smooth, sanded texture and the rhythmic pattern of the slats provide a minimalist aesthetic that makes even the simplest snake plant or fern look like a piece of high-end art. It brings an architectural element to your garden that feels structural, permanent, and incredibly chic.
Essential Elements:
- Cedar or pressure-treated lumber
- Exterior-grade wood screws
- Wood glue and waterproof sealant
- Power drill and miter saw
- Landscape fabric for lining
How to make it
- Measure and cut four side panels of equal length and a square base that fits inside the perimeter of the walls.
- Apply wood glue to the edges and join the side panels using a corner clamp to ensure a perfect 90-degree angle.
- Pre-drill holes to prevent the wood from splitting, then secure the corners with two screws per side.
- Insert the base panel about two inches from the bottom to create a recessed look, and drill several drainage holes through the wood.
- Sand all surfaces thoroughly with 120-grit sandpaper and apply a weather-resistant stain or clear coat for longevity.
- Staple landscape fabric inside the planter to hold the soil while allowing water to drain out, then fill with your favorite greens.
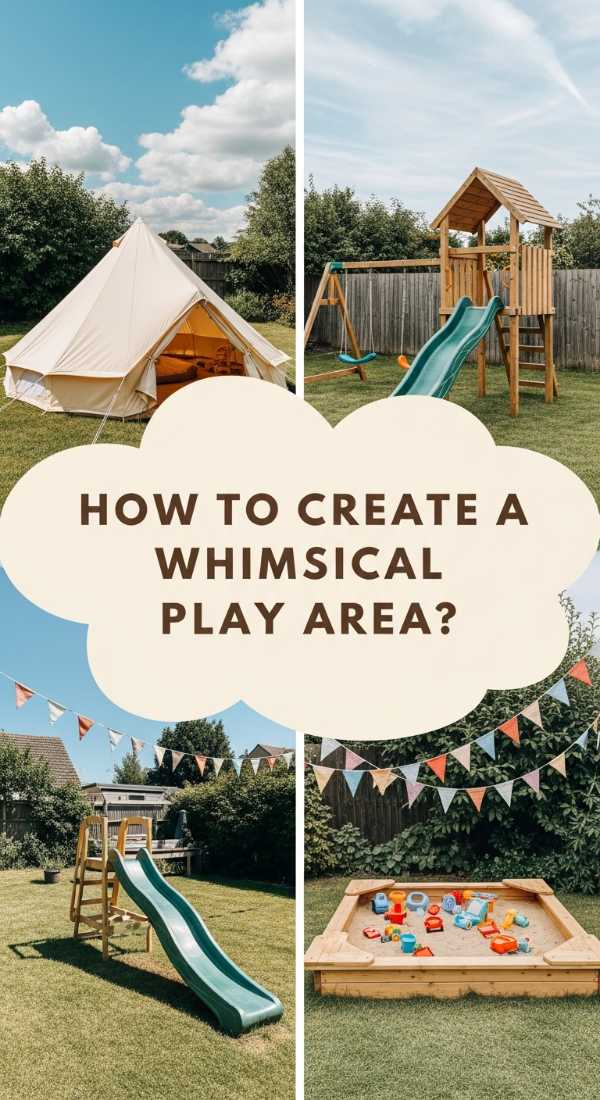
How to Create a Whimsical Outdoor Play Area for Happy Kids

Why we love this
Watching children lose themselves in a world of imagination is the ultimate garden reward. A whimsical play area is a place of soft grass, bright streamers, and hidden nooks where the air is thick with the sound of laughter and the hum of insects. It’s designed to be a tactile wonderland—the cool touch of sand, the tickle of tall ornamental grasses, and the vibrant colors of painted stepping stones. It’s a space that encourages movement and creativity, making the backyard the most magical room in the entire house.
Essential Elements:
- Rubber mulch or soft play sand
- Wooden play structure or teepee
- Colorful bunting and fairy lights
- Large chalkboard paint panel
- Log rounds for stepping stones
How to make it
- Designate a zone with clear boundaries using log rounds or low fencing to separate the play area from the rest of the garden.
- Level the ground and lay down a heavy-duty weed barrier to prevent unwanted growth.
- Cover the area with at least 4 inches of soft landing material like rubber mulch to ensure a safe environment for active play.
- Assemble a central feature, like a simple A-frame teepee, and drape it with weather-resistant fabric for a secret hideout.
- Mount a large piece of plywood treated with outdoor chalkboard paint onto a fence or wall for artistic expression.
- String battery-operated fairy lights through the trees or around the play structure to extend the fun into the twilight hours.
How to Style a Charming Mud Kitchen with Tiny Garden Tools

Why we love this
A mud kitchen is the height of rustic charm, blending the messiness of nature with the structure of pretend play. There’s a nostalgic joy in seeing tiny hands mix “soups” made of rainwater and rose petals, using weathered wooden spoons and dented metal pots. The earthy aroma of damp soil combined with the clinking of stainless steel creates a delightful sensory experience. It’s a beautiful, functional addition to a garden that looks like a miniature version of a countryside cottage kitchen, making the outdoors feel cozy and lived-in.
Essential Elements:
- Upcycled wooden pallets or old side table
- Stainless steel mixing bowls and pots
- Old kitchen utensils (spoons, whisks, ladles)
- Hand pump or large water jug
- Assorted hooks and small shelves
How to make it
- Construct a basic frame using two pallets—one for the back wall and one for the counter—or repurpose an old table by sanding off any peeling paint.
- Cut a hole in the countertop that matches the size of your largest mixing bowl so it can sit flush as a “sink.”
- Attach hooks to the backboard for hanging spoons, whisks, and small gardening trowels.
- Install a small shelf above the counter for jars filled with “ingredients” like pinecones, acorns, and dried leaves.
- Set up a water source, such as a large beverage dispenser, so the little chefs can easily add liquid to their mud creations.
- Finish the wood with a non-toxic, water-resistant oil to protect it from the splashes and spills of messy play.
How to Curate a Relaxing Hot Tub Area for Ultimate Home Spa Vibes

Why we love this
Transforming your hot tub into a spa-like retreat is all about the atmosphere—the steam rising into the cool night air, the soft glow of lanterns, and the scent of eucalyptus. It’s a sensory escape where the world goes quiet and the warmth of the water soothes tired muscles. By styling the surrounding area with lush greenery and soft textures, you create a private cocoon that feels world’s away from the daily grind. It’s the ultimate luxury that turns a simple soak into a restorative ritual that you’ll look forward to every single day.
Essential Elements:
- Privacy screens or tall potted plants
- Outdoor rug and plush towels
- Waterproof LED candles
- Side table for drinks
- Essential oil diffuser (outdoor safe)
How to make it
- Place your hot tub on a reinforced, level surface such as a concrete pad or a heavy-duty deck designed for the weight.
- Erect privacy screens or plant a row of tall evergreens like Thuja Green Giant to create a sense of seclusion and wind protection.
- Lay a soft, weather-resistant outdoor rug near the entry point to keep feet clean and provide a comfortable place for towels.
- Add a small, waterproof side table nearby to hold books, beverages, and a bluetooth speaker for calming music.
- Arrange various heights of LED candles in glass hurricanes around the perimeter for a safe, flicker-free ambient glow.
- Keep a basket of fresh, fluffy towels and a robe hook within arm’s reach to ensure the spa experience continues even after you step out of the water.
How to Repurpose Rustic Pallets into a Creative Outdoor Kitchen
Why we love this
There is a rugged, industrial beauty in repurposing pallets into a functional outdoor kitchen. The sun-bleached wood and visible grain tell a story of sustainability and grit, providing the perfect backdrop for summer grilling sessions. You can almost smell the charcoal smoke and hear the sizzle of food hitting the grates as you prep veggies on a handmade counter. It’s a project that feels incredibly rewarding because it takes something discarded and turns it into the heart of your outdoor entertainment, offering a cool, artisan vibe that guests will rave about.
Essential Elements:
- 4-6 heat-treated (HT) pallets
- A solid stone or concrete remnant for the counter
- Industrial-style hooks and rails
- Bar stools
- Heavy-duty casters (optional for mobility)
How to make it
- Source pallets that are stamped with “HT” (Heat Treated) to ensure they are safe for use around food and haven’t been chemically treated.
- Stack and screw two pairs of pallets together to create two sturdy pillars for the base of your kitchen.
- Sand every inch of the wood with coarse then fine-grit sandpaper to remove splinters and smooth out the rough texture.
- Bridge the two pillars with a heavy slab of stone, concrete, or thick wood to create your main preparation surface.
- Add pallet boards across the back to create a shelving unit for spices, oils, and grilling tools.
- Stain the wood with a deep walnut or charcoal finish and attach heavy-duty casters if you want the ability to move the kitchen for different events.
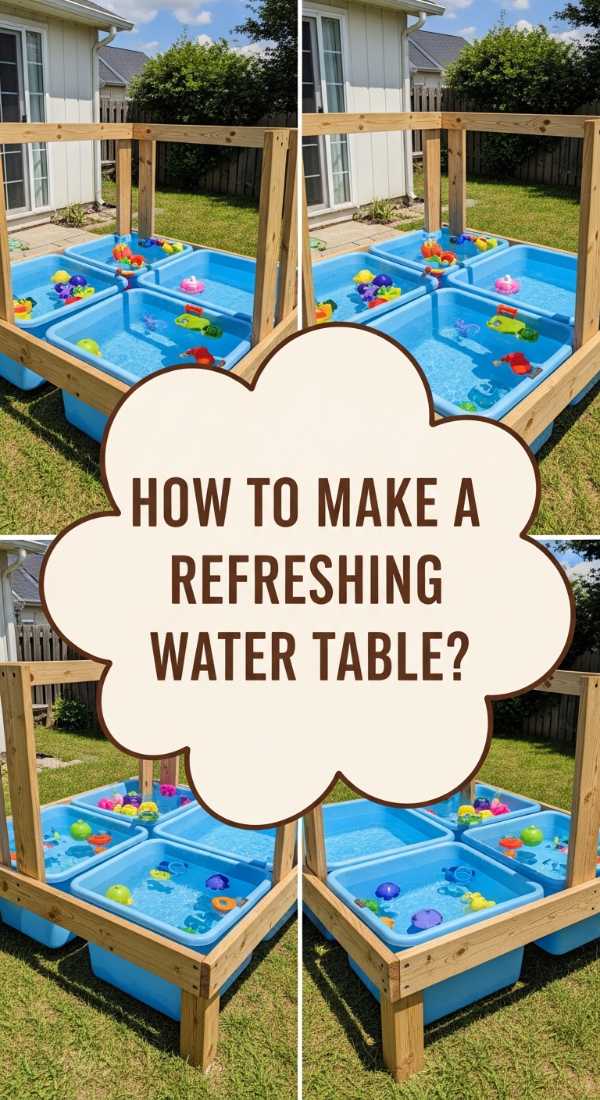
How to Make a Refreshing Water Table for Cool Summer Fun
Why we love this
On a sweltering July afternoon, the sound of splashing water is the most refreshing thing in the world. A DIY water table is a magnet for sensory play, with its cool, shimmering surface and the bright primary colors of floating toys. It’s about the tactile joy of pouring, scooping, and feeling the water run through your fingers. This project adds a playful, dynamic element to the garden that keeps everyone cool while providing a beautiful, bubbling focal point that mimics the soothing effect of a fountain but with way more fun involved.
Essential Elements:
- Large plastic storage bin or galvanized tub
- PVC pipes and connectors
- A small submersible water pump
- Plastic funnels and tubing
- Sturdy wooden frame
How to make it
- Build a simple waist-high wooden frame using 2x4s to hold your tub securely at a comfortable height for standing.
- Place the tub inside the frame and ensure it is level so the water doesn’t spill over one side.
- Construct a “waterfall” tower at one end using PVC pipes, securing funnels at various levels for the water to travel through.
- Install a small submersible pump in the bottom of the tub and run the tubing up through your PVC tower to create a continuous loop.
- Fill the tub with water and turn on the pump to test the flow, adjusting the funnels for maximum splash and movement.
- Add sensory items like smooth river stones, plastic sea creatures, and measuring cups to complete the interactive station.
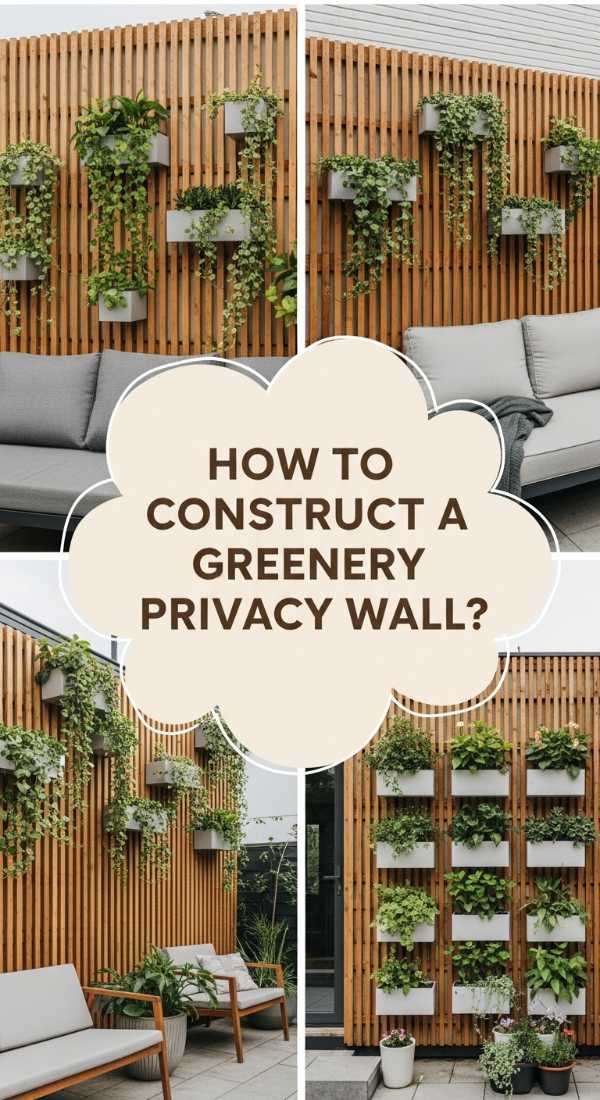
How to Construct a Greenery Privacy Wall with Vertical Planters
Why we love this
A vertical greenery wall is like a living curtain that breathes life into your patio while shielding you from the prying eyes of neighbors. The lush, overlapping leaves of ferns and trailing ivy create a dense wall of emerald green that cools the air and softens the hard lines of fences. It’s an immersive experience—surrounded by the rustle of foliage and the fresh, clean scent of chlorophyll. It turns a flat, boring wall into a three-dimensional garden that feels like a private jungle sanctuary, offering both peace and a stunning visual backdrop.
Essential Elements:
- A wooden trellis or wire grid
- Hanging planter boxes or fabric pockets
- Drip irrigation kit (optional)
- Assorted trailing plants (Pothos, Creeping Jenny, Ivy)
- Strong wall anchors
How to make it
- Secure a heavy-duty trellis or wire mesh to your wall or fence using spacers to allow air to circulate behind the structure.
- Choose a variety of plants with similar light requirements—trailing varieties work best for a “curtain” effect.
- Attach your planters or fabric pockets to the grid, starting from the top and working your way down to ensure full coverage.
- Fill each pocket with a lightweight potting mix designed for containers to keep the weight manageable.
- Plant your greenery, ensuring that the trailing stems are tucked slightly behind the grid to encourage them to climb and hang.
- Install a simple drip irrigation line at the top to allow water to trickle down through all the pockets, ensuring even hydration without constant manual watering.
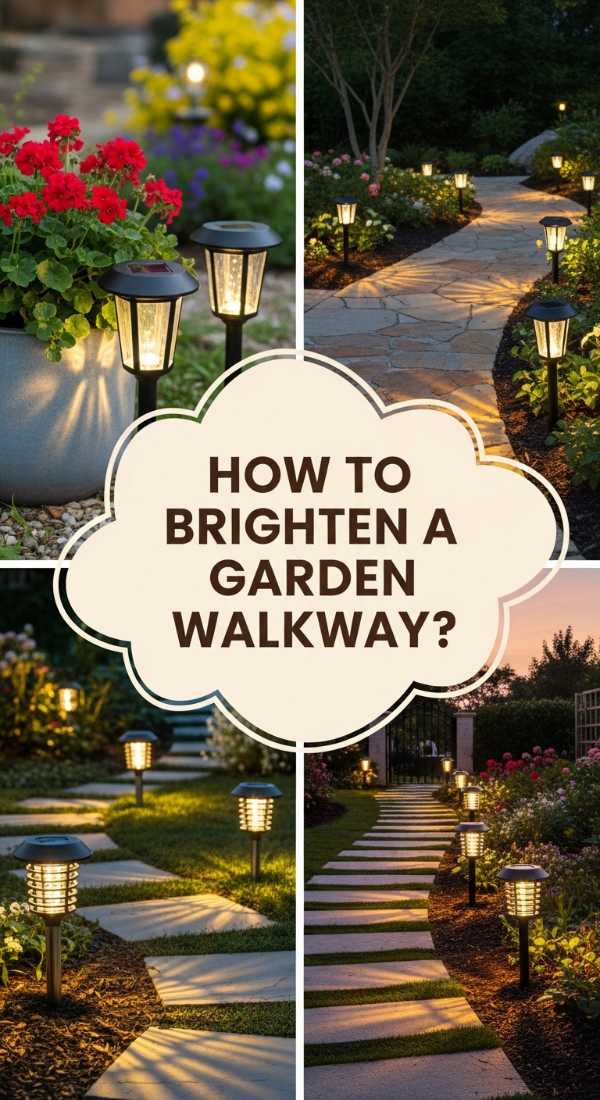
How to Brighten a Garden Walkway with Simple Solar Light Hacks
[IMAGE_10]
Why we love this
As the sun sets, a well-lit path guides you through the shadows like a trail of fallen stars. There is a quiet magic in seeing your garden transformed by soft, amber light that highlights the textures of the stones and the silhouettes of the trees. It’s about the feeling of safety and enchantment as you walk through your haven at night, the air cooling and the crickets beginning their chorus. These solar hacks aren’t just practical; they are a design element that adds depth and drama, making your outdoor space usable long after the day has ended.
Essential Elements:
- Stake-style solar lights
- Glass jars or decorative lanterns
- Gravel or decorative river stones
- Frosted glass spray paint (optional)
- Adhesive for mounting
How to make it
- Map out your walkway, placing a solar stake every 3 to 4 feet to create a continuous guide without being overpowering.
- For a more high-end look, remove the stakes from the solar tops and glue the light units into the lids of upside-down mason jars.
- Spray the jars with frosted glass paint to diffuse the light, creating a soft, romantic glow rather than a harsh beam.
- Place these jars directly on the ground or nestle them into a bed of white river rocks to reflect the light upwards.
- Ensure the solar panels are positioned in an area that receives at least 6 hours of direct sunlight during the day.
- Intersperse a few color-changing solar lights in hidden corners to create a subtle “moonlight” effect on large leaves or garden sculptures.
Conclusion: Your Sanctuary Awaits
Designing an outdoor haven is a journey of creativity and connection. It’s about taking the time to nurture your environment so that it, in turn, can nurture you. Whether you start with a single birdbath or commit to a full pallet kitchen, every small change adds a layer of personality and peace to your home. Don’t be afraid to experiment, get a little dirty, and make these projects your own. Your garden is a living, breathing reflection of your style—go out there and make it beautiful!