
From Pantry to Post: Creating the Most Instagrammable Food Board
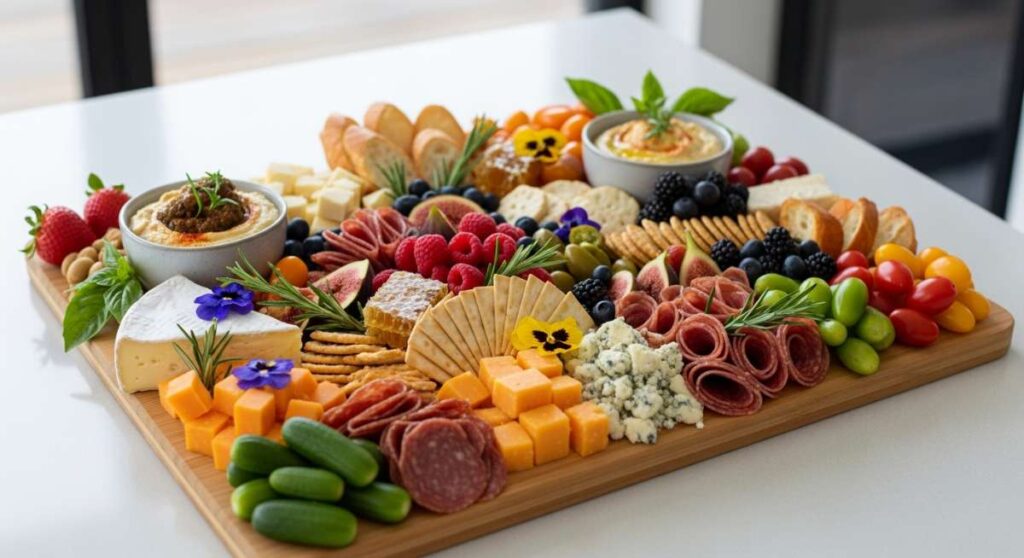
There is something inherently magical about a gathering that centers around a beautifully curated board. I remember the first time I set out a sprawling spread for my best friend’s birthday; the way the sunlight hit the vibrant greens and the golden crusts of the bread felt like a scene straight out of a glossy magazine. It’s not just about the food; it’s about the communal experience of reaching for a bite, the laughter shared over a shared plate, and the collective ‘oohs’ and ‘aahs’ as guests realize that simple pantry staples have been transformed into a work of art.
Creating a viral food board doesn’t require a culinary degree—it requires a little bit of heart and an eye for color. Whether you are hosting a backyard summer bash or a cozy indoor brunch, the secret lies in the variety of textures and the freshness of the ingredients. In this guide, I’m sharing ten of my absolute favorite recipes that transition perfectly from your kitchen counter to a stunning social media post, ensuring your next gathering is as delicious as it is photogenic.
How to Make Chicken Caesar Wraps

Why we love this
These wraps are the ultimate crowd-pleaser, offering a satisfying crunch from the Romaine lettuce paired with the savory, umami-rich punch of creamy Caesar dressing and perfectly seasoned chicken. There’s a certain nostalgia in a Caesar wrap that feels both sophisticated and comforting, especially when the tortilla is slightly toasted to give it a warm, pliable texture. Every bite is a harmonious blend of salty parmesan, juicy poultry, and that signature garlic kick that lingers just long enough to make you reach for another.
Ingredients
- 2 large flour tortillas
- 1 cup grilled chicken breast, sliced
- 2 cups Romaine lettuce, chopped
- 1/4 cup Caesar dressing
- 2 tablespoons grated Parmesan cheese
- 1/4 cup croutons, crushed slightly
- Black pepper to taste
How to make it
- Begin by preparing your chicken; ensure it is cooked through and cooled slightly so it doesn’t wilt the lettuce immediately. Slice the breast into thin, even strips against the grain for maximum tenderness.
- In a large mixing bowl, toss the chopped Romaine lettuce with the Caesar dressing, Parmesan cheese, and crushed croutons until every leaf is glistening and evenly coated.
- Lay your flour tortillas flat on a clean surface. For a professional touch, warm them for 10 seconds in a dry skillet over medium heat to make them more flexible.
- Distribute the dressed salad evenly across the center of each tortilla, leaving about an inch of space at the edges.
- Top the salad with the sliced chicken strips and a crack of fresh black pepper.
- To fold, tuck the sides in first, then roll tightly from the bottom up, maintaining firm pressure to ensure the wrap stays together when sliced. Cut on a diagonal for that perfect ‘Instagrammable’ cross-section.
How to Bake Strawberry Pie
Why we love this
A fresh strawberry pie is the crown jewel of any summer dessert board, radiating a deep, ruby-red glow that looks incredible under natural light. The aroma of simmering berries mixed with buttery, flaky pastry is enough to bring anyone to the kitchen in seconds. We love the contrast between the tender, sweet-tart filling and the crisp, golden-brown lattice crust that crumbles delicately with every forkful, releasing a burst of summer sunshine that tastes like pure bliss.
Ingredients
- 2 discs of chilled pie dough
- 5 cups fresh strawberries, hulled and halved
- 3/4 cup granulated sugar
- 3 tablespoons cornstarch
- 1 tablespoon lemon juice
- 1 teaspoon vanilla extract
- 1 egg (for egg wash)
- Turbinado sugar for topping
How to make it
- Preheat your oven to 400°F (200°C). Roll out your first disc of dough on a floured surface until it’s about 12 inches in diameter, then gently press it into a 9-inch pie dish.
- In a large bowl, gently fold the strawberries with the sugar, cornstarch, lemon juice, and vanilla. Let them sit for about 10 minutes; this allows the juices to start releasing and the cornstarch to begin its thickening magic.
- Pour the berry mixture into the prepared crust, mounding them slightly in the center for a beautiful domestic look.
- Roll out the second disc of dough and cut into 1-inch strips. Weave a lattice pattern over the berries, pressing the edges to seal them to the bottom crust.
- Whisk the egg with a splash of water and brush the lattice generously. Sprinkle with turbinado sugar for a glittering, crunchy finish.
- Bake for 45-50 minutes. If the edges brown too quickly, tent them with foil. The pie is done when the crust is deep golden and the filling is bubbling thick, viscous bubbles near the center.
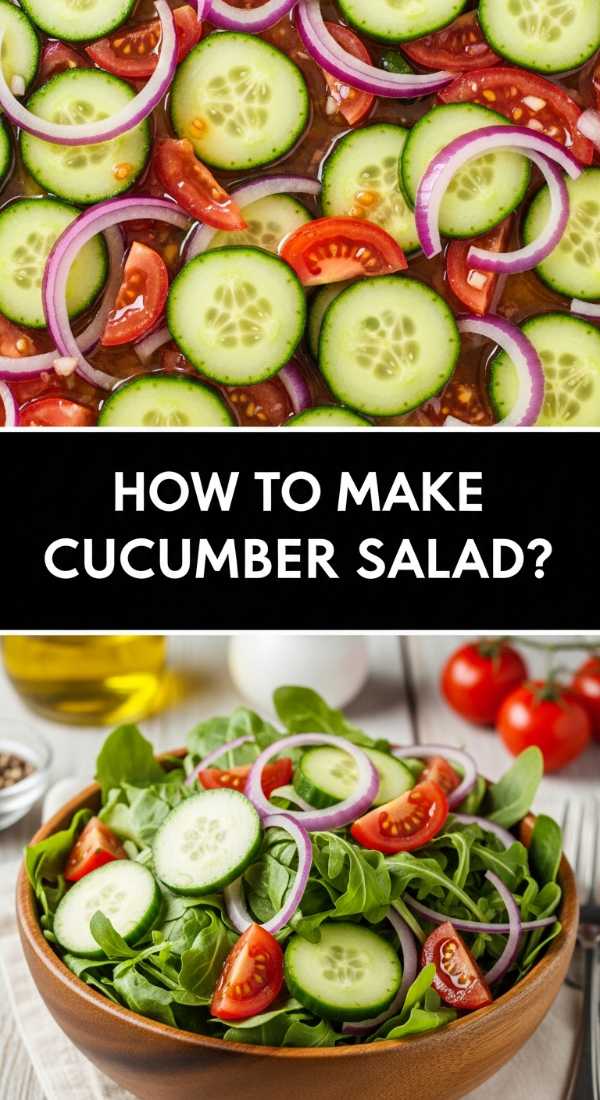
How to Make Cucumber Salad
Why we love this
This salad is the refreshing palate cleanser every heavy food board needs, providing a crisp, cooling snap that balances out savory meats and cheeses. The visual of translucent cucumber rounds mixed with vibrant red onion and flecks of green dill is stunningly clean and minimalist. It smells like a garden after a rainstorm—fresh, bright, and invigorating—with a vinegary tang that wakes up the senses and keeps you coming back for more.
Ingredients
- 2 large English cucumbers, thinly sliced
- 1/2 red onion, thinly sliced into half-moons
- 1/2 cup white wine vinegar
- 2 tablespoons sugar
- 1 teaspoon salt
- 1/4 cup fresh dill, chopped
- 1/2 teaspoon black pepper
How to make it
- Using a mandoline or a very sharp chef’s knife, slice the cucumbers into uniform rounds about 1/8 inch thick. Uniformity is key for both aesthetics and even marination.
- Place the cucumbers and red onions in a large glass bowl. Avoid metal bowls as the vinegar can react with the surface over time.
- In a separate small jar, whisk together the white wine vinegar, sugar, salt, and pepper until the sugar and salt have completely dissolved.
- Pour the dressing over the vegetables and toss thoroughly to ensure every slice is submerged or coated.
- Fold in the fresh dill. The herbs should be bright green and fragrant; if they look wilted, wait to add them until just before serving.
- Cover and refrigerate for at least 30 minutes. The cucumbers will release some water, creating a light brine that infuses the entire dish with a zesty, crisp flavor.
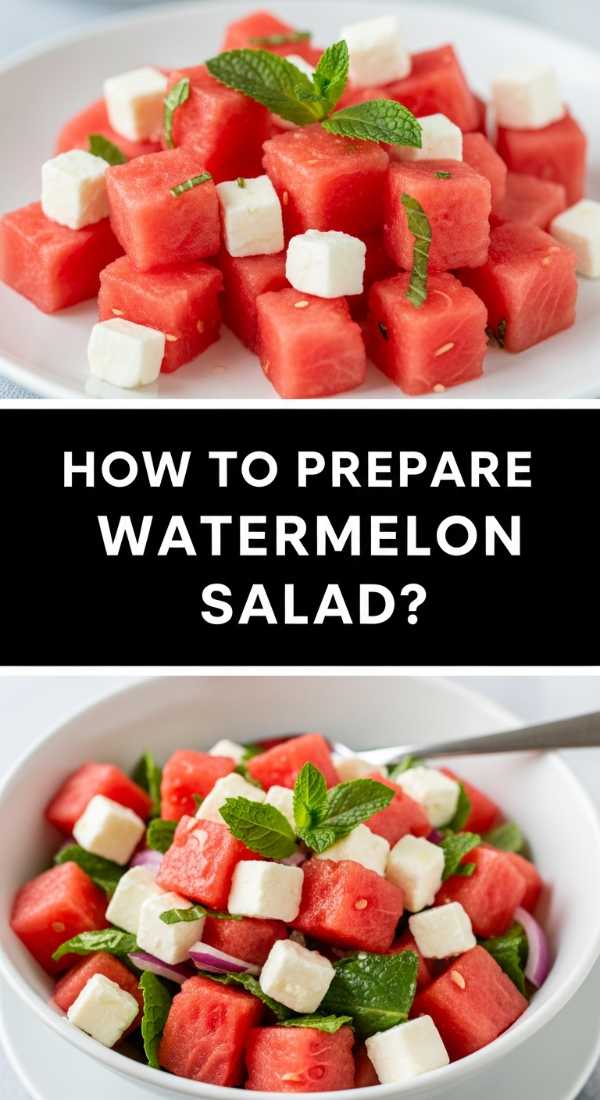
How to Prepare Watermelon Salad

Why we love this
Watermelon salad is a masterclass in flavor contrast, bringing together the icy sweetness of melon with the salty, creamy punch of feta cheese. It’s a dish that looks like a party on a plate, with bold blocks of red, white, and emerald green mint leaves. The scent is incredibly breezy and tropical, and the texture—a mix of juicy fruit and crumbly cheese—is an addictive sensation that defines the feeling of a high-end summer soiree.
Ingredients
- 6 cups seedless watermelon, cubed
- 1 cup feta cheese, crumbled
- 1/2 cup fresh mint leaves, torn
- 1 lime, juiced
- 2 tablespoons extra virgin olive oil
- Flaky sea salt
How to make it
- Cut your watermelon into uniform 1-inch cubes. Pro tip: chill the watermelon for at least 4 hours before cutting to ensure the cubes stay firm and refreshing.
- Arrange the watermelon cubes in a shallow wide bowl or directly onto your serving board to create a colorful base layer.
- Sprinkle the crumbled feta cheese evenly over the top. Use a high-quality sheep’s milk feta for the best creamy-salty balance.
- Scatter the torn mint leaves over the salad. Tearing the leaves by hand rather than chopping them prevents bruising and releases more aromatic oils.
- In a small bowl, whisk the lime juice and olive oil together. Drizzle this mixture slowly over the salad just before serving to prevent the watermelon from becoming too soft.
- Finish with a pinch of flaky sea salt. The salt enhances the sweetness of the melon and bridges the gap between the fruit and the savory cheese.
How to Bake Pound Cake
Why we love this
A classic pound cake is the ultimate comfort food, boasting a dense, velvety crumb and a golden, buttery crust that practically glows. The aroma of vanilla and toasted butter filling the kitchen is pure nostalgia, evoking memories of afternoon tea and family celebrations. It’s a versatile star for any board, acting as a soft, sweet anchor that pairs beautifully with fresh berries, whipped cream, or even a drizzle of balsamic glaze for the adventurous foodie.
Ingredients
- 1 cup unsalted butter, softened
- 1 cup granulated sugar
- 4 large eggs, room temperature
- 2 cups all-purpose flour
- 1 teaspoon baking powder
- 1/2 teaspoon salt
- 1 teaspoon vanilla extract
- 1/4 cup whole milk
How to make it
- Preheat your oven to 325°F (165°C). Lower heat is essential for pound cake to ensure the center cooks through without burning the thick, sugary exterior. Grease and flour a 9×5 inch loaf pan thoroughly.
- In a large stand mixer, cream the butter and sugar together for at least 5 minutes. The mixture should look pale yellow and fluffy; this aeration is what gives the cake its lift.
- Add the eggs one at a time, beating well after each addition. If the batter looks curdled, add a tablespoon of flour to help it emulsify.
- Sift together the flour, baking powder, and salt. Gradually add the dry ingredients to the wet ingredients, alternating with the milk and vanilla extract.
- Mix only until the flour streaks disappear. Overmixing will lead to a tough, rubbery cake instead of a tender crumb.
- Pour the batter into the pan and smooth the top. Bake for 60-70 minutes. Test with a long skewer; it should come out clean or with a few moist crumbs. Let it cool in the pan for 10 minutes before transferring to a wire rack.
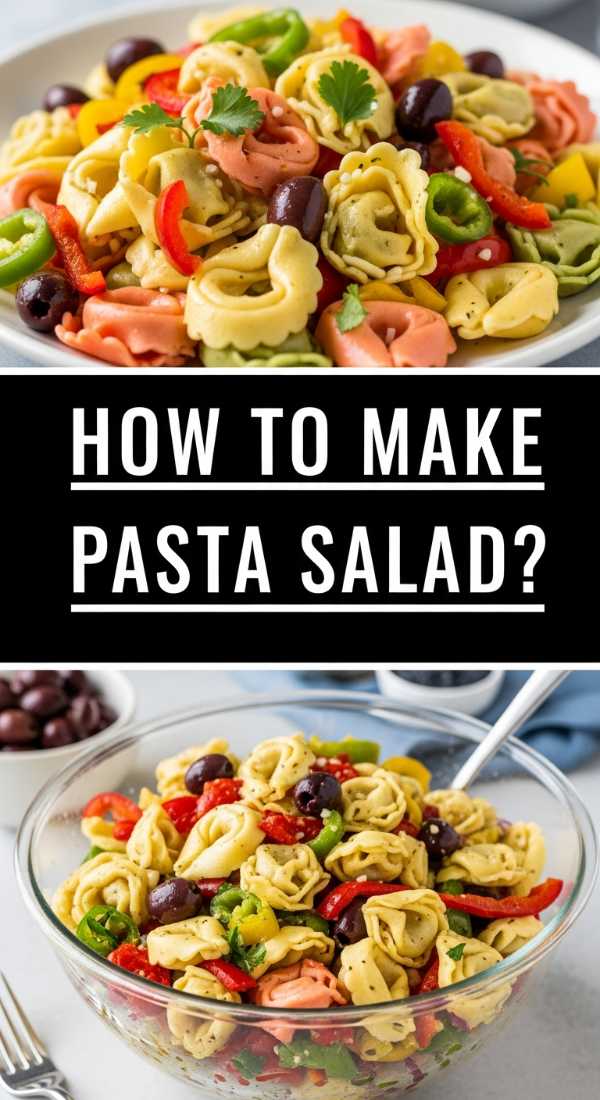
How to Make Pasta Salad

Why we love this
Pasta salad is the ultimate versatile canvas, allowing for a riot of colors and textures that make any food board pop. We love the chewy ‘al dente’ bite of the pasta combined with the snap of fresh bell peppers and the zesty zing of an Italian vinaigrette. It’s a dish that actually tastes better as it sits, as the pasta soaks up the herbaceous oils, creating a savory, mouth-watering experience that is both filling and incredibly light.
Ingredients
- 1 lb rotini or fusilli pasta
- 1 pint cherry tomatoes, halved
- 1 bell pepper, diced
- 1/2 cup black olives, sliced
- 1/2 cup cucumber, diced
- 1/2 cup Italian dressing
- 1/2 cup grated Parmesan or mozzarella pearls
- Fresh parsley for garnish
How to make it
- Boil a large pot of heavily salted water. Cook the pasta according to the package directions, but aim for the lower end of the time range to ensure the pasta stays ‘al dente’—it needs to hold up against the dressing without getting mushy.
- Drain the pasta and rinse immediately under cold water. This stops the cooking process and removes excess starch, preventing the noodles from sticking together.
- In a large bowl, combine the cooled pasta with the cherry tomatoes, bell peppers, olives, and cucumbers. The variety of colors here is what will make the dish ‘viral’ on your board.
- Pour the Italian dressing over the mixture. Toss thoroughly to ensure every nook and cranny of the spiral pasta is filled with dressing.
- Fold in the Parmesan cheese or mozzarella pearls. Adding cheese at the end ensures it retains its texture and doesn’t get too soft from the residual heat.
- Chill for at least 2 hours before serving. Just before placing on your board, give it one final toss and add a handful of chopped fresh parsley for a burst of green.
How to Marinate Grilled Chicken

Why we love this
There is nothing quite like the smoky, charred aroma of perfectly marinated grilled chicken hitting the board. This technique transforms humble poultry into a tender, juicy masterpiece infused with citrus, garlic, and herbs. We love how the marinade creates a beautiful caramelized exterior that glistens under the light, promising a burst of savory flavor that makes it the protein-packed star of any outdoor gathering.
Ingredients
- 1.5 lbs chicken thighs or breasts
- 1/4 cup olive oil
- 1/4 cup soy sauce
- 2 tablespoons honey
- 3 cloves garlic, minced
- 1 lemon, zested and juiced
- 1 teaspoon dried oregano
- 1/2 teaspoon smoked paprika
How to make it
- In a medium bowl or a gallon-sized resealable bag, whisk together the olive oil, soy sauce, honey, minced garlic, lemon juice, zest, oregano, and smoked paprika. The honey is the secret to getting those dark, beautiful grill marks.
- Add the chicken to the marinade. If using breasts, pound them to an even thickness first to ensure they cook at the same rate and remain juicy.
- Seal the bag, removing as much air as possible, and massage the marinade into the meat. Refrigerate for at least 2 hours, or up to 8 hours for maximum flavor penetration.
- Preheat your grill to medium-high heat (about 400°F). Lightly oil the grates to prevent sticking.
- Place the chicken on the grill and sear for 5-7 minutes per side. Avoid moving the chicken too much once it hits the heat; this allows the crust to form and the sugars in the marinade to caramelize.
- Use a meat thermometer to ensure the internal temperature reaches 165°F. Let the chicken rest for 5 minutes before slicing so the juices redistribute throughout the meat.
How to Cook Blackstone Burgers

Why we love this
The Blackstone burger is the epitome of the ‘smash burger’ trend, known for its thin, crispy, lacy edges and an incredibly juicy center. Cooking on a flat-top griddle allows the beef to sear in its own fat, creating a Maillard reaction that results in an explosion of savory flavor. We love the visual of the melted cheese draping over the craggy edges of the meat, served on a toasted brioche bun—it’s pure, unadulterated food porn that everyone craves.
Ingredients
- 1 lb ground beef (80/20 blend is best)
- 4 brioche buns
- 4 slices American cheese
- Salt and heavy black pepper
- Butter for the buns
- Optional: Thinly sliced onions
How to make it
- Preheat your Blackstone or flat-top griddle to high heat. You want it screaming hot—around 450°F—to get that signature crust.
- Divide the beef into four 4-ounce balls. Do not flatten them yet; keep them loosely packed to maintain tenderness.
- Place the balls on the hot griddle. Immediately use a heavy press or a sturdy spatula to ‘smash’ them flat until they are about 1/2 inch thick. This maximizes the surface area in contact with the heat.
- Season generously with salt and pepper. If you like ‘onion burgers,’ press a handful of thinly sliced onions into the raw side of the patty now.
- Cook for 2 minutes until the edges are dark brown and crispy. Flip the patty; you should see a deep, mahogany crust.
- Immediately place a slice of cheese on each patty. Close the griddle lid or use a basting cover for 30 seconds to melt the cheese into every crevice. Serve on butter-toasted buns.
How to Brew Sun Tea
Why we love this
Sun tea is more than a drink; it’s a nostalgic ritual that captures the very essence of a slow summer afternoon. The way the tea leaves dance in the water as the sun gently extracts their flavor results in a brew that is remarkably smooth and devoid of the bitterness sometimes found in boiled tea. It looks stunning on a board when served in a glass dispenser filled with lemon slices and fresh mint, glowing with a deep amber light that signals relaxation and hospitality.
Ingredients
- 8-10 black tea bags (or 4 tablespoons loose leaf tea)
- 1 gallon filtered water
- 1 lemon, sliced into rounds
- Fresh mint sprigs
- Honey or simple syrup (optional)
How to make it
- Find a large, clean glass jar with a tight-fitting lid. Using glass is crucial as it allows the sun’s rays to penetrate the water effectively.
- Fill the jar with one gallon of room-temperature filtered water. Drop in the tea bags, ensuring the strings hang outside for easy removal later.
- Secure the lid and place the jar in a spot that receives direct, uninterrupted sunlight for 3 to 5 hours. Avoid leaving it out longer than this to prevent any bacterial growth.
- Observe the color; as the sun warms the water, the tea will slowly swirl and darken into a rich, clear amber.
- Once the desired strength is reached, remove the tea bags and bring the jar inside. Add your sweetener while the tea is still slightly warm so it dissolves easily.
- Refrigerate immediately. Serve over plenty of ice, garnished with fresh lemon rounds and mint sprigs for that perfect, breezy aesthetic.
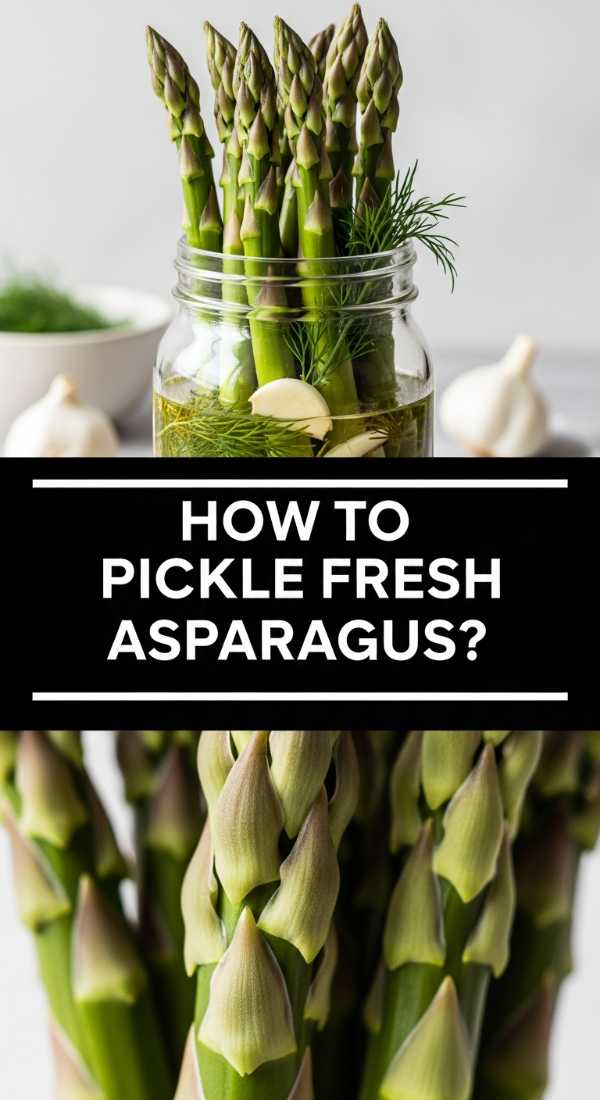
How to Pickle Fresh Asparagus
[IMAGE_10]
Why we love this
Pickled asparagus is the sophisticated ‘wow’ factor your food board needs, offering a sharp, vinegary snap that contrasts beautifully with soft cheeses and rich meats. The vibrant green stalks standing tall in a mason jar add a vertical element to your board’s design that is incredibly pleasing to the eye. We love the infusion of garlic and dill into the tender-crisp spears, creating a savory, bright snack that feels like a gourmet delicacy you made right in your own kitchen.
Ingredients
- 1 lb fresh asparagus, trimmed to fit your jar
- 1 cup white vinegar
- 1 cup water
- 1 tablespoon kosher salt
- 1 tablespoon sugar
- 2 cloves garlic, smashed
- 1 teaspoon red pepper flakes
- 2 sprigs fresh dill
How to make it
- Clean the asparagus and trim the woody ends so the spears fit vertically in a pint-sized wide-mouth mason jar with about half an inch of headspace at the top.
- Blanch the asparagus by dropping it into boiling water for exactly 60 seconds, then immediately plunging it into an ice bath. This preserves the bright green color and ensures the perfect ‘snap.’
- In a small saucepan, combine the vinegar, water, salt, and sugar. Bring to a boil, stirring until the solids are fully dissolved, then remove from heat.
- Pack the garlic, red pepper flakes, and dill into the bottom of the jar. Pack the asparagus spears tightly on top of the aromatics.
- Pour the hot brine over the asparagus, ensuring the spears are completely submerged. Tap the jar on the counter to release any trapped air bubbles.
- Seal the jar and let it cool to room temperature before refrigerating. For the best flavor, let them pickle for at least 24 hours. They will stay crisp and delicious for up to two weeks!
Wrapping Up Your Aesthetic Spread
Building the perfect food board is an evolving art form. It’s about more than just following recipes; it’s about the joy of arrangement, the play of colors, and the satisfaction of seeing your friends dive into something you’ve crafted with care. By mixing these diverse flavors—from the smoky sear of Blackstone burgers to the delicate sweetness of strawberry pie—you create a multisensory experience that people will remember long after the last crumb is gone. So, grab your favorite wooden board, start prepping, and don’t forget to take a photo before everyone digs in!