
From Pantry to Party: The Easiest Viral Food Board Ever
We’ve all been there: the group chat is buzzing, friends are dropping by in an hour, and your kitchen feels more like a chaotic storage room than a gourmet bistro. But here’s a secret I’ve learned after years of hosting: the most viral, Instagram-worthy moments aren’t born from stress, but from the simple joy of sharing. There is something truly magical about a communal board—a spread that invites everyone to lean in, reach across the table, and savor flavors that feel like a warm hug.
Today, I’m pulling back the curtain on my go-to recipes that transform basic pantry staples into a show-stopping feast. Whether you’re soaking up the golden hour of a summer evening or hosting a bright spring morning brunch, these dishes are designed to be effortless yet extraordinary. Let’s dive into the ultimate guide for creating a food board that will have your guests asking for the recipe before they’ve even finished their first bite.
How to make summer pasta?

Why we love this
This dish is the literal definition of sunshine on a plate. We adore it because it captures the fleeting essence of peak-season tomatoes, bursting with a concentrated sweetness that only August heat can produce. The aroma of fresh basil hitting warm noodles creates an instant olfactory escape to a Mediterranean terrace, while the silky olive oil coats each strand of pasta in a luscious, liquid gold sheen that feels indulgent yet incredibly light on the palate. It’s a sensory celebration of simplicity and freshness.
Ingredients
- 1 lb Spaghetti or Linguine
- 2 cups Cherry tomatoes, halved
- 4 cloves Garlic, thinly sliced
- 1/2 cup Extra virgin olive oil
- 1 bunch Fresh basil leaves
- Red pepper flakes
- Freshly grated Parmesan cheese
How to make it
- Bring a massive pot of water to a rolling boil and salt it aggressively—it should taste like the ocean to season the pasta from the inside out.
- In a large, cold skillet, combine the olive oil and sliced garlic. Turn the heat to medium-low, allowing the garlic to gently infuse the oil until it becomes fragrant and turns a very pale golden blonde; do not let it brown or it will turn bitter.
- Add the halved cherry tomatoes and a pinch of red pepper flakes to the skillet. Increase the heat to medium and cook for 8-10 minutes, stirring occasionally, until the tomatoes begin to slump, release their juices, and form a jammy, rustic sauce.
- Drop your pasta into the boiling water and cook for roughly 2 minutes less than the package directions. You want it to be significantly firm (al dente) because it will finish cooking in the sauce.
- Using tongs, transfer the pasta directly from the water into the tomato skillet, bringing some of that starchy pasta water with it. Toss vigorously over medium-high heat for 2 minutes, adding more pasta water a splash at a time, until the sauce emulsifies and clings to every strand.
- Remove from heat, stir in a handful of torn basil leaves and a generous dusting of Parmesan, and serve immediately.
How to serve spring brunch?

Why we love this
Spring brunch is all about the transition from cozy winter layers to the bright, crisp energy of new growth. We love this spread because it balances the savory richness of farm-fresh eggs with the snap of tender asparagus and the peppery bite of radishes. The visual appeal of pastel-colored ingredients arranged on a wooden board creates an inviting, relaxed atmosphere where guests can linger over mimosas for hours, enjoying the delicate textures and the refreshing, clean finish of seasonal greens.
Ingredients
- Soft-boiled eggs (6-minute eggs)
- Smoked salmon ribbons
- Toasted sourdough slices
- Whipped lemon ricotta
- Fresh asparagus, blanched
- Thinly sliced radishes and cucumbers
- Fresh dill and chives
How to make it
- Begin by prepping your “anchor” items: boil your eggs for exactly 6 minutes, then plunge them into an ice bath for 10 minutes to stop the cooking; this ensures a jammy, custard-like yolk that looks stunning when sliced.
- Prepare the whipped ricotta by pulsing whole milk ricotta with lemon zest, a squeeze of lemon juice, and a pinch of flaky salt in a food processor until it is airy and spreadable.
- Lightly blanch the asparagus by dropping the spears into boiling water for 60 seconds, then immediately shocking them in ice water to lock in that vibrant emerald green color and a crisp-tender snap.
- Assemble the board by placing the bowl of lemon ricotta in the center, then fan out the toasted sourdough slices and smoked salmon ribbons around it.
- Peel and halve the eggs, seasoning them with salt and pepper, and nestle them into the gaps along with the blanched asparagus and sliced vegetables.
- Garnish the entire board with a shower of fresh dill and chives, providing a final pop of herbal aroma and color before serving at room temperature.
How to decorate spring cookies?

Why we love this
Decorating spring cookies is a meditative act of art that brings a whimsical, floral touch to any food board. We love the contrast between the buttery, melt-in-your-mouth shortbread base and the crisp, sweet snap of royal icing. The fragrance of vanilla and almond extract fills the kitchen, while the ability to use soft lavender, mint, and rose hues allows for a stunning aesthetic that mimics a blooming garden. It’s a tactile, creative process that yields beautiful results that are almost too pretty to eat.
Ingredients
- Chilled sugar or shortbread cookies
- Royal icing (meringue powder, powdered sugar, water)
- Gel food coloring (pastel tones)
- Edible dried flowers
- Fine-tip piping bags
- Toothpicks for marbling
How to make it
- Whisk your royal icing to a “15-second consistency,” which means when you drizzle a line of icing back into the bowl, it takes exactly 15 seconds to disappear completely into the surface; this is the perfect thickness for both outlining and flooding.
- Divide the icing into small bowls and use a toothpick to add tiny amounts of gel food coloring, mixing thoroughly until you achieve soft, muted spring shades.
- Pipe a thin border around the edge of your cooled cookies using a small round tip, then immediately fill in the center with more icing. Use a toothpick to pop any tiny air bubbles for a perfectly smooth finish.
- For a marbled look, drop small dots of a contrasting color onto the wet icing and gently swirl them with a toothpick in a figure-eight motion.
- While the icing is still tacky, carefully place edible dried flowers or a sprinkle of sanding sugar onto the edges to add texture and a sophisticated floral flair.
- Allow the cookies to dry completely on a flat surface for at least 6-8 hours (or overnight) until the icing is hard to the touch before stacking or serving.
How to cook summer soup?

Why we love this
Summer soup, like a chilled gazpacho or a light corn chowder, is a revelation for those hot afternoons when you want something nourishing but refreshing. We love the vibrant, raw crunch of finely diced cucumbers and bell peppers paired with the velvety smoothness of a blended tomato or corn base. The aroma is herbaceous and bright, often accented by lime or cilantro, offering a cooling sensation that revitalizes the senses. It’s a sophisticated way to showcase summer produce in its most concentrated, liquid form.
Ingredients
- 6 Large ripe tomatoes (for Gazpacho)
- 1 Cucumber, peeled and seeded
- 1 Red bell pepper
- 2 cloves Garlic
- 1/4 cup Sherry vinegar
- 1/2 cup High-quality olive oil
- Salt and cumin to taste
How to make it
- Roughly chop your tomatoes, cucumber, and bell pepper into uniform chunks, removing any large seeds from the pepper to ensure a smooth final texture.
- Place all the chopped vegetables, garlic, sherry vinegar, and a pinch of cumin into a high-powered blender. Blend on high speed for at least 2 minutes until the mixture is completely liquefied and slightly frothy.
- With the blender running on its lowest setting, slowly drizzle in the olive oil. This process, known as emulsification, will change the soup from a bright red to an orange-pink hue and give it a luxurious, creamy mouthfeel without using any dairy.
- Pass the blended liquid through a fine-mesh sieve into a large bowl, using the back of a spoon to push through the juice while discarding the leftover skins and seeds for a professional, silky finish.
- Season generously with salt—chilled soups need more salt than hot ones as cold temperatures mute flavors.
- Refrigerate the soup for at least 4 hours. Serving it ice-cold is non-negotiable for the best flavor profile; serve in chilled glasses or bowls garnished with a drizzle of oil and diced herbs.
How to master grilling recipes?

Why we love this
There is an elemental, primal joy in mastering the grill that defines the summer experience. We love the intoxicating scent of charcoal and wood smoke mingling with the savory aroma of searing proteins. The texture of a perfectly grilled dish—a crispy, charred exterior giving way to a tender, succulent interior—is a culinary contrast that is hard to replicate indoors. It’s about the ritual of being outside, the sound of the sizzle, and that unmistakable smoky flavor that feels like the very soul of a backyard party.
Ingredients
- Thick-cut steaks or chicken thighs
- Dry rub (brown sugar, smoked paprika, garlic powder, salt, pepper)
- Neutral oil with a high smoke point (canola or grapeseed)
- Fresh rosemary sprigs for basting
- Butter for finishing
How to make it
- Start by cleaning your grill grates thoroughly with a wire brush and preheating your grill to high heat (around 450-500°F) for at least 15 minutes to ensure those iconic sear marks.
- Pat your meat completely dry with paper towels; moisture on the surface will create steam instead of a crust. Apply a generous layer of dry rub, pressing it into the fibers of the meat.
- Lightly oil the grill grates using a folded paper towel dipped in oil and held with tongs. Place your meat on the hottest part of the grill and leave it undisturbed for 3-4 minutes to develop a deep, caramelized crust.
- Flip the meat and move it to a slightly cooler part of the grill (indirect heat) to finish cooking. This prevents the outside from burning before the inside reaches the desired temperature.
- Use a meat thermometer to check for doneness: 135°F for medium-rare beef or 165°F for chicken. In the final minute of cooking, baste the meat with a knob of butter using a bundle of rosemary as a brush.
- Remove the meat from the grill and let it rest on a cutting board for at least 10 minutes. This allows the juices to redistribute so they don’t run out when you slice it.
How to bake fluffy cupcakes?

Why we love this
A truly fluffy cupcake is like biting into a sweet, flavored cloud. We love this recipe because it achieves that perfect balance between a moist crumb and an airy structure that doesn’t feel heavy or greasy. The gentle aroma of vanilla bean and toasted sugar creates an inviting atmosphere, while the delicate texture provides the perfect canvas for rich frostings. It’s the ultimate nostalgic treat, elevated by professional techniques that ensure every single bite is consistently light and delicious.
Ingredients
- 1 1/2 cups All-purpose flour
- 1 cup Granulated sugar
- 1 1/2 tsp Baking powder
- 1/2 tsp Salt
- 1/2 cup Unsalted butter, softened
- 1 Large egg, room temperature
- 1/2 cup Whole milk
- 2 tsp Vanilla extract
How to make it
- Preheat your oven to 350°F (175°C) and line a cupcake tin with high-quality paper liners. Ensure your butter, egg, and milk are all at room temperature to ensure they emulsify properly.
- In a stand mixer, cream the softened butter and sugar together for a full 5 minutes on medium-high speed. Do not skip this; you are beating air into the fat, which is the secret to a fluffy rise.
- Add the egg and vanilla extract, beating until well combined and the mixture looks pale and voluminous.
- In a separate bowl, whisk together the flour, baking powder, and salt. Turn the mixer to the lowest setting and add the dry ingredients in three parts, alternating with the milk in two parts.
- Mix only until the last streaks of flour disappear. Over-mixing at this stage will develop gluten and make the cupcakes tough and bready rather than fluffy.
- Fill the cupcake liners only 2/3 full to allow room for the domed tops. Bake for 18-20 minutes, or until a toothpick inserted in the center comes out clean with just a few moist crumbs attached.
How to frost spring cake?

Why we love this
Frosting a spring cake is where flavor meets fashion. We love this technique because it uses a silky Swiss Meringue Buttercream that is far less cloying than traditional American frosting, allowing the subtle notes of spring—like lemon or elderflower—to shine through. The texture is incredibly smooth, melting away on the tongue like velvet. Decorating with soft, sweeping motions creates a romantic, ethereal look that anchors a food board with a touch of elegance and whimsy.
Ingredients
- Swiss Meringue Buttercream (Egg whites, sugar, butter)
- Gel food coloring (soft pinks or yellows)
- Offset spatula
- Bench scraper for smooth sides
- Fresh edible pansies or violets
How to make it
- Start with completely cooled cake layers. Apply a very thin “crumb coat” of frosting over the entire cake to lock in any loose crumbs, then refrigerate the cake for 20 minutes until the frosting is firm.
- Once chilled, apply a generous amount of frosting to the top of the cake, spreading it out toward the edges with an offset spatula. Let the excess hang over the sides.
- Apply more frosting to the sides of the cake. Hold your bench scraper at a 45-degree angle against the side of the cake and spin your turntable steadily to create a perfectly smooth, professional finish.
- To create a “rustic spring swirl,” use the tip of your offset spatula to create a spiral pattern starting from the center of the top and working your way out.
- For a gradient or “ombre” effect, mix a tiny drop of gel coloring into a portion of the frosting and apply it to the bottom third of the cake, blending upward into the lighter color.
- Finish by pressing fresh, pesticide-free edible flowers gently into the side of the cake or clustering them on top for a natural, meadow-like appearance.
How to grill juicy chicken?

Why we love this
Nothing beats the satisfaction of cutting into a piece of grilled chicken and seeing the juices shimmer. We love this method because it dispels the myth that grilled chicken has to be dry or rubbery. By focusing on temperature control and moisture retention, you get a skin that is incredibly crisp and savory, paired with meat that is tender and infused with the bright, zesty flavors of lemon and herbs. It’s a versatile staple that makes any summer board feel substantial and satisfying.
Ingredients
- Bone-in, skin-on chicken thighs
- Lemon-herb marinade (olive oil, lemon juice, garlic, oregano, thyme)
- Kosher salt and cracked black pepper
- Honey (for a final glaze)
How to make it
- Marinate the chicken for at least 2 hours, but no more than 6, in the lemon and herb mixture. The acid in the lemon will tenderize the meat, but too much time will turn the texture mushy.
- Preheat your grill to a medium heat setting (about 375°F). Bone-in chicken takes longer to cook than steaks, so a slightly lower heat prevents the skin from burning before the bone-area is cooked.
- Place the chicken skin-side down on the grates. Close the lid and let it sear for 5-7 minutes. If you see flare-ups from the fat, move the chicken to a cooler part of the grill.
- Flip the chicken and continue to cook with the lid closed for another 10-15 minutes. This creates an oven-like environment that cooks the chicken evenly through to the bone.
- During the last 3 minutes of grilling, brush a tiny bit of honey or the remaining marinade over the skin to create a sticky, caramelized glaze.
- The chicken is done when the internal temperature hits 165°F. Remove it from the heat and let it rest for 5 minutes under a piece of foil to keep it warm while the juices set.
How to make lemon pasta?

Why we love this
Lemon pasta is the sophisticated, minimalist cousin of the heavy Alfredo. We love it for its bright, acidic punch that cuts through the richness of butter and cream, leaving your palate feeling refreshed rather than weighed down. The scent of fresh lemon zest being grated over a hot pan is intoxicating, and the way the sauce creates a glossy, translucent coating on the pasta is visually stunning. It’s an elegant, five-ingredient wonder that feels like a trip to the Amalfi coast in every bite.
Ingredients
- 12 oz Spaghetti or Tagliatellie
- 2 Large lemons (zest and juice)
- 1/2 cup Heavy cream
- 4 tbsp Unsalted butter
- 1 cup Grated Pecorino Romano
- Fresh cracked black pepper
How to make it
- Cook your pasta in salted water until it is very al dente—about 3 minutes before the box says it’s ready. Reserve 2 cups of the starchy pasta water before draining.
- In a large skillet over medium heat, melt the butter until it starts to foam. Add the heavy cream and the zest of both lemons, bringing it to a very gentle simmer for 2 minutes to slightly thicken.
- Whisk in the lemon juice and half of the Pecorino Romano cheese until the sauce is smooth and creamy.
- Add the undercooked pasta directly into the skillet along with 1/2 cup of the reserved pasta water. Toss constantly over medium-high heat. The starch in the water will react with the cheese and cream to create a thick, velvety sauce.
- If the sauce looks too thick or dry, add more pasta water a tablespoon at a time until the noodles are perfectly coated and the sauce is glossy.
- Plate the pasta and finish with a massive amount of freshly cracked black pepper and the remaining cheese for a sharp, savory finish.
How to bake berry cake?

Why we love this
This berry cake is a celebration of the harvest, bursting with pockets of warm, jammy fruit that bleed beautiful purples and reds into a golden crumb. We love the contrast between the slightly crunchy, sugar-dusted top and the moist, tender interior. The aroma of baking berries is sweet and earthy, and the simplicity of the cake makes it perfect for a casual afternoon gathering. It’s a rustic, heartfelt dessert that highlights the natural beauty of fruit without needing fancy decorations.
Ingredients
- 2 cups Fresh mixed berries (blueberries, raspberries, blackberries)
- 1 1/2 cups All-purpose flour
- 1 cup Sugar (plus extra for sprinkling)
- 1/2 cup Butter, softened
- 2 Large eggs
- 1/2 cup Sour cream or Greek yogurt
- 1 tsp Lemon zest
How to make it
- Preheat your oven to 350°F and grease a 9-inch round springform pan. Toss your fresh berries in a tablespoon of flour; this prevents them from sinking to the bottom of the cake while baking.
- Cream the butter and sugar in a mixer until light and fluffy. Add the eggs one at a time, followed by the sour cream and lemon zest, mixing until just combined.
- Gently fold in the flour and baking powder using a spatula. Do not over-mix, as this will lead to a dense cake.
- Carefully fold in half of the berries, then spread the batter into the prepared pan. Scatter the remaining berries over the top, pressing them slightly into the surface.
- Sprinkle a generous tablespoon of granulated sugar over the top of the batter to create a crackly, sweet crust.
- Bake for 45-50 minutes, or until the center is set and a tester comes out clean. Let it cool in the pan for 15 minutes before releasing the sides to prevent the delicate berry-heavy structure from breaking.
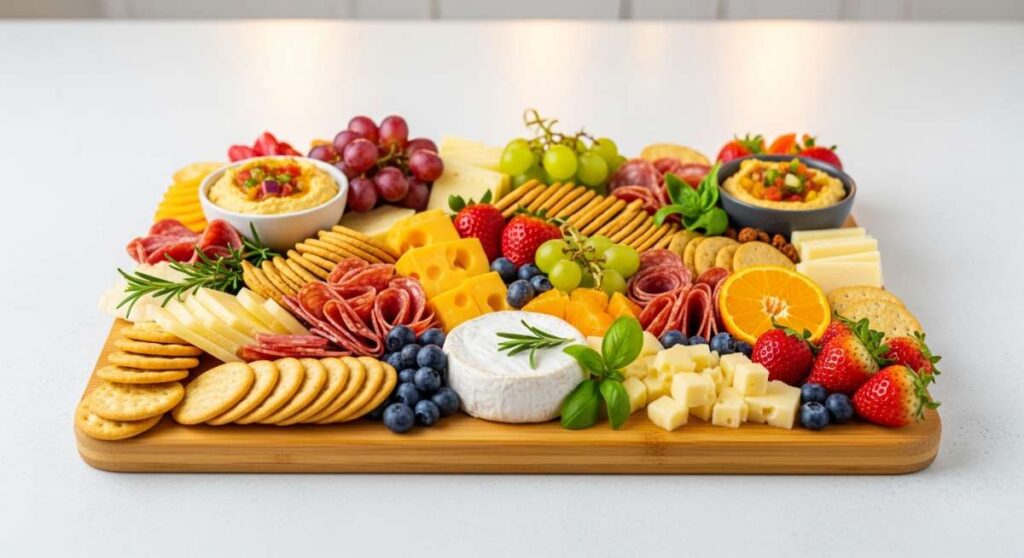
The Final Spread: Bringing the Board Together
Now that you have your repertoire of viral-worthy dishes, the final step is assembly. The beauty of a food board is in the abundance. Don’t be afraid to let the summer pasta nestle next to the lemon-herb chicken, or to place the berry cake right in the mix for a “grazing” style dessert. Use wooden boards, ceramic bowls of varying heights, and scattered fresh herbs to fill the gaps. This isn’t just about food; it’s about creating a landscape of flavors that invites your favorite people to slow down and enjoy the moment.
Frequently Asked Questions
Find answers to common questions about hosting the perfect viral food board event.