

From Chrome to Velvet: The Ultimate Guide to This Season’s Hottest Nails
Welcome back, my loves! There is something so profoundly healing about the ritual of painting our nails, isn’t there? As the seasons shift and the world begins to wake up in a riot of color, I’ve found myself spending my quiet mornings by the window, letting the soft sunlight catch the shimmer on my fingertips. It’s more than just a manicure; it’s a moment of pause, a soft embrace for the soul after a long winter.
Lately, I’ve been dreaming of textures that feel like a hug—velvet finishes that play with the light and chrome that mirrors the bright sky. I wanted to gather all my favorite inspirations in one place for you, like a digital bouquet of self-care. Whether you’re getting ready for a big milestone or just want to feel a bit more ‘you’ while sipping your morning matcha, there is a design here waiting to tell your story.
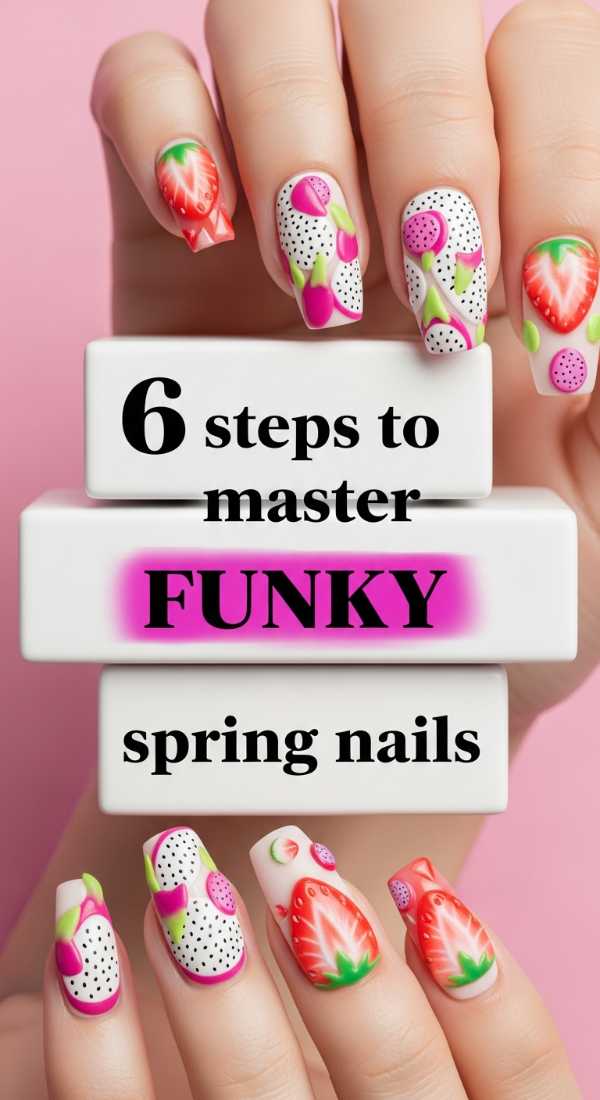
6 Steps to Master Funky Spring Nails
Why to love this Design:
Spring is the season of rebirth, and what better way to celebrate than with a burst of playful energy? Funky spring nails are all about breaking the rules—mismatched patterns, smiley faces, and checkerboards that make you smile every time you look down at your keyboard.
Essential Elements:
- Pastel base colors
- Fine liner brushes
- Matte and glossy top coat mix
- Neon accents
How to Prepare:
- Cleanse nails with alcohol to remove oils.
- Apply a sheer nude base coat for a clean canvas.
- Sketch your ‘funky’ shapes (blobs, waves) with a pencil first if needed.
- Paint one element at a time, curing between layers.
- Add tiny details like dots or stars.
- Seal with a high-shine top coat.
Budget Range
- Essie Pastel Polish ($9)
- Nail Art Brush Set ($6)
- Holo Taco Glossy Taco ($11)
Achieve Red Prom Nails in 4 Quick Stages

Why to love this Design:
Classic, timeless, and oh-so-romantic. Red is the color of confidence, and for prom, it adds that sophisticated ‘old Hollywood’ glamour that never goes out of style. It’s like a velvet rope for your fingertips.
Essential Elements:
- True crimson red polish
- Gold foil flakes
- Sturdy base coat
How to Prepare:
- Shape nails into a sleek oval or coffin.
- Apply two thin coats of deep red polish.
- Place a few gold flakes near the cuticle for a ‘regal’ touch.
- Finish with a thick, gel-like top coat.
Budget Range
- OPI ‘Big Apple Red’ ($11)
- Gold Nail Foil ($5)
- Seche Vite Dry Fast Top Coat ($10)
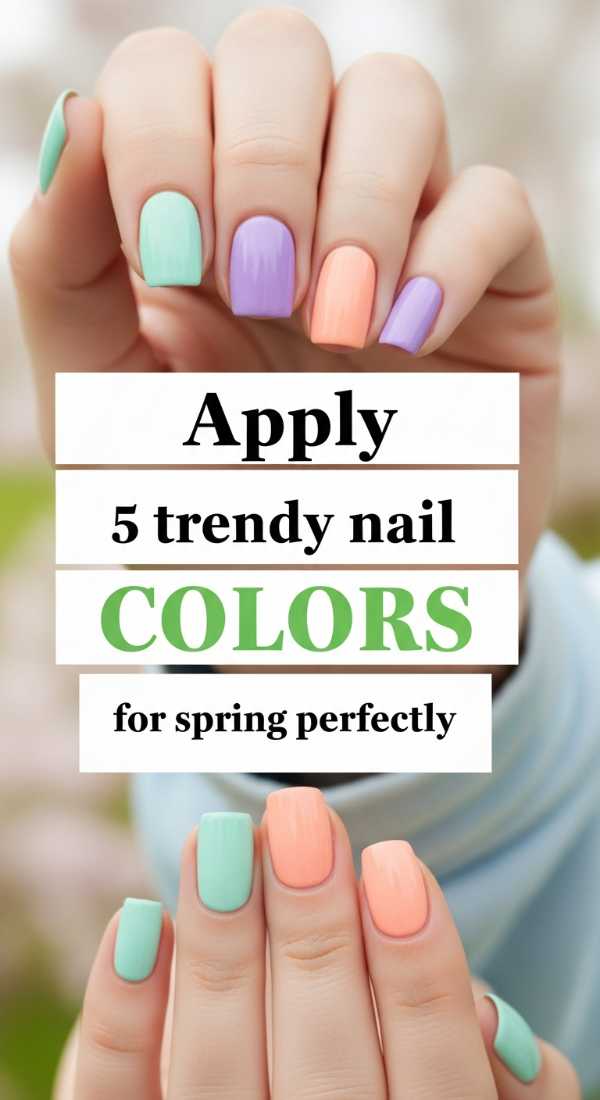
Apply 5 Trendy Nail Colors for Spring Perfectly
Why to love this Design:
Sometimes, the simplest things are the most beautiful. This multi-colored look allows you to wear all your favorite spring hues at once without feeling overwhelmed. It’s soft, approachable, and incredibly chic.
Essential Elements:
- Sage green polish
- Lavender polish
- Soft peach polish
- Butter yellow polish
- Sky blue polish
How to Prepare:
- Hydrate your cuticles with oil 24 hours before.
- Apply a ridge-filling base coat.
- Paint each finger a different pastel shade starting from the pinky.
- Apply thin layers to avoid bubbling.
- Use a cleanup brush dipped in acetone for crisp edges.
Budget Range
- Olive & June Spring Set ($40)
- Sally Hansen Cuticle Oil ($7)
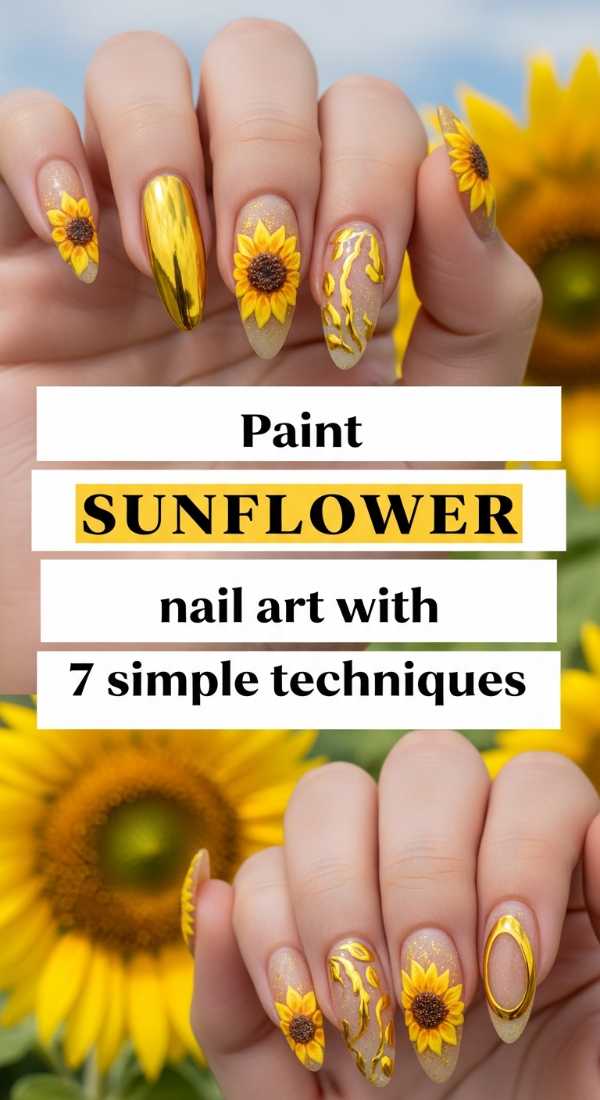
Paint Sunflower Nail Art with 7 Simple Techniques
Why to love this Design:
Sunflowers represent warmth and longevity. Wearing them on your nails feels like carrying a little piece of sunshine with you, even on the rainiest spring days. It’s a literal bloom of joy.
Essential Elements:
- Opaque yellow polish
- Chocolate brown polish
- Dotting tool
- Clear top coat
How to Prepare:
- Apply a sky-blue or white base color.
- Place a brown dot near the side of the nail for the center.
- Use a thin brush to pull yellow ‘petals’ outward from the dot.
- Add a second layer of yellow for dimension.
- Place tiny black dots in the brown center for ‘seeds’.
- Add a small green leaf for a pop of contrast.
- Seal the art carefully to prevent smearing.
Budget Range
- Zoya Yellow Polish ($12)
- Double-ended Dotting Tool ($4)
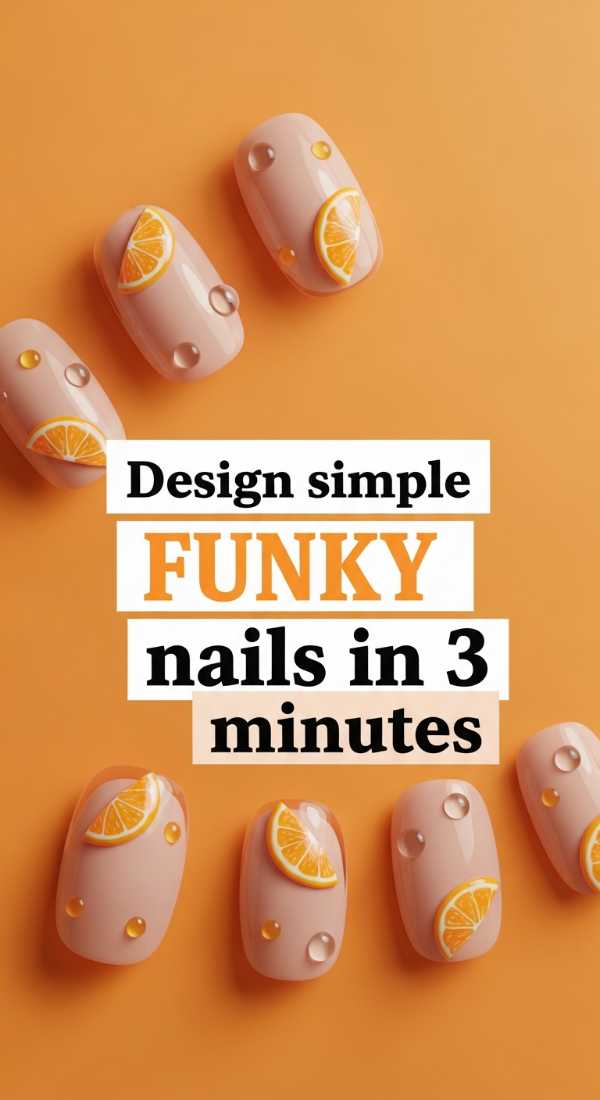
Design Simple Funky Nails in 3 Minutes
Why to love this Design:
For my busy loves who are always on the go! This design proves that ‘funky’ doesn’t have to mean ‘difficult’. It’s modern, minimalist, and can be done during a quick coffee break.
Essential Elements:
- Bright cobalt blue
- Natural nail base
- Angled brush
How to Prepare:
- Keep your natural nail bare or with a clear coat.
- Swipe a single diagonal line across the tip of each nail.
- Add one single dot at the base of the nail.
Budget Range
- Orly Breathable Polish ($15)
- Drugstore Makeup Brush (for cleanup) ($3)
Style Hot Coral Nails using 5 Professional Tips
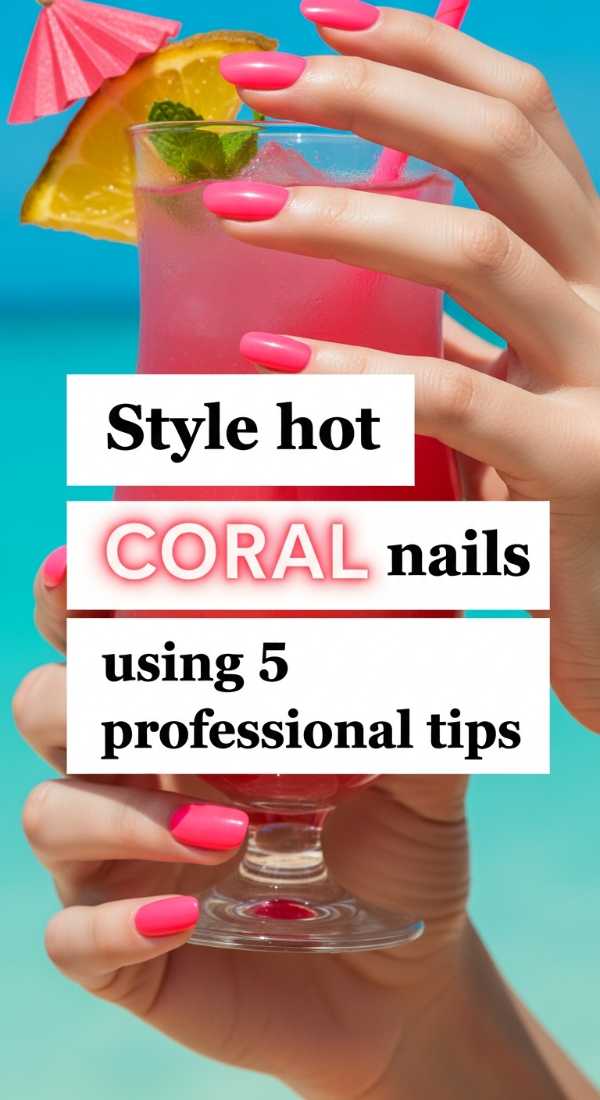
Why to love this Design:
Coral is the bridge between spring sweetness and summer heat. It glows against every skin tone and brings an instant vacation vibe to your look. It’s vibrant, loud, and incredibly happy.
Essential Elements:
- Neon coral lacquer
- White base coat (to make the neon pop)
- UV-resistant top coat
How to Prepare:
- Always start with a white base coat to enhance the coral’s pigment.
- Work in three strokes: middle, side, side.
- Wrap the ‘free edge’ (tip) to prevent chipping.
- Apply thin coats to avoid ‘pooling’ at the cuticles.
- Finish with a solar-active top coat for extra shine.
Budget Range
- China Glaze ‘Flip Flop Fantasy’ ($8)
- Essie Strong Start Base ($11)
Get Almond Nail Inspo for Spring in 8 Ways

Why to love this Design:
The almond shape is the most flattering for elongating the fingers. It’s elegant and provides the perfect canvas for ‘soft-girl’ aesthetics. Think of it as the ‘quiet luxury’ of nail shapes.
Essential Elements:
- Glass nail file
- Nude pink polish
- Fine iridescent shimmer
How to Prepare:
- File from the sides toward the center at an angle.
- Round off the tip into a soft peak.
- Apply a milky pink base.
- Add a ‘velvet’ magnetic top coat for texture.
- Try a micro-french tip.
- Experiment with matte floral stickers.
- Add a single pearl accent.
- Keep the length moderate for a natural look.
Budget Range
- Glass Nail File ($10)
- Milky Pink Polish ($9)
- Nail Pearls ($5)
Create Baseball Nails Design for Moms in 6 Steps
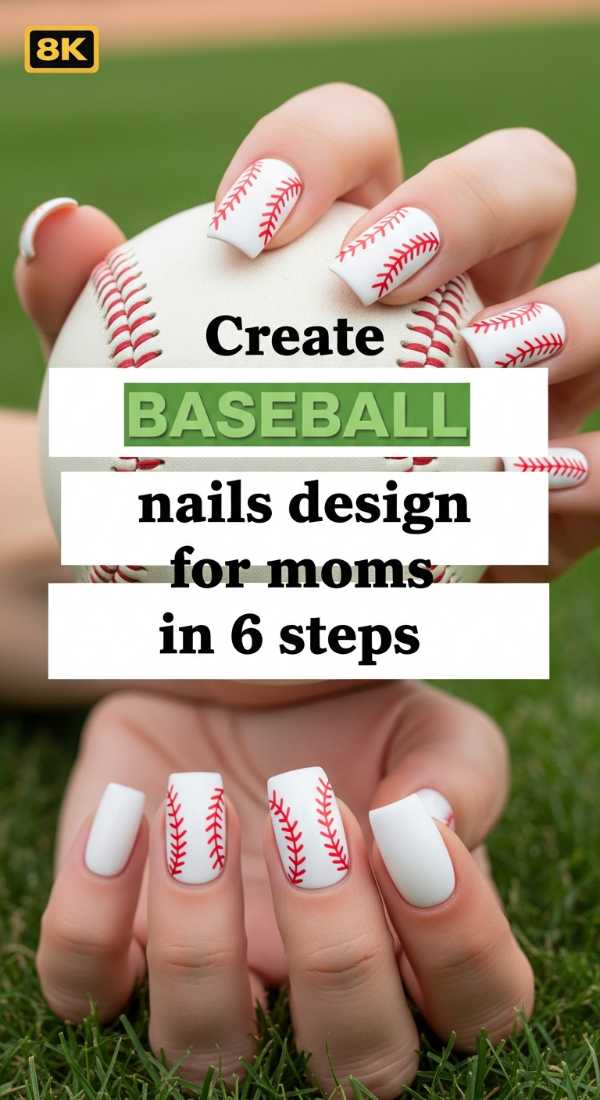
Why to love this Design:
For the sports moms out there—we see you! This is such a cute way to show support at the ballpark while keeping things stylish. It’s a home run for team spirit!
Essential Elements:
- Bright white polish
- Red thin-liner pen
- Matte top coat (for a leather feel)
How to Prepare:
- Paint nails a crisp, solid white.
- Wait for the base to dry completely.
- Draw two curved red lines on either side of the nail.
- Add tiny ‘V’ shapes along those lines to look like stitches.
- Keep the thumb as an accent nail with a jersey number.
- Seal with a matte top coat to mimic the texture of a baseball.
Budget Range
- Nail Art Pens ($8)
- OPI Matte Top Coat ($11)
Craft Butter Yellow Nails with Chrome in 4 Steps

Why to love this Design:
This is the ‘It Girl’ look of the season. Butter yellow is soft and creamy, and when topped with chrome, it creates a ‘glazed’ effect that looks expensive and ethereal. It’s like sunshine dipped in silk.
Essential Elements:
- Butter yellow polish
- Pearl chrome powder
- No-wipe gel top coat
- Sponge applicator
How to Prepare:
- Apply two coats of butter yellow.
- Apply a no-wipe top coat and cure/dry.
- Rub the pearl powder onto the nail until it glows.
- Seal with one final layer of top coat.
Budget Range
- Pearl Chrome Powder ($7)
- Butter Yellow Polish ($9)
Create 9 Stunning Nail Designs for Summer Now
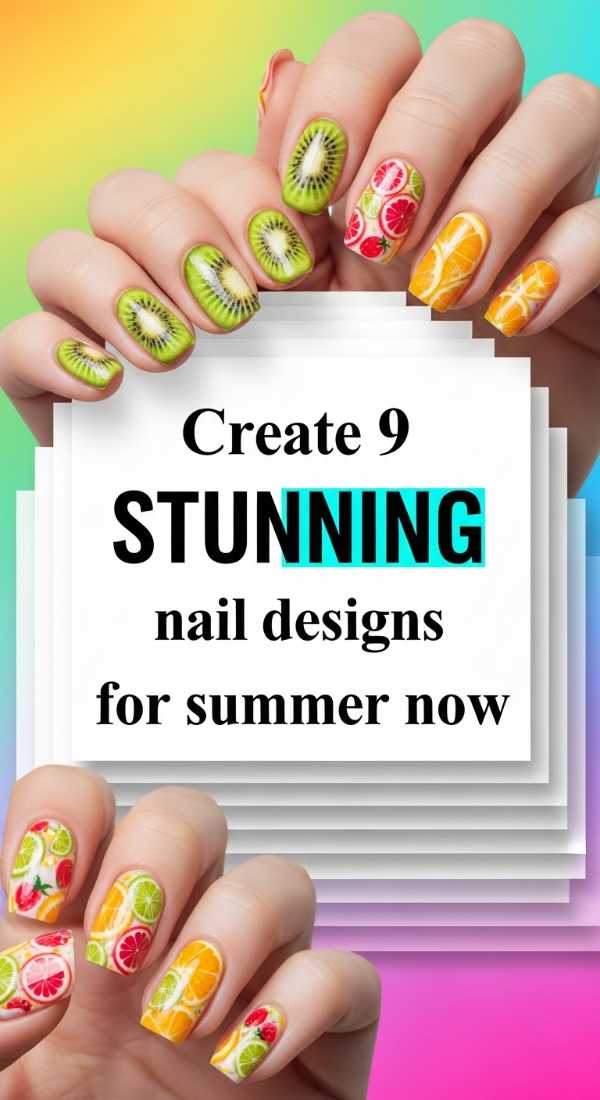
Why to love this Design:
Summer is about variety! From the beach to the bonfire, these designs are curated to match every mood of the warmest season. It’s your ultimate summer bucket list for your hands.
Essential Elements:
- Neon pigments
- Fruit decals
- Seashell textures
- Translucent ‘jelly’ polishes
How to Prepare:
- Mix ‘jelly’ polish with clear for a sea-glass look.
- Use stickers for quick fruit art (cherries, lemons).
- Try a vertical ombre with three neon colors.
- Add gold flakes to mimic sand.
- Use a fan brush for a sunset effect.
- Experiment with ‘blooming gel’ for marble looks.
- Add 3D droplets using hard gel.
- Try mismatched hands for a bold statement.
- Keep your cuticles hydrated with heavy balm.
Budget Range
- Summer Decal Pack ($6)
- Jelly Polish Set ($20)
- Burt’s Bees Lemon Butter Cuticle Cream ($6)
Your Most Radiant Self Awaits
I hope these tutorials spark a little light in your heart today, my loves. Remember, your nails are just a small reflection of the beautiful energy you carry inside. Whether you choose a simple butter yellow or go all out with funky spring art, the most important ‘essential element’ is the joy you feel while wearing it. Until next time, stay soft, stay bright, and keep blooming.