

There is nothing quite like that first step onto a sun-drenched patio, the scent of jasmine and chlorine mingling in the warm breeze, and the promise of a quiet afternoon by the water. But let’s be real: that dream of a five-star resort vibe usually lasts about five minutes until someone trips over a giant inflatable flamingo or can’t find a dry towel. We spend so much time curate the perfect outdoor space, yet the ‘stuff’ of summer always seems to take over, turning our serene oasis into a cluttered obstacle course.
I’ve spent the last few seasons obsessing over how to bridge the gap between functional utility and high-end aesthetics. It’s not just about hiding the toys; it’s about creating a flow that feels effortless, where every sunblock bottle has a home and every towel is exactly where you need it, when you need it. Today, I’m sharing my secrets for transforming your backyard from a chaotic splash zone into a sophisticated cabana-style retreat that will make your neighbors think you’ve hired a full-time pool concierge.
How to Arrange Pool Float Storage for a Clutter Free Backyard
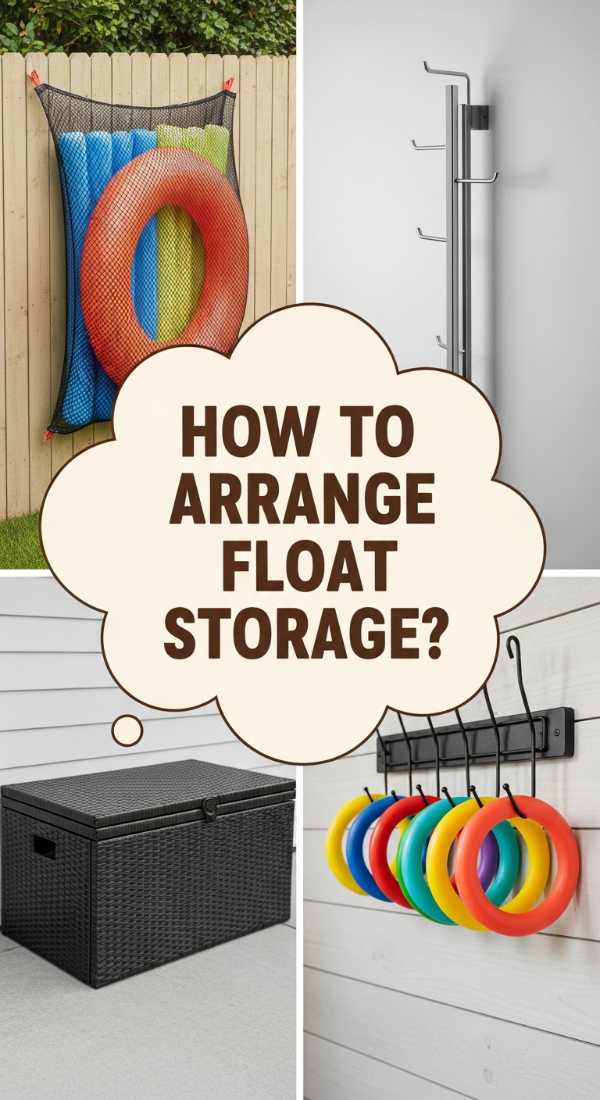
Why we love this
There is a specific kind of magic in a backyard that feels open and airy, where the gaze can travel from the sparkling water to the lush greenery without being interrupted by a pile of neon plastic. By arranging float storage with intent, you reclaim your visual horizon, allowing the natural beauty of your landscaping to take center stage. Imagine the soft rustle of leaves and the gentle lap of water being the only things on your mind, rather than the chore of clearing a path through a sea of inflatables that have been bleached by the midday sun.
Essential Elements:
- Extra-large mesh rolling bins
- Over-the-fence PVC float racks
- Weather-resistant bungee cords
- Categorized zones for small vs. large items
How to make it
- Begin by sorting your entire collection of inflatables by size and buoyancy, ensuring all items are fully dry to prevent mildew from forming in the crevices of the plastic.
- Position your primary storage unit in a low-traffic ‘dead zone’ of the patio, preferably one that receives afternoon shade to protect the integrity of the float materials from UV degradation.
- Install horizontal wall-mounted racks at a height of approximately 48 inches, allowing you to slide larger ‘ride-on’ floats vertically, which maximizes floor space and creates a cleaner silhouette.
- Secure smaller rings and ‘noodles’ into breathable mesh bins, placing the heaviest items at the bottom to provide a stable center of gravity that prevents the bin from tipping during summer thunderstorms.
- Conduct a weekly ‘air check’ where you slightly deflate oversized items that aren’t in use, allowing them to nest together more tightly and reducing the overall footprint of your storage area.
How to Organize Pool Towels for Guest Ready Luxury
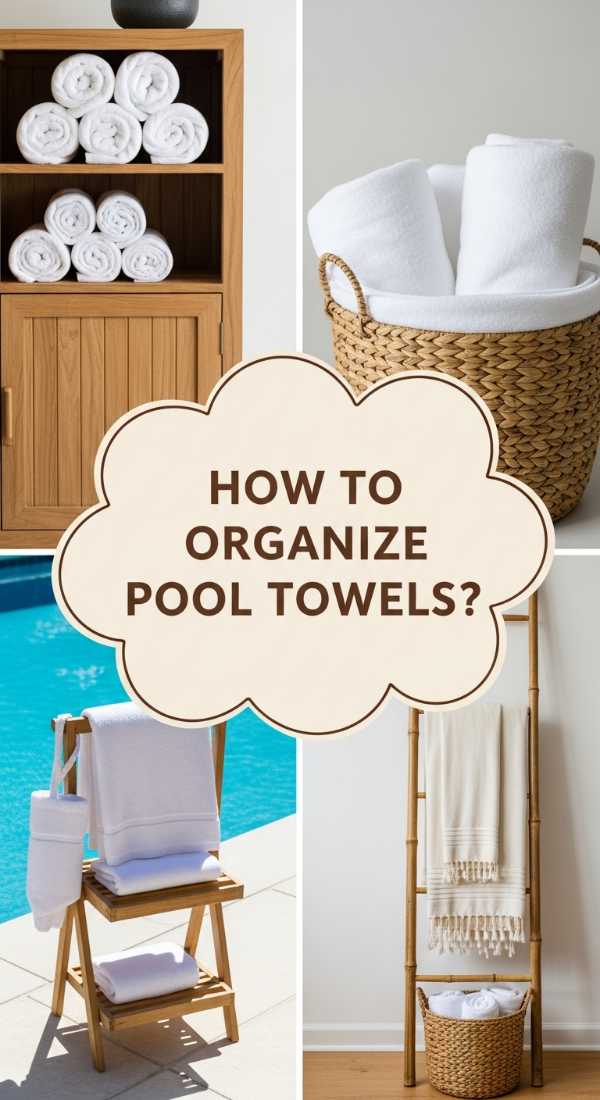
Why we love this
Nothing says ‘welcome to paradise’ like a stack of plush, oversized towels waiting for you after a refreshing dip. When towels are organized with a touch of luxury, they become more than just a utility; they become a design element that adds texture and warmth to your outdoor space. The sight of neatly rolled terry cloth, perhaps scented with a hint of lavender or coconut, evokes the sensory experience of a high-end spa, making every guest feel pampered and every afternoon feel like a true vacation from the everyday hustle.
Essential Elements:
- Over-sized wicker or rattan baskets
- Aromatic linen spray
- Consistent color palette of towels
- Open-air shelving unit
How to make it
- Select a unified color palette for your towels, such as crisp white or nautical navy, to create a cohesive and high-end visual impact that feels intentional and curated.
- Utilize the ‘hotel roll’ technique: fold the towel in half lengthwise, then fold one corner down to form a triangle, fold the other end over, and roll tightly toward the point to create a firm, aesthetically pleasing cylinder.
- Lightly mist each rolled towel with a UV-resistant linen spray or essential oil blend to provide a subtle, refreshing aroma that greets guests as they unfurl their wrap.
- Arrange the rolls vertically in a deep, moisture-wicking basket made of natural fibers, ensuring the ‘seam’ of the roll is facing downward or inward to maintain a clean appearance.
- Place the basket on a raised platform or stool at least 12 inches off the ground to protect the bottom layer from splashing water and stray grass clippings.
How to Style a Pool Towel Rack for Chic Outdoor Vibes
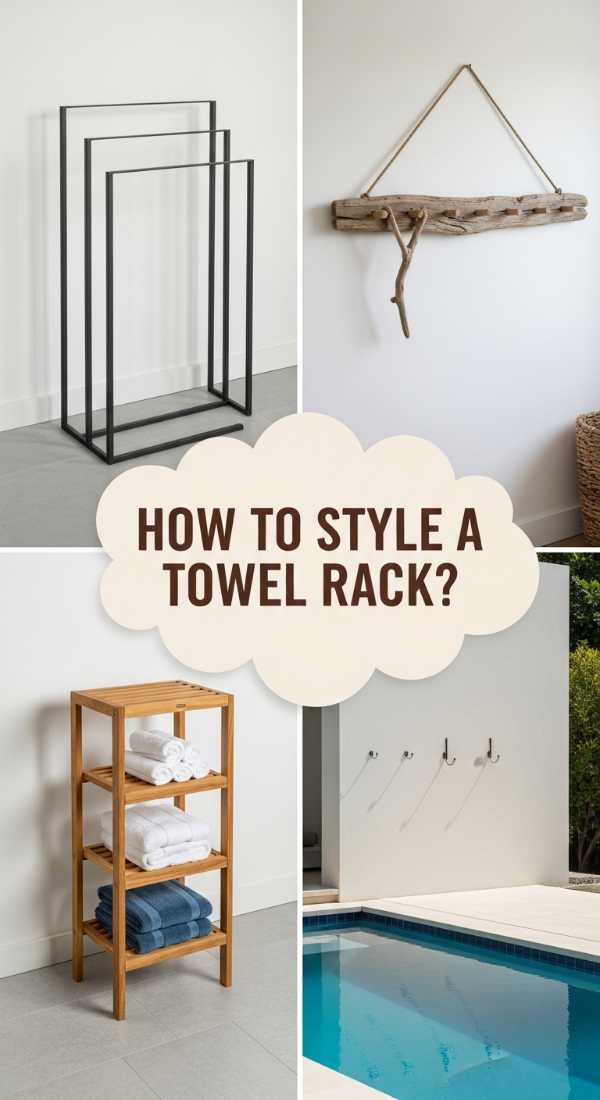
Why we love this
The humble towel rack is often an afterthought, but when styled correctly, it acts as a functional sculpture that defines the ‘drying zone’ of your patio. We love how a well-styled rack encourages guests to keep the space tidy without you ever having to say a word, maintaining that pristine cabana look all day long. The sight of colorful textiles drying in the sun adds a lived-in, joyful energy to the backyard while ensuring that no one is ever left shivering in a damp, forgotten heap of fabric on a lounge chair.
Essential Elements:
- Freestanding teak or powder-coated aluminum rack
- Matching S-hooks for accessories
- Weighted base for wind resistance
- Integrated side table for refreshments
How to make it
- Choose a location for your rack that is at least five feet away from the water’s edge to minimize splashing, but close enough to be reached within three steps of exiting the pool.
- Align your towels by length and color, hanging them with even spacing (at least 4 inches apart) to ensure maximum airflow and rapid drying in the sun’s heat.
- Use decorative S-hooks on the ends of the rack to hang goggles, wet swim caps, or small mesh bags filled with diving toys, keeping these smaller items off the floor and easily accessible.
- Anchor the rack using a weighted base or by bolting it into a heavy-duty decorative planter to ensure it remains upright during high-gust summer winds.
- Add a small, weather-proof tray to the top of the rack assembly to hold sunglasses and watches, providing a safe ‘dry spot’ for guests to leave their valuables before jumping in.
How to Build Pool Float Storage for Custom Backyard Appeal
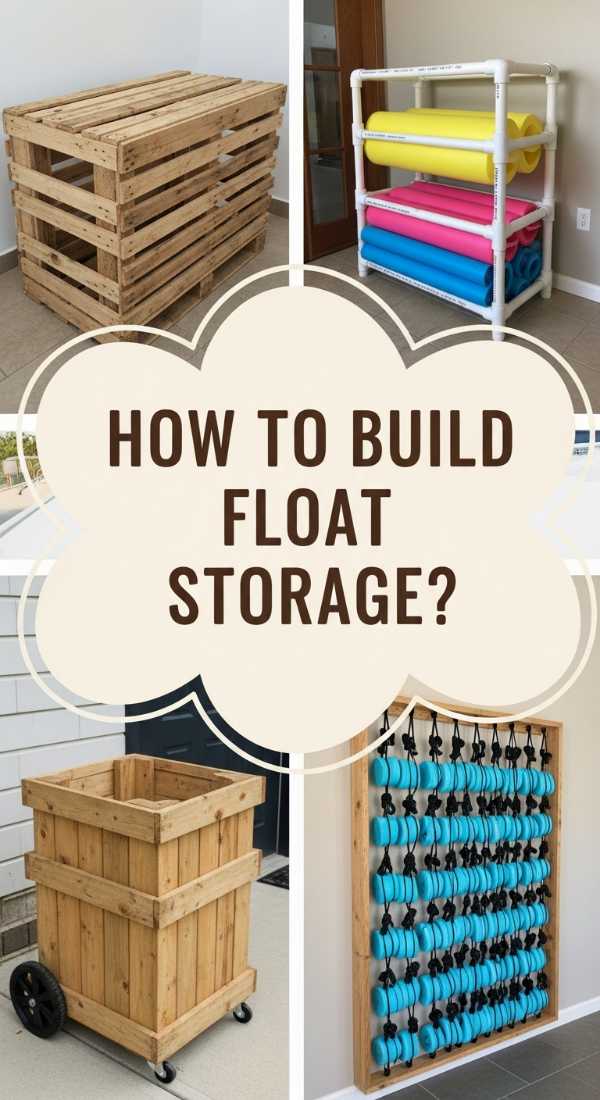
Why we love this
Custom builds are the ultimate way to ensure your storage fits your specific lifestyle and aesthetic preferences perfectly. Building your own float storage allows you to hide the bright, sometimes-clashing colors of pool toys behind beautiful cedar or teak slats that complement your home’s architecture. There is a deep satisfaction in seeing a bespoke piece of furniture that solves a messy problem while looking like it was professionally designed for a luxury magazine spread, proving that organization can be both rugged and refined.
Essential Elements:
- Pressure-treated lumber or cedar planks
- Outdoor-grade wood screws and hinges
- Waterproof sealant or wood stain
- Louvered side panels for ventilation
How to make it
- Measure your largest inflatable when fully inflated to determine the minimum internal dimensions of your storage box, adding 10% to the width for ease of access.
- Construct a sturdy frame using 2×4 pressure-treated lumber, ensuring all corners are perfectly square to prevent the lid from warping or sticking over time.
- Attach louvered side panels—angled slats that allow air to circulate freely—which is critical for preventing the buildup of mold and ‘stale water’ smells inside the unit.
- Apply a high-quality, UV-rated exterior stain or sealant using a wide brush, working in the direction of the grain to highlight the wood’s natural beauty while providing a moisture barrier.
- Install a heavy-duty, soft-close hinge on the lid to prevent accidental slamming, a crucial safety feature for households with curious children who might be hunting for their favorite float.
How to Design Pool Storage for Ultimate Summer Ease

Why we love this
Great design is invisible; it simply makes life feel smoother and more intuitive. Designing your pool storage with a focus on ‘ease’ means that at the end of a long, sun-soaked day, the cleanup takes minutes rather than an hour. We love how a well-designed system anticipates your needs—like having a dedicated spot for sunblock right next to the towels—so you can spend more time floating and less time hunting through drawers or bins for the essentials of outdoor living.
Essential Elements:
- Modular storage cabinets
- Clear, labeled bins for goggles and toys
- Integrated bench seating
- Hydration station with built-in cooler
How to make it
- Map out your ‘activity zones’ on the patio (Sun, Splash, and Lounge) and place storage units at the transition points between these zones for maximum efficiency.
- Select modular cabinets made of high-density polyethylene (HDPE) which won’t rust, peel, or fade, and arrange them to create a seamless wall of storage that mimics a built-in outdoor kitchen.
- Inside the cabinets, use clear, perforated bins to hold smaller items like dive rings and sunblock, allowing water to drain away while making it easy to see exactly what’s inside at a glance.
- Incorporate a ‘top-shelf’ policy where the most frequently used items—like goggles and sunscreen—are at eye level, while seasonal items like winter covers are stored in the lowest compartments.
- Install a magnetic strip on the inside of a cabinet door to hold metal items like hair clips or small tools, keeping them organized and preventing them from getting lost in the bottom of a bin.
How to Master Pool Organization for a Stress Free Oasis
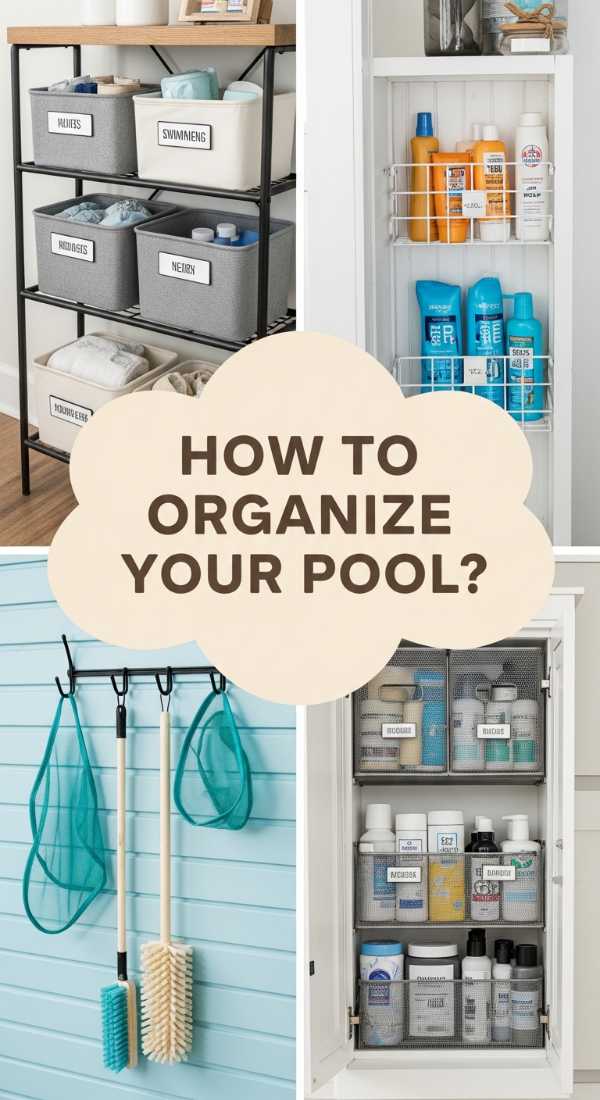
Why we love this
Mastering organization is about more than just bins; it’s about a mindset of maintenance that protects your peace of mind. When your pool area is truly organized, the mental load of ‘homeowner chores’ vanishes, leaving only the pure, unadulterated joy of summer. We love the feeling of waking up on a Saturday morning and looking out at a patio that is already guest-ready, requiring nothing more than the flip of a switch for the fountains to start and the opening of an umbrella to begin your day of relaxation.
Essential Elements:
- Daily 5-minute ‘reset’ routine
- End-of-day drying ritual
- Multi-purpose furniture with hidden storage
- Child-friendly labeling system
How to make it
- Implement a ‘dry-before-you-fly’ rule where every float must be wiped down with a microfiber cloth before being returned to its storage unit, significantly extending the life of the plastic.
- Use multi-functional furniture, such as storage ottomans that serve as both seating and a hidden home for pool chemicals or cleaning equipment, keeping eyesores out of sight.
- Develop a simple labeling system using waterproof vinyl stickers that use icons (like a picture of a goggle) so that even the youngest swimmers can participate in the cleanup process.
- Establish a weekly ‘deep sort’ where you check for sun-damaged toys that need to be recycled, ensuring your storage space isn’t being wasted on broken or unused items.
- Set a ‘sunset alarm’ on your phone to remind you to do a quick 5-minute walkthrough of the patio, tucking away stray items and straightening the towels before the evening dampness sets in.
How to Upgrade Pool Storage for Sophisticated Outdoor Living

Why we love this
Upgrading your storage is the quickest way to elevate your entire property’s value and aesthetic appeal. Moving away from plastic tubs and toward high-end materials like stone, brushed metal, and treated hardwoods transforms your backyard into a sophisticated extension of your home’s interior. We love the way these upgrades signal a commitment to quality and style, proving that even the most functional aspects of life—like storing a pool skimmer—can be handled with grace and architectural intent.
Essential Elements:
- Built-in stone storage niches
- Stainless steel hardware upgrades
- Low-voltage LED cabinet lighting
- Hidden ‘pocket’ storage for pool covers
How to make it
- Replace standard plastic handles and hinges on your existing storage boxes with marine-grade stainless steel hardware to add a touch of industrial chic that resists salt and chlorine corrosion.
- Install low-voltage LED strip lighting inside storage cabinets and under the lip of storage benches, providing a warm glow that makes it easy to find items during evening pool parties.
- If renovating, work with a hardscape designer to build recessed ‘cubbies’ directly into your stone retaining walls, providing permanent, architectural storage that disappears into the landscape.
- Upgrade your towel storage to a heated towel cabinet if you have an outdoor power source, offering guests a warm, cozy experience that feels like a world-class resort.
- Use decorative outdoor urns or large ceramic planters to hold ‘noodles’ or umbrellas, turning these awkward items into a vertical design statement.
How to Create a Pool Towel Station for Effortless Hosting
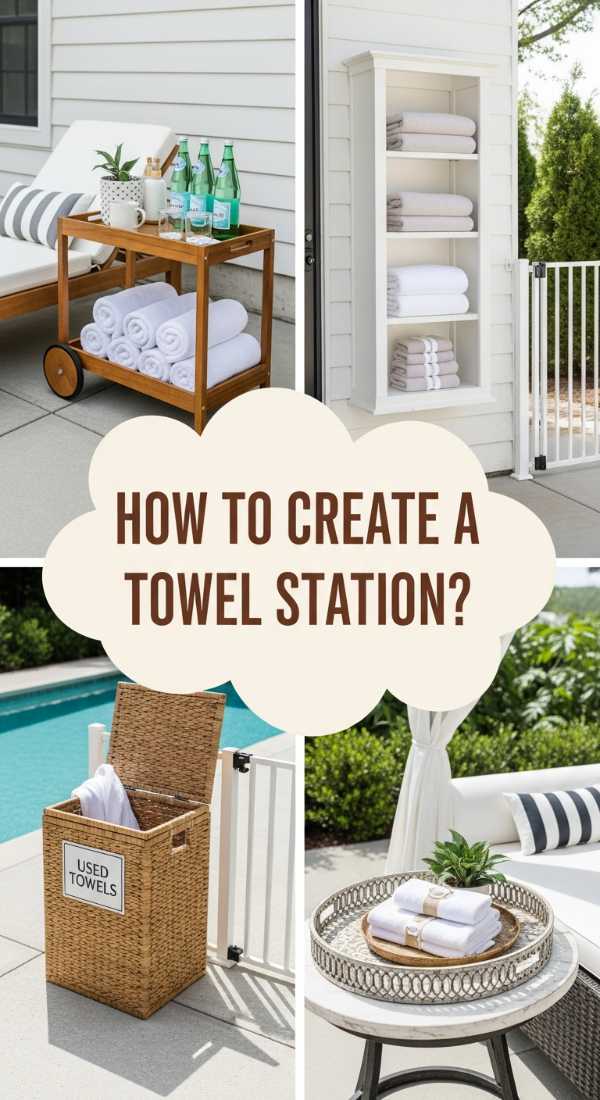
Why we love this
A dedicated towel station is the hallmark of a great host; it says ‘I’ve thought of everything so you don’t have to.’ By centralizing your towels and sun care in one beautiful, accessible spot, you remove the friction of hosting, allowing you to stay in the moment with your friends instead of running back and forth to the linen closet. We love the ‘concierge’ feel of a well-stocked station, which adds a layer of professionalism and hospitality to even the most casual Sunday afternoon barbecue.
Essential Elements:
- Console table with weather-resistant finish
- Divided acrylic tray for sunscreens
- Hamper for used towels
- Decorative signage
How to make it
- Select a slim console table that fits against a wall or fence, ensuring it is made of a material like eucalyptus or metal that can withstand direct sun and moisture.
- Designate the top surface for ‘clean’ items: place a stack of rolled towels on one side and a tiered acrylic organizer for various SPF levels, lip balms, and bug sprays on the other.
- Place a ventilated, stylish hamper (like a lidded resin wicker bin) directly underneath the table, clearly marked for ‘Used Towels’ to keep wet laundry off the furniture and floor.
- Add a small framed sign with a welcoming message or the Wi-Fi password, adding a personal touch that makes guests feel instantly at home.
- Finish the station with a small, drought-resistant potted plant like an agave or succulent to soften the edges and tie the station into the surrounding garden.
How to Tame Pool Floats for an Elegant Patio Look
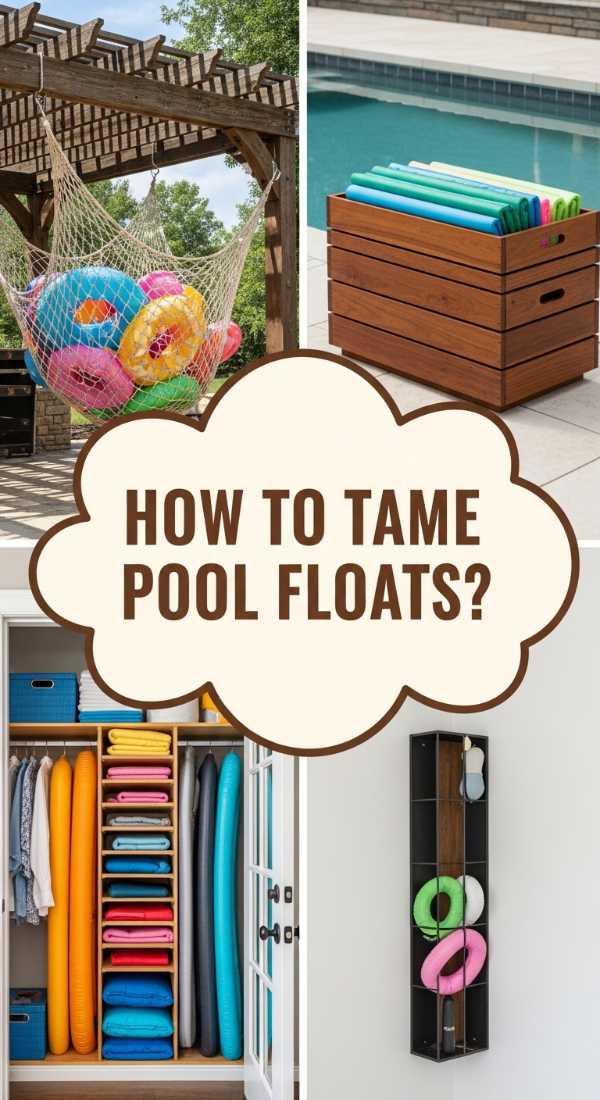
Why we love this
Inflatables are notoriously difficult to manage—they’re large, light, and prone to wandering off in the wind. Taming them with elegance means finding solutions that are as beautiful as they are practical. We love the look of a ‘floating gallery’ or a neatly contained bin that turns these playful items into a controlled pop of color rather than a messy heap. It’s about striking that perfect balance between a fun, family-friendly backyard and an adult-approved lounge space that looks great even when the kids aren’t in the water.
Essential Elements:
- Vertical wall-mounted ‘arms’ or brackets
- Heavy-duty mesh cargo nets
- Color-coordinated float selection
- Weight-integrated storage bags
How to make it
- Install vertical ‘arms’ made of powder-coated steel onto an inconspicuous side of your house or fence, allowing you to stack floats horizontally like surfboards in a shop.
- For smaller items, use a heavy-duty mesh cargo net stretched across a frame, which allows the wind to pass through (preventing the ‘sail’ effect) while keeping everything contained.
- When purchasing new floats, stick to a specific aesthetic—such as all metallics, all white, or all pastels—to ensure that even when they are out, they look like a coordinated collection.
- Use ‘sand-filled’ base bags to anchor larger floats that must remain on the ground, preventing them from blowing into the pool or over the fence during a breeze.
- Train the family to ‘stack by size’ at the end of every swim session, ensuring the largest items are always at the back or bottom to maintain a sense of visual order.
How to Simplify Pool Organization for Maximum Relaxation

Why we love this
At the end of the day, the goal of organization is to get out of the way of your relaxation. Simplification is about removing the ‘extra’—the toys that don’t get used, the towels that are past their prime, and the bulky storage units that crowd your walking paths. We love the minimalism of a simplified pool deck, where every item is high-quality and serves a clear purpose, leaving more room for what matters: the sun on your skin, the sound of the water, and the company of your favorite people.
Essential Elements:
- Minimalist deck box
- All-in-one cleaning tool rack
- Standardized towel size and brand
- Digital inventory of pool supplies
How to make it
- Perform a ‘ruthless edit’ of your current pool gear, donating any items that haven’t been used in the last two seasons to reclaim valuable real estate on your patio.
- Invest in one high-quality, extra-large deck box with a streamlined profile that can hold everything from chemicals to covers, eliminating the need for multiple smaller bins.
- Mount a single, discrete rack behind a hedge or wall to hold your skimmer, brush, and vacuum pole, keeping these long, awkward tools upright and out of the line of sight.
- Standardize your towels to a single brand and size, which makes folding and stacking infinitely easier and creates a more uniform, ‘clean’ look in your storage area.
- Keep a digital list on your phone of your pool chemical levels and filter replacement dates, reducing the mental clutter of trying to remember when you last serviced the system.
Conclusion
Elevating your poolside organization is more than just a weekend project; it’s an investment in your own well-being. When we clear the physical clutter from our outdoor spaces, we make room for the mental clarity that only a perfect summer day can provide. By choosing high-end materials, implementing thoughtful routines, and focusing on the small sensory details, you can turn your backyard into the sophisticated sanctuary you deserve. So, grab a cold drink, put on your favorite playlist, and start transforming your chaos into a cabana today!