
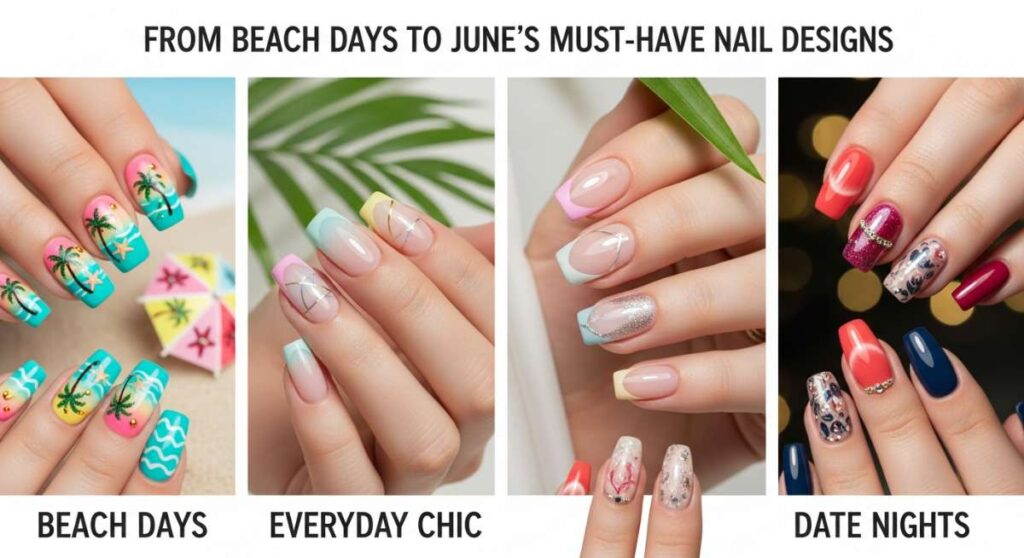
From Beach Days to Date Nights: June’s Must-Have Nail Designs
Hello, my loves! Can you feel it? That soft, golden whisper in the air that tells us June has finally arrived. It’s that magical time when the days stretch out like a lazy cat in the sun, and every evening feels like a soft, cloud-soft embrace. I’ve been sitting on my porch, sipping iced lavender tea, and thinking about how our hands are the storytellers of our summer—holding cold drinks, tucking flowers behind ears, and reaching for the hands of the ones we love.
This month, I wanted to bring you something truly special. We’re not just talking about paint on nails; we’re talking about capturing the essence of a June sunset, the sparkle of the Mediterranean, and the joy of a spontaneous road trip. I’ve curated these designs to feel like a warm hug for your aesthetic, ensuring your fingertips are as ready for a barefoot beach stroll as they are for a candlelit dinner under the stars.
5 Easy Steps to Design June Nails

Why to love this Design:
This design is like a breath of fresh air for your hands. It combines the softness of June mornings with a hint of playful shimmer that catches the light whenever you reach for your favorite sun hat. It’s effortless, feminine, and perfectly understated for every occasion.
Essential Elements:
- Soft Peach Polish
- Iridescent Top Coat
- Fine Detailing Brush
- Nourishing Cuticle Oil
How to Prepare:
- Cleanse and shape nails into a soft almond.
- Apply a sheer peach base coat.
- Dab a touch of iridescent shimmer on the tips.
- Blend the shimmer downward for a subtle gradient.
- Seal with a high-shine top coat for that ‘wet’ summer look.
Budget Range
- Essie ‘Peach Side Babe’ ($10)
- Sally Hansen Miracle Gel Top Coat ($8)
- Glass Nail File ($5)
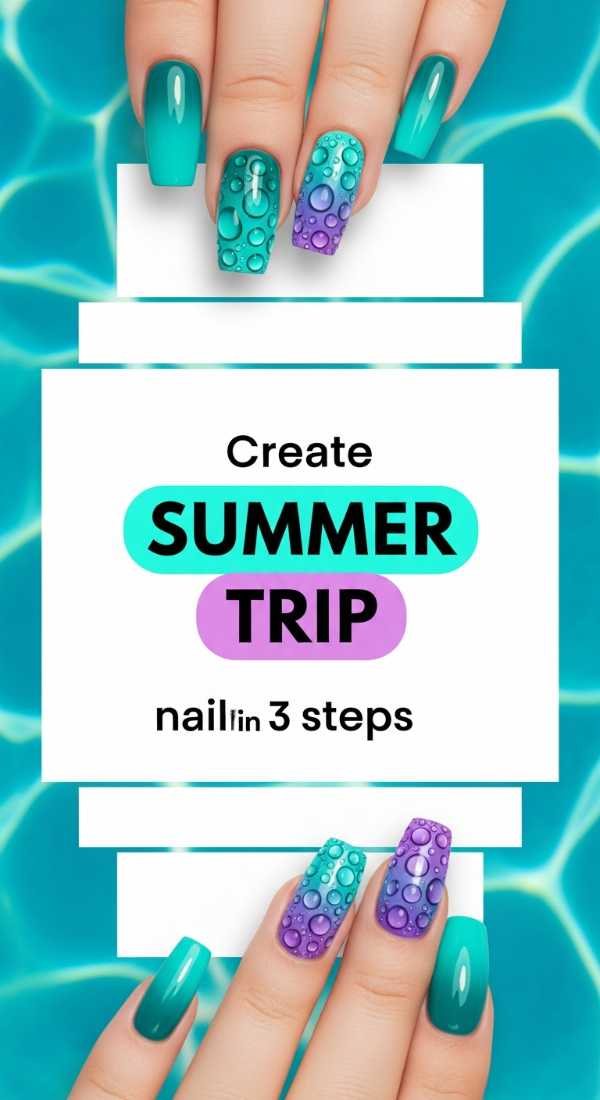
Create Summer Trip Nails in 3 Steps
Why to love this Design:
When you’re traveling, you need a look that is resilient yet striking. These ‘Summer Trip’ nails are inspired by the deep turquoise of hidden lagoons, designed to look better and better as you spend time in the water and sand.
Essential Elements:
- Turquoise Cream Polish
- Gold Leaf Flakes
- Long-wear Base Bond
How to Prepare:
- Apply two thin coats of turquoise polish for full opacity.
- Gently press gold leaf flakes onto the ring finger while tacky.
- Apply a double layer of top coat to protect against salt and sand.
Budget Range
- OPI ‘Mexico City Move-mint’ ($11)
- Nail Art Gold Foil Kit ($6)
- Zoya Anchor Base Coat ($12)
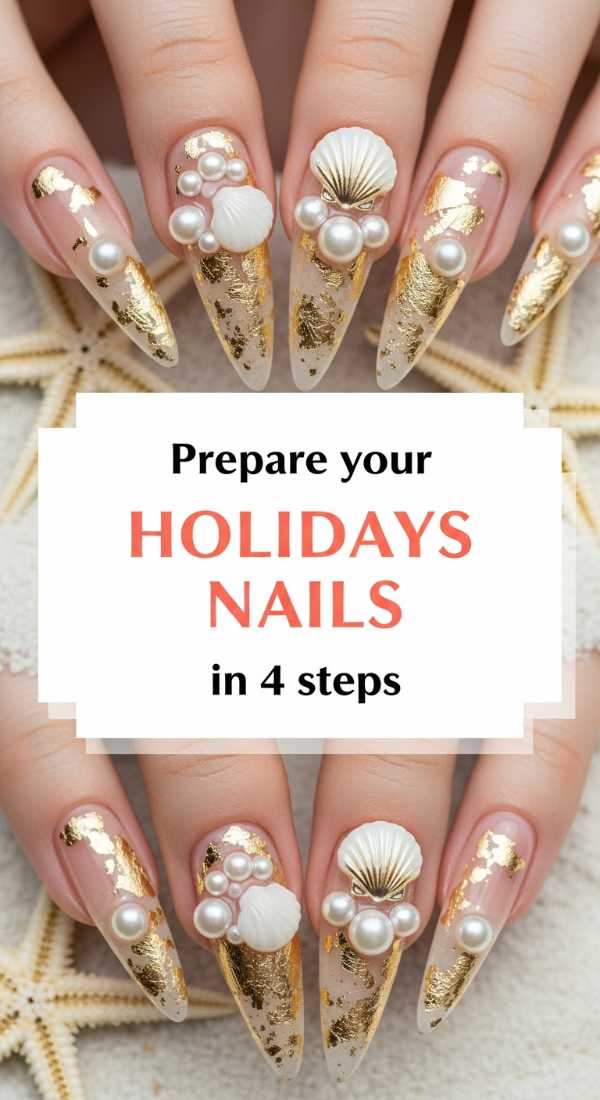
Prepare your Holidays Nails in 4 Steps
Why to love this Design:
Holiday nails should feel like a celebration. This design uses ‘Cloud-Soft’ whites and pearlescent finishes to mimic the look of luxury resort linens and white sandy beaches. It’s the ultimate chic companion for your vacation wardrobe.
Essential Elements:
- Milky White Polish
- Pearl Chrome Powder
- Sponge Applicator
- UV Lamp (Optional)
How to Prepare:
- Apply two coats of milky white polish and dry completely.
- Rub a small amount of pearl powder over the surface using a sponge.
- Buff gently until a mirror-like sheen appears.
- Finish with a non-wipe top coat to lock in the pearl glow.
Budget Range
- Funny Bunny by OPI ($11)
- Born Pretty Pearl Powder ($7)
- Mini LED Nail Lamp ($15)
7 Secrets for Perfect June Nails Trends

Why to love this Design:
This isn’t just one look, but a collection of secrets to master the ‘Quiet Luxury’ nail trend that is taking over June. It’s about skin health, subtle tones, and the glow that comes from within (and a really good buffer).
Essential Elements:
- Buffing Block
- Nude Beige Polish
- Matte Top Coat
- Hydrating Serum
How to Prepare:
- Secret 1: Always buff for a smooth canvas.
- Secret 2: Use a serum before polish for hydration.
- Secret 3: Apply thin layers to prevent bubbling in the heat.
- Secret 4: Match your nude to your undertone.
- Secret 5: Use matte top coats for a ‘velvet’ finish.
- Secret 6: Clean edges with a brush dipped in acetone.
- Secret 7: Reapply top coat every 3 days.
Budget Range
- 7-Way Buffer Block ($3)
- Olive & June ‘CHM’ ($9)
- CND SolarOil ($13)
Make your Summer Nails pop in 6 Steps

Why to love this Design:
Sometimes, we just want to stand out! This vibrant citrus-inspired look is all about energy and zest. It’s the visual equivalent of a cold glass of lemonade on a 90-degree day—bright, refreshing, and full of life.
Essential Elements:
- Neon Orange Polish
- White Base Polish (as a primer)
- Small Dotting Tool
How to Prepare:
- Start with a white base coat to make the neon pop.
- Apply the neon orange over the white.
- Use a dotting tool to create tiny white ‘blossom’ dots.
- Add a yellow center to each dot for a daisy effect.
- Let dry completely for 10 minutes.
- Apply a glossy top coat to enhance the neon pigment.
Budget Range
- Orly ‘Kitsch You Later’ ($12)
- Dotting Tool Set ($5)
- White Polish Primer ($8)
4 Easy Steps to June Nails Design

Why to love this Design:
This ‘Lavender Field’ design is for my soulful loves. It’s soft, romantic, and reminiscent of the flowers blooming in our gardens right now. It brings a sense of peace to your busy summer schedule.
Essential Elements:
- Lavender Cream Polish
- Fine Silver Glitter
- Tapered Brush
How to Prepare:
- Apply lavender polish to all nails except the pinky.
- On the pinky, apply a dense silver glitter.
- Add a tiny silver line along the cuticle of the other nails.
- Seal with a fast-dry top coat.
Budget Range
- Holler and Glow Lavender Mist ($6)
- Wet n Wild Glitter Polish ($3)
- Seche Vite Fast Dry Top Coat ($9)
Design Summer Holidays Nails in 8 Steps

Why to love this Design:
The ‘Mediterranean Mosaic’ is a showstopper. It uses blues and whites to create a pattern that looks like the tiles in Santorini. It’s a bit more intricate, but oh-so-worth the effort for your summer getaway.
Essential Elements:
- Royal Blue Polish
- White Striper Pen
- Steady hand!
How to Prepare:
- Prep nails with a clear base.
- Paint half the nail white and half blue.
- Use the white pen to draw small ‘X’ shapes on the blue side.
- Use the blue pen to draw dots on the white side.
- Connect the shapes to form a tile pattern.
- Add a gold dot in the center of each tile.
- Clean up the cuticles with a small brush.
- Seal with a thick gel-effect top coat.
Budget Range
- Nail Art Striper Pens ($10/set)
- Revlon Enamel Blue ($6)
- Gold Stud Accents ($4)
5 Hacks for Viral June Nails

Why to love this Design:
Want that ‘Instagrammable’ look without the salon price tag? These hacks are the short-cuts to viral-worthy nails. We’re talking about using everyday items to create professional-level textures and effects.
Essential Elements:
- Makeup Sponge
- Toothpicks
- Cornstarch (for matte effect)
How to Prepare:
- Hack 1: Use a makeup sponge for a perfect 2-second ombre.
- Hack 2: Mix cornstarch into clear polish for an instant matte finish.
- Hack 3: Use a toothpick to drag wet polish into marble swirls.
- Hack 4: Use a Band-Aid (the perforated part) as a stencil for polka dots.
- Hack 5: Soak nails in ice water to dry polish instantly.
Budget Range
- Wedge Makeup Sponges ($2)
- Kitchen Cornstarch ($1)
- Clear Polish ($4)
Create 3D Summer Nails in 10 Minutes

Why to love this Design:
3D nails are the biggest trend of the season! This ‘Sea Shell’ design adds texture that you can actually feel. It’s playful, unique, and makes you feel like a mermaid who just stepped out of the ocean.
Essential Elements:
- Building Gel or Thick Top Coat
- Pearl White Polish
- Detailing Tool
How to Prepare:
- Apply pearl white polish and let it dry.
- Apply a thick line of building gel vertically.
- Repeat 4 times to create ‘ridges’.
- Cure or let the thick gel set until hard.
- Apply a final shimmer coat over the ridges to blend.
Budget Range
- Ibd Hard Gel ($14)
- Sinful Colors ‘Pearl’ ($3)
- UV Flashlight ($10)
Prepare June Nails Trends in 3 Steps

Why to love this Design:
This is the ‘Sunset Ombre.’ It’s the ultimate June trend because it captures the sky’s transition from pink to orange. It’s warm, inviting, and looks absolutely stunning against a tan.
Essential Elements:
- Hot Pink Polish
- Sunset Orange Polish
- Blending Sponge
How to Prepare:
- Paint pink on the bottom half of a sponge and orange on the top.
- Dab the sponge repeatedly onto the nail until colors blend.
- Wipe away excess from skin and finish with a high-gloss top coat.
Budget Range
- China Glaze ‘Flip Flop Fantasy’ ($8)
- Neon Pink Polish ($7)
- Acetone Clean-up Brush ($5)
Embrace Your Summer Glow
As you head out into the warmth of June, remember that your nails are the finishing touch to your beautiful, radiant self. Whether you choose a soft lavender or a bold 3D seashell, let it be a reflection of the joy you feel this season. Take a moment for yourself, breathe in the summer air, and enjoy the simple pleasure of a fresh manicure. You deserve to sparkle, my loves!