
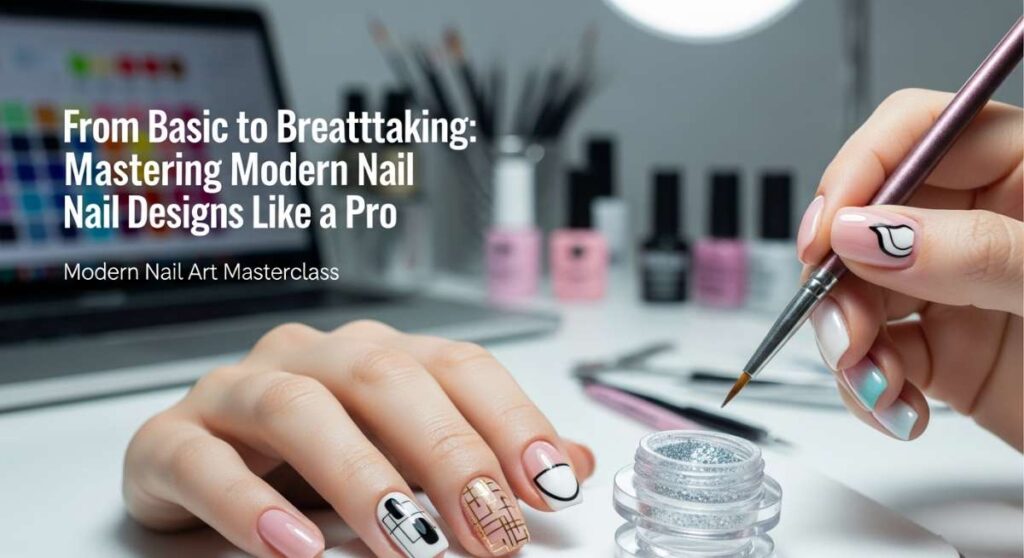
From Basic to Breathtaking: Mastering Modern Nail Designs Like a Pro
Hello, my darling loves. Pull up a chair, grab a warm cup of matcha, and let’s just breathe for a moment together. You know that feeling when you look down at your hands after a long day and see a splash of color that just feels like *you*? It’s more than just polish; it’s a little love letter to your soul, a way to carry a piece of art with you through the mundane and the magical alike.
I’ve spent so many quiet afternoons experimenting with colors and brushes, finding serenity in the slow, rhythmic strokes of a manicure. Today, I want to wrap you in that same creative embrace and show you that you don’t need a professional studio to achieve that breathtaking, high-end look. We are turning our homes into sanctuaries of self-expression, one nail at a time.
4 Simple Steps to Paint Floral Nails
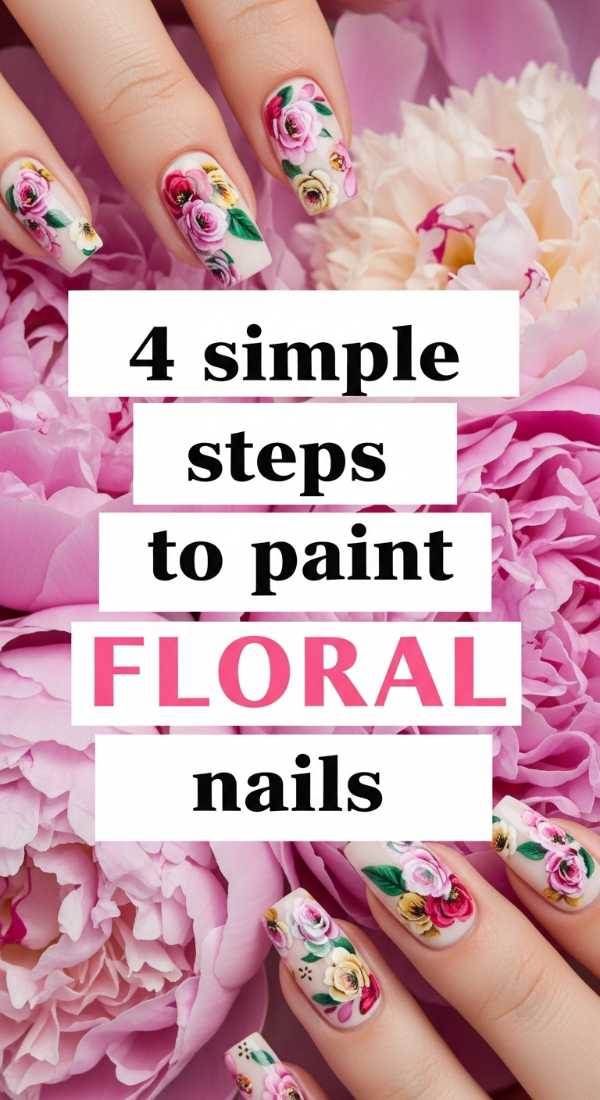
Why to love this Design:
Floral nails are like carrying a tiny, eternal spring right at your fingertips. They remind us of growth, softness, and the delicate beauty of nature that persists even on the busiest city streets. It’s a design that feels deeply feminine and grounding.
Essential Elements:
- A fine-tipped dotting tool
- Pastel petal colors
- A steady, relaxed hand
- Soft matte top coat
How to Prepare:
- Apply a neutral base color and let it dry completely.
- Use your dotting tool to place five small dots in a circle for petals.
- Add a tiny yellow or gold dot in the center of the petal circle.
- Seal with a matte top coat to give it a soft, pressed-flower feel.
Budget Range
- Essie ‘Soothe Hole’ Pastel Pink – $9.00
- Beetles Dotting Tool Set – $6.99
- Sally Hansen Matte Top Coat – $7.00
3 Ways to Master Modern French Tips
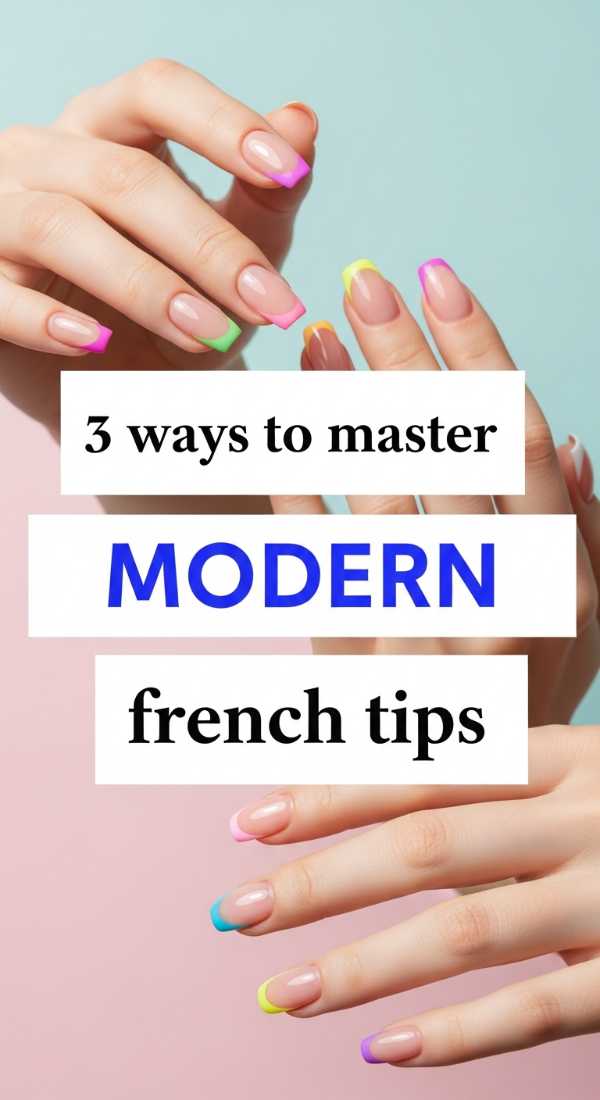
Why to love this Design:
The modern French tip is the ultimate ‘cool girl’ staple. It’s a nod to tradition but with a sharp, contemporary edge that says you know exactly who you are. It’s clean, sophisticated, and makes your fingers look miles long.
Essential Elements:
- Silicon nail stamper
- Ultra-thin liner brush
- Contrast colors (neon or deep black)
How to Prepare:
- Method 1: Press your nail tip into a polish-covered silicone stamper for a perfect micro-edge.
- Method 2: Use a liner brush to follow the natural ‘smile line’ with a deep V-shape.
- Method 3: Side-tip application where you only paint one slanted half of the tip.
Budget Range
- Vrenmol Silicone Nail Stamper – $8.50
- OPI ‘Black Onyx’ Polish – $11.50
- Modelones Liner Brush Set – $9.99
5 Minutes to Achieve Liquid Chrome Nails
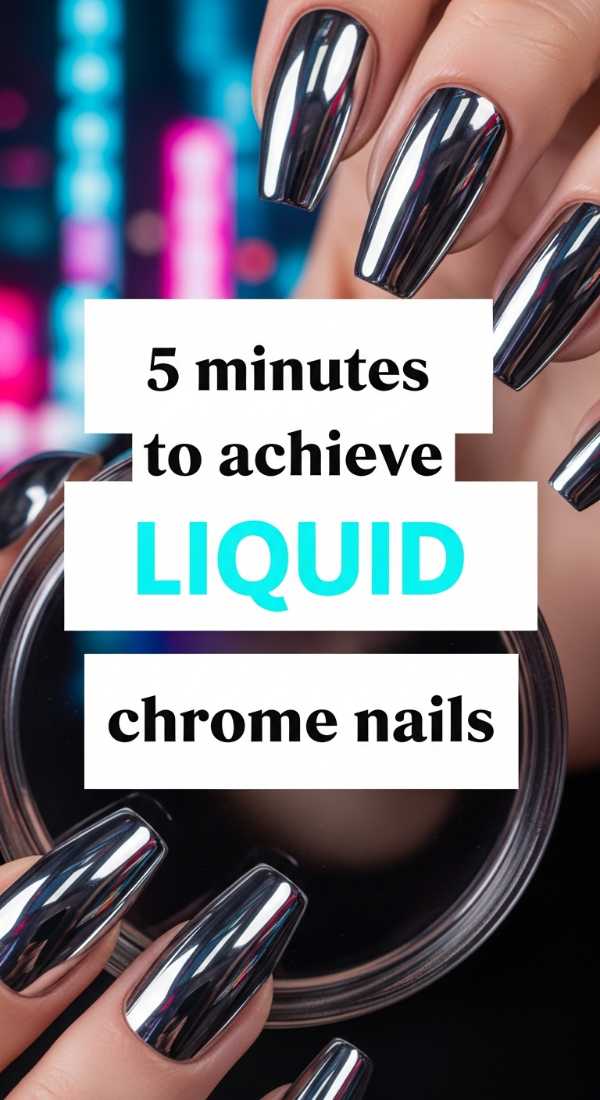
Why to love this Design:
There is something so futuristic and powerful about chrome. It reflects the world around you, turning your nails into tiny mirrors. It’s bold, unapologetic, and takes almost zero effort once you know the secret.
Essential Elements:
- No-wipe gel top coat
- Fine chrome powder
- Sponge applicator
- UV/LED lamp
How to Prepare:
- Apply a black gel base and cure.
- Apply a no-wipe top coat and cure for only 30 seconds.
- Rub the chrome powder onto the warm nail using the sponge.
- Buff until it shines like liquid metal and seal with a final top coat.
Budget Range
- Artdone Holographic Chrome Powder – $10.00
- SUNUV LED Nail Lamp – $24.00
- Beetles No-Wipe Gel Top Coat – $8.00
2 Steps for the Glazed Donut Finish
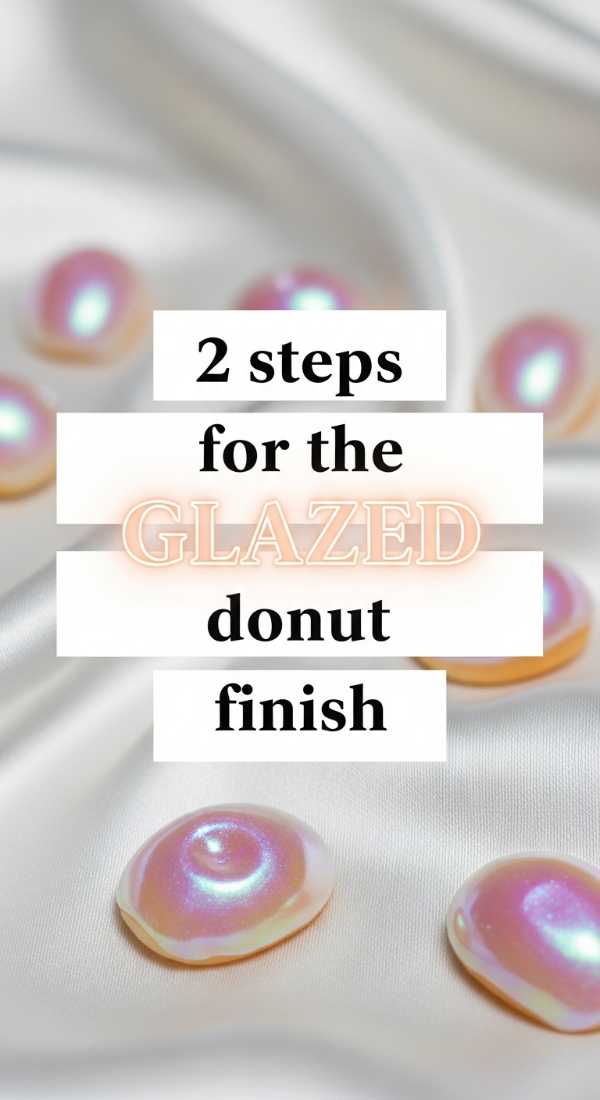
Why to love this Design:
The ‘Glazed Donut’ look is the epitome of the ‘clean girl’ aesthetic. It’s ethereal, iridescent, and looks stunning under the soft glow of golden hour. It’s that perfect ‘your nails but better’ vibe with a touch of stardust.
Essential Elements:
- Sheer milky white polish
- Pearl iridescent powder
How to Prepare:
- Apply one thin, even layer of sheer milky white polish.
- Gently buff a tiny amount of pearl powder over the surface for that iconic shimmering glow.
Budget Range
- OPI ‘Funny Bunny’ – $11.50
- Born Pretty Pearl Pigment – $7.00
6 Steps to Blend Your Aura Nails
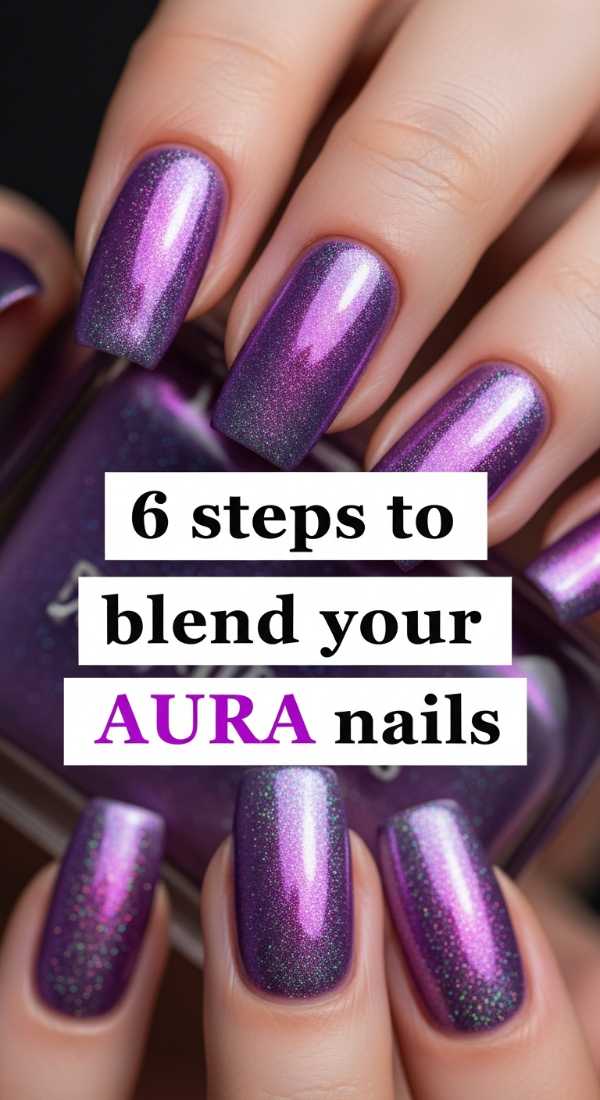
Why to love this Design:
Aura nails are a visual representation of your inner energy. They are soft, blurred, and deeply personal. Looking at them feels like a meditation, watching the colors bleed into one another in perfect harmony.
Essential Elements:
- Makeup sponge wedges
- Two coordinating gel colors
- Acetone for cleanup
How to Prepare:
- Apply a solid base color and cure.
- Dab a small circle of your second color onto a makeup sponge.
- Lightly press the sponge into the center of the nail.
- Repeat the dabbing in layers to build the gradient intensity.
- Use a clean brush with acetone to soften the outer edges of the circle.
- Seal with a high-gloss top coat.
Budget Range
- Wedge Makeup Sponges (Bulk) – $5.00
- Gelish Harmony Gel Polish Duo – $20.00
4 Hacks for the Perfect Ombre Nails
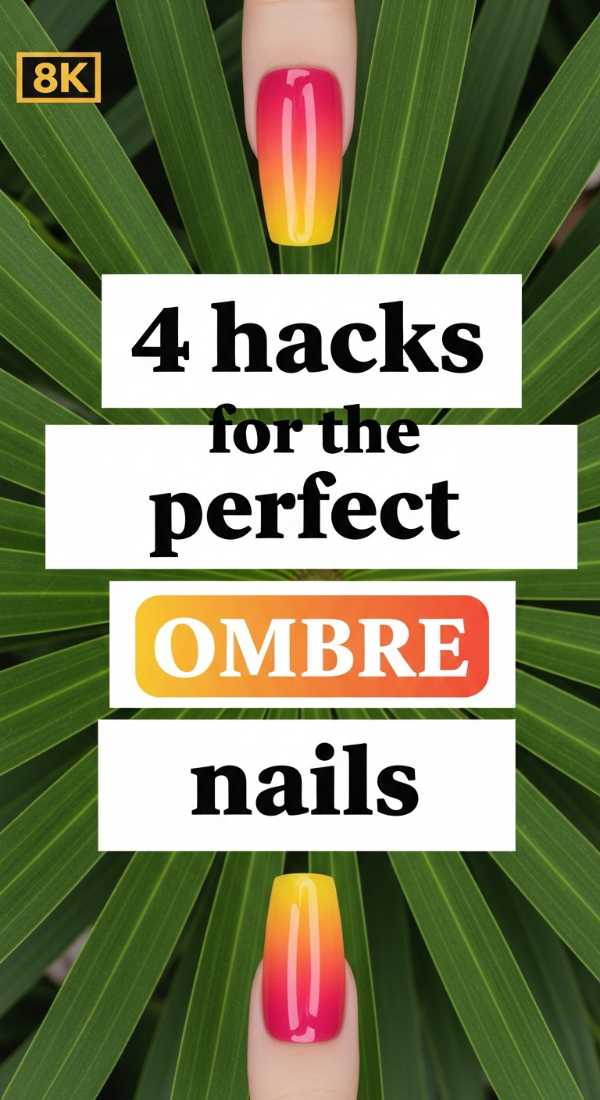
Why to love this Design:
Ombre is the classic sunset for your hands. It provides a seamless transition that is visually soothing. It’s the perfect way to wear multiple colors without feeling overwhelmed.
Essential Elements:
- Liquid latex (for skin protection)
- Ombre brush or sponge
- Highly pigmented polishes
How to Prepare:
- Apply liquid latex around your cuticles to prevent a mess.
- Paint the two colors directly onto a damp sponge, overlapping slightly.
- Bounce the sponge onto the nail repeatedly.
- Peel off the latex and add a top coat to blend the transition lines.
Budget Range
- Pueen Liquid Latex – $9.00
- Holo Taco ‘Linear’ Collection – $14.00 per bottle
3 Easy Techniques for Swirl Nail Art
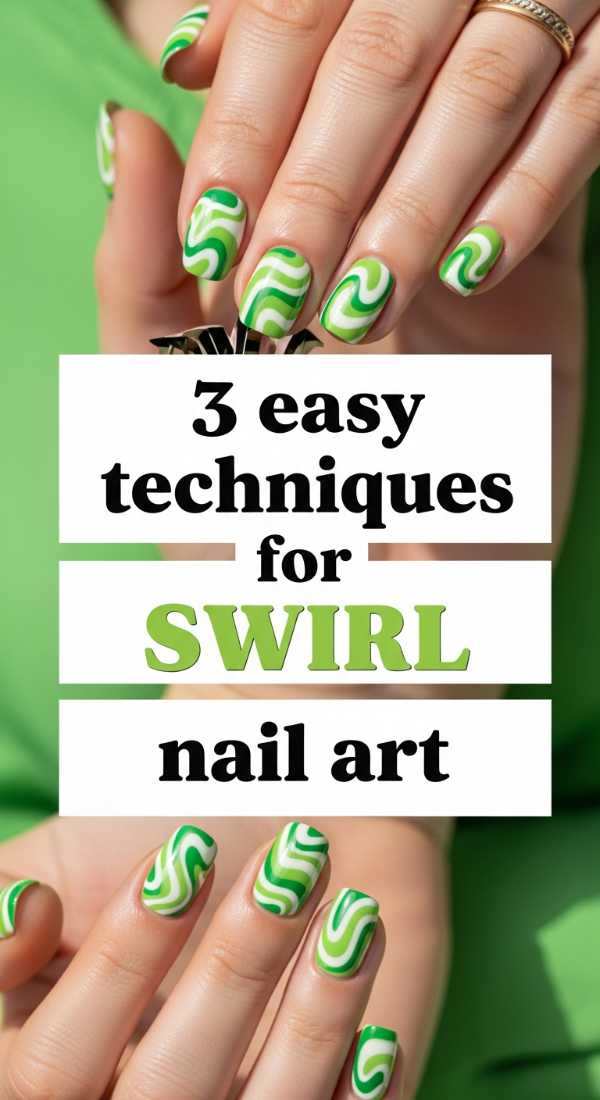
Why to love this Design:
Swirls are playful and full of movement. They bring a 70s retro energy to your modern life. They don’t have to be perfect, which is why they are so incredibly freeing to create.
Essential Elements:
- Long-haired striper brush
- High-viscosity polish
How to Prepare:
- Technique 1: The ‘S’ curve—start at the cuticle and drag down to the opposite corner.
- Technique 2: The ‘Nested’ swirls—paint three lines that follow each other’s curves.
- Technique 3: The ‘Abstract’ swirl—random loops that intersect for a chaotic-chic look.
Budget Range
- Winstonia Long Liner Brush – $7.50
- DND Gel Polish Duo – $12.00
7 Strokes to Create Abstract Nail Art

Why to love this Design:
Abstract art is where your intuition takes over. There are no rules, only feelings. It’s a way to be messy and intentional at the same time, resulting in a design that is uniquely yours.
Essential Elements:
- Gold leaf flakes
- Matte black polish
- Nude base
How to Prepare:
- Stroke 1: A bold, dry-brush swipe of black across the top.
- Stroke 2: A thin vertical line offset to the left.
- Stroke 3: A small dot near the cuticle.
- Stroke 4: A smudge of gold leaf in the center.
- Stroke 5-7: Three tiny white flickers for highlights.
Budget Range
- Makartt Gold Leaf Foil – $8.00
- Orly ‘Liquid Vinyl’ – $10.00
5 Tools Needed for 3D Nail Designs
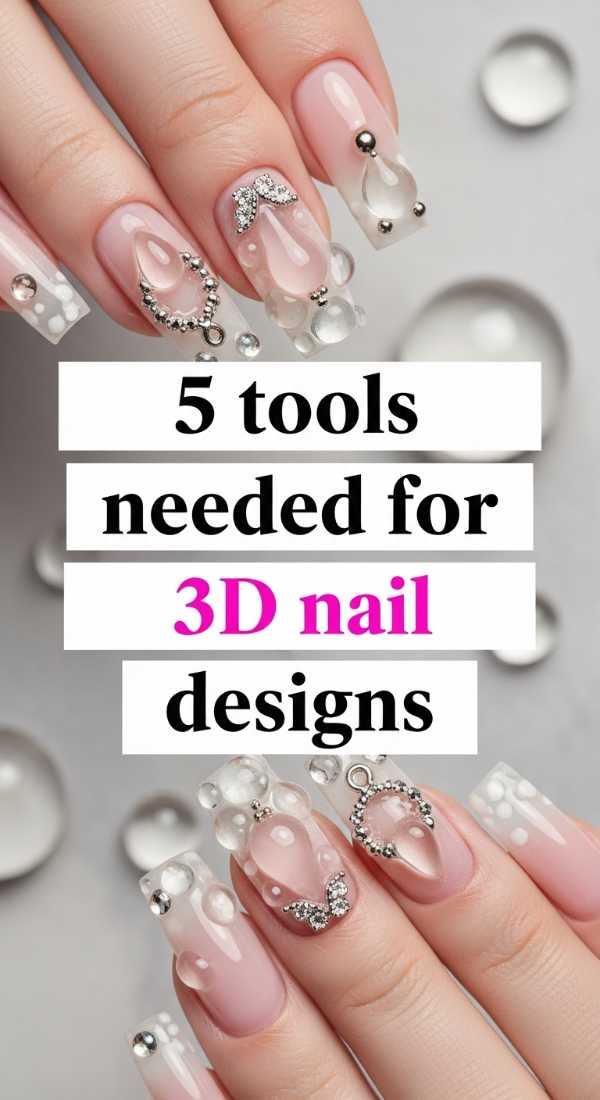
Why to love this Design:
3D designs are for the bold dreamers. They add texture and a tactile element to your style. It’s like wearing jewelry that is actually part of you.
Essential Elements:
- Hard builder gel
- Jewel picker tool
- Rhinestones or charms
- UV lamp
- Precision tweezers
How to Prepare:
- Apply a dollop of builder gel where you want the charm.
- Use the picker tool to place the jewel into the gel.
- Adjust the position with tweezers.
- Flash cure for 10 seconds to set, then full cure for 60 seconds.
- Secure edges with a thin brush and top coat.
Budget Range
- Saviland Builder Nail Gel – $12.00
- Rhinestone Picker Tool – $6.00
3 Tips to Apply Aesthetic Pearl Nails
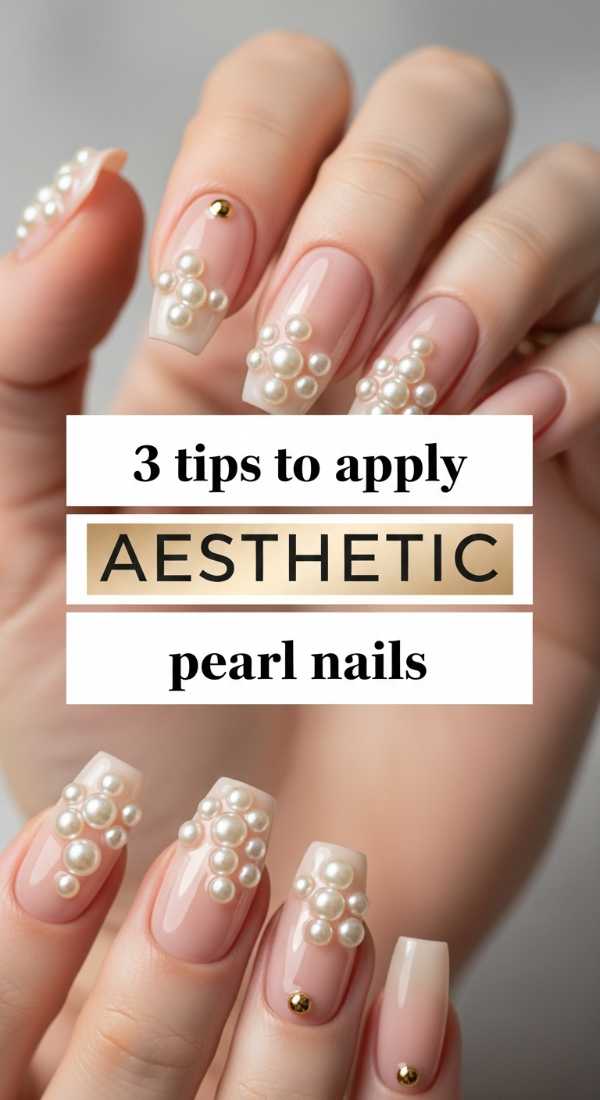
Why to love this Design:
Pearl nails are timeless and regal. They evoke the mystery of the ocean and the elegance of vintage Hollywood. They are the perfect choice for a soft, romantic look.
Essential Elements:
- Half-back flat pearls
- Nail glue or resin
- Tweezers
How to Prepare:
- Tip 1: Always apply pearls to a completely dry or cured surface to prevent sliding.
- Tip 2: Use a tiny drop of professional resin rather than standard glue for longevity.
- Tip 3: Group three pearls of different sizes for a clustered, organic look.
Budget Range
- KDS Nail Resin – $7.00
- Multi-size Flatback Pearl Set – $9.00
Conclusion: Your Hands, Your Masterpiece
As we wrap up our little masterclass, I hope you feel a sense of excitement and peace. Your hands do so much for you—they hold, they create, they comfort. Giving them this attention is a beautiful way to honor yourself. Don’t worry about being perfect, my loves. The beauty lies in the journey, the practice, and the joy of the process. Go forth and shine!