

Have you ever walked into a space and felt an immediate sense of peace, as if the walls themselves were whispering a warm welcome? That feeling isn’t an accident; it’s the result of intentional living and the magic of a well-curated environment. For years, I struggled to find that balance between ‘cluttered’ and ‘cold,’ but I’ve realized that elevating your lifestyle isn’t about expensive renovations—it’s about the rituals we keep and the small, thoughtful details we sprinkle into our homes.
In this guide, we are diving deep into the art of the home sanctuary. From the way your front yard greets the neighborhood to the tiny whimsical corners of your apartment, every inch of your space is a canvas for your personality. Whether you’re hosting a summer dinner under the stars or setting up a workspace that actually makes you want to be productive, it’s all about creating a life that feels as good on the inside as it looks on the outside. Let’s explore how to transform the everyday into the extraordinary.
How to Achieve Simple Landscaping for a Welcoming Front Yard
Why we love this
There is something profoundly satisfying about the smell of fresh cedar mulch and the sight of crisp, clean edges along a walkway. A well-landscaped front yard isn’t just about curb appeal; it’s a gift to yourself every time you pull into the driveway after a long day. We love this approach because it emphasizes low-maintenance beauty—think drought-resistant perennials that dance in the breeze and structured evergreens that provide a lush, green backdrop even in the dead of winter. It creates a transition zone between the chaotic outside world and your private haven, making your home feel established and loved.
Essential Elements:
- Dark hardwood or cedar mulch
- Metal or plastic garden edging
- Drought-resistant perennials (like Hostas or Lavender)
- Low-voltage LED path lights
- Decorative river rocks
How to make it
- Begin by clearing the designated area of all weeds, old grass, and debris. Use a flat-head spade to define a clean, sharp edge between your lawn and the garden bed; a slightly curved line often looks more professional and organic than a rigid straight one.
- Check your soil quality. If it’s heavy clay or very sandy, mix in two inches of organic compost to provide a nutrient-rich foundation for your new plants.
- Arrange your plants while they are still in their nursery pots. Place taller shrubs toward the back (closest to the house) and shorter flowers in the front. Leave at least 12-18 inches of space between them to allow for future growth.
- Dig holes that are twice as wide as the root ball but no deeper. Gently tease the roots before placing the plant in the ground, ensuring the top of the root ball is level with the soil surface.
- Install your edging material along the perimeter to keep the grass from encroaching. Press it firmly into the soil and secure it with landscape stakes.
- Spread a 3-inch layer of mulch over the entire bed, being careful not to pile it up against the stems or trunks of the plants, which can cause rot. Water everything deeply immediately after planting to settle the soil.
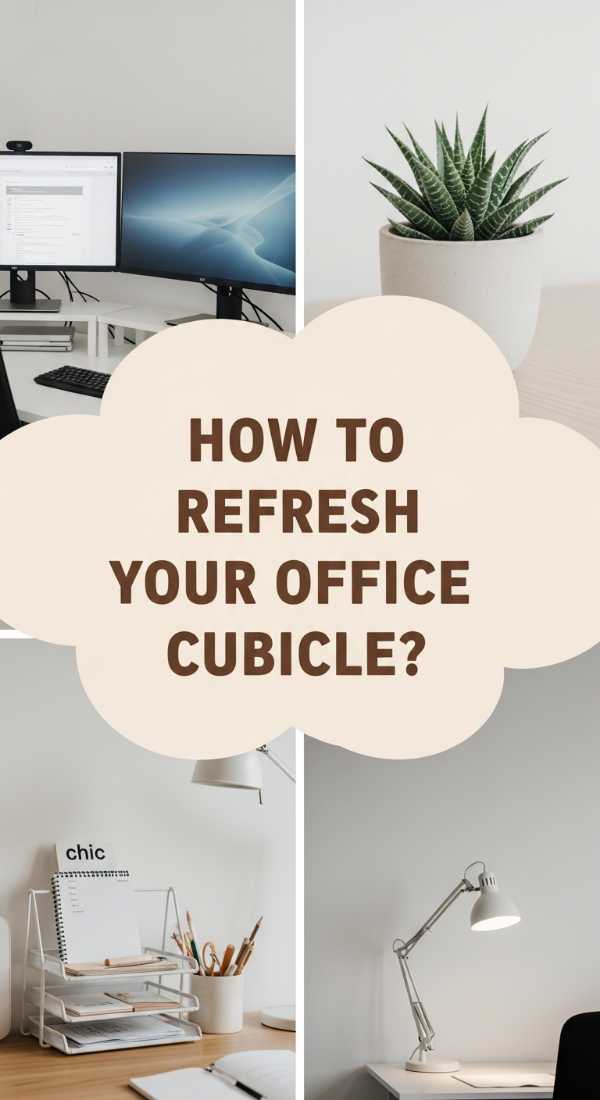
How to Design a Productive Office Desk Setup for Your Work Cubicle

Why we love this
A productive desk setup is more than just a place to park your laptop; it’s a cockpit for your creativity. When your cubicle is designed with intention, the ‘afternoon slump’ feels less like a brick wall and more like a gentle transition. We love the fusion of ergonomic support with aesthetic charm—the way a soft amber desk lamp cuts through the harsh overhead fluorescent lighting, or how a single potted succulent brings a touch of the outdoors to a corporate environment. It’s about minimizing friction so your brain can focus on the work that truly matters, all while surrounded by textures that feel personal and grounding.
Essential Elements:
- Ergonomic laptop stand or monitor riser
- Mechanical keyboard and wrist rest
- Ambient desk lamp with warm bulb
- Desktop organizer or felt tray
- Noise-canceling headphones
- A small, hardy indoor plant (like a Snake Plant)
How to make it
- Start with a total ‘desk reset.’ Clear everything off your surface and wipe it down with a microfiber cloth. This blank slate helps you visualize the most efficient flow for your daily tasks.
- Position your monitor so the top third of the screen is at eye level. This prevents neck strain and encourages better posture. If using a laptop, a dedicated stand is a must-move for your spinal health.
- Implement the ‘Reach Zone’ rule: keep your most-used items (keyboard, mouse, phone) within an easy arm’s reach, and secondary items (staplers, files) further away to reduce visual clutter.
- Manage your cables using adhesive clips or a cable sleeve. Nothing kills productivity vibes faster than a ‘rat’s nest’ of tangled wires under your feet.
- Introduce ‘Layered Lighting.’ Turn off the overhead lights if possible and use a desk lamp with a warm-toned LED bulb. This reduces eye strain and creates a focused, cozy atmosphere.
- Add one or two ‘joy items’—a framed photo or a ceramic mug you love. Keep these to a minimum to ensure they don’t become distractions.
How to Create a Whimsical Apartment Aesthetic for a Dreamy Living Space

Why we love this
Stepping into a whimsical apartment feels like falling into the pages of a storybook. It’s a style that rejects the ‘beige’ trend in favor of personality, ethereal textures, and a bit of organized chaos. We love the way sheer iridescent curtains catch the afternoon sun, casting tiny rainbows across a velvet sofa, and how mismatched vintage frames tell a story of a life well-traveled. This aesthetic is all about softness and wonder; it encourages you to play with proportions and colors that make your inner child smile, turning a standard rental into a magical sanctuary that feels entirely unique to you.
Essential Elements:
- Warm-toned fairy lights or ‘star’ projectors
- Velvet or faux-fur throw pillows
- Sheer, flowy curtains
- Ornate gold mirrors
- A mix of vintage and modern art prints
- Dried flower bouquets
How to make it
- Define your color story. For a whimsical look, opt for a base of soft pastels (mint, lavender, or dusty rose) accented by metallic touches like gold or brass to add a sense of luxury.
- Focus on ‘Mood Lighting.’ Replace harsh white bulbs with warm ones and drape fairy lights behind sheer curtains. The goal is a soft, diffused glow that blurs the edges of the room at night.
- Layer your textiles. Place a fluffy sheepskin rug over a larger jute rug, and pile cushions of different shapes and textures—round velvets, square linens—onto your seating areas.
- Create a ‘Wonder Wall.’ Use a variety of frames—some ornate, some simple—to display a mix of personal photos, botanical sketches, and abstract art. Don’t worry about perfect symmetry; a gallery-style layout works best here.
- Incorporate elements of nature. Hang macramé plant holders at different heights and place vases of dried pampas grass or eucalyptus in corners to add height and a touch of the outdoors.
- Use scent to seal the vibe. A vanilla or sandalwood candle adds a sensory layer that makes the space feel truly ‘dreamy’ and lived-in.
How to Build a Cheap Pool Deck for an Affordable Backyard Oasis

Why we love this
There is nothing quite like the feeling of sun-warmed wood beneath your feet before you plunge into the cool, clear water of your backyard pool. Creating a pool deck on a budget is the ultimate ‘summer hack’ that turns a simple above-ground pool into a luxurious destination. We love this DIY approach because it’s as much about the process as the result—the smell of sawdust, the satisfaction of a level board, and the knowledge that you’ve created a resort-style experience for a fraction of the cost. It transforms the backyard into a social hub where memories are made over cold drinks and splashing water.
Essential Elements:
- Pressure-treated 2×4 and 2×6 lumber
- Concrete deck blocks
- Galvanized deck screws
- Outdoor-rated wood sealer or stain
- Spirit level and power drill
How to make it
- Measure the height of your pool and the desired dimensions of the deck. Mark the area with stakes and string to ensure your footprint is square and clear of any underground utility lines.
- Level the ground where your concrete deck blocks will sit. Use a layer of gravel under each block to ensure stability and prevent the wood from sitting in standing water during rain.
- Build the outer frame using pressure-treated 2×6 boards. Place your joists 16 inches apart (center-to-center) to ensure the deck is sturdy and won’t bounce when walked upon. Check for level constantly during this phase.
- Attach the frame to the concrete blocks, ensuring there is a small gap (about 1/2 inch) between the deck and the pool wall to account for movement and water overflow.
- Lay your decking boards (5/4×6 or 2×6) across the joists. Use a spacer (like a nail or a dedicated deck spacer) to keep a consistent 1/8-inch gap between boards for drainage.
- Once the structure is complete, sand down any rough edges or splinters. Apply a high-quality outdoor sealer or a tinted stain to protect the wood from UV rays and chlorine splashes. Allow it to dry for at least 48 hours before furniture is added.
How to Master the Vintage Grandma House Aesthetic for a Cozy Vibe

Why we love this
Commonly known as ‘Grandmacore,’ this aesthetic is a warm hug in interior design form. It’s the scent of cinnamon tea, the tactile joy of a crocheted throw, and the visual richness of floral patterns that shouldn’t match but somehow do. We love this style because it prioritizes comfort and nostalgia over the sterile minimalism of modern trends. It’s about collecting items that have a history—a chipped teacup, a heavy oak table, or a stack of weathered quilts. It creates a space that feels safe, timeless, and deeply personal, where every object has a story and every corner invites you to sit and stay a while.
Essential Elements:
- Crocheted or knitted ‘Afghan’ blankets
- Floral wallpaper or patterned textiles
- Dark wood vintage furniture
- Doilies and lace accents
- Open shelving with ceramic teapots
- Botanical wall art
How to make it
- Start at the thrift store. Look for ‘anchor pieces’ like a sturdy wooden coffee table or a high-back armchair with interesting bones. Don’t worry about the upholstery; you can always use a slipcover or a throw.
- Embrace the ‘Pattern Mix.’ The secret to this look is pairing different scales of florals. Match a large-scale floral rug with a small-scale floral pillow in a similar color family to create a cohesive but eclectic look.
- Display your ‘collections.’ Whether it’s vintage glass bottles, ceramic figurines, or old hardback books, group them on open shelves or in a hutch to create visual interest.
- Introduce lace and crochet. Use a lace table runner over a dark wood table or drape a colorful handmade quilt over the back of your sofa. These textures are the hallmarks of the aesthetic.
- Focus on warm, amber lighting. Swap out any ‘cool’ bulbs for ‘extra warm’ ones. Use pleated lampshades to diffuse the light and create that soft, nostalgic glow common in older homes.
- Add a ‘living’ element. A few African violets or a trailing ivy in a ceramic pot will tie the vintage look together with a fresh, organic feel.
How to Plan a Serene Aquarium Setup for Peaceful Home Decor

Why we love this
There is a meditative quality to a well-maintained aquarium that no other piece of decor can match. The rhythmic hum of the filter, the gentle swaying of live plants, and the effortless glide of colorful fish create a living art piece that lowers blood pressure and calms the mind. We love ‘aquascaping’ because it’s a tiny ecosystem you can curate with your own hands. It brings a slice of the underwater world into your living room, providing a focal point that is both visually stunning and intellectually engaging. It’s the ultimate way to bring life and movement into a quiet corner of your home.
Essential Elements:
- Glass aquarium (10-20 gallons for beginners)
- Substrate (aquarium soil or fine gravel)
- Live plants (Java Fern, Anubias, or Amazon Sword)
- Hardscape materials (Driftwood or Seiryu stone)
- Low-noise aquarium filter and heater
- Dechlorinated water and ‘beneficial bacteria’ starter
How to make it
- Place your tank on a sturdy, level surface away from direct sunlight (to prevent excessive algae growth) and near an electrical outlet.
- Rinse your substrate thoroughly and layer it at the bottom of the tank, sloping it slightly from back to front to create a sense of depth in your ‘aquascape.’
- Arrange your hardscape. Position driftwood and stones to create natural-looking caves and structures. Follow the ‘rule of thirds’—don’t place your main feature exactly in the middle; offset it slightly for a more pleasing look.
- Add your plants. If using Java Fern or Anubias, tie them to the wood or rocks with fishing line rather than burying the roots in the soil. For rooted plants, use tweezers to gently push them into the substrate.
- Fill the tank slowly with treated water (use a plate to break the flow so you don’t disturb the substrate). Turn on the filter and heater, setting the temperature to about 78°F (25°C).
- Crucial Step: Perform a ‘Fishless Cycle.’ Allow the tank to run for 2-4 weeks while monitoring ammonia and nitrate levels with a test kit. Only add fish once the ‘beneficial bacteria’ have established, ensuring a safe home for your new aquatic friends.
How to Style Summer Table Centerpieces for an Elegant Outdoor Dinner

Why we love this
Outdoor dining in the summer is one of life’s greatest luxuries, and the right centerpiece sets the entire mood for the evening. We love centerpieces that feel effortless and ‘foraged’—as if you simply walked into the garden and gathered the best of the season. Think of the vibrant contrast between bright yellow lemons and deep green rosemary sprigs, or the way flickering candlelight dances on clear glassware as the sun begins to set. It’s about creating a multisensory experience where the scent of the table matches the freshness of the meal, encouraging guests to linger long after the last bite is gone.
Essential Elements:
- Natural linen table runner
- Fresh citrus fruits (lemons, limes, oranges)
- Eucalyptus or olive branch garlands
- Assorted glass bud vases
- Unscented taper candles in brass holders
- Woven placemats
How to make it
- Lay down a neutral linen runner to act as your base. The slight wrinkles in linen add to the relaxed, elegant summer vibe.
- Create a ‘Green Foundation.’ Lay a garland of seeded eucalyptus or olive branches down the center of the table. Fluff the leaves to create volume and hide any plastic stems.
- Incorporate ‘Pops of Color.’ Scatter fresh citrus fruits throughout the greenery. You can leave some whole and slice a few in half to expose the vibrant interiors and release a subtle, fresh scent.
- Add height with taper candles. Use varying heights of brass or glass holders. Ensure they are unscented so they don’t interfere with the aroma of the food you are serving.
- Fill small bud vases with a single type of flower (like white ranunculus or daisies) and tuck them into the greenery. This keeps the centerpiece low enough so guests can easily see each other across the table.
- Final touch: Sprinkle a few sprigs of fresh herbs like mint or basil near the place settings for an extra layer of fragrance and texture.
How to Decorate a Patriotic Front Porch for a Festive Celebration

Why we love this
A patriotic porch is a classic Americana statement that feels both nostalgic and celebratory. We love the crisp contrast of bold reds, whites, and blues against a neutral house exterior. It’s more than just a holiday decoration; it’s a way to welcome the community and share in a sense of pride and festivity. Imagine the sound of a flag fluttering in a warm July breeze, the sight of traditional bunting draped over a railing, and the cozy invitation of a porch swing decked out in themed pillows. It creates a perfect backdrop for sipping lemonade and watching the neighborhood festivities unfold.
Essential Elements:
- Cotton American flag (with pole and bracket)
- Tea-stained or traditional flag bunting
- Red and blue outdoor throw pillows
- White rocking chairs or a porch swing
- Galvanized metal buckets for planters
- Red geraniums or white petunias
How to make it
- Start with the ‘Anchor.’ Install a flag bracket on a prominent porch pillar or near the front door. Ensure the flag is made of a high-quality cotton or nylon that can withstand the wind without fraying.
- Hang the bunting. Drape it along the top of your porch railing or above the front door. Use zip ties or small hooks to ensure it is secure and has an even ‘swag’ across the distance.
- Update your seating. If you have rocking chairs or a swing, add outdoor pillows in stars-and-stripes patterns or solid navy and red. Choose weather-resistant fabrics to prevent fading in the sun.
- Create ‘Living Decor.’ Plant vibrant red geraniums and crisp white petunias in galvanized metal buckets or blue ceramic pots. Group them in threes near the steps for a balanced, symmetrical look.
- Add a festive wreath. A simple grapevine wreath with a burlap bow and some small silk flags tucked in is an easy way to dress up the front door without overcomplicating things.
- Don’t forget the ‘Night Glow.’ String some simple white globe lights along the ceiling of the porch to keep the festive atmosphere going once the sun goes down.
How to Choose Fall Baby Shower Themes for a Heartwarming Celebration
Why we love this
Fall is arguably the most ‘cuddly’ season, making it the perfect time to celebrate a new arrival. We love fall baby shower themes because they lean into the richness of the harvest—the warmth of cinnamon, the softness of chunky knits, and the glowing hues of amber and copper. It’s a time to move away from traditional baby pastels and embrace ‘muted’ earthy tones that feel sophisticated and grounded. Whether it’s a ‘Little Pumpkin’ or a ‘Woodland Creature’ theme, the focus is on creating a ‘nesting’ environment that feels cozy, intimate, and filled with the anticipation of new life amidst the falling leaves.
Essential Elements:
- Miniature pumpkins and gourds
- Cozy flannel or plaid tablecloths
- A ‘Hot Cocoa’ or ‘Cider’ bar station
- Kraft paper invitations and signage
- Dried wheat stalks or pampas grass
- Velvet ‘maternity’ sash for the mom-to-be
How to make it
- Select your ‘Micro-Theme.’ Instead of a generic ‘Fall’ theme, narrow it down to something specific like ‘A Little Pumpkin is on the Way’ or ‘Wild One Woodland.’ This helps streamline your decor choices.
- Set the color palette. Think burnt orange, sage green, and cream. Use these colors consistently across your invitations, napkins, and floral arrangements.
- Create a ‘Cozy Corner.’ Set up a station with a ‘Hot Cider’ dispenser, cinnamon sticks, and whipped cream. Use mismatched ceramic mugs to lean into that ‘homey’ feel.
- Design the tablescapes. Use mini white pumpkins as place card holders and scatter dried leaves or acorns across a plaid table runner. Use wooden crates to add height to your food display.
- Organize a ‘Sentimental Activity.’ Have guests write ‘Wishes for Baby’ on wooden hearts or leaf-shaped cards and hang them on a ‘giving tree’ made of gathered branches in a tall vase.
- Send guests home with a ‘Seasonal Favor.’ A small jar of local honey or a cinnamon-scented candle wrapped in twine and kraft paper is a perfect, thoughtful way to end the day.
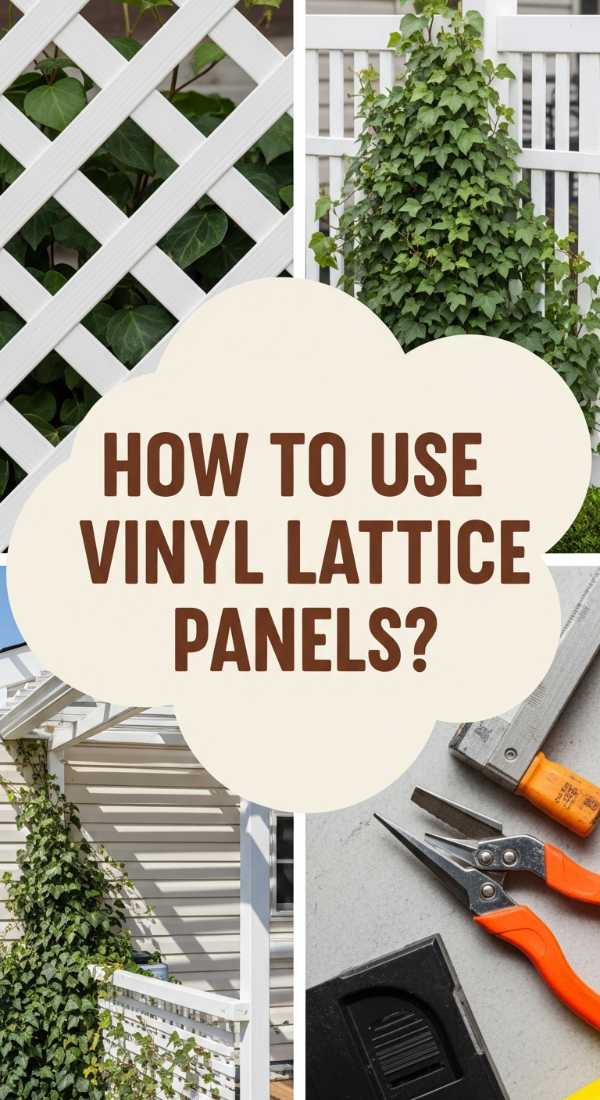
How to Install Vinyl Lattice Panels for a Stylish Privacy Screen
[IMAGE_10]
Why we love this
Privacy is the ultimate luxury in a suburban or urban backyard, and vinyl lattice panels offer a solution that is as stylish as it is functional. We love the clean, modern look of a white or charcoal lattice—it provides a crisp grid that feels architectural rather than just ‘utilitarian.’ Unlike wood, vinyl won’t rot, peel, or require painting every two years, making it a dream for busy homeowners. It’s the perfect way to hide an unsightly AC unit or create a secluded ‘reading nook’ on your deck, allowing the breeze to flow through while keeping prying eyes at bay.
Essential Elements:
- 4’x8′ Vinyl lattice panels
- Vinyl U-channel molding (for the edges)
- Stainless steel screws (color-matched)
- Power drill and circular saw (with a fine-tooth blade)
- Measuring tape and a level
How to make it
- Measure the area you wish to screen and plan your support structure. You will need sturdy vertical posts (4×4 pressure-treated wood covered in vinyl sleeves work best) spaced no more than 4 feet apart.
- Cut your lattice panels to size using a circular saw with a fine-tooth blade. Tip: To prevent chipping, tape the cut line with painter’s tape before sawing.
- Leave ‘Expansion Room.’ Vinyl expands and contracts with the temperature. When cutting, ensure the panel is 1/4 inch smaller than the frame on all sides to prevent buckling in the summer heat.
- Install the ‘U-channel’ molding onto your wooden posts or frame. This molding hides the cut edges of the lattice and provides a professional, finished look.
- Slide the lattice panel into the U-channels. If you are screwing directly through the lattice, pre-drill holes that are slightly larger than the screw shank; this allows the panel to move slightly without cracking.
- Secure the panel with stainless steel screws every 12 inches along the perimeter. Do not over-tighten; the screw head should just touch the surface of the vinyl. Finish by wiping down the panels with a damp cloth to remove any dust from the installation.
The Art of the Elevated Home
Creating a home that inspires you isn’t a race; it’s a slow, beautiful evolution. Whether you started with a single succulent on your desk or went all-out with a new pool deck, the goal is always the same: to build a space that reflects your soul and supports your daily life. Remember, the most important ‘ritual’ is simply enjoying the space you’ve created. Light the candle, sit on the porch, and take a moment to breathe it all in. You’ve worked hard to make your home a sanctuary—now, make sure you take the time to live in it.